Ultralight Hiking:
See also:
THE ULTRALIGHT HIKER
Ulralight Hiking
Ultralight
Hiking Advice
The
Upper Yarra Walking Track
Hiking 2019
Hiking 2018
Hiking 2017
Hiking 2016
Hiking
2015
Hiking
2014.htm
Hiking 2013
& Earlier
Steve's
Blog
World
Travel Kit for Son
Finnsheep.com
NEW MOBILE
FRIENDLY SITE: THE ULTRALIGHT HIKER
Della & I (combined age then 120) heading
off from Freney Lagoon on the second day of our walk across Tasmania
All about light weight, ultra light
hiking, backpacking, bushwalking, hunting, tracks, trails, adventures, gear,
reviews…
I have been hiking/hunting now for over sixty years, a little more
slowly than I once did, walking in the Victorian Alps & elsewhere often in
winter and in all weathers. I have camped out a lot, more than two years of my
life in toto. I have seen the failure of just about every type of gear, and
experienced most disasters which can befall you in the wilderness, and survived.
So, if you dream of doing a bit of camping/hiking, maybe I can offer some
useful advice?
This is a ‘work in progress’. I will be adding to it on a regular basis
adding new photos, adventures, product/ideas, suggestions, etc. You should also
look at HIKING
ADVICE WORLD
TRAVEL KIT FOR SON . Hiking 2017 . Hope you find something interesting.
PS: UPPER YARRA TRACK: I have recently created this site The
Upper Yarra Walking Track
Now, complete with Track
Instructions
ULTRALIGHT HIKING BLOG:
31/12/2019: Cheap Down: These
folks have ultra-cheap down sleeping bags, pants, jackets, socks etc on
Aliexpress for unbeatable prices. What’s not to like about an 800 fill power ultradry
down jacket for US$76.76 (Jan 2019) including delivery, or down pants for
US46.41, socks for US$16.24, balaclavas for US$24.85 or 480 grams +5C
sleeping bags for US 75.88! Certainly worth a look – they seem to have plenty
of positive reviews.
If you needed a bit more warmth you could easily add some more yourself, as
we did here: Adding
Down to a Sleeping Bag
You can buy the down quite cheaply from eg
Aliexpress Just be sure to buy eg 800 ‘fill power’ down. The fill power
means eg the amount 1 ounce of down will expand to fill (in this case 800
cubic inches). So around four ounces (or around $20 worth of such down added to
a bag will make it OK to say -10C. $100 is pretty cheap for a sub zero bag
which weighs around 600 grams.Think about partnering it with one of these cheap
backpacks and some other
budget items
.
See Also:
Aegismax
Budget Pack Mods
Ultralight hiking on a Budget
PS: Summer
this year (2019) there is not much water anywhere in Gippsland (and of course
fires everywhere) but there is still enough to enjoy a trip down the Thomson.
You can have an enjoyable journey from about .2 metres on the Coopers Creek
gauge though you might have to get out at a few pebble races. Looks more like
.3 on the video.
Also there is
water in the Latrobe eg from Thoms Bridge (Yallourn North-Morwell Rd Rd) down
to Sale (swing bridge) is approx five days of delightful flat water paddling
(take a water filter; this section of the river is muddy).
The last
section (shown below) from Kilmany South (two days) is arguably the most
scenic: the river is bounded by a strip of magnificent riverine gums on
both sides, though there are some quite large sections of forest too. Bird life
is particularly varied and plentiful. There are vast numbers of perfect camping
spots along the river.
The section
from Noojee down to Willow Grove is probably the best but will need some
clearing. Get cracking. Also the Tanjil is worth considering (eg from Costins
or Rowley’s Hill Rd down to Blue Rock).
See:
Long and Lazy River
Tanjil River
PS: The cover
photo is of Steve coming down one of the Thomson’s better rapids (The Chute –
which can be inspected from the T1 track 4WD only) the same year (2006) but on
a different trip (when we put in from the end of the T9 track (off Stoney Creek
Rd) for a day trip. (NB Road ‘officially’ closed but it could be re-opened by
determined canoeists. I did it last time – now your turn).
I have
improved the photo as much as I can. Alas that I can never take it again, Steve
has been gone now for ten whole years. Seems unbelievable: ‘ The Moving Finger writes; and, having writ, Moves on: nor all
thy Piety nor Wit. Shall lure it back to cancel half a Line, Nor all thy Tears
wash out a Word of it.’ Omar Khayyám
See Also:
Canoeing the Thomson River
Only the Moon and Me
How Green Was My River
29/01/2019: The Arch – Update: Della: ‘The new
archway is beginning to settle in and look much less stark with the lower
plantings taking off now and the roses starting to climb the uprights. What a
difference a few months make in the garden (especially when spring and summer
are also involved!) Thanks Steve Jones for the structural work and for laying
those tedious pavers: Every glance out the front door now makes me smile!’
Xmas 2019:
August 2019:
See Also: https://www.theultralighthiker.com/2019/08/31/the-arch/
29/12/2019: Marvelous Mitchell Day 3: What a
wonderful ruin - like something from Ozymandias. Construction of this weir at
the junction of the Mitchell and Stoney creek commenced in 1881 but the weir
was destroyed by floods in 1893 soon after completion and has never been
repaired. Two other attempts to dam the river at Billy Goat Bend and Tabberabbera
both came to nothing so that the river remains the last great 'free' river in
Victoria. In winter it is common for enough water to be flowing down it to fill
one of Melbourne's large catchment dams in a single day, so that a weir like
this much higher up such as the one at Swinglers on the Thomson would guarantee
Melbourne fresh water for a long while to come. Mind you I am not sorry that it
runs free. Dams in Tasmania already built could just as easily supply Melbourne
via a pipeline across Bass Strait.
I'm afraid I
just kept snapping away at it.
And camped
right in the shelter of it overlooking a swallow-filled billabong.
Here the
jungle seeks to reclaim it like Angkor Wat.
This Banyalla
is growing right out of the wall.
And these two
seem to have it surrounded.
You can walk
right out along the top.
What a huge
pool it still is above the weir. it would have provided very good water for the
Lindenow Flats.
The Stoney
Creek on the left of the photo was clearly used as a diversion while they built
the weir.
The stones
from the weir lie scattered below it making a very complex rapid.
My camp is
quite dwarfed by the weir.
It was lovely
to wake in the morning to this enchanting view.
The weir's
stones have been worn quite smooth by a century of rushing water.
Next to last
view.
A dragon
watches me pass.
The very last
viwe of the weir as I head downriver on mostly flat water.
Two dragons.
But there are
still a few difficult rapids.
But only 1-2
spots to camp below the weir.
One of the
last siltstne cliffs is riddled with caves.
These look as
if they contain ancient rock art.
But it is an
optical illusion. They would have long since washed away.
A beautiful
noxious weed?
The first
glimpse of 'civilisation'.
But still a
couple of tricky rock gardens.
The reed beds
quiver.
At last the
'Final Fling' rapid.
A dead stag
had fetched up here. Despite his being more than somewhat overpowering I could
not pass up the chance of a trophy without even a gun!
You can walk
around this rapid on the right hand side - recomended.
Ony a bit
over half an hour to go mainly on flat water.
And real
willows hove in sight. What a delight they are!
On the
car/bike shuttle I chanced upon a family of emus.
It was a
truly delightful three day trip. Younger folk could probably do it more quickly
particularly in higher water levels - but what's the hurry. Unfortunately the
summer has turned hot and dry and there is now not enough water to follow in my
footsteps but put it on your bucket list for when the autumn break comes along
- or you might chance to Catch the Wave
River
Heights: Glenaladale Weir: Began Trip .65 ended .66;
Waterford: 1.63-1.57; Crooked River: 1.31 - 1,26. These figures probably give
you some idea about the comparability of the three gauges. Adventure Pro claimed the river was canoeable from .6 on the Glenaladale Gauge. This
is probably about right - for packrafts anyway, but you would expect portages
across many rapids. I know I just managed a few and portaged 2.3 at nearly
2" more water than that. That being said this section of the river is
characterised my very many long still deep so you might enjoy the
experience even when river heights are low - as they are at the moment.sections
where you might have to paddle against a headwind. It would be much more
enjoyable with a couple more inches of water eg .8 on the Glenaladale Gauge.
Times:
Angusvale
Camp Ground to Jorgensens 4 hours
Jorgensens to
Amphithesatre Rapid 3 hours
Amphitheatre
to Den of Nargen 2 hours
Den of Nargen
to Glenaladale Weir 2 hours
Glenaladale
Weir to Final Fling 2hours
Final Fling
to Glenaladale Bridge 3/4 hour.
Portages
approx 1/2 hour.
Campsites: are not wonderfully numerous on this section of the river., though they
are to be found. There are hardly any between the Amphitheatre rapid and the
Den of Nargen for example, though there does appear to be a bench a chain up
from the river on the true right bank which might provide some good spots.
There are also not many spots after the Glenaladale Weir, but there are some.
Mostly folks have been camping on the lovely sandbars along the way and at the
confluences of major creeks. There are shadier spots a little further away from
the river which you really need to look out for (look for the benches I
mentioned earlier). There is a delightful spot on the true left bank just above
the Roaring Mag Creek, for example.
The
Glenaladale Weir camping spot is a delight. I camped there and above and
opposite Jorgensens. The trip took me 14 hours on the water, so it would have
become fairly tedious if done over only two days. You would have to make an
early start and a late finish at very least. If you are packrafting you can get
out at the Den of Nargen and walk up to the Caravan Park.. Doing so would cut
nearly five hours off the trip making it much more suitable for an overnight
trip. Of course with more water (and fewer years of age) it might be done much
more quickly. You should allow some leeway so that you can perhaps wait an hour
or more for a suitable camp to show up.
See Also:
http://www.theultralighthiker.com/pack-rafting-the-remote-wonnangatta/
http://www.theultralighthiker.com/remote-wonnangatta-day-two/
http://www.theultralighthiker.com/a-wonnangatta-spring/
http://www.theultralighthiker.com/a-wonnangatta-spring-day-two/
http://www.theultralighthiker.com/a-wonnagatta-spring-day-three/
Section 1: http://www.theultralighthiker.com/wonnangatta-kingwell-bridge-to-black-snake-creek/
Section 2: http://www.theultralighthiker.com/wonnangatta-black-snake-to-hut-creek/
Section 3: http://www.theultralighthiker.com/wonnangatta-hut-creek-to-waterford-bridge/
http://www.theultralighthiker.com/canoe-wonnangatta/
For River
Heights: http://www.theultralighthiker.com/canoeing-the-wonnangatta-catching-the-wave/
http://www.theultralighthiker.com/pack-rafting-the-wonnangatta-mitchell/
http://www.theultralighthiker.com/videos/dawn-surprise-rapid-wonnangatta-river-australia-day-2017/
http://www.theultralighthiker.com/wonnangatta-waterford-to-angusvale-day-one/
http://www.theultralighthiker.com/wonnangatta-waterford-to-angusvale-day-two/
http://www.theultralighthiker.com/wonnangatta-waterford-to-angusvale-day-three/
http://www.theultralighthiker.com/videos/canoe-wonnangatta-the-movie/
https://www.theultralighthiker.com/2019/12/23/marvelous-mitchell-river-day-1/
28/12/2019: Marvelous Mitchell Day 2: I spent a
wonderfully restful night under the huge walnut tree lulled to sleep by the
noise of the river rolling past - and surrounded by deer! The walnuts are a
great magnet to them. They clearly check them daily to see whether a leaf or a
nut has been discarded for their delectation. I notice that on the map this few
acres has a National Park boundary around it on the map so that it may be a
remnant of private property for all I know. What a weekend retreat!
Going...
Going...
Gone.
Such an
enchanting river. I would be paddling for nearly eight hours today. Quite a big
day for me.
There are
some big carp in the Mitchell, and I'm sure more desirable fish too.
A relict
brachychiton (kurrajong). They are a feature of the lower Wonnangatta/Mitchell
though nearly a thousand km South of where they are much more common. A
beautiful and very desirable tree.
I got out to
take a look at a beautiful campsite just above the Roaring Mag creek on the
true left bank. A lovely honeyeater joined me.
What a great
camp in the midst of this tiny piece of temperate rainforest.
Cobbanah
Creek on the true right bank would be a pleasant campsite so long as there were
no flash-floods. On my map there is a small lake (or dam) about 200 metres long
about 200 metres up the creek. I will check it out when Iwalk the Mitchell
River Walking Track which parallels the river on the true right bank.
The rock
faces at the entrance to the creek look almost as if they were man-made which
they weren't.
What a
beautiful limpid pool!
It goes on
and on forever.
Unfortunately
it means (as such things always do) that there is a major drop ahead. And here
it is: the Amphitheatre rapid. It started way up there. I walked it - on the
true left bank)
And it is
still going on way down there.
And some more.
It would be quite a thrill and/or dangerous iof there was a bit more water.
I put in
again at the bottom.
Here is a
look at the wonderful siltstone cliffs of the amphitheatre. There is a walking
track to a lookout on the tops of them.The river becomes quite gorgey for a
couple of km - and there are about 5 Grade 3 type rapids.
Like this
one, but I just bumped on down it.
Another one.
Could be quite
exciting in higher water.
Time for a
lunch stop in a shady spot on the true right bank. It was quite easy to pick up
a few bits and pieces of smashed canoe (centre)!
Another Grade
3 rapid.
Then just
deep slow pools and pebble races till we get to Woolshed Creek and the Den of
Nargun.
Some ducks
enjoying the river too.
Woolshed
Creek and the Den of Nargun. You can camp here or walk up the creek for car
access if you want a shorter pack rafting trip. You need to keep a sharp
lookout on the true right bank. There is a nasty drop right after it which you
can portage on the right bank.
That was it
up there.
What a treat
to see these two little guys. It was a hot afternoon so there were lots of them
out having a drink to cool off.
An
interesting monolith.
What a
spectacular rock-face.
Finally the
ruins of the Glenaladale Weir loom into sight, like something out of Ancient
Egypt. A fine spot for an overnight camp - and a but of an explore of an
interesting piece of Gippsland's history.
What a wonderful
place for swallows to nest: there were dozens of them wheeling and curving
around the ends of this buttress.
I will have
lots more photos tomorrow after I have spent the night relaxing and cooling
down.
River
Heights: Glenaladale Weir: Began Trip .65 ended .66;
Waterford: 1.63-1.57; Crooked River: 1.31 - 1,26. These figures probably give
you some idea about the comparability of the three gauges. Adventure Pro claimed the river was canoeable from .6 on the Glenaladale Gauge. This
is probably about right - for packrafts anyway, but you would expect portages
across many rapids. I know I just managed a few and portaged 2.3 at nearly
2" more water than that. That being said this section of the river is
characterised my very many long still deep so you might enjoy the
experience even when river heights are low - as they are at the moment.sections
where you might have to paddle against a headwind. It would be much more
enjoyable with a couple more inches of water eg .8 on the Glenaladale Gauge.
Times:
Angusvale
Camp Ground to Jorgensens 4 hours
Jorgensens to
Amphithesatre Rapid 3 hours
Amphitheatre
to Den of Nargen 2 hours
Den of Nargen
to Glenaladale Weir 2 hours
Glenaladale
Weir to Final Fling 2hours
Final Fling
to Glenaladale Bridge 3/4 hour.
Portages
approx 1/2 hour.
Campsites: are not wonderfully numerous on this section of the river., though they
are to be found. There are hardly any between the Amphitheatre rapid and the
Den of Nargen for example, though there does appear to be a bench a chain up
from the river on the true right bank which might provide some good spots.
There are also not many spots after the Glenaladale Weir, but there are some.
Mostly folks have been camping on the lovely sandbars along the way and at the
confluences of major creeks. There are shadier spots a little further away from
the river which you really need to look out for (look for the benches I
mentioned earlier). There is a delightful spot on the true left bank just above
the Roaring Mag Creek, for example.
The
Glenaladale Weir camping spot is a delight. I camped there and above and
opposite Jorgensens. The trip took me 14 hours on the water, so it would have
become fairly tedious if done over only two days. You would have to make an
early start and a late finish at very least. If you are packrafting you can get
out at the Den of Nargen and walk up to the Caravan Park.. Doing so would cut
nearly five hours off the trip making it much more suitable for an overnight
trip. Of course with more water (and fewer years of age) it might be done much
more quickly. You should allow some leeway so that you can perhaps wait an hour
or more for a suitable camp to show up.
See Also:
http://www.theultralighthiker.com/pack-rafting-the-remote-wonnangatta/
http://www.theultralighthiker.com/remote-wonnangatta-day-two/
http://www.theultralighthiker.com/a-wonnangatta-spring/
http://www.theultralighthiker.com/a-wonnangatta-spring-day-two/
http://www.theultralighthiker.com/a-wonnagatta-spring-day-three/
Section 1: http://www.theultralighthiker.com/wonnangatta-kingwell-bridge-to-black-snake-creek/
Section 2: http://www.theultralighthiker.com/wonnangatta-black-snake-to-hut-creek/
Section 3: http://www.theultralighthiker.com/wonnangatta-hut-creek-to-waterford-bridge/
http://www.theultralighthiker.com/canoe-wonnangatta/
For River
Heights: http://www.theultralighthiker.com/canoeing-the-wonnangatta-catching-the-wave/
http://www.theultralighthiker.com/pack-rafting-the-wonnangatta-mitchell/
http://www.theultralighthiker.com/videos/dawn-surprise-rapid-wonnangatta-river-australia-day-2017/
http://www.theultralighthiker.com/wonnangatta-waterford-to-angusvale-day-one/
http://www.theultralighthiker.com/wonnangatta-waterford-to-angusvale-day-two/
http://www.theultralighthiker.com/wonnangatta-waterford-to-angusvale-day-three/
http://www.theultralighthiker.com/videos/canoe-wonnangatta-the-movie/
https://www.theultralighthiker.com/2019/12/23/marvelous-mitchell-river-day-1/
28/12/2019: Watch Betelgeuse – this could be the show
of a lifetime: https://wattsupwiththat.com/2019/12/26/is-betelgeuse-in-orion-about-to-explode-in-a-supernova/
25/12/2019: Naturehike Carbon Fibre Walking Pole 135
grams: $38 each with free shipping (to Australia). US76 per pair. What’s
not to like about this? I received a pair for Xmas. Stripped of the strap and
its aluminium screw mine weighed 128 grams each on my scale and fold down to
just under 50 cm (20”) – 51/110cm according to the Specs. They come in three
lengths. Mine are Short – the shortest and lightest. The other
two lengths are Medium 54/120 cm $ 140 grams and Long
57/130cm & 145 grams.
The hand grip
is very positive but is longer than either of us need, so that I think I could
trim a few grams off that weight, probably bringing it to under 120 grams – if
I wanted to foresake the screw fitting at the top – which is bigger than a
camera thread anyway.
This is just
marginally lighter than the new Gossamer Gear LT5 poles at 130 grams stripped
(though they are longer – 60/130cm)) . However they cost US$195 per pair, plus
shipping. I/we have been quite happily using Massdrop’s Fizan poles
I really like the look and feel of
these Naturehike poles. The three sections seem very solid and the locking
mechanism is wonderful. They come with a lightweight strap and one basket. It
is a ‘standard’ (Leki) thread so you should be able to replace it anywhere
if/when you break it. At 20″ they will clearly slip inside any pack your
are using.
Available
from Aliexpress here: https://www.aliexpress.com/item/33057690090.html?spm=a2g0s.9042311.0.0.34174c4ds7SbS8
See Also:
Extempore Hiking Poles
Ultralight Compact Hiking Pole
Fizan Compact Hiking Poles
Rutalocura Hiking Poles
24/12/2019: Marvelous Mitchell River Day 1: I
canoed this lovely section of river from Angusvale Camping Ground to the
Glenaladale Bridge over the last three days in my Alpacka packraft. The river
heights were at the bottom end of this section’s canoeability (see note below)
and the smoke from the huge bushfires the environmentalists are having in East
Gippsland spoiled the visibility (of the photos) but all in all it was a
wonderful trip.
I left my car
(and trailer) at the Glenaladale Bridge (plenty of parking on the North bank)
and rode my motorbike to Angusvale where I parked it under a shady tree with a
note affixed on both saying, ‘Canoeing the River’. This was a precaution
against campers calling the police over an abandoned motorcycle as happened to
us when we canoed the section Waterford to Angusvale
Setting out
from the Angusvale Camp Ground.
I have
included a lot of photos to give a clear indication of the conditions
likely to be found along the river. They are in order. The canoe height shown throughout
was approx .65 on the Glenaladale Gauge. People claim the conditions are ‘best’
at 1.3 metres which I misdoubt I would survive any more. I think .8 or
thereabouts would be preferable. This is a common river height in the summer
months – but not this year!
This section
of the river is characterised by many long, slow deep sections
Such as these.
Pebble races.
A couple of
km below Angusvale the inconspicuous 4WD Mitchell Track parts company with the
river. From here on the river flows through a splendid wilderness. You can see
that it is 9 1/2 hours walking the Mitchell River Walking Track to the Den of
Nargun (cave). The track continues another 7-8 km (3-4 hours) to the end of
Findlay Alexanders Rd (Glenaladale Bridge). If you are walking it you generally
have to slip off the track (down a ridge here and there) to get water (in
summer). More details later.
There are a
number of complex rock gardens, some of them stretching hundreds of yards. Most
you can just bump on down in your packraft at this river height, except or the
two biggest: the Amphitheatre and Final Fling Rapids. There are quite a few (as
the next photos show just below the sign (on the right bank) above
If you have
been noticing the unusual trees along the river (in the photo above for
example) they are Water Gums or ‘Kanooka’ (https://en.wikipedia.org/wiki/Tristaniopsis_laurina
NB: Later in
the season they have these attractive flowers too:
A shady lunch
stop under similar shade.
And time for
a ‘selfie’.
And then
onwards.
Beginning to
see some beautiful silt-stone cliffs which are a feature of this section of the
Mitchell.
You will see
many reminders that the river can be a trap for the unwary:
This one is a
bit trickier.
After four
hours I camped right under a spreading walnut tree on the right bank – what
could be better?
A spiker
creeps down to the river for his evening meal:
Some other
creatures seen along the way:
What a deer
magnet a walnut tree is. Every tree in this grove had the remains of a deer
under it – like this one!
River
Heights: Glenaladale Weir: Began Trip .65 ended .66;
Waterford: 1.63-1.57; Crooked River: 1.31 – 1,26. These figures probably give
you some idea about the comparability of the three gauges. Adventure Pro claimed the river was canoeable from .6 on the Glenaladale Gauge. This
is probably about right – for packrafts anyway, but you would expect portages
across many rapids. I know I just managed a few and portaged 2.3 at nearly 2″
more water than that. That being said this section of the river is
characterised my very many long still deep so you might enjoy the
experience even when river heights are low – as they are at the moment.sections
where you might have to paddle against a headwind. It would be much more
enjoyable with a couple more inches of water eg .8 on the Glenaladale Gauge.
Times:
Angusvale
Camp Ground to Jorgensens 4 hours
Jorgensens to
Amphithesatre Rapid 3 hours
Amphitheatre
to Den of Nargen 2 hours
Den of Nargen
to Glenaladale Weir 2 hours
Glenaladale
Weir to Final Fling 2hours
Final Fling
to Glenaladale Bridge 3/4 hour.
Portages
approx 1/2 hour.
Campsites: are not wonderfully numerous on this section of the river., though they
are to be found. There are hardly any between the Amphitheatre rapid and the
Den of Nargen for example, though there does appear to be a bench a chain up
from the river on the true right bank which might provide some good spots.
There are also not many spots after the Glenaladale Weir, but there are some.
Mostly folks have been camping on the lovely sandbars along the way and at the
confluences of major creeks. There are shadier spots a little further away from
the river which you really need to look out for (look for the benches I
mentioned earlier). There is a delightful spot on the true left bank just above
the Roaring Mag Creek, for example.
The
Glenaladale Weir camping spot is a delight. I camped there and above and
opposite Jorgensens. The trip took me 14 hours on the water, so it would have
become fairly tedious if done over only two days. You would have to make an
early start and a late finish at very least. If you are packrafting you can get
out at the Den of Nargen and walk up to the Caravan Park.. Doing so would cut
nearly five hours off the trip making it much more suitable for an overnight
trip. Of course with more water (and fewer years of age) it might be done much
more quickly. You should allow some leeway so that you can perhaps wait an hour
or more for a suitable camp to show up.
For More
About the Wonnangatta/Mitchell River, see:
See Also:
http://www.theultralighthiker.com/pack-rafting-the-remote-wonnangatta/
http://www.theultralighthiker.com/remote-wonnangatta-day-two/
http://www.theultralighthiker.com/a-wonnangatta-spring/
http://www.theultralighthiker.com/a-wonnangatta-spring-day-two/
http://www.theultralighthiker.com/a-wonnagatta-spring-day-three/
Section 1: http://www.theultralighthiker.com/wonnangatta-kingwell-bridge-to-black-snake-creek/
Section 2: http://www.theultralighthiker.com/wonnangatta-black-snake-to-hut-creek/
Section 3: http://www.theultralighthiker.com/wonnangatta-hut-creek-to-waterford-bridge/
http://www.theultralighthiker.com/canoe-wonnangatta/
For River
Heights: http://www.theultralighthiker.com/canoeing-the-wonnangatta-catching-the-wave/
http://www.theultralighthiker.com/pack-rafting-the-wonnangatta-mitchell/
http://www.theultralighthiker.com/videos/dawn-surprise-rapid-wonnangatta-river-australia-day-2017/
http://www.theultralighthiker.com/wonnangatta-waterford-to-angusvale-day-one/
http://www.theultralighthiker.com/wonnangatta-waterford-to-angusvale-day-two/
http://www.theultralighthiker.com/wonnangatta-waterford-to-angusvale-day-three/
http://www.theultralighthiker.com/videos/canoe-wonnangatta-the-movie/
23/12/2019: Deer Wars: Kim Hollows reprises his
role as Executive Producer for the first time since creating Ata Whenua. This
is a story of men and machines, of incredible daring and unprecedented
ingenuity set in the dangerous and unpredictable New Zealand mountains. Over a 20
year period these helicopter pioneers turned a national ecological disaster
into a major export industry – but at a cost. Over 80 men died in the pursuit
of deer and many more seriously injured. This film celebrates this unique time
when through innovation and sheer guts a few hundred Kiwis did the impossible
and created the legend that became the deer wars. Please note that some scenes
may offend. Rating: E (Exempt from classification) Duration: 30 mins https://www.youtube.com/watch?v=uUq4K478fYM&feature=youtu.be&fbclid=IwAR1TF6J6icQMIBJNPOUg_IPTOFk1SbhZDC2OKdpTkMf498Ncw-RVrK7_7BQ https://www.theultralighthiker.com/2018/11/24/shadowland-fiordland-video/
Della
particularly loved the donkeys. Here is a donkey train passing by in the main
street at Lukla:
https://www.youtube.com/watch?v=cbCPK43ZltQ&feature=emb_title
Another
donkey train crossing a swing bridge near Phakding Nepal:
https://www.youtube.com/watch?v=5KU_FQkSeeQ&feature=emb_title
She also
loved the yak trains. She just had to buy a cow bell as a souvenir. I will have
to figure out how to make it ring like this at home at Jeeralang Junction. Here
is one passing by near Benkar: https://www.youtube.com/watch?v=MU-i3P5vI4U&feature=emb_title
A popular
game in the backstreets of Lukla: https://www.youtube.com/watch?v=iwD0FgV1nns&feature=emb_title
Arriving in
Namche. I was full of excitement from the climb (as you can see): https://www.youtube.com/watch?v=NEK0Rlt7MNo&feature=emb_title
Most of the
way you are following the Dudh Khosi River which is always too rough for fish
to live in it: https://www.youtube.com/watch?v=qkNtshhEOp0&feature=emb_title
Lots of
wildlife along the way, like these lovely plump birds: https://www.youtube.com/watch?v=_PTgx6mIu8c&feature=emb_title
A rickshaw
ride at night through the back streets of Kathmandu: https://www.youtube.com/watch?v=viVDp2CDpJM&feature=emb_title
Here is what
we were seeing. I have turned the sound off to spare you from Della’s noisy
laughter and etc: https://www.youtube.com/watch?v=nigQDqyaJG4&feature=emb_title
At the end of
the rickshaw ride we ended up at the Yak and Yeti restaurant which is in one of
the royal palaces. It is one of the best places to eat in Kathmandu (apparently
in the world) though quite pricey. In Thamel we usually ate at the Green Olive.
This
wonderful man, Guillaume Maurel from Mauritius (whom we met during a long wait
at Lukla Airport) took us there (by rickshaw). Many thanks for a delightful
night
PS: If you are thinking of walking the EBC you should go soon. When I was
there in 2016 you would see 1-2 helicopters a day fly by. Now there are several
in the sky pretty much from dawn to dusk flying by carrying building supplies.
They are building heaps of multi-storey ‘hotels’ along the way which they
clearly anticipate charging you like wounded buffaloes for (when you can stay
in the existing guest houses – which are often nearly empty for a couple of
dollars a night. Pretty much all the donkeys and yaks are carrying helicopter
fuel so that when that when they have finished building these wonderful
features may disappear. Also they are building (using just private
donation) a road to Lukla which will be completed in a few months. This
too will change the character of the Trek (but you will be able to get there by
bus, perhaps this time next year – if you dare!.
For more
about the EBC See:
https://www.theultralighthiker.com/2019/12/01/ebc-gear-list/
https://www.theultralighthiker.com/2019/11/20/ebc-4-5-and-so-onwards-and-upwards/
https://www.theultralighthiker.com/2019/11/19/dos-and-donts-on-the-ebc-and-elsewhere/
https://www.theultralighthiker.com/2019/11/18/ebc-3-and-onward-to-xanadu/
https://www.theultralighthiker.com/2019/11/17/preventing-batteries-from-going-flat-at-high-altitudes/
https://www.theultralighthiker.com/2019/11/16/ebc-starting-out-kathmandu-to-lukla/
https://www.theultralighthiker.com/2019/11/15/9-days-trekking-the-ebc/
From my
previous trip, see:
http://www.theultralighthiker.com/to-the-roof-of-the-world/
http://www.theultralighthiker.com/i-followed-my-footsteps/
http://www.theultralighthiker.com/i-saw-below-me-that-golden-valley/
http://www.theultralighthiker.com/thatendlessskyway/
http://www.theultralighthiker.com/the-diamond-desert-everest-base-camp-trek-8/
http://www.theultralighthiker.com/everest-base-camp-three-passes-trek/
http://www.theultralighthiker.com/cold-weather-face-masks/
http://www.theultralighthiker.com/my-life-was-wide-and-wild-and-who-can-know-my-heart/
https://www.theultralighthiker.com/2016/12/26/the-diamond-desert-everest-base-camp-trek-8/
Here are
Google’s Page Speed Insights for desktop speed for this morning 10-12-2019:
Loading in .7
of a second is great!
And here is
Google’s mobile speed test result:
2.3 seconds
is also great for mobiles but as you can see, there is still room for
improvement! Nonetheless these speeds mean the page is taking about a quarter
of the time that it did this time last year
I can make
the file size of the images on the home screen smaller – but I can’t figure out
how. Also, though gzip (a compression tool) is loaded it does not seem to be
outputting (according to W3 Total cache). It should compress the text part by
nearly 80% if I can get it working) so I should be able to squeeze these page
speed seconds a little shorter still! I am also not sure whether Lazy Load
Images is working for mobiles.
Reducing the
size of the page (and the images) helped. W3 Total Cache is one of the
important answers. (Seems much better than WP Rocket to me). Getting rid of the
sidebar (mobile users will appreciate that!) and turning off Google Ads (half
the load time!) also. The Jetpack plugin has been holding me back for years –
it clearly slows your site down. It was also costing me A$455 per year!
Some of the
(all free)plugins I am now using: W3 Total Cache (most important), Short Pixel
Optimiser (vital), All In One SEO Pack, Updraft Plus (for backup), WP
Statistics and Google Site Kit (both for traffic information), Akismet (for
spam) and Classic editor (because I refuse to learn how to use WordPress’s new
Gutenberg format). I may add back in a couple more such as Google
Language Translator if they don’t slow the site down. I should also add extra
security. PS: Added Wordfence.
I hope you
enjoy the new ‘look’ of the site – and come back lots of times. I have removed
the side bar which spoiled the appearance of the page when you turn your
phone/tablet on its side (Sorry!). I have also tidied up all the ‘suggested
page’ links at the bottom – as you can see. After I have finished a few
necessary farm jobs I will be completing some (I hope interesting) new posts.
For example, I have been working on backpacks – I have the beginnings of over
100 new posts. So, Check back later.
Cheers, Steve
& Della.
PS: I am
happy to hear from any ‘tech heads’ out there with advice!
14/12/2019: Poor Little Pumbaa the Poochie. Bad Mountain
Lion: https://www.aol.com/article/lifestyle/2019/12/10/desperate-woman-punches-mountain-lion-as-it-attacks-later-eats-dog-she-could-hear-her-baby-dying/23878095/
03/12/2019: Remember this poem. We need these
sentiments even more today:
Henry
Wadsworth Longfellow - The Village Blacksmith
UNDER a spreading
chestnut tree
The village
smithy stands;
The smith, a
mighty man is he,
With large
and sinewy hands;
And the
muscles of his brawny arms
Are strong as
iron bands.
His hair is
crisp, and black, and long,
His face is
like the tan;
His brow is
wet with honest sweat,
He earns
whate'er he can,
And looks the
whole world in the face,
For he owes
not any man.
Week in, week
out, from morn till night,
You can hear
his bellows blow;
You can hear
him swing his heavy sledge
With measured
beat and slow,
Like a sexton
ringing the village bell,
When the evening
sun is low.
And children
coming home from school
Look in at
the open door;
They love to
see the flaming forge,
And hear the
bellows roar,
And watch the
burning sparks that fly
Like chaff
from a threshing-floor.
He goes on
Sunday to the church,
And sits
among his boys;
He hears the
parson pray and preach,
He hears his
daughter's voice,
Singing in
the village choir,
And it makes
his heart rejoice.
It sounds to
him like her mother's voice,
Singing in
Paradise!
He needs must
think of her once more,
How in the
grave she lies;
And with his
hard, rough hand he wipes
A tear out of
his eyes.
Toiling,—rejoicing,—sorrowing,
Onward
through life he goes;
Each morning
sees some task begin,
Each evening
sees it close;
Something
attempted, something done,
Has earned a
night's repose.
Thanks,
thanks to thee, my worthy friend,
For the
lesson thou hast taught!
Thus at the
flaming forge of life
Our fortunes
must be wrought;
Thus on its
sounding anvil shaped
Each burning
deed and thought!’
NB: The
'Smithy' stood underneath the chestnut tree. The C18th American forest was full
of these giant trees (such that Indians had to do very little work, such was
their abundance). An accidentally imported disease wiped (almost) every last
one out in the twinkling of an eye (C1904): https://en.wikipedia.org/wiki/Chestnut_blight
11/12/2019: Non-Lethal Protection; Things We Can’t Have
in Oz: https://byrna.com/
03/12/2019: Squanto. Good Heavens – what an astonishing story: http://ericmetaxas.com/media/articles/miracle-squantos-path-plymouth/
02/12/2019: EBC Gear List: A
number of people wanted to know what we took on the EBC since we carried all
our own gear and did not employ the services of a guide. I have answered some
of their questions in the post Dos and Don’ts on the EBC
I carried more
than some people might and a lot less than most people do. When my pack was
weighed at some point (checking in for the flight from Kathmandu to Lukla I
guess) my pack weighed 6 point something kg – which sounds about right. Della’s
was lighter than this, though she had more of some things (clothes) and less of
others (communication equipment, safety, first aid, repairs etc).
Well, here
goes (I have added links to some of the things mentioned):
NB: Surplus
or unused in (brackets)
Grams
Worn:
Columbia
Silver Ridge
Trousers
288
Icebreaker
Icebreaker
Darn Tough Socks
Hankies (2)
(Microfibre Towel cut into six
pieces)
28
Keen
Samsung
Galaxy S4 Mini Phone (inc battery, cards,
protectors)
124
Watch & Compass
Sony Camera
(inc battery, wrist strap & card)
CybershotDSC-TX200V 131
Camera
Accessories: String Tripod Stickpic
Gossamer Gear LT4
Kathmandu
L/Sleeve Light Wool Top (as
needed)
220
Gloves (as
needed – rarely): MLD mitts 26 & Icebreaker Wool Liner
25 45
Hat/s:
Sub Total: 2547 (19)
Pack: G4 Free from Amazon (<US$20)
439 (100)
(with some mods
and DIY shoulder pouches)
Waterproof Sea to Summit Liner
Air Flow Sitlight Camp Seat
Sleeping Bag Montbell Super Spiral #3 added down
(in Sea to Summit Waterproof compression bag
(Much
repaired) Thermarest Neoair X-Lite Womens
Emergency Shelter alternative 253 grams
DIY Pillow
Sub Total: 2176 (187)
Weather: Montbell raincoat
214
Rain Pants
(Zpack)
100
Gaiters
Montbell Down Coat
Montbell Down
Vest
186
Down Socks
Jardine
Bomber
Hat
33
Compression
Sack (Insulated
Clothes)
65
Dry Bag
(other)
Clothes
43
Dry Change: 3
spare hankies (as
above)
42
Icebreaker
Longjohns
(Pyjamas)
158
Kathmandu
L/Sleeve Wool Top (as
above)
220
Columbia
Trousers (as
above)
288
Icebreaker
Shirt (as
above)
223
Icebreaker
Knickers (as
above)
58
Darn Tough
Socks (as
above)
73
Microfibre
Towel
83
Sub-Total: 2152 (0)
Drink: 600 ml empty soft drink bottle
(water)
29
Sawyer Mini Water Filter
Emergency
Communicaion: (old) Iridium Sat Phone (inc
battery)
378
Spare Samsung
Galaxy S4 Mini (inc Battery)
(124)
Delorme
Inreach Poor Man’s Sat Phone
GoTenna
2 Litre Sea
to Summit Waterproof Bag for
above
17
Sub-Total: 769 (124)
Electronics: (batteries carried in three Aloksaks which
weighed)
21
Another stuff
sack
(17)
2 x Single 18650 Power Banks
Spare Electronics
Bag (spare hearing aids, cables
Surplus
Charging
Cable
(26)
Unnecessary
AAA Torch inc
battery
(26)
Unnecessary
Spare AAA
Battery
(12)
Unnecessary
rechargeable
Torch
(24)
2 x Rechargeable Torches
Spare Sat
Phone
battery
(65)
Spare camera
battery (camera not
taken!)
(28)
2 spare phone
batteries (one
used)
66 (33)
2 spare
camera batteries (flat – altitude,
unused)
26 (26)
Sub-Total: 562 (329)
Other:
Toilet Bag
(4 dry 2 wet)
plus nano head net and insect repellent)
Chemicals
Repairs
Spare Glasses
First Aid
Bag
297
Chewing Gum
Bag (inc hearing aid safety and glasses
cleaner)
35 (17)
(Sore Throat)
Lollies (unused! Available on
track)
(175)
2 Unnecessary
Knives (1 used) 36 +
45
(81)
Knife Sharpener Micra
Combination
Padlock
(39)
Sub-Total: 1183 (322)
Total: 9499 inc 2547 worn so: 6962 grams inc unnecessary (981); Needed: 5981
As you can
see I ‘needed’ a 6 kg pack weight though it included things others might not
carry (eg a sat phone plus a Sat Messenger (378 grams right there), a shelter
(253 grams), glasses, a camera, etc.
If I had been
going on from Dingboche to Base Camp (at this time of the year), I might have
carried an extra pair of Longjohns/ Down Trous (Della took hers – she feels the
cold more = not enough adopose!) and a woolen T-shirt. It gets colder (and
nastier) up there, but you can put all your clothes on when necessary. You get
quite a good enough view though from the top of the hill at Dingboche and along
the way.
Della’s pack
was substantially lighter (around 5 kg). Between us we had under 12 kg to walk
the EBC.
As you can
see, I accidentally had on board a pile of junk I usually carry (hunting etc)
which I had forgotten (in the rush) to leave behind. Still, I am still young
and fit enough (at 70) to carry this and more, and to walk 7 hours a day a few
kilometres in the sky – and I am overjoyed to say, so is Della – who had a
simply swell time. Cheers.
BTW: The (sub
US$20) Amazon Packs Backpack Tricks ‘!
See Also:
https://www.theultralighthiker.com/2018/09/25/riding-on-the-sheepss-back/
https://www.theultralighthiker.com/2016/11/25/camo-merino-wool-for-deer-hunting/
https://www.theultralighthiker.com/2018/10/21/guaranteed-for-life/
https://www.theultralighthiker.com/2016/05/03/keen-shoes/
https://www.theultralighthiker.com/2014/11/13/watch-bands-for-hikingbushwalking/
https://www.theultralighthiker.com/2016/08/09/4-gram-string-reverse-tripod/
https://www.theultralighthiker.com/2016/01/01/stick-pic/
https://www.theultralighthiker.com/2017/11/03/ultralight-compact-hiking-pole/
https://www.theultralighthiker.com/2019/07/03/down-socks/
https://www.theultralighthiker.com/2018/11/07/i-just-love-hats/
https://www.theultralighthiker.com/2016/06/29/the-poor-mans-satellite-phone/
https://www.theultralighthiker.com/2017/06/04/gotenna/
https://www.theultralighthiker.com/2018/03/24/budget-pack-mods/
https://www.theultralighthiker.com/2015/05/14/dry-bags-sea-to-summit-ultra-sil-nano/
https://www.theultralighthiker.com/2018/01/25/gossamer-gear-air-flow-sitlight-camp-seat/
https://www.theultralighthiker.com/2017/03/11/adding-down-to-a-sleeping-bag/
https://www.theultralighthiker.com/2016/08/23/a-tardis-folding-space/
https://www.theultralighthiker.com/2018/08/15/womens-are-great-in-bed/
https://www.theultralighthiker.com/2014/10/19/survival-shelter/
https://www.theultralighthiker.com/2019/06/12/thermoplastics-101/
https://www.theultralighthiker.com/2017/03/27/new-ultralight-survival-shelter/
https://www.theultralighthiker.com/2019/11/17/preventing-batteries-from-going-flat-at-high-altitudes/
https://www.theultralighthiker.com/2019/03/20/lightest-cheapest-powerbank/
https://www.theultralighthiker.com/2019/11/23/ultralight-charging-cable/
https://www.theultralighthiker.com/2018/04/29/ultralight-rain-gear/
https://www.theultralighthiker.com/2016/02/17/ultralight-mitts-and-gaiters/
https://www.theultralighthiker.com/2016/09/21/montbell/
https://www.theultralighthiker.com/2016/08/22/smallest-rechargeable-flashlight/
https://www.theultralighthiker.com/2015/11/20/ultralight-personal-hygiene/
https://www.theultralighthiker.com/2019/10/16/small-is-beautiful/
https://www.theultralighthiker.com/2015/06/12/cuben-tape/
https://www.theultralighthiker.com/2017/03/21/ultralight-glasses-case/
https://www.theultralighthiker.com/2016/06/12/ultralight-knife-sharpener/
https://www.theultralighthiker.com/2014/11/14/leatherman-micra-multitool/
For more
about the EBC See:
https://www.theultralighthiker.com/2019/11/20/ebc-4-5-and-so-onwards-and-upwards/
https://www.theultralighthiker.com/2019/11/19/dos-and-donts-on-the-ebc-and-elsewhere/
https://www.theultralighthiker.com/2019/11/18/ebc-3-and-onward-to-xanadu/
https://www.theultralighthiker.com/2019/11/17/preventing-batteries-from-going-flat-at-high-altitudes/
https://www.theultralighthiker.com/2019/11/16/ebc-starting-out-kathmandu-to-lukla/
https://www.theultralighthiker.com/2019/11/15/9-days-trekking-the-ebc/
For my
previous trip, see:
http://www.theultralighthiker.com/to-the-roof-of-the-world/
http://www.theultralighthiker.com/i-followed-my-footsteps/
http://www.theultralighthiker.com/i-saw-below-me-that-golden-valley/
http://www.theultralighthiker.com/thatendlessskyway/
http://www.theultralighthiker.com/the-diamond-desert-everest-base-camp-trek-8/
http://www.theultralighthiker.com/everest-base-camp-three-passes-trek/
http://www.theultralighthiker.com/cold-weather-face-masks/
http://www.theultralighthiker.com/my-life-was-wide-and-wild-and-who-can-know-my-heart/
https://www.theultralighthiker.com/2016/12/26/the-diamond-desert-everest-base-camp-trek-8/
30/11/2019: Colin Dowler Fought Off a Grizzly with a
Small Pocketknife: https://neveryetmelted.com/2019/11/26/49489/
28/11/2019: Thinking of a 12 Gauge for Deer Hunting?
The Maximum Practical Range of Slugs & Buckshot: https://www.shootingillustrated.com/articles/2019/2/15/the-maximum-practical-range-of-slugs-buckshot/
24/11/2019: The G4 is Back: An updated version of
this iconic pack is now available in 70D & 100D (as in the Gorilla) DWR
coated Robic Nylon in three sizes from 578 grams & US$153 (Nov 2019),
the G4-20 Ultralight 42 Backpack
Features
include: 'Extendable roll-top with dual closure options, Waterproof zippers,
Removable molded cushy sitpad, Fixed hip belt with unique hip belt pocket design'.
The 'new' G4
is up approx 100 grams from the original which was mostly a much less durable 2
oz nylon) and down about 10 litres in size (from 60 to 50) NB There are approx
8 litres inside the extension collar – the spec. of 42 litres doesn’t include
this (nor does it on any other of GG's packs).
It has
a roll-top closure which you might modify if you don’t like them (I
don't) – they do reduce the storage of the pack (compared with the simple draw
string of the original) but their intention (along with the side compression)
is to ensure that the contents exactly fill the volume of the pack so that you
don’t need a frame. The contents of the pack are the frame. I would prefer to
have 2-3 draw strings going down so that you could shrink the pack to achieve
this 'frame effect' but without reducing its volume when full. This would also
be (fractionally) lighter
This is a mod
I will be adding to the Amazon packs we used on the EBC. They lack an extension
collar altogether. I will be able to increase their volume (eg up from 42 to 50
litres) by adding this small rectangle of material. A few minutes work at most.
At about 1-1.5 Ft2 it will only add 5-10 grams to the pack (eg 5 in silnylon or
closer to 10 eg in 3.5 oz/yd2 Dyneema) but make them more suitable for
multi-day trips. 8 litres of dry food is quite a lot.
If you like
this type of wide hip belt, then you won’t be unhappy with it – but I would
probably cut it off and add a 12 grams gross-grain strap and buckle as I did on
the Amazon packs as I think that hip belts that are wide and start at the side
really make load transfer more difficult and unnecessarily inhibit the natural
movements of the wearer - however neat they may look..
You really
only need to make the pack swing into the small of your back (with a waist
belt). The pack weight actually sits on your bum, not on the strap. A too wide
strap starting from the sides of the pack will never achieve this comfortably
as it never does up around your torso properly - if you try to tighten it, it
only cuts in. Bad design. But practically everyone does it! If you keep it make
sure you don't quite fill the pack across this point of attachment so that the
belt can better pull in and conform to your waist. And make sure it is at your
waist and not lower.
The mods I
would make to the new G4 would take probably 100 grams off the pack. Lids are
just a waste of material as far as I am concerned. Then I would perhaps
substitute an Air Flow Sit Light Pad
The straps
and buckles on the lid (there are three where there only needs to be one - as
on the original) are also about twice the weight they need to be. If there are
going to be three, 1/2" wide is adequate (and if the pack had a draw
string closure) the three straps could be used to attach another item to the
top (a compression bag, a pack raft or a bear canister perhaps). I do not
see that these three straps achieve anything other than the effort of carrying
them, though perhaps like many things in 'pack design' they 'look nice'! (Just
like the inappropriate and heavier than necessary hip belt folks are always
attaching to packs nowadays.
I like the
asymmetric sizing of the side pockets – one can carry your shelter, which is a
good idea. I long ago modified all my packs for this purpose. Usually you only
need to add a light strap less than 5 grams to achieve this. I run an
ultralight carabiner through the draw string of the tent and this strap so you
never lose your tent!
The
waterproof zip compartment will probably attract a lot of people, but I would
have put this compartment's entry inside the pack (because I just don’t trust
zippers at all; when they go where are you?) – and if you really want
waterproof, go for Sea to Summit Ultrasil liner bags or Aloksaks.
I would
prefer a ring of small pockets heading downwards inside the pack from the
extension collar join for quick access to small things on the trail if you
can’t cope with having a drawstring ‘possibles’ bag at the top of your pack
inside the liner bag (where nothing gets wet). Frankly this is a much better
idea. You can build too many 'gimmicks' into a pack. Keeping it
simple is best.
The shoulder
straps on Gossamer Gear’s new (Robic) line of packs all seem to be about ¾”
narrower than on the old G4s, Mariposas etc though they are softer and lined
with a wicking material. In general though I think narrower is a backwards step
even though they are now better shaped than they once were. The greater the
'bearing' surface area, the easier it will be to carry the pack. I would extend
this bearing area rather than reduce it.
I would have
made the straps wider even though the pack is only intended for relatively
light loads (well under 15 kg). If the straps are wider and the pack only
carries under 10 kg, then I think you can dispense with the chest and waist/hip
straps altogether as they only impede walking anyway - and add weight.
I would have
aimed for a pack under the weight of the old G4 (460 grams) rather than over it
but made with the improved materials. Robic is about 50% stronger than an
equivalent weight standard nylon. Reducing the pack to nearer 50 litres than 60
is not such a bad move either, but maybe a compromise would have been to have
reduced the dimensions of the pack (which they have done) but gone for a
slightly longer extension collar (say nearer 12 litres - or a 54 litre pack),
but with the aim being sub 400 grams. I know this is possible because I own
such a 52 litre 390 gram by 4.8 oz/yd2 Dyneema pack - and am about to make it a
little lighter still in one direction and a little heavier (and bigger) in
another. Always tinkering...
Incidentally
they have eliminated the distinctive bulge at the bottom of the old G4 pack. I
found this quite an attractive feature. It also possessed a certain utility. It
was intended that you could allow your sleeping bag to spread out there and
form a cushion or shock absorber for other contents in the pack - though some
folks think you should load the heaviest items at the bottom. Strictly the most
important loading decision you make with a frameless pack is putting everything
soft towards the front of the pack so you don't have hard objects jabbing into
your back.
I have a
Medium Gorilla which is exactly 18” from bottom of the shoulder strap
attachment points to the bottom of the hip belt) which I removed and replaced.
18” is just about right for me (though 17” would be better) but is much too
long for Della who is better under 17".
The Specs for
this pack say that the length of the Small is 19 ¼” to the extension collar
seam (which I am assuming is about 2” above the shoulder strap attachment point
- as on my Gorilla) making the pack approx 17 ¼” long. Gosssamer Gear needs to
provide more precise detail on sizing to fit different hikers. I would probably
want a 'Small' which (if the above is true) would be far be too long for Della
(who is only 5' tall). As I say, more precise buying information necessary. I
know there are lots of bigger people than us! The pack comes in three sizes but
it would be good if one of these was for 'little' people and children.
I do not like
the stretchy material in the back pocket (though it is a lot more robust than
that used by most hiking pack manufacturers). I would prefer a solid material
here. I know the intention is to dry socks in the pocket (which does not work
well under compression anyway). You are much better to add a clothesline to the
pack and peg your washing to that.
The stretchy
material tears (especially) in blackberry patches and you then have to worry
about losing the pocket’s contents (or attempting a trail repair). I own
several packs with torn stretchy material pockets awaiting ‘repair'. The
difficulty is that the material is almost always caught up in the seam so that
a very elaborate unpicking and resewing is necessary. Might as well just about
make a new pack.
I note that
the Silverback
See Also:
https://www.theultralighthiker.com/2017/02/24/the-silverback/
https://www.theultralighthiker.com/2016/08/20/a-gorilla-in-the-hand/
https://www.theultralighthiker.com/2016/08/30/a-gorilla-in-the-bush/
https://www.theultralighthiker.com/2016/11/27/pimping-a-gorilla/
PS: You can
still make your own (original) G4:
https://www.theultralighthiker.com/2015/06/14/diy-hiking-gear/
23/11/2019: Ultralight Charging Cable: Tired of
lugging around that long (heavy) charging cable – which maybe weighs all of an
ounce? Ouch! You can do better than that. For example:
Anker 2-Pack Powerline Micro USB (4 Inches) – Durable Charging Cable, with Aramid Fiber and
5000+ Bend Lifespan (Approx) 11.3 grams A$11.48 (x2) Nov 2019
USB (Male) to Micro USB adaptor (approx) 7 grams A$ 2.49 (Nov 2019) May not be suitably flexible for
your purpose.
Urbo Keyring Charger
You just have
to have 1-2 of these for Xmas.
22/11/2019: A Real Invisibility Cloak: https://www.youtube.com/watch?v=pZMyWEWHCTM&feature=emb_title http://joannenova.com.au/2019/11/an-unpowered-invisibility-cloak/
20/11/2019: Dos and Don’ts on the EBC (and Elsewhere):
I intend this post to apply to lots of other hiking destinations, but at least
it should improve your experience and expectations on this iconic walk. ‘You
live and learn – or you don’t live long’ – as the man said (ie Lazarus Long,
‘Time Enough For Love’).
I have lived
long, and intend to live even longer. In contrast, both times I undertook the
EBC I witnessed dead bodies being unloaded from helicopters! I also saw many
folks much younger than myself getting themselves into serious difficulties
which might well have led to just the same outcomes if I had hung around being
a fly on their walls. I have seen young folks dead many times before
Setting out
from Lukla:
Should you
carry your own gear &/or should you employ a guide? If you are into ‘virtue signalling’ – as about half the population seems
to be nowadays, (Myself – as Red said – ‘I couldn’t give a damn!’) you will
have lots of reasons why you should employ someone else. Delegate
responsibility for your life to someone else if you don’t value it overmuch.
Myself I value my own hide too highly to trust someone else with its
responsibility.
Crows will be
into your pack if you leave it unattended:
If you want
that important piece of gear (without which you are just a frozen corpse) when
you need it, best make sure it is in the pack on your own back ,
not perhaps many miles away on someone else’s, no matter how much more
comfortable that may seem to be. Most people on the trail had off-loaded
everything (looked like the kitchen sink too) onto someone else. Certainly all
the (few) older people such as ourselves had. I have direct experience on both
trips of numbers of folk who regretted it!
About that
Pack: We both took the Amazon packs I wrote about back here with some further
mods I will detail later. The packs each weighed around 350 grams (for 40
litres – quite enough!) Della’s cost A$10.90 from Amazon. She bought four so
she would never run out! She likes purple! Fully loaded they weighed 6-7 kg at
most.
Della loves
that purple pack:
Aside: I have discovered that hip belts are in the wrong place (ie not at the
waist – your narrowest part) and should not weigh more than 12 grams (including
clip/buckle) and should be sewn on to the pack only at the middle (approx) six
inches of your back – so they do up all around your waist. The belt will then
cinch up comfortably all around your waist, your narrowest part, making it impossible
for your pack to move down from the small of your back, and so its weight will
be supported by your bum instead of your shoulders even though the waist belt
(and shoulder straps) are quite loose as they should be – by comparison with
whatever you are doing now. More about this later…
The Sit Light Air Pad wrong, wrong, wrong !
I have
further decided that you ought not need a hip/waist belt or a chest belt at all
if the pack is well-designed (which I suspect none are!) and not too
heavy – shouldn’t be. These extra straps and other gee-gaws just restrict your
body’s natural walking movement and rhythm and tire you out unnecessarily
without adding one jot of comfort! As I said, more about this later….
The way
ahead:
Shelter? I would always carry an emergency shelter/tent anywhere you might get
caught outside in the rain/wind/snow, ie practically everywhere. Most places I
go I usually carry one of my ultralight DIY tents or a hammock and fly (or sometimes both – my new tarp doubles ). Even on day trips I will have a space blanket bag or poncho. Just something to save your life if you get caught out – yet I am proficient at constructing emergency
shelters from found materials and lighting fires in the wet – are you?
Of course I
would recommend that like most that you visit the EBC at the most (weather)
opportune time (late Oct-Early Nov for example). Temperatures, wind and
precipitation are then at their best. Even so (just like anywhere) disastrous
‘weather’ can strike – and don’t forget the awful earthquake of just a few
years back (which flattened whole towns – Think Thame) where you may have been
intending to stay!
People have
put considerable thought into the design of these ultralight shelters (which
are not dependent on soft ground (not much of it around on the EBC) to drive
tent pegs into). This one (from Terra Nova
In an
emergency both of us could cram into this shelter, inflate our mats (good to
‘Comfort’ at -10-20C), climb into our -10-20C sleeping bags (plus all our down
clothes) and ‘enjoy’ a safe night out in the most extreme conditions if
necessary. You just don’t know when/whether such an emergency will occur. Be
warned: the ground is often frozen, or nearly so!
I already
mentioned earthquakes. Everywhere on the trail there is evidence of (immense)
earlier landslides. (There are warning signs everywhere that) glacial lakes can
burst and cause inundations which would sweep whole villages away. You might
simply lose the trail, be beaten by darkness arriving earlier than you
expected, be sick, twist your ankle and be unable to complete your day’s
journey, and so on…Prepare for the worst and be grateful when it does not
occur. Even after a lifetime of experience in the bush we can sometimes be caught out
First view of
Everest as you ascend the Namche Hill:
Sleeping? Should you take an insulated mat and sleeping bag? Again, if you want to
live – and this survival equipment should be on your person at all times . Wherever you are, go nowhere without your pack (and its essentials).
Many (inexperienced) folk meet with disaster because they put their pack down
on a trail just to step off it a few metres eg to answer a ‘call of nature’, an
interesting euphemism.
Separated
from their pack and alone in the wilderness…not long before things can start to
really unwind! Not everyone has the ability eg to lose one of their hearing aids yet be able to backtrack
themselves through several hours of the trackless bush until they find it
You need a
mat anyway even when staying in tea/guest houses and ‘hotels. Particularly as
you travel higher up the (provided) mattresses will ‘strike’ colder and colder.
Probably this is because of condensation which has not had a chance to
evaporate away (actually at this altitude water/ice does not evaporate;
it ‘sublimes’ – there’s a new use of that word for you). If your body (heat) is
trying to warm up (perhaps several kilos) of sub zero ice/water in your (quite
likely uncomfortable) mattress, it will not matter if you have a minus 100C sleeping
bag; you will be cold! An ultralight inflatable mat such as
the Thermarest NeoAir X-Lite Women’s superb Exped Synmat
Rain Gear? Yes, it might rain/snow etc, though it is unlikely at this time of year, but you never
know . We carried both coats, pants, gaiters and
waterproof shoes, though I (but not Della) usually do not bother with more than
just a coat. Adipose is good insulation! If you get wet at this altitude (and
night-time temperature/s) you are likely to be miserable (at best). Frostbite
is not much fun either. We did not need them, but an extra layer is good
insurance. We are looking at something like 300 grams (each) for the three
waterproof clothing items (plus a bit for Keen Targhees instead of Voyageurs).
Safety first.
Food and
Water. You really don’t need to carry either. There is
somewhere you can buy either every few hundred yards on average, though there
are some longer sections where you might get a bit thirsty if you started out
without a full water bottle – climbing the hill up to Tengboche for example on
a warm day. ‘Safe’ bottled water is available from (approx) US$1-2 per litre.
We also carried a Sawyer Mini filter and squeeze bottle in case we needed to
drink from other sources, etc. This is just sensible insurance.
You will
inevitably meet with (very ill) folks who think they can (safely) drink the
water or that water purification tabs ( iodine etc) work. There is one born
every minute. Disinfection takes time (more than an hour) and only removes a
handful of the pathogens which your Sawyer with <1 micron filter)
automatically removes. It can/should regularly be backflushed like this (2 grams
NB: Do not clean your teeth or wash you mouth out with the water. Also carry
antiseptic wipes (or similar) and use them religiously. There are lots of
invisible nasties you do not want to succumb to. Do not pat animals!
When you contract diarrhea from bad water/food you will need Imodium and
probably Stemetil for vomiting. If it persists (Typhoid perhaps?) you will need
Cipro (antibiotic). It has saved my life! (from Pneumonia ) I gave some of
my supplies to a young British backpacker at the bottom of the hill at
Tengboche. He was leaking badly at both ends. His guide was completely
unprepared (common) and insisted he continue (to gain altitude) when his
symptoms (I was trying to alleviate) might well prove to be the beginning of
altitude sickness as well – in which case he needed to descend (fast!) or
maybe die! Be warned! I hope he survived.
You should
also have a prescription for Amoxycillin for pneumonia. There is a pharmacy in
Namche and also one at the French Bakery/Snow Lions in Dingboche where you can
obtain these things. There is a small hospital in Pariche (near Dingboche).
Your first aid kit should also contain blister pads – you will likely need
them!
I suggest you
do not eat meat after you leave Lukla. Even in Lukla not everyone has a
(working) refrigerator. Animals cannot be slaughtered within the National Park
so all meat is carried in on someone’s back (perhaps in the hot sun for days)!
Eggs or beans are good alternative protein. Food poisoning is not much holiday
fun really. Be warned!
You can buy
Snickers/Mars/ Bounty bars pretty much everywhere (US$1-2). Most/all of the
food on the trail is just absolutely awful. I would never pay for such food
anywhere else. Expect to lose weight! There is very little variety, but even
with the few ingredients they mysteriously seem to be able to grow/carry in
Della or I could make many delicious meals. Instead expect every meal to lean
towards inedibility. It is possible too that you may not like oily.
If you carry
your own food in (or decide to eat elsewhere than where you are staying) your
accommodation costs will be bumped up – and the quality of the food will not be
very different. The Dal Bhat, Momos ‘Tuna Burgers’ and fried eggs on chips
appear to be about the height of fine dining Nepali style. I could just about
choke down two slices of ‘toast’ with ‘butter’ and honey for breakfast. If you
are a ‘coffee snob’ forget it! They do sell sore throat lollies practically
everywhere. You will likely need them. If you have a preference maybe bring
your own. Butter Menthols are great (and Werthers caramels – you will lust after
these before you return to Australia. You can buy them in Kathmandu airport!)
Do look
forward to having ‘Black Forest Cake’ at Hermen’s Bakery (Northern outskirts of
Phakding). It will not be anything like Black Forest Cake, but it will probably
be the best thing you eat on the trip. You would not look at it elsewhere. (Tip:
When you are back in Kathmandu, do try the Yak and Yeti
Lots of people (most?) get diarrhea
or pneumonia (or both) above Dingboche. And of course Altitude Sickness. Lots
of very expensive helicopter evacuations. There is also much less
accommodation. You may (even/likely) end up sleeping on the (forzen) floor –
where you really wish you had that minus 20C mat! One reason why Della and I
decided before we left Australia that the Nagarshang
Hill, Dingboche would be our destination. This is as high as Everest Base Camp
but can be climbed on a pleasant sunny morning with tea and cake in the French
Bakery Dingboche afterwards. (They also have rooms for rent with their own
toilets!) Even in Dingboche all the water freezes overnight. Above that hardly
anything thaws ot, so if you venture there be on the lookout (eg) or toiletry
fiascos you had never imagined possible.
French Bakery Dingboche:
It has pretty
much as good a view (of Everest, etc) as you are going to get elsewhere without
venturing into the permanent sub-zero regions where there is not a single
living thing to break the dismalness and monotony of the view. It will shorten
your trip by 3-4 days too and enormously reduce the chances of your getting
sick and/or dying.
View from the
Hill, Dingboche: NB: Behind that grey hill on he left
is just such a one of those glacial lakes perched up there held in pace
only by scree and ready to let go and drown towns downstream like Phariche
(below) immediately. Della os enjoying herself anyway. Steroids and being alive
again, when last time I was there she was just so flat with he poor old heart
(seemingly) all played out. She is good as new (almost) now – as you can see!
Altitude
Sickness and Acclimatisation: Pay attention Everywhere we
met (even fit young) people who had gone up the same day as us (or before)
coming back down with Altitude Sickness, and looking very unhappy and worried.
If you are going to enjoy the walk you must do everything you can too avoid
this nemesis. You need to increase oxygen transfer in a much lower oxygen
environment. Get a prescription from your doctor before you leave home for
either Diamox or Dexamethasone (Steroid Della needed instead because of her
heart condition – it seemed to work somewhat better).
Take the time
to enjoy the donkeys:
And the yaks:
These guys
were making heavy going of it:
I took half a
tab of Diamox twice per day from when I was leaving Kathmandu to when I arrived
back there. This was as a preventative. It is normally carried as a treatment
for Altitude Sickness, but if you wait till you have symptoms it is too late
for this trip: you will have to go down, fast!
You also need
to take the time to acclimatise. If you don’t you will very likely get sick
(and you can even die suddenly eg from an embolism! Be warned)! You will have
come up from 1`400 metres at Kathmandu to 2900 metres at Lukla. That is quite
enough stress for the body in one day. Stay the night in Lukla. Spend the day
on some little acclimatisation walks around the town. For example, walk around
the airport, or go down to the hydro plant in the valley below and back, climb
up the hill above the town (past the army base and the school) into the
wonderful rhododendron forests etc. Over 3,000 metres when you have ascendeded
500 metres you need a day to acclimatise. You can spend this day climbing
higher so long as you sleep lower. You need an acclimatisatiion day at Namche
and again at Dingboche.
Take a break
in Namche:
If you skip
these days you are risking your life. All the people we saw who were sick from
the altitude had skipped one of these pieces of advice – or both. It has
probably cost you at least A$1500 just to get yourself to Lukla (return) plus
insurance. It is foolish to just waste that investment.
You get a odd
view of Everest during your acclimatisation day at Namche:
Vaccines? Yes you should. Everything available eg Triple Antigen, Hepatitus,
Typhoid, Cholera… and Rabies? Yes. It is 100% fatal. look at the photo of Della
(above) to see just how easy it would be to contract it by such an innocuous
thing as feeding the monkeys! Get the best advice from your country’s foreign
affairs department about what might be required in Nepal and have yourself
protected against them all. There are quite enough other dangers as well. (Untreated)
eg cholera can rob you of your entire body weight in fluid in a single day!
That must be something to see, but I will eschew it! Doesn’t sound like much
fun, does it? And it is preventable.
Don’t feed
the monkeys:
More About
Guides/Outfitters: I already stressed why we would
determine to carry our own (at least essential) gear. In fact we carried all
our own gear – but this only came to 5-6 kg each for a ten day trip! This is
more than we would normally carry, because it was colder. We would normally
begin a 10 day (unsupported) hike where we camped out the entire way with pack
weights including food of well less than 10 kg each.
I would
normally wash my clothes and dry them on a line across the back of my pack (and
then in front of the night fire) on such a trip but this is not possible on the
EBC because it is too dusty. In half an hour your clothes will be coated in
mud! You can have your dirty clothes washed and dried (eg) in Namche and
Dingboche during your rest days. This way you only need one change of clothes
to be quite clean enough.
I have often
enough gone for ten days at a time in the past without washing my (wool)
clothing without becoming offensively smelly. Of course I usually go where
there is no-one else about. There are lots and lots of people on the EBC. You
have to wait for them all the time eg to cross bridges or at narrow points in
the trail, or just because the large groups are just bloody rude and want to
take up the whole width of the trail. There is no credo of ‘age before beauty’
amongst them I assure you! The donkeys and yaks are more polite, believe me.
Still they should not be challenged for passage on bridges, and you should
always pass them on the uphill side in case they accidentally bump you off.
The ‘give
way’ rule in action:
No doubt
there are competent guides and outfitters, but you really don’t need to spend
the money. Nor do you have to pre-book the accommodation. You can just pretty
much walk into any guest hose unannounced and there will be a vacancy – at
least as far as Dingboche anyway. It is incredible just how much building has
been going on there in the last three years since I was there before. Then you
were lucky to see two helicopters a day but now there are usually 2-3
helicopters in the sky above you from dawn to dusk. Mostly they are ferrying
building supplies up the valley. They are too impatient (etc) to wait for
porters to carry the supplies up, so why should you feel guilty if you chose to
carry your own (survival) gear? You will have to eat the food etc that the
porters have carried up from Phaplu anyway.
The
outfitters can add A$5-6,000 to a couple of weeks’ trek. You do not need them.
Nor do you need guides. You can download maps and save instructions on ‘Pocket’
etc. Besides most everyone is going the same place and you can always ask a
local: ‘Namchi?’ That way.
Last time I
rescued’ a woman (from Pangboche to Lukla) who had been deserted by her
outfitters, guides and porters. She had become sick above Dingboche (where I
first started noticing her and saying ‘Hello’) and she had just been left on
the side of the track to fend for herself. Presumably the many wild(-ish) dogs
would have cleaned her up quickly enough if she had succumbed. I hate to think.
In Kathmandu there is a temple you can visit (This is a tourist attraction – we
avoided) where they are openly burning 50-100 human beings all the time. Not to
be missed! This is the Third World.
Guides are
more like US$25 a day. No doubt there are good ones – but how to tell? I have
seen them desert their customers. For example leaving a man who was clearly
beginning to suffer from Altitude Sickness struggling up the hill into
Tengboche in the dark. Then asking me as I arrived in Tengboche, ‘Have you seen
him?’ ‘Not since you left,’ No doubt he will be along in a little while’…Or
letting someone decide to walk to EBC and back in three days (next to
impossible – and suicidal to boot) yet not being prepared with the necessary
medicines, telephone numbers, a satellite phone or epirb. Or even adequate
local knowledge. Wow!
If you go
with a group you will see less wildlife. Musk deer (below) are in plague
proportions in the forest along the way. Soon their
predators (snow leopards and wolves) will be too. Then there will be another
interesting risk associated with the EBC!
And miss lots
of fascinating wild birds:
And
Acccommodation: Most ‘guides’ obviously have some
sort of ‘cumshaw’ deal with a hotel up front if they take you there (regardless
of the cost to you)! It is just not possible for them to switch you to a closer
hotel etc if you are not traveling quite so fast as they had planned. They will
chivvy you along. Myself I like to just make my own way at my own pace,
stopping when I am tired or when I want to. I am an old bushman and could
easily have found my way to the EBC and back again by myself even if there were
no road or buildings along the way – and I would prefer that sort of trip in
any case. Mind you there are probably very few places you can go where the
scenery is quite so stunning though!
We had no
trouble walking into the first piece of accommodation we came to and securing a
room for the night (usually at between US$0-2 at most) providing we ate in – we
always did. Some of these guest houses were a bit ordinary but most now have
solar showers (which was not the case three years ago) so you can get decently
clean anytime you want to. One night coming back from Pangboche towards
Tengboche we stayed (for free) at the first place we came to, the Evergreen
Lodge Milinggo (Debuche). The company was pretty much all sherpas. This was the
most enjoyable night of the whole trip (despite the pretty daunting toilet
facilities!)
Entering
Pangboche:
And of course
if you chose to go with a guide or an outfitter you are going to have their
company (and that of the rest of the awful company) all day every day for such
a long time. If you are some sort of lonely misfit this might suit you, but it
does not suit me. I have said many times in these pages, ‘No company is better
than bad company’. Anyway, I have/had Della for company, (these last nearly
fifty years) and there is no better than that!
Can you tell
whether we are enjoying ourselves?
Buffs:
There is lots
to see – Is Ama Dablam the most beautiful (if not the worst named of) of
mountains?
This time of
year there is lots of bright sunshine (too much probably – take lots of
sunscreen). They will dry quite quickly in this was – or if they are not
finished you can hang them over the back of a chair in front of the fire in the
guest house where you stay to finish off. This works well with towels,
handkerchiefs and undies, for example – even when it is only a dung fire
(common).
Take a break
every now and then and smell the flowers:
There are
other devices you can use to heat up the air your are breathing it (and hydrate
it). The Cold Avenger
Warm Clothes:
No doubt you can underdo or overdo it in this department.
I have mentioned the wonderful Montbell down garments many times before. They are our ultralight standby for warmth on the
trail. I took a down vest and jacket. (Never needed the vest – but it could
have been colder). Della also took her down pants. Used sometimes of a night or
when she felt cold. (Not enough adipose). We both had (light) woolen shirts and
Icebreaker or Kathmandu long underwear (top and bottoms). I took one bottom and
two tops. Bottoms only worn (some) nights so could wash on rest days. Tops worn
(sometimes) during day) and as pyjamas at night. Two pairs of Icebreaker woolen
undies (one in the wash). Two pairs of medium wool socks (Darn Tough) and one
pair of down socks (cold nights). I had my dyneema moccasins for a dry change. Shoes get a bot sweaty by the end of the day. Most
toilet trips (nights) needed shoes on again. Water hazard! I used a Montbell
sleeping bag to which we had added 9 ounces of down .
Bits and
Pieces: There is mobile phone coverage pretty much all along
the EBC now. You can buy a Nepalii telecom card with data for approx US$20
before you leave Kathmandu Or probably at Lukla and Namche where they sell most
everything. Most guest houses etc have Wifi available for maybe US$1-2 a night.
Free at Hermens Bakery Phakding where you can call your beloved on What’s App –
or chat to her across the rable if you are as lucky as me!
Permits: You can buy the necessary permits on the way (providing you fly in to
Lukla. One permit as you exit Lukla (Approx US$20) and one when you get to
Monjo (Approx US$30). it will be checked lots of times. The Nepalis are keen as
mustard on bureaucracy. It is all they seem to have mastered. Otherwise they
are mostly like children playing at ‘real life’. Nothing is ever organised the
way you expect it would be. But the army do have some pretty fancy guns and I
suspect know how to use them – and they are everywhere. Don’t know when the
open season on tourists is – not when we were there anyway!
To Avoid
Batteries Going Flat at High Altitude , do this. https://www.theultralighthiker.com/2019/11/17/preventing-batteries-from-going-flat-at-high-altitudes/
Yet another use for Aloksaks!
Toilet Facts: You need to get yourself prepared for the toilets – or the lack of them.
Be prepared to squat. They will (likely) freeze above Dingboche. Carry handy
(12) packs of tissues instead of toilet paper (and antiseptic wipes for your APC – a very important precaution ). You can buy them at every town. You can clean yourself up well after a
toilet stop with only 1-2 tissues. Wipe and fold, wipe and fold. You can get
5-6 wipes from a single tissue. Saves a lot of paper, weight – and does not get
wet and disintegrate in the rain, etc. Carry an ultralight trowel.
What’s For
Sale? You could begin the trek in a pair of thongs and a T
shirt and buy everything you need along the way. Lots of shopping in Lukla and
Namche, and lots of other shops with nick-nacks and groceries along the way.
You can buy cans of tuna and canned ‘Spam’ in every town – if you are craving
protein.
Lots and lots
to see:
So we
continue our journey through life:
See Also:
https://www.theultralighthiker.com/2019/05/23/the-ultimate-hunting-trip/
https://www.theultralighthiker.com/2017/03/27/new-ultralight-survival-shelter/
https://www.theultralighthiker.com/2017/08/18/raincoat-shelter/
https://www.theultralighthiker.com/2016/07/31/if-you-could-only-carry-two-things-in-the-bush-what-would-they-be/
https://www.theultralighthiker.com/2019/09/24/10-by-10-tarp-update/
https://www.theultralighthiker.com/2018/03/24/budget-pack-mods/
https://www.theultralighthiker.com/2018/01/25/gossamer-gear-air-flow-sitlight-camp-seat/
https://www.theultralighthiker.com/2018/06/09/cold-season-pads/
https://www.theultralighthiker.com/2015/10/21/sawyer-water-filter/
https://www.theultralighthiker.com/2016/10/07/cold-weather-face-masks/
https://www.theultralighthiker.com/2017/09/07/are-you-beautiful-in-the-buff/
https://www.theultralighthiker.com/2017/08/10/the-pocket-poncho-tent/
https://www.theultralighthiker.com/2017/04/14/19-gram-dyneema-camp-shoes/
https://www.theultralighthiker.com/2016/09/21/montbell/
https://www.theultralighthiker.com/2017/03/11/adding-down-to-a-sleeping-bag/
20/11/2019: EBC 4 & 5: And So Onwards and Upwards:
‘Tengboche, Pangboche and finally Dingboche – the end of our ascent. 4,410
metres at Dingboche, but we climbed higher to look down the valley to Everest
Base Camp, 2 more days ahead. These 2 days of cold and hardship were not on our
agenda. A medley of pics following, some with explanatory notes.’ (Della Again)
‘Sherpa baby
chewing on a 100 rupee note
Dung patties
drying in the sun for cooking fires
Yaks becoming
more prevalent
A welcome
stretch of newly made road
Entering
Pangboche
Between
Pangboche and Dingboche
Just one more
corner before Dingboche:
Our
accommodation at Dingboche: The Snow Lions Lodge
View from our
window in the morning
Such
organised and tidy lives!
Gotta love a
yak
Dining room,
Dingboche
Mission
accomplished!
A view up the
valley towards Base Camp.
Some solid
climbs!
Leaving
Dinfboche’.
19/11/2019: EBC 3: And Onward to Xanadu: ‘I
confess to having bored countless Eng Lit students of mine with my passion for
Coleridge’s poem “Kubla Khan”. Little did I suspect that I would one day
discover Coleridge’s Xanadu in the Sherpa capital of Namche Bazar. I saw so
many parallels to the poem, but perhaps the most relevant is the fact that
Coleridge was writing about an opium dream he had just awakened from, whilst I
felt as if I had stepped into a waking dream’. (Della again)
‘Nestled on
the sides of a hill, Namche is reached after a fairly tough climb. At over
3,400 feet, sensible trekkers spend an extra acclimatisation day there,
climbing higher the next day and then returning to Namche to sleep, thus hoping
to prevent altitude sickness. So we had plenty of time to enjoy this amazing
town as well as wander over the nearby hillsides and villages.
Entering
Namche Bazar after a day of solid climbing
One of those
“stately pleasure dome”(s) that Coleridge rattles on about! It also looks
like “Alph, the sacred river” has been put into service here!
View from our
bedroom
More pleasure
dome stuff
I love a busy
bazaar
My “local”
hairdresser in Namche. A shampoo and dry sure beats the discomfort of wet hair
in a cold climate. Melanie Cardillo , they will
never replace you, though!
‘Caverns
measureless to man…Oh that deep romantic chasm”
18/11/2019: Everest – Days 1 & 2: Lukla to Namche
Bazar with overnight stop at Benkar’. (Della)
‘Main street
of Lukla
The road out
of town
Other trekkers: The person in front is carrying a largish day
pack whilst the hired porter behind is carrying the rest of his/her gear. This
was normal procedure for almost all trekkers. We, in contrast, proudly carried
our own packs with everything we would need for the 9 days apart from food.
Not such a
large pack: all bedding, warm clothing, wet weather gear, change of clothes,
toiletries, medication, communication, safety.
The first of
many road trains: Donkeys, cows, yaks…these were constant and colourful
traffic. These donkeys are carrying empty fuel drums back to Lukla to be
refilled with aviation fuel and carried back to Base Camp again.
Such a
sweetheart! You could always hear the bells as the animals approached, so that
you had time to stand out of the way. I had to bring a yak bell home with me so
that I can be transported to Nepal every time the wind blows in the garden.
A proud
Sherpa woman selling her produce outside her home.
Despite the
shortage of good, cultivable land, almost all houses devoted space to flowers.
Our first
night in Benkar with the hospitable Neema Sherpa. We were her only guests.
Suspension
bridges everywhere.
Approaching
our lunch stop at Jorsalle’.
17/11/2019: Preventing Batteries From Going Flat at
High Altitudes: This is my ‘Poor Man’s Satellite Phone recent EBC trek my first time on the EBC
That time I
also had a 5 watt solar charger which was supposed to be charging Nicads or
Nickel-Metal-Hydrides pretty much all day. The days were perfect sunshine all
the time but the batteries just went slowly flatter as they lost charge to the
air more quickly than the solar could replace it – something I had never
experienced before.
Pretty much
everyone who hikes this trail (or that elevation) finds the same phenomenon
many blaming it (incorrectly) on the cold – but it was not cold. I wore just a
simple light short sleeved wool jersey polo shirt pretty much all day every day
and placed all my batteries in my sleeping bag of a night though it never got
so cold of a night as I am used to winter camping in the Victorian mountains
where my batteries never go unnaturally flat.
I reasoned
that it must be the altitude, but Googling it found that no-one had a solution.
Extraordinary! First I thought up lots of elaborate ways to place the phone in
a space which would emulate sea level air pressure (no doubt dreaming of
receiving millions for such a clever invention,,,) when I realised that Aloksak
had already beaten me to it/them!
They make
waterproof and airproof zip-lock bags – much superior quality to the
supermarket variety (which will not suffice for this purpose – they leak). If
you place your phone/battery in the Aloksak bag (they come in a variety of
sizes/shapes) and inflate them slightly as you seal them, then place them
(gently) in your pocket or pack so that they are under ever such slight
pressure all the time the battery/phone just stops going flat. Simple as that –
but you can send money if you so desire:
https://www.paypal.me/theultralighthiker
Beware too much pressure or you will
burst the bag at the seams. They can be repaired eg with cuben tape two red power bank batteries
A Note on
Charging on the EBC: Since I was there three years ago
they have installed many micro hydro systems along the trail so that most of
the small villages now have A/C power but it is often not enough to charge any
larger battery than the single cell ones I took (in the photo below – 18650
batteries of approx 3.5 amp hours). Be warned.
Aloksak also
make waterproof ‘gun bags’ which are very handy for canoeing/hunting trips: https://www.theultralighthiker.com/2016/11/17/aloksak/
Here in
Australia I bought mine from Injinji
A selection
of bags below. The two at the bottom are the small and large phone size.
17/11/2019: EBC Starting out: Kathmandu to Lukla.
Flying to Lukla is the adrenaline-filled beginning to the Everest Base Camp
Trek. Reputedly the most dangerous airport in the world, Lukla Airport has a
landing strip just 500 metres long, with a sheer cliff on one end and a brick
wall on the other. We took videos of both our landing and takeoff to share. The
flight only takes 30 minutes, but believe me, Nepali disorganization manages to
make the waiting last almost all day. And seats at the airport? Why would you
need those? When they finally decide that it is time to fly, you have less than
5 minutes between frenzied waves towards the plane and being launched into
space! Who needs to bungy jump for thrills?’ (Della Continued)
Aside: The cover photo was taken at Phaplu Nepal. Tara dropped us off there to
wait for 4-5 hours instead of flying straight to Lukla. Our return flight was
delayed by the same amount. Even so it was much better than the 4-5 hour each
way bus trip to Ramechhap (from Kathmandu) which most visitors are having to
endure ‘at the moment’. In Nepal nothing happens according to schedule!
Lukla
Landing:
https://www.youtube.com/watch?v=7uzYeZiyNVc&feature=emb_title
https://www.youtube.com/watch?v=8qKs7znCRL0&feature=emb_title
Lukla Take
Off:
https://www.youtube.com/watch?v=SVdPoT5fSiQ&feature=emb_title
16/11/2019: 9 Days Trekking the EBC: Della: ‘And
so we are back! 9 days trekking along the Everest Base Camp trail, Lukla to
Dingboche. Our final climb above Dingboche was as high aa Everest Base Camp,
but I never wanted to experience the cold and privation of the last 2 days of
the trail, so we were happy to call Dingboche our goal. And it was beyond
amazing: I never expected it to be the journey of a lifetime, but it was… The
soaring beauty? The time, whilst walking, to contemplate my life…? I only know
that I felt more energy and happiness than one small, imperfect heart can hold,
and each day that heart swelled further with gratitude for all the people whose
loving support put me there: my husband and lifelong guide, my family
support-crew back home who kept our home base running amidst their already busy
lives, my friends who cheer me from these Facebook pages daily, and my
outstanding cardiologist who saved me just moments from death exactly a year
ago and then solved (though not quite “cured”) my heart problem. So many people
– giving so much: No wonder my heart soared. The cynic that usually inhabits my
soul might suggest that all this emotion was a side-effect of the steroids that
I was prescribed to help prevent altitude sickness.. Who knows?! Nepal was
certainly a fitting place for such a spiritual experience, whatever the
trigger, and my gratitude will be a golden nugget that I treasure for the rest
of my life.
I will bore
you all further with some more pics over the next few days, but feel free to
flick on past if holiday snaps are not your thing!’
Lukla-Chheplung:
Pangboche to
Dingboche:
Nagarzhang
Peak Dingboche:
15/11/2019: Global Tree Cover Has Expanded More Than 7
Percent Since 1982: https://reason.com/2018/09/04/global-tree-cover-has-expanded-more-than/?fbclid=IwAR2CZ1K4FpCZ0uS5ZpsC5w9zm0Zo_vxvP0aq1yuD2mDV21W-VP9HnJbQyR4
30/10/2019: Namaste from Kathmandu! We were unaware
that Nepal would be in the middle of a religious holiday festival when we got
here, but it sure adds a little extra colour and mayhem! Local sightseeing
today, then flying out to Lukla at first light tomorrow to begin our 9 day trek
along the Everest Base Camp trekking route.
28/10/2019: Face Painting one day, tree planting with
Dad the next. Another 20+ trees down today! Now they just need to hurry up
and grow!
26/10/2019: Never Get Lost – With Google Offline Maps:
So long as you have a smart phone (with GPS and Compass – be sure it does
before you buy it!) you don’t need a Garmin or any other GPS device, and you
don’t need to pay for any maps. You can organise your phone so that you
need never get lost.
However you
do need to download the particular area you want to explore onto your phone as
an offline map before you venture out into the wilderness . You
should try this with your home area first so that you are sure you know how it
works, then with a different area you are also familiar with. You need to be
sure of yourself and your phone.
Now you can
go offline. So you can turn off your Wifi or data and be in flight mode and
still view the downloaded map. You just open the App, go to Offline Maps (as
you did before) and select the appropriate map you want the phone to display.
It will open. With ‘location’ selected, by pulling down the menu at the top of
the phone, the phone’s GPS will locate your position on the offline map (by
tapping on the round ‘location question mark’ icon below right. , so you should
never be lost again. You can view the Map as ‘default, satellite, Terrain’ etc
by selecting from the menu icon on the op right hand corner of the map. You can
tell your phone to default its ‘Location’ service to the phone’s GPS (rather
than towers etc if you are in a remote locale. This will save some battery
usage.
I use this
App all the time to navigate my way around the bush both in Victoria and in
distant countries. It works brilliantly when you have the map open (in offline
mode).
It will even
speak and tell you how to get ‘Home’ or to any described point just like Google
online maps which you probably use in your car.
Enjoy your
journey.
PS: Be sure
to close the App and turn off ‘Location’ and put your phone in ‘Flight Mode’
when you are not navigating as it will eat through your battery.
Please tell
your friends.
TIP : You need to be sure that you have opened all
the bits (they are technically called ’tiles) of the map you want before you
download it then after you have downloaded it you need to check
(offline) that it is all there in the detail you want and need before you head off into the wilds. It takes a bit of practice.
24/10/2019: Cooking for Two: My wife, Della and I
used to carry two complete cook sets but we have shrunk that down a bit. Mostly
we carried two pots because it simplified heating water for a shower a sponge bath
Another
reason we carried two cook sets were in case we became separated in some accident
or disaster each would still be able to cook his/her own food. For the same
reason we used to have two shelters, a fly and a poncho for example and two
satellite communicators ( a phone and a messenger).
We think it
is essential to have two utensils (spoons/sporks, two cups and two receptacles
for eating out of. The first two were easy enough to just double up on but we
have done some experimenting with the dish/plate. Quite a bit of shopping went
in to getting one which came in at an acceptable weight.
These are the
best three we have come up with. The aluminium one on the left is a plate which
came in a cookset I bought back in the early 1960’s and which I rescued from
one of my hunting camps recently (See: https://www.theultralighthiker.com/2019/07/30/the-seventieth-birthday-platypus/
So the
(Della) addition to my cook set now weighs 8 grams for the spoon/spork Wildo cup
I should
mention that I have also started to carry an ultralight titanium pot lid (13
grams) to use as a stable base for my burner. It is much better (and safer)
than a spilled meal, and handy for doing some food preparation on too if you
need to. It is from Trail Designs, the Evernew Multi Dish wonderful mug I have talked about before
See
Also:
https://www.theultralighthiker.com/2016/01/26/cookset-woes/
https://www.theultralighthiker.com/2016/05/22/the-egg-ring-ultralight-wood-burner-stove/
https://www.theultralighthiker.com/2019/06/03/ultralight-cutlery/
https://www.theultralighthiker.com/2019/10/20/ultralight-folding-coffee-cup/
https://www.theultralighthiker.com/2016/05/23/bathtime-on-the-trail-the-one-gram-platypus-shower/
https://www.theultralighthiker.com/2019/08/17/the-apc-and-the-sponge-bath/
https://www.theultralighthiker.com/2015/11/20/ultralight-personal-hygiene/
20/10/2019: Light from Heat: Although they are not
(at present) ultralight, I really like the concepts behind these wonderful
lamps. Lumir-k: Cooking oil fueled LED lamp Lumir-C Candle Powered Led lamp
Lumir C:
Lumir K:
This is a
similar concept, power from heat: https://drop.com/buy/biolite-campstove-bundle#overview https://www.theultralighthiker.com/2015/07/20/power-from-heat/
PS: You
should be able to make this system work with a Peltier on a chimney as in: https://www.theultralighthiker.com/2019/05/29/tim-tinker/
20/10/2019: Ultralight Folding Coffee Cup: This cup
has been officially classified as a work of art in its home country, Sweden –
which it certainly is. It is a folding coffee cup which folds down to
just 1″ (2.5cm) high but it weighs just 25 gram (which is well-nigh
impossible to beat for hiking). It holds 237 mls just shy of a ‘regular’ cupful
(250 mls) If this is a bit small for you it does have a ‘big brother’ (or
sister) which holds nearly two cups full (591 mls = 46 grams). It costs less than A$5 their range
It would make
a great companion piece to those showcased in my last two posts: https://www.theultralighthiker.com/2019/10/19/best-coffee-on-the-trail/ https://www.theultralighthiker.com/2019/10/19/most-beautiful-ultralight-windscreen/
And of course
you need something to boil the water in such as https://www.theultralighthiker.com/2016/01/26/cookset-woes/ https://www.theultralighthiker.com/2017/09/18/ultralight-cookpot/
20/10/2019: Best Coffee on the Trail: While you are
over at Tier Gear https://www.theultralighthiker.com/2018/09/29/the-ultralight-barista/ Wildo’s famous 24 gram folding cups
Available in Polypropylene at Tier Gear
Over at
Munieq it also comes in Stainless Steel or Titanium (and in two sizes: 1 1/2
and 3/1/2 cups) Titanium is heavier (16 grams) a mere nothiong if you have a
fetish for this remarkable metal!
20/10/2019: Most Beautiful Ultralight Windscreen:
This brilliant 14 gram windscreen by Munieq of Japan (and available at Tier Gear Tasmania here
‘Flame
visible ultra light outdoor stove windscreen and pot stand from Munieq in
Japan.
Micro meshed
0.2mm thin stainless steel sheet.
Assembles in
a cylindrical shape
Alcohol stove
or solid fuel compatible
Only 14g
Can be
stacked in a mug or cup.
Multiple
connect system – connect two for bigger pots or stoves
Single
Diameter: 62mm x H:67mm for alcohol stove with diameter smaller than 55mm
Double
Diameter:124 x H:67mm for alcohol stove or solid fuel’
It looks like
it would also work well (and beautifully) with an ultralight esbit stove
See Also:
https://www.theultralighthiker.com/2019/07/23/tinnys-gnomes/
https://www.theultralighthiker.com/2015/07/09/windscreens/
https://www.theultralighthiker.com/2017/09/22/ultralight-windscreen/
https://www.theultralighthiker.com/2018/06/27/clever-titanium-windscreen/
https://www.theultralighthiker.com/2017/09/21/ultralight-esbit-stove/
11/10/2019: A Radio Controlled Paper Aeroplane: (from
US$49 – Oct 2019) https://www.kickstarter.com/projects/393053146/powerup-40-smartphone-controlled-paper-airplane/?utm_content=TRS_82&utm_term=e2337218-6860-47a1-8369-e3ed1b20ecc0&utm_campaign=TRS&utm_source=TRS_82&utm_medium=FB
03/10/2019: Canoeing the Macalister Again:
Yesterday was the first decent day of Spring: 28C and with enough water (1.73
at Licola – ideal) for a decent trip down from Basin Flat to Cheyne’s Bridge.
This is one of the few sections of river that you can canoe alone (as you can
readily hitch a lift back to your canoe after dropping it off at Basin Flat.
Aother is Hernes’s Spur to Eaglevale ont the Wonnagatta – but you will want a
pack raft for that (See: https://www.theultralighthiker.com/2017/11/20/pack-rafting-the-remote-wonnangatta/
I made the
trip in 3 3/4 hours allowing a quarter hour for lunch and three small portages
(a small log jam and the two grade 3 rapids where I am loathe to come to grief
alone at my age – though I have shot them a hundred times in the past. The
first one just below Burgoyne’s Track still has a log stuck in it but is now
canoeable. The second one has a (hidden) rock in the chute which has had me out
a few times. Once I spilled my old Mauser 30:06 into the river there and it
stuck between two rocks right in the middle of the rapid. It was some trick to
recover it! You can try and imagine diving in this. (I was younger then!)
I was very pleased
with my sub 4 hour time. I was not racing though. I used to complete the trip
in under four hours when I was in my late 30’s so it is good to see that my
upper body strength is still OK at 70. Now to get that knee fixed!
The riuver
starts out sun-drenched, flat and wide. You just know you are going to enjoy
this trip!
Could have
avoided this log jam by taking the left fork. Many people have drowned side on
to logs like this in shallow water. The canoe tips upriver, fills with a tonne
of water and you are trapped in it (particularly if it is a kayak) with your
nose two inches under the water! If in doubt, get out! I always have an open
canoe, either (the current Old Town Pack Angler) Canadians or kayaks with holes
which are open to below your knees (like the Perception Minnow). Inflatables
may be safer. We have a couple of Alpacka pack rafts which we love.
A real Huck
Finn day.
Lunch stop.
There are dozens of delightful spots where you can camp for the night. The
river abounds with of deer, trout and red-fin perch.
The only
thing I needed to make the day perfect were Della (away crafting) and the dogs
– need a second person to look after them through the car shuttle. There will
be another day!
It is a great
section of river for white water training purposes (for folks who already have
some experience in canoes). It begins with wide slow flat water and the
occasional pebble race, then gradually moves on to Grade 2. Some of these are
tricky and require you to develop navigation skills. Then there are the two
Grade 3 rapids (below Burgoyne’s) which can be shot again and again on a lovely
fine day such as yesterday was.
Things to
remember:
Stay in the
centre of the current.
Lean in
towards rocks (plastic boats – the reverse for inflatables).
Never get
side on to the current (or logs).
Beware of
overhangs, logs etc – stick to the slower edge of (such) bends.
If in doubt get
out and check first.
Don’t be
worried about portaging. Better to be a live mouse than a dead lion – better
still to be a live lion! If you hurt yourself badly alone in the wilderness you
will be sorry! Why you should not do silly things like take your shoes off in a
river or cross on logs! And never jump! Softly, softly, catchee
monkey.
I only took a
few snaps. You can view more detailed pics and instructions eg here:
https://www.theultralighthiker.com/2017/10/18/silver-river-endless-sky/
See Also:
https://www.theultralighthiker.com/2014/11/01/canoeing-the-macalister-river/
https://www.theultralighthiker.com/2014/11/02/canoeing-the-macalister/
https://www.theultralighthiker.com/2015/01/07/macalister-river/
29/09/2019: Ultralight Waterproof Fabric: I am
after some light waterproof fabric to make one of my new 10 x 10 Tarps Pocket Poncho Tent Deer Hunter’s Tent
If I can
purchase it cheaply enough (eg for less than US$2/metre) I will then see
whether I can have some whipped up (eg by someone in Vietnam) into tents etc to
sell on the website…In the meantime I will source some eg from the suppliers below,
possibly using a shipping agent to save on freight.
I will make
the silpoly version of the 10 x 10 Tarp out of some of the .93/yd2 (above) or
the 1.06/yd2 4000PU (but I will certainly use this for a groundsheet – for its
extra waterproofness). As I will need 9 metres to build the tarp the material
for the tarp will weigh 284/326 grams. I expect the tie-outs and guys to add
less than another 50 grams to this, so I should have a very light tarp (approx
330 grams).
The Tyvek
model was made out of 1.85/yd2 Homewrap (ie 2.21oz/m2 or 63 gsm) so the Tyvek
must have weighed 568 grams of this, therefore my tie-outs and guys only added
44 grams.
I like the
‘Dark Olive’ colour. I made my Pocket Poncho and Siligloo
I will probably
make a simple 7′ x 4′ (2.1 x 1.2 m) groundsheet for it (for Della
and me) – as I say out of the 1.06/yd2 material. It should weigh 87 grams. 330
+ 87 + approx 10 x 6 gram stakes = 447 grams for the complete tent/shelter! Not
bad for the size and flexibility this has. It can also be used as a hammock
tarp.
Because this
fabric has polyester on one side (instead of silnylon) you can tape or
glue to it, so that I will finally be able to make my inflatable bathtub groundsheet raham pillows DIY Pack raft
I am going to
make a slightly bigger Poncho Tent (one which will accommodate taller people –
and in a pinch two; at least Dell and me!) I will use the .7 oz/yd2 fabric for
this. As the original weighed 185 grams (complete), I expect the new one
will weigh somewhere above .7 times this – somewhere between 130-150 grams
perhaps. Quite a spectacular weight for a completely enclosed shelter, (nearly)
big enough for two! Of course I have to add a space blanket or piece of polycro
to that (<50 grams) for an ultralight groundsheet
The Deer
Hunter’s Tent should come in at under 400 grams in the .93 oz/yd2 fabric,
including floor.It is a lovely little tent.I have really enjoyed the Tyvek
model. Time to finish it off in a lighter material.
Below are
some of the waterproof fabric products I am looking at:
1.4
oz/yd 47.46gsm 1 silpoly https://ripstopbytheroll.com/collections/waterproof-polyester-fabric/products/1-1-oz-silpoly-pu4000?variant=11054730177
1.3 oz/yd2
silnylon https://www.questoutfitters.com/Coated_2.htm#SILNYLON%201.1%20OZ%20RIPSTOP
72”
wide 1.3 oz/yd2 44gsm silpoly https://ripstopbytheroll.com/collections/waterproof-xl-wide-fabrics/products/1-1-oz-silpoly-xl?variant=35045467469
1.24 oz/yd2
42gsm silnylonhttps://ripstopbytheroll.com/collections/waterproof-nylon-fabric/products/1-1-oz-silnylon?variant=11168938177
1.06 oz/yd2
36 gsm: https://www.extremtextil.de/en/ripstop-nylon-tentfabric-silicone-coated-20den-36g-sqm.html?number=70777.SAND
1.07 oz/yd2
36.28gsm https://ripstopbytheroll.com/collections/waterproof-polyester-fabric/products/membrane-silpoly-pu4000?variant=10662993601
.93 oz/yd2
31.5gpm US$7.50/yd: https://ripstopbytheroll.com/collections/waterproof-polyester-fabric/products/membrane-silpoly?variant=21841469185
.7 oz: http://rockywoods.com/7D-Ultralight-Coated-Ripstop-Nylon-Fabric
.51oz/yd2
17.29gsm cuben https://ripstopbytheroll.com/products/0-51-oz-dyneema-composite-fabric-ct1e-08?variant=1030734849
See Also:
10 by 10 Tarp Update
The Pocket Poncho Tent
The Deer Hunter’s Tent:
https://www.theultralighthiker.com/2017/11/22/ultralight-ground-sheet/
https://www.theultralighthiker.com/2017/02/25/inflatable-bathtub-groundsheet/
24/09/2019: The Valley of the Deer: I guess every
hunter dreams of some secluded valley where it feels like you are the first
person to have ever trod – at least where the deer are as plentiful and tame as
rabbits and there is no competition from other hunters. Where you can arrive at
your camp after a couple of day’s hard slog getting in and notice at once that
no-one else had been there. For years this was ‘my’ such valley deep in the
Gippsland mountains. I guess it is a wonder I had it for so long undisturbed.
But, one
should be very careful who you tell about such a magical spot. And perhaps even
more careful of making a path in which is easier for you to follow without
stooping with a pack on. I confess my bad back has made me guilty over the
years of breaking a branch off here and there so that I can smoothly thread my
way through the tall timber.
Other sharp
eyes are ever looking out for such give-a ways, so that one day I arrived to
find my usual pile of wood burned (I always leave a pile against a late
arrival), rubbish strewn everywhere, bones left near camp. Toilet paper! Some
people really annoy me. Can’t they carry a 12 gram trowel
My new spot
is way down that very steep hill. Nearly a kilometre vertically in only about
the same distance horizontally! There are very few ways through the tangle of
precipices. I want to hunt the other side of the valley, and you can’t get to
it from the other side – or from this side without a pack raft.
There I go
again leaving signs to show me the cleft in the rocks where I can clamber down.
At 70 I don’t think I will have many more years I can make it there and back
again anyway really.
I have always
chosen steep country (because others eschew it), but this country is steep by
even my (young) standards, and a hard fall at my age could be very nasty
indeed! Still, I think I would rather someone find my beached bones underneath
some grass tree on a steep mountainside somewhere in the Victorian mountains
than die in bed incontinent and incoherent.
Stupidly (I
know) I have broken off the odd branch to ease my passage. This time I found my
way down in half the time because of it, and annoyingly where I have been
others are bound to follow. This (along the river) stood out to me like a
beacon – because I did not carry a machete either time. It could have been
canoeists. I will hope so. No other sign of hunters.
This time
Della could not come and I did not get bluffed out (like last time
At least
no-one else had come along and shared our precarious camping spot (below) since
I was there before. Does Spot remember? Of course he does.
I carried this little raft now US$110 – Sept 2019 this half kg paddle 282 gram life vest https://www.theultralighthiker.com/2017/01/02/new-diy-pack-raft/
There were a
couple of swans at camp to greet me – the first I have ever seen on a
white-water river. Migrating perhaps?
I set up camp
for the night. My new tarp arrangement (610 grams) needed no pegs or a pole to
erect. Spot and I were as snug as bugs in there,
and so cosy
with that delicious warm fire out the front.
Right behind
my camp was this beautiful brachychiton – with pittosporum understory. There
are some beautiful sights in the Victorian bush. These Brachychitons are
hundreds of kilometres from where they are supposed to grow. Don’t they know?
Climate change perhaps? Get real. I have had a rare enough resident of the
Northern territory travel all the way to my back fence to die
Next morning
all we had to do was paddle across to where that creek joined the main river.
Over there. Downstream of the confluence the creek had changed its course over
the years creating a flat nearly a kilometre long and as much as 300 metres
wide. Further up that very long remote creek are other magnificent flats – to
be explored on a later trip. As I mentioned it is just about impossible to
access from the other side of the river.
We are across
the river and looking back (upstream) at our tent amongst the manuka opposite.
I can just make it out – but I know where it is. You would never spot it from
the river. I like to have my camp invisible from the river, as you never know
what kinds of two-legged snakes will came along and maybe even steal your
paddle (as happened to me once!) I had found a way down between the two cliffs
centre. As you can see it is extremely steep, such that you can only just stand
up on it.
The view
downstream from the same spot. That ridge looks much better and leads to the
other end of the flat (and another flat downstream). I will explore it on a
future trip. I could not find where the ridge started at the top on this trip.
You can get around that vast precipice near the top (I think), but there may be
others!
This shot
shows better just how far this flat extends along the river.
There is lots
of grass to eat. If I was sheep farming there I would ‘carry’ about 3-4 ewes
per acre – and this flat is at least a couple of hundred acres! A sambar deer
eats 2-3 times what a mature ewe needs, but you get the point. There are lots
of deer here. Hundreds!
It is a very
beautiful creek – and has trout.
With its own
small grassy flats
Well grazed
pasture on the main flat here.
And here.
A high
traffic area.
Along the
back of the flat is a string of billabongs, each containing many wallows as in
the foreground. I was able to see this from Google Earth – and the deer tracks
going to and from them. Spot sees something at the far right end of the photo.
He knows not
to go for these fellows. We have blue tongue lizards in the garden he was
trained not to chase, and then moved on to not chasing red-bellied black snakes
(as shown here). I have not trained him not to chase sambar deer – quite the
reverse. Hence the shortage of photos of deer. He sees them off before I notice
them usually – but we are here to both have fun! And I prefer eating lamb
anyway. My sheep farmer prejudices showing there.
The
billabongs are quite extensive – and beautiful.
Stretching
downstream underneath that ridge. I naturally expected that the deer would be
bedded along the ridge and not on the flat itself, but I was quite wrong about
that. The deer here are quite undisturbed and have no reason not to be lazy.
Spot and I may give them reason in the future to be a bit more wary!
Lots of
‘preaching trees’ along the flat. Lots of thrashing, rubs etc. Lots of stags
hereabouts.
This is the
bottom end of the flat looking across at another flat downriver. If I can get
down the gentler ridge (right) to here this will make a better base and camp.
It is also easier and closer to get across the river here. There is a good
screen of bushes opposite behind which I can set up a camp.
That is the
same precipice seen from the bottom of the flat. As you can see there is a way
down the ridge behind it. There may be other unseen precipices as one ascends.
One foot after another and I shall find out in the future.
And where are
the deer, you ask. The flat positively reeked of deer. I have never smelled
such a strong scent of many deer except where there is a plague of red deer in
the leatherwood fringes of the snowgrass tops in Fiordland (where I go
sometimes to hunt moose
A dozen times
Spot put up groups of deer who leapt up, honked at him and crashed off – with
him yapping in pursuit. No time to get a photo. Precious little time to even
get off a shot – had I wanted to anyway. I will need to clear a few walking
trails though the flat so that I can creep along without stooping under thick
vegetation or making a noise if I want to shoot any. The grassy clearings here
and there and wallows would be fine places for ambush hunting (if you did not
have a dog with you!) but which I prefer not to do. Unsporting for the deer I
feel. As I said earlier I prefer lamb anyway. And i really prefer to just see
the deer nowadays. I would not enjoy hauling bits of them up those steep ridges
anyway. Perhaps if i make a permanent camp down here – a drum with an Intex paddle shelter
The only
other thing to report was that as I was driving down the precipitous 4WD track
my rear brakes let go. I had spat out a brake pad as one of the pistons in the
caliper had seized. You should never drive in such a manner that you cannot
stop without brakes. I had a long drive back (over 50 km) without any other brakes
than the hand brake (and engine) to somewhere my lovely Della could bring me a
spare part to fix it. 50 years yet she never ceases to delight me!
See Also:
https://www.theultralighthiker.com/2019/05/23/the-ultimate-hunting-trip/
https://www.theultralighthiker.com/2018/03/05/the-lure-of-the-moose/
https://www.theultralighthiker.com/2019/09/24/10-by-10-tarp-update/
https://www.theultralighthiker.com/2011/12/15/faux-packraft-vs-alpacka-raft/
https://www.theultralighthiker.com/2019/09/04/the-intex-double-paddle/
https://www.theultralighthiker.com/2019/09/06/two-great-poly-tarp-configurations/
24/09/2019: 10 by 10 Tarp Update: I sewed the
tie-outs onto the Tyvek tarp on Friday night and headed up the bush to give it
a try-out on Saturday morning. Completed it weighed 610 grams. An acceptable
weight for such a commodious and versatile shelter. In silnylon it would weigh
under 350 grams.
To reiterate
(just in case you have not read my earlier post
I am using a
piece of Polycro here as a ground sheet
You can also
pitch the tarp as a simple floorless diagonal which will span 14 feet and have
edge cover of 10′ either pegged out from from a pole or tree to the
ground (as shown) or as hammock tarps between two trees. Or it can be pitched
as a completely enclosed hammock shelter spanning 10′). If you are using
it as an open shelter pitched much as above except from the corners instead of
half way along the sides (as shown) it will accommodate several people. I would
use a ridge pole with such a span. (You can get away without one to 10′).
Anyway plenty
of room for me and Spot (who is hiding under my sleeping bag).
Spot has come
along simply to smell the flowers.
Looks good
down (a very steep kilometre vertically) by the river, doesn’t it?
You don’t
need to bring pegs or a pole. The bush is full of sticks which can be used
instead. A foot long forked stick like this will give the tent better purchase
especially in sand than any bought peg anyway.
And it is a
simple matter to tie the shelter to a tall stick.
It always
looks even better with a fire out the front I think.
Especially at
night.
See Also:
https://www.theultralighthiker.com/2019/09/06/two-great-poly-tarp-configurations/
https://www.theultralighthiker.com/2017/11/22/ultralight-ground-sheet/
https://www.theultralighthiker.com/2019/09/07/60-diy-ultralight-hiker-ideas/
20/09/2019: A Magical Day: (Della) ‘yesterday
revisiting Tongue Point and Fairy Cove at Wilson’s Promontory with friends. The
beautiful spring weather, the good company and the 8 km walk were all very
pleasant indeed, and we were warmly welcomed by the appearance of some winged
luncheon guests at Fairy Cove (not actual fairies) as well as a killer whale
surfacing just below the cliffs of Tongue Point’.
09/09/2019: 60 DIY Ultralight Hiker Ideas: It has
been quite a while (over two years) since I first posted this. Time for an
update. There are now over 100 ‘ideas’ to try out. Most will save you money or
at least improve your outdoors experience; nearly all of them are my own ‘inventions’.
Hope you find something useful to you.
99. Two Great Poly Tarp Configurations
98. The Intex Double Paddl
97. A Hiking Bidet
96. Thermoplastics #101
95. A Wider Lighter DIY Sleeping Pad
94. Even More Free Stuff for Hiking
Seamless Tyvek Tipi
The Ultimate Camp Shoe
Extempore Hiking Poles
Embryo Wire
Stop Losing Your Pillow
More Free Stuff for Hiking
Free Stuff for Hiking
Best $5 Spent on Camping Ever
Fire Umbrella
DIY Dry Back Pack
How to Carry a Saw
Make Your Sleeping Pad Warmer
Whoopie Sling Guy Line Tensioner
Electric Drill Earth Auger
DIY Air Frame Pack
New Fancy Feast Stove
Budget Pack Mods
Self-Cleaning Pet Water Bowl
More Bird-Brained Things
Trees and Tree Guards
Ultralight Bathtub Floor
Convert a Car to a Camper for $50
Nightcore Tube Hat Clip
A Cure for Slippery Mats
The Siligloo
Simple Hammock Double Up
The Pocket Poncho Tent
Raincoat Shelter
Ultralight Hiking on a Budget
Ultralight Cups
Knee Pillow
Bathtub Groundsheet Chair
Ultralight Poncho Tent
Simple Hearing Aid Safety Clip
Fun With Sticky Tape – Mylar Poncho
A Ball of String and a Feed of Cray
Repurposing Camping Gear
More Fun With Sticky Tape – Mylar Vest
Fishing With Floss
Securing Hearing Aids
Four Gram Fishing Handlines
Hammock Side Insulation
An Open Shelter
4 Gram String Reverse Tripod
Linelock Tie Downs
Attaching Tie Downs to Your Pack
DIY Head Torches
Impregnable Gun Safe
Toughened Foam Flip Flop
The Ultralight Fisherman
Hand Line Fly Fishing
Cold Weather Booties
Pimping a Gorilla
Adding Down to a Sleeping Bag
Windscreens
How to Avoid Being Wet and Cold While Camping
World’s Lightest Tarp Clip
15 Gram Blue Foam Flip Flop
Tyvek Jack Russell Rain Coat – 13 Grams
Ultralight Trail Baker
Folding Staircase for Camper
11 Gram Rechargeable Head Torch
Enginesaver – Low Engine Water Alarm
Ultralight Glasses Case
Hole-less Poncho Shelter
The Ultralight Bush Chair
Pitching the Poncho – This May Save Your Life
Faux Packraft Vs Alpacka Raft
Fire Tent
Honey I Shrank the Tent
Tyvek Twin Fire Shelter
New Decagon-Octagon Igloo Tent
Home made Pack Raft
Poly Tent by the Ultralighthiker on the Cheap
DIY Hiking Desalinator
No Sew sandals
New Tyvek Forester Tent Design
Tray Top Camper
How to Light a Fire in the Wet
Catenary Curves
Bathtime on the Trail – the 1 Gram Platypus Shower
Ultralight Clothes Pegs
Tarp Bathtub Groundsheet
The Egg-Ring Ultralight Wood Burner Stove
Inflatable Bathtub Groundsheet
Tyvek Tent Designs
Tyvek Bivy
The Deer Hunter’s Tent
Tyvek Solo Fire Shelter
Ultralight Chair – Groundsheet
Mobile Phone Antenna
Trowel Peg
Some other
people’s great DIYs:
Tim Tinker
Transparent Tent Instructions
Brawny’s Tarptent
DIY Crampons
DIY PFD 114 Grams
The DIY Gunsmith
DIY Stun Gun
DIY Netless Hammock
DIY Side Burner Metho Stove
08/09/2019: The Rapid Raft: Cheap, light, quick,
simple and tough – and almost self-inflating. What’s not to like? Here are the
two most outstanding features.
Wonderful.
15″ x 5″
when deflated. 33″ x 72″ inflated. 3 lbs. Tubes 200 denier. Floor
400 denier. The nearest competition I guess is the Ultralight version of this
one: https://www.theultralighthiker.com/2017/01/02/new-diy-pack-raft/ https://www.theultralighthiker.com/2016/04/23/klymit-packraft/
Winner Best
New Gear Outdoor Retailer Summer 2019: Buy now from A$365 (Sept 2019)
https://www.indiegogo.com/projects/uncharted-rapid-raft-world-s-lightest-pack-raft#/
07/09/2019: Harbingers of Spring at Jeeralang Junction:
‘Snapped late yesterday as the cold front approached!’
(Della)
In other
developments the Ring-Tailed Possum I thought a victim to Brer Fox
07/09/2019: Still only two swallows. They are now
over a fortnight late, but I am heartened by this old post: 13/12/2016: Swallow
Update: The missing birds have at last returned.
06/09/2019: Two Great Poly Tarp Configurations: I
know most people can’t sew (and probably don’t have much money either) so I
suggest either of these two simple poly tarp ‘hacks’ for en excellent dry
shelter (which you can also enjoy a fire out front with). They both also feature
‘stand-up’ room (at least if you are shorter than 6′) which I think is so
much more comfortable than crawling around on your hands and knees on wet
ground entering and exiting (eg to put another log on the fire).
Both can be
closed in case rain decides to come from every direction at once. I recommend
(if you can sew) sewing gross-grain tie-outs to them and cutting off any excess
material. You don’t need the hems or useless grommets for example (and
especially if they have rope in them as some do). If you can’t sew I suggest
you buy some tarp clips. These ones make a kayak
The 8 by 8: This can be made from a 12 ‘by 12′ tarp. When I began this post I
own that I intended to dig out a 12′ x 12’ model I used to use for years
while waiting for hounds to wander back in from sambar deer hunting. It i s
hidden in the shed somewhere. I rediscovered a couple of them I had made in my
drums along the river where I went recently and spent a couple of delightful nights camped in them – I only regret I
did not take any photos!
Well, I did
find one:
While we were
waiting for hounds, cooking our sausages etc (Brett Irving shows how) I
would set it up like this (in the rain). When I went to bed, I would drop it
down, fold the back flaps under to make a ground sheet and bring the front
‘wings’ across a bit so I stayed dry all night. Of course I could also keep the
fire going so I stayed toasty warm. Half a dozen could shelter safely under it
during our ‘cook-up’ at day’s end.
As it
eventuated I was keen enough to try out a smaller model (& in Tyvek!) that
I went ahead and made it instead of continuing my search through the labyrinth
of the shed:
This diagram
below is for the smaller one therefore and is in feet but I actually cut the
tarp out of a 3 metre roll of Tyvek, so the intermediate points are actually
1.5 metres. If you are making the 8′ x 8′ above instead you will
begin with approximately a 12′ x 12′ tarp. Halving the sides will
give you a 8′ by 8′ diamond in the middle with 12′ diagonals
and the flaps will be approx 6′ long. The size below is likely all you
will need – unless you have lots of friends!
Once I used
to carry just a 7′ by 7′ nylon tarp (and my raincoat). I had a few
uneasy rainy nights when the wind wanted to shift a bit, but I never got wet. I
even used it quite successfully as a hammock tarp many times – and again never
got wet. You can get too excitable about size and ‘making sure’. Most nights it
doesn’t rain anyway – and how often do you go camping when it is going to?
This 10 x 10
tarp can also be pitched as a hammock tarp (and with closed ends on both
sides!) It will definitely keep you dry under the most extreme conditions. I
may add a couple of extra pieces of Tyvek to the floor (with some Tyvek sticky
tape) instead of the 6 x 4′ blue poly tarp you see in the pictures below
– or I will use a piece of Polycro instead. I will post the dimensions of the
floor pieces when I have cut them out.
And here it
is:
There will be
more tie-outs.
The front
flaps can be configured in a variety of ways depending on conditions. I have
only altered one side in the photos. I will take it down (tonight?) and sew all
the tie-outs on as I am intending a (return) trip to a new spot fire umbrella ultralight saw A$40 Intex raft paddle
I also need
to work out a way to fire-proof my drums (as I lost so many in the summer
fires). My initial idea is to bury them standing up so that the top of their
lids is level with the ground (in a grassy spot). The deer will keep the grass
short in the warmer months. I will then peg out a 1 metre by one metre fire
blanket over it. I will have a go at dyeing it. I know that the white fire
blanket will attract attention, but I am hoping that folk who get to such
remote places will be civilised enough to simply use the shelter etc if they
need or wish and put it/them back in the drum. When there is a bushfire it
should go out at the edge of the fire blanket and not be hot enough to melt the
drum.
On this trip
I will see if I can find a small cave in a rocky cliff to stow it. I may take a
makeshift piton and some string to secure it there.
The front
opening is an equilateral triangle 7′ on a side, meaning its height is
approx 6′ . You can either tie to a piece of wood (as shown) or to a
small tree (if available) – which obviates the need for front guys. You could
pitch it lower (and so wider) but the flaps at the front would not join.
My grandson
enjoyed it.
As well as
his mother and our dogs, Spot and Honey.
PS: I usually
have two guys at the front instead of the one shown so that I can peg out to
the ground at the side front thus making room for a fire immediately in front
of the shelter (say about 5′ away).
In Tyvek the
tent in the photos above will weigh about 650 grams in the 1.85 oz/yd2 Tyvek
Homewrap. A lightweight blue poly tarp I bought locally yesterday had a stated
fabric weight of 90 Grams Per Square Meter ie 2.6544 Ounces Per Square Yard (or
43% more) The 12 x 12 model is 44% heavier than the 10 x 10 model, so you might
want to reserve it (in poly) for car camping, as I used to. Nonetheless I think
you should give one a try. If I made the one above out of 1 oz silnylon it
would weigh under 450 grams (under a pound) including pegs and guy lines!
Pretty good for a tent with a floor you can stand in which can double as a
hammock tarp.
It will cost
you very little, and I’m sure you will be mightily pleased with it particularly
when you want to sit in front of a warm fire out of the wind, and especially on
rainy days. One advantage of such a shelter is that your back does not get cold
when you are sitting in front of the fire as the heat is reflected off the back
walls. I usually find that I am sitting around when the temperatures are below
freezing in just my shirtsleeves!
The Forester
Tarp: I haven’t got time to finish the second section of
this post just now so it will become a future post. I must finish the tent
above and get a few other jobs done around the farm or else I will never get
away up the bush. What I have in mind is to add ‘wings’ to the front and back of
this basic Forester design (cut down a little in size as in the second link
below) so that the front will close (as in the tent above) and the back will
also close with overlapping flaps from either side – so that the whole tent can
be cut from a single piece (Tyvek is not quite wide enough – I think). This
design will make a roomier tent than either the 12 x 12 or the 10 x 10 models
above with more stand up room.
https://www.theultralighthiker.com/2015/05/11/col-townsend-whelens-forester-tent/
https://www.theultralighthiker.com/2016/02/12/new-tyvek-forestertent-design/
https://www.theultralighthiker.com/2017/07/01/the-dawn-of-ultralight/
Note on
Tie-Outs: I would sew a piece of reinforcing material at the
front tie-out (which takes all the weight of the fabric -and any flap) and also
at the rear one (particularly on the Forester – for the same reason). Otherwise
I have found that simply hemming the material then sewing the gross-grain
ribbon for the tie outs along the hem for 2’3 inches then forming an approx 2″
loop, giving the material 180 degree twist (like a Mobius strip) – so it is
easier to get the pegs through, then sewing along the hem for a for a further
2-3″ on the other side works well. As this one may also be used as a
hammock tarp I might also reinforce the corners.
BTW: You can pitch either of these tarps as simple floorless diagonals where
the smaller of the two will span 14 feet and have edge cover of 10′
either pegged out from from a pole or tree to the ground (as shown) or as
hammock tarps between two trees. (Obviously if you were going to use it like
this, you would need to carry a piece of Polycro as an ultralight groundsheet You can buy a piece 5′ x 9′ from Amazon.com.au for A$11.46).
So, something
like this (or the photo of the blue tarp at the top):
Or you could pitch it like thi
DIY Hiker: You can find over 100 of my other DIY hiker ideas here: https://www.theultralighthiker.com/2017/07/13/60-diy-ultralight-hiker-ideas/
See Also:
https://www.theultralighthiker.com/2017/02/01/poly-tent-by-the-ultralight-hiker-on-the-cheap/
https://www.theultralighthiker.com/2018/05/29/brawnys-tarptent/
https://www.theultralighthiker.com/2017/05/28/tyvek-solo-fire-shelter/
https://www.theultralighthiker.com/2014/05/27/an-open-shelter/
https://www.theultralighthiker.com/2017/03/03/fire-tent/
https://www.theultralighthiker.com/2017/11/22/ultralight-ground-sheet/
https://www.theultralighthiker.com/2015/06/25/pitching-the-poncho-warning-this-may-save-your-life/
https://www.shelter-systems.com/product-category/gripclips/
01/09/2019: Snow Day: The photo of me standing in
the snow in front of the archway in the last post
Back in 1983
there was an even bigger dump. I remember it even snowed at Tarwin Lower where
we were then living within 10 metres of sea level – our driveway here at
Jeeralang Junction is exactly 200 metres above sea level, so that we are safe
from the Poles melting.
There was
substantial snow on the road all the way to Mirboo North back in 1983 where we
then worked. It was so heavy it broke the tops of the old cypress trees on our
farm here at Jeeeralang Junction and they have been falling down ever since. Of
course we were not living here then (1991 on) so we didn’t see it but the dump
in 2005 we did see. We kept the kids home from school (as it was very cold and
might become even more dangerous) so I took quite a lot of photos of it, after
I had been around the lambs on the flats first thing in the morning.
This was the
view across the road from our driveway as I drove down.
The Maremma
sheep guard dog, Brandy wasn’t fazed by all that white stuff. He grew up on our
old Dobbins Hill farm on the top of the Jeeralangs several hundred metres
higher up where it often snowed in winter.
Here is the
old archway again with my oldest daughter Irralee posing in front of it.
The snow was
still falling intermittently throughout the day – here along the front of the
house.
Looking down
towards the front gate through Della’s extensive gardens.
The snow
falling in front of the hills opposite.
Irralee again
in front of the other archway. She must have been the first of the children up
that day. She seemed very happy to see the snow (or because it was my
birthday!)
We used to
have a lot of this model Subaru (1981-4) -around a dozen of them! Someone had
built a snowman on the bonnet of this one.i used to fit five canoes on one set
of those roof racks in summer!
Mid-morning
but the snow was still falling heavily. We didn’t know whether Della would be
able to get to or back from Mirboo North where she worked at the time – but she
did!
Brandy
decided discretion was the better part of valor and sheltered under the
archway.
Della’s rose
garden.
Rams on the
hill looking forlorn.
And others
just lying around in it.
These two
look quite blizzarded in.
At various
times during the day I took one family member or another up the road to look at
our old Dobbins Hill farm where the snow lay much heavier. This is my son, Bryn
at the front gate.
And again.
My daughter
Merrin.
The snow was
really coming down for her. Even when she was a small child she never needed to
wrap up from the cold.
But her
husband, Matt did.
After Della
returned from work, she wanted to have a look there too.
And took a
photo of me also standing at our old front gate. Some days the snow was thick
enough up there to toboggan.
The road back
down was looking a bit icy.
Looking down
on the home farm from the top road.
And again.
It was
snowing heavily as Della and I drove back down.
This old plum
tree in the paddock looked quite magical.
There was
lots of snow waiting for us in the driveway.
View of the
bottom dam in the creek below the house.
And across
the creek.
Heading down
to the Hazelwood Flats farm the snow was much lighter though there had been
more ice and snow when I first arrived there to check the lambs at daybreak.
The warm water of the power station pondage just across the road helped melt it
into icy puddles quite quickly.
But the
surrounding hills had practically enough to ski on.
By the time Della
and I got there to re-check the sheep in the afternoon the snow was pretty much
all gone.
Just vast icy
puddles.
And ewes
standing around looking forlorn and bereft.
The worst
part about such a cold day was all the stock losses. We actually lost no adult
sheep (They were all in good condition – and we had plenty of hay I could put
out as well) but one farmer in South Gippsland lost 300 Jersey cows. Another
lost 3,000 sheep. My losses for the day were (approx) 200 newborn lambs which I
found (mostly) lying dead in 6″ deep icy puddle of water when I was going
around the lambs as I did first thing every morning at lambing on our property
then on the Hazelwood Flats.
Of course
there were others which were near expiring. I did everything I could for them,,
but it was not to much effect. The best thing was putting out several dozen big
round bales of hay which the sheep could tear at – in the process making warm
dry beds for the surviving lambs. It was pretty distressing (on my birthday) I
can tell you to be losing around a fifth of my annual income; somewhere above
$30,000 (gross) worth!
Something
like this: https://www.theultralighthiker.com/2015/11/27/anguish/
See
Also: https://www.theultralighthiker.com/2019/08/31/the-arch/
31/08/2019: The Arch: Which I built in a morning
(for $27) over thirty years ago is no more. Back on 08/06/2014 I posted this
about it: Invisible worlds: the archway: Straight outside our front door we
have this archway: you’ve probably seen it before in family photos, as it makes
an interesting backdrop. Around here we have often been too busy to notice
things, but as we are slowing down we maybe have more time for noticing and
less for doing…anyway, we were sitting in front of it the other night watching
the pigeons fly…And hearing them too: since a have had my new Siemens
waterproof hearing aids I can once again hear the wondrous ‘whoosh’ of pigeon
flight…we noticed a fair sized flock of starlings circling as well. It was just
on dusk. We were wondering what they were doing.
Well, Della
put the pigeon food in the loft and opened the trap. The pigeons dropped into
the loft like stones. A chill was creeping in, so we turned to go in the front
door. Suddenly, literally in the blink of an eye I guess, 100 starlings fell
out of the sky into that archway. They must have done this several thousand
times since I built it many years ago, but we had never caught them doing so.
They are quiet neighbours, obviously up at sunrise and off about their
business, returning swiftly at dusk, and making no outward noise to advertise
their presence. I am sure the potato vine has benefited enormously from their
residence over the years though. So much in nature is virtually invisible to us
even if it is right before our eyes.
The arch was
very simple to construct, and we do need more of them, one leading down to the
shed, for example – a job for another day…I marked it out, drove 3’ lengths of
¾ gal water pipe into the ground vertically to half their length, then slipped
the required length of concrete reo inside them (to form a hoop), and lengths
of 1 ½ inch poly water pipe over them, Surprisingly each arch is strong enough
like this for a large person like me to swing on. Having made a row of them, we
simply clad them with light gal weldmesh (attached with cable ties), planted
the potato vine/s, and voila! You used to be able to walk up pavers through it
from the ‘guest’ parking below to our front door, but over the years Della has
so cluttered it with interesting decorations this may no longer be possible…
Della had
this to say about its demise: Underneath the Arches: Some Garden
Nostalgia .
The
accompanying pictures, beginning with a 3-year-old Merrin cradling her kitten
“Blackie”, document the aging of that archway. Within 2 years, when the 3
children are pictured on their first day of the school year, the sky has been
all but obliterated, and from then on, despite my constant battle with shears
and secateurs, the potato vine took over, smothering the roses and creating a
dense, tunneled thicket that became home to dozens of starlings.
A couple of
years ago, the weight of all that vine began crushing the structure, so that it
was impossible to even crawl through it. Something had to be done, so we added
it to the jobs planned for our recent excavation work.
This was the
famous ‘Snow Day’ Aug 10th 2005:
Its removal
was the work of less than 5 minutes: one large munch, a roll of the jaws and a
lift up and out. And while the excavator was here, Steve arranged to have it
dig in the supports for the replacement walkway which he later finished with
some carpentry.
So: the sky
has returned, I have 10 new climbing roses ready for planting, and I have
learned an important lesson about avoiding potato vine! The old pavers will
need replacing, but I will get the garden cleaned up and replanted first.
Meanwhile,
Merrin and a 3-year-old Milo (complete with a puppy, this time) posed today for
a photo of our archway for the next generation.
See Also:
https://www.theultralighthiker.com/2017/05/08/invisible-worlds-the-weir/
https://www.theultralighthiker.com/2015/04/30/invisible-worlds/
https://www.theultralighthiker.com/2018/02/28/hidden-worlds-nocturnal-ants/
https://www.theultralighthiker.com/2015/11/15/boojums/
https://www.theultralighthiker.com/2015/07/26/water-babies/
https://www.theultralighthiker.com/2016/10/24/the-wildlife-seems-to-get-wilder-everyday/
21/08/2019: The Dragonfly Knife: I know I posted
about this remarkable knife some time back, but mine arrived today and it is
the most astonishing knife I have ever owned. Only 10 grams but razor sharp and
capable of butchering a deer. It is also absolutely beautiful: https://www.theultralighthiker.com/2019/08/20/the-dragonfly-ultralight-titanium-knife/
19/08/2019: Unusual Locking Folder: Opinel make
some pretty unique knives. I guess I came to the party a bit late on this one,
but I have two of them in my hand right now and they are magnificent! First I
bought the Opinel No 6: because a reader (Tim) recommended it (in this https://www.opinel.com/en/tradition/stainless-steel/n6-stainless-steel https://www.opinel.com/en/tradition/carbon-steel/n6-carbon eBay
Then a friend
(Jock) happened to give me a No #8 stainless
The first
thing I discovered was the unique blade lock. I had seen them in the shop and
passed them over as I thought they didn’t have one. Instead they have what
might be a superior one. At least there is no way this blade lock is going to
fail and leave you with severed fingers – as can happen. You can see in the
photos I took below how the ring-type lock they have works. They call it the
‘Virobloc safety ring’. You just need to rotate it to make the bade stay
in the open or closed position. Just hook it around with your thumbnail (as
shown) though as it wears a bit it will become easier to rotate.
You can see
how it moves into place completely blocking the movement of the blade in either
the open or closed position.
Now
completely blocked.
This is the
No 6 Carbon). It has a 7 cm (2 3/4″) blade.
My hands are
still pretty scratched up from nearly a week of bush-bashing
It is a very
attractive little knife with its distinctive and comfortable beech handle. A
rounded handle like this is great on the hand if you have big job to do (such
as lots of whittling, pruning or butchering perhaps. For lots of butchering the
larger no # 8 might be better but this little fellow would get the job done.
As you can
see (below) the No 8 fills the hand much better.
This would be
an excellent knife for butchering a sambar deer – unless you don’t know how to
sharpen a knife (maybe with one of these Olfa I mentioned here.
See Also:
https://www.theultralighthiker.com/2019/07/30/the-seventieth-birthday-platypus/
https://www.theultralighthiker.com/2019/07/17/the-olfa-knife/
https://www.theultralighthiker.com/2016/06/12/ultralight-knife-sharpener/
18/08/2019: The APC and the Sponge Bath: A friend
of mine coined the phrase ‘APC’ being a play on words for a major patent
medicine of the 50s and 60s. Instead of the three chemicals which were its
constituents (Aspirin, Phenacetin and Codeine – you just can’t get good pain
relief cheaply any more!), her expression stood for ‘Armpits and Crotch’. A
quick freshen up of those important areas would ‘do’ if you were in a hurry – or
as so often in rural areas in time’s past, you were very short of water.
I know I grew
up in a house on a farm near Paterson NSW with mostly a ‘ground floor’ which is
what we said when there was no floor save the earth itself, and which had one
2,000 gallon much-repaired leaky galvanised iron water tank to serve a family
of five – and frequent guests, some of whom arrived by horse and cart.
Most of the
walls were hessian bags to which newspapers had been ‘pasted’ with a mixture of
flour and water. It gave us something to read at least! My mother had cut out a
picture of a harbour scene from a magazine, framed it and hung it on my bedroom
wall as a decoration. Naturally it still has pride of place on my bedroom wall
today. Baths were an occasional luxury particularly in summer, but fortunately
there was a pretty much permanent swimming hole in Tucker’s Creek nearby,
shared with dogs, cows, goannas, black snakes and other assorted critters.
Most nights
our mother gave us a standing up ‘sponge bath’ in the kitchen. This
involved just a face washer, a lick of Velvet Soap (which I still always use –
I love the smell) and half a billy of warm water off the hob (there was always
a fire burning in the range as that was pretty much all my mother had to cook with
She started
with the cleanest bits first and worked down to the really grubby feet – I
never wore shoes until I was around 15 and starting shift work in a heavy metal
refinery! Those compulsory ‘safety boots’ sure killed me then. The water was
thrown on the fruit trees outside which flourished on its many nutrients,
particularly a lime which furnished many refreshing summer drinks – It
flourished wonderfully next to the outhouse!
Kids in ‘my
day’ pretty much all started full-time work at 15 (or earlier eg as farmhands
with permission) having had various part-time work from around the age of 10 –
cleaning shops, delivering papers, milking cows and such. Mostly they left home
at the same time, boarding with some other family or renting a ‘bed-sit’.
We were
considered adults at 15 – and expected to fend for ourselves in all things,
though we weren’t allowed to vote till we were 21. We didn’t miss much! Very
few ever got into any trouble such as drugs, alcohol, crime or juvenile
delinquency. Too busy working maybe! And too little money!
Of course
growing up on a farm you learned to work pretty early on – before you went to
school at least. I know I was up at 5:00am every morning to help my mother
with the (hand) milking. My dad would have headed off to work by then eg as a
fettler on the railways, or as a timber-getter in the forestry industry nearby,
etc.
It was my job
to first get the cows in from the frosty paddocks – in my bare feet, to get the
cows in to the bails (and let them out), to carry the buckets of milk to the
milk cooler and tip it in, to see that the milk cans did not overflow, to pump
up by hand the well water which supplied the corrugated milk cooler, to wind
the handle of the separator to make the cream, to wash up at the end of the
milking – and give the milky filter paper (which he loved) to my great
blue-heeler pup, Rover.
Of course I
also had pigs (with the skim milk) and chickens to feed, eggs to collect,
kindling to split, and so on. Mostly before breakfast, and before I was even
old enough to go to school. No doubt such ‘child labour’ is illegal in this
weird world in which we now live, but it was very good for you and created a
broad sense of self-discipline which is an indispensable component of good character.
Growing up in
the forest meant I learned to roam the bush at will as soon as I could walk. My
mother just used to let me go and figured I would be home when I got hungry. I
reckon I could lead you to some wondrous spots in those hills even today. A
place where a giant sheltering Moreton Bay grew, another a maze of erosion
gullies, yet another where a vast avalanche of car-sized stones had tumbled
down the valley and been covered with rock-lilies, a remote bat-infested cave,
etc.
Once a week
(usually Saturday night, country dance night’ = ‘You Beautie’!) we would have a
‘proper’ bath, ie mum would heat enough water on the stove in a 4 gallon or 60
lb honey tin which is what my parents used instead of the ubiquitous kerosene
tin (as they were also apiarists) to half fill a tin ‘hip bath’ on the kitchen
floor.
She and dad
would bathe first, then the order went: oldest to youngest. The water was
pretty whiff by the time it got to the youngest (me). I always suffered from
boils as a kid – as people do who don’t bathe enough or bathe in such
contaminated water. ‘Everyone’ did in those days.
Or maybe it
was our diet of mostly carbs, salt and sugar – which apparently contributed to
everyone’s long life! At least, no generation which ever existed lived as long
as the ‘Great Generation’ of my parents, so who knows? I think a steady diet of
hard work and self-reliance helped a lot too.
I still have
the mini craters here and there particularly on my legs where a horribly large
boil was squeezed long ago. What an awful procedure that was! You don’t want to
know, particularly if you are not over-fond of pus. I am still unable to eat
raspberry flavored custard!
We did so
love those dances at Martin’s Creek (where we also all went to Primary school).
Saturday nights there were the highlight of the week. It may have seemed like
an isolated sort of life to folks today. We had no electricity or TV. Our
telephone was a ‘party’ line. We very seldom visited a town. I can only
remember having two brief holidays in all my childhood, one at the seaside, one
on a sheep station. We listened to programmes on the radio every night for an
hour before we went to bed (early). Yet I think we had more friends and
personal encounters (and continuity) than children have today – and those
Saturday night ‘old time’ dances at the Martin’s Creek Hall were amongst the
happiest memories of my life.
Whilst I am
not advocating a return to the hygiene standards of long ago, both these two
bathing methods are useful on the trail – as is the occasional swim, even in
cold weather. When I am ‘up the bush’ as we say, I usually manage a swim in the
river or a creek every couple of days even in a Southern Australian winter (or
in Fiordland, NZ) where daytime high temperatures are around 12C. It’s usually
pretty quick though!
I also wash
my clothes regularly in a nearby stream and put them back straight on again to
dry. There is no better ultralight clothes drier than the human body – and no
quicker! They strike a bit cold at first, but some frenzied activity soon warms
you up again.
At other
times (or if it is too cold) an ‘APC’ at the end of the day is a good idea.
Just one antibacterial wet tissue is all you need. Do it in that order,
(armpits first- well, hands first actually) ending with your bum. I find that I
can get by with 1-2 wet tissues and a similar number of (dry) ‘Kleenex’ per
day, even with an APC at the end of the day. The 10-12 pack is best as
you can keep them dry even in the rain. This could also be a good idea
It is a
(very) good idea to apply hand cream (or the like) between your thighs to
prevent chafing. In the morning before you start out is best. Similarly it s a
good idea to apply foot balm prevent a lot of grief oot Care
I have
encountered (eg) folk with multiple square inch sized infections between their
legs which I had to lend them iodine to treat as it was all I had (painful but
effective) – when they had nothing. This particular chap
Fortunately I
had plenty of food and a fishing line Sawyer
My wife,
Della usually prefers a sponge bath (from a billy) over an ultralight shower
I recommend
you test the various ‘hiking’ towels available. Most are just no damned good.
The cheapest ones are (often) the best. You need to see how much (and whether)
they will wick up the water off you, whether you can wring them dry, and how
long they take to dry out. I use half a towel (as I said before- adequate even
all the way to Everest
It is
surprising how little water you need to get yourself quite clean, and how
wonderfully refreshed you feel afterwards – particularly if you have those nice
freshly washed wet clothes to put on afterwards! I would recommend scouring the
billy after your bath and boiling something in it eg a cup of coffee before you
eat out of it again though (e coli are nasty).
See Also:
https://www.theultralighthiker.com/2015/08/07/foot-care/
https://www.theultralighthiker.com/2019/07/22/johnny-cakes/
https://www.theultralighthiker.com/2019/04/19/neat-feat/
https://www.theultralighthiker.com/2018/06/23/you-must-learn-to-shoot-your-own-dog/
https://www.theultralighthiker.com/2018/06/02/mattresses-i-have-known/
https://www.theultralighthiker.com/2016/08/02/a-friend-i-met-on-the-dusky-track-fiordland-nz/
https://www.theultralighthiker.com/2015/10/21/sawyer-water-filter/
https://www.theultralighthiker.com/2016/05/23/bathtime-on-the-trail-the-one-gram-platypus-shower/
https://www.theultralighthiker.com/2015/11/20/ultralight-personal-hygiene/
https://www.theultralighthiker.com/2017/05/10/the-ultralight-fisherman/
https://www.theultralighthiker.com/2019/08/03/a-hiking-bidet/
https://www.theultralighthiker.com/2018/10/31/i-followed-my-footsteps/
11/08/2019: My 71st cherry (plum) blossom this morning
outside our bedroom window in a sheltered part of Della's wonderful garden. The
rain and snow seem to have passed; the lambing has quieted down a little, the
remnants of the party are cleared away. Life is good here at Jeeralang
Junction. Thanks to all of you for your kind birthday thoughts. 50 wonderful
years with this astonishing woman, and greedily hoping for many more. The sun
has just broken through the clouds over the hill to the North-East. Life is
good.
11/08/2019: Well, I have done it, ‘all three score
years and ten'. Thank you all for your kind wishes. I will reply tomorrow
when things quieten down a bit around here - lambs, rain snow, jobs, jobs jobs,
birthday...
Loveliest of Trees – A.E. Housman
Loveliest of
trees, the cherry now
Is hung with
bloom along the bough,
And stands
about the woodland ride
Wearing white
for Eastertide.
Now, of my
three score years and ten,
Twenty will
not come again,
And take from
seventy springs a score,
It only
leaves me fifty more.
And since to
look at things in bloom
Fifty springs
are little room,
About the
woodlands I will go
To see the
cherry hung with snow.
05/08/2019: Lucky 13: This is my 1300th post here
at the Ultralight Hiker! That’s probably about a million and a half words (more
than a dozen novels worth!) and over 25,000 photos. Quite an achievement in
four years since May 2015 when I began this blog.
It has been
200 posts since the 1100th post in May 2018 when I last wrote up a
summary of our doings in the last 100 or so posts, so I thought I would
showcase the highlights of the last couple of hundred posts here.
Unfortunately
I/we have not been as active over the last year as we would have liked due to
health issues: Della’s heart and my back and knees. We hope that these can be
moved to the past and that we can get on with things a bit more from now on.
Back in May
2018 we had a couple of weeks in Scotland allowing Della to catch up a bit with
her dad’s home which she had of course heard much about but never seen. We
converted the hire car (a VW Golf) into a camper so that we could stop pretty
much anywhere we liked. They are very liberal about camping and wandering
there. You can see how we did it here: Car Camper Conversion $50
Some other of
our Scotland posts: Beach Burial #2: The Cat Car Camping Scotland Great Scot
I got a
write-up on Stuff NZ about my long search for the elusive NZ moose which I
still hope to gain photos of in the future. 2019? If I can get this back and
knee up to the Dusky I will be back in late summer. I have a (new) strategy
which I think might work. See New Evidence of Fiordland Moose.
I continued a
series of reminiscences: Mattresses I have Known You Must Learn to Shoot Your Own Dog Pack Raft Saves the Day Trapped by Flood Waters Johnny Cakes
Some more
advice about Deer hunting: The Deer Hunter’s Apprentice #1 Poacher’s Moon All Flesh is Grass Follow Your Nose Embryo Wire The Seventieth Birthday Platypus
Ultralight
hiking advice: Beginning Hiking How much weight in fuel? How Many Clothes Should I Take in My Pack? How Warm a Bag or Quilt Do I Need? More Fun in the Rain Gully Walking Free Stuff for Hiking Neat Feat Lightest Cheapest Powerbank Ultralight Cutlery…
Lots of
general advice, eg: The Compleat Survival Guide The Spanish Windlass Wire Tricks, Cobb and Co Hitch Make Your Sleeping Pad Warmer It’s Not My Fault Nuts to ‘Leave No Trace’ Cure Back Pain Kill Wasp Queens Now The Happiness Trick
Places to
see: NZ’s South Coast Track: Westies Hut to Cromarty Liptrap to the Five Mile Alps Walk Long and Lazy River Wirilda Reflection Halls Gap Sand and Sea Training The Ultimate Hunting Trip
Jobs around the farm Several Winter’s Fires The Tree-Planting Team Today Electric Drill Earth Auger Wildlife Proof Fencing Bird Feeder Fire at Jeeralang
Lots of new
DIY hiker ideas have been developed. A lightweight trick to keep your shoulders
warm in a hammock (<5 grams), the No Cold Shoulder Spreader Hammock How to Carry a Saw A Wider Lighter DIY Sleeping Pad Seamless Tyvek Tipi Extempore Hiking Poles Stop Losing Your Pillow A Hiking Bidet Thermoplastics #101
Finally a set
of instructions for the fabulous Upper Yarra Track and a complete track
description with by someone else: Upper Yarra Track Instructions Upper Yarra Walking Track Upper Yarra Track Map
Some fabulous
recipes: Della’s Way Bread
And there
have been lots of gear reviews. Some of the things I have most liked have been:
a Clever Titanium Windscreen The Pack Rifle 3F Ultra Cheap Tents Two Great Cheap Tents The Ultralight Barista Ultralight Glasses Ultralight Bivy Bag Tinny’s Gnomes The Olfa Knife The Dragonfly – Ultralight Titanium Knife Down Socks Winter Tent Stoves Tim Tinker Exped Synmat HL Winter M.
200 posts in
just over a year is not too bad for one person – well over a thousand words
written on average every day! Not so bad for an old bloke who will be 70 this week
And, of
course we have three fabulous puppies for sale starting next week: Cuteness Alert
05/08/2019:
Great quote: ‘If ye love wealth better
than liberty , the tranquility of servitude better than the animating
contest of freedom, go home from us in peace. We ask not your counsels or arms.
Crouch down and lick the hands which feed you. May your chains set lightly upon
you, and may posterity forget that ye were our countrymen’. Samuel Adams
05/08/2019: And another: ‘ Today, college has become
our go-to yardstick for minimal competence. Take a look at almost any job
listing for almost any desk job in any city, and you will see “college degree”
listed as an essential requirement. The argument in favor of this arrangement
is that if a candidate can demonstrate that he has completed such a degree, he
can be assumed to be both relatively smart and capable of sticking with things
to their end. Which, in some cases, is of course true. But it is telling that
none of the other experiences that demonstrate capacity and tenacity tend to
make an appearance in the listings. Know what else demonstrates an ability to
stick things out? Military service. Running a small business. Working at a
charity. Training as a plumber. Working on a farm. Learning to weld. Keeping
another job for a long period of time...’ Charles C. W. Cooke https://www.nationalreview.com/magazine/2019/08/12/college-does-not-make-you-a-better-person/
05/08/2019: If Greenland keeps melting like this it
will all be gone in 25,000 years – of course ignoring the fact that it will
add ice every season except summer. For example, a squadron of WW2 planes which
had to be abandoned there are now 140 feet down. Such a concern: https://www.breitbart.com/politics/2019/08/04/delingpole-greenland-ice-melt-shock-the-terrifying-truth/
04/08/2019: A
Hiking Bidet: An idea whose time is right: A Portable Bidet
However their
device weighs only .5lb (225 grams?) lasts 3 weeks between charges and
recharges with USB. If you are like most ‘hikers’ I have seen evidence of
(Yuck!) you would save a power of toilet paper – and the environment would
thank you! They are on offer now for A$144 (Aug 2019).
I think a
bidet is a great idea. Our current bathroom renovations will see me remove ours
to make some room for wheelchair shower/toilet access (in preparation for knee
operations etc – Ugh!) and replace it with a bidet seat (from Bunnings
Myself, I only ever use one Kleenex tissue ‘cat-hole’
You have
probably seen my own ‘ultralight shower
However a Sawyer Water Filter
See Also:
https://www.theultralighthiker.com/2017/07/13/60-diy-ultralight-hiker-ideas/
https://www.theultralighthiker.com/2016/05/23/bathtime-on-the-trail-the-one-gram-platypus-shower/
https://www.theultralighthiker.com/2015/11/20/ultralight-personal-hygiene/
https://www.theultralighthiker.com/2015/03/10/water-filter/
https://www.theultralighthiker.com/2015/10/21/sawyer-water-filter/
https://www.theultralighthiker.com/2017/05/28/trowel-peg/
31/07/2019: The Seventieth Birthday Platypus: I
had hoped that this post would be titled ‘The Seventieth Birthday Stag’ but he
did not emerge from his lair during my recent sojourn up the bush to check how
my hunting camps had fared from the terrible bush fires of earlier this year.
I am still
not fit enough for this sort of hiking after my spinal fusion but I spent four
days at it nonetheless – much harder work than in times past and nonetheless
only managing a daily total equal to about half my ‘normal’. They said it would
be twelve months. I hope this is not a permanent situation – it informs me at
least that I am going to have to bite the bullet on a new knee, soon. So many
operations. I am tired of them. I hoped to make this one last until I could
just have an artificial cartilage
Each day just
walking (not hunting) I saw at least two deer (some days four) I could have
easily taken with my rifle, mainly smaller stuff, spikers or hinds. If I can
chamber a round, draw a bead on the deer and count to 1,2 seconds I clearly
could have pulled the trigger and made it a dead deer. These days I usually
don’t shoot unless I have some particular reason. Of course I encounter more
deer than I could have had a reliable shot at. That goes without saying.
I would have
taken a decent stag (I guess) but one did not present itself to me during the
daylight hours – though on two separate nights (the first and the last) one
visited me at my tent. The first thing I knew was the overpowering smell of
stag. When I switched the head-torch up to a suitable level of brightness there
was a stag not twenty yards away (on each occasion). My loaded gun is always to
hand on such camps (because of the risk from wild dogs particulraly with Spot
along) but I have no temptation to shoot a magnificent animal at such a
disadvantage. Fortunately they have never charged.
I think the
wild dog numbers are down because of the fires. They would have had a field day
cleaning up the corpses followed by very lean times indeed where many starved.
The few dead deer i did find had not been touched even though they were days
old – which is unusual.
Neither do I
see any point in leaving 8-10 dead deer just lying around in the bush
completely untouched – like some I found, even though they are still quite
numerous. Apparently there are still plenty of young folks who would like to
harvest them and enjoy lugging all the meat out, so I will leave the deer to
such upcoming hunters.
You have to
be quiet in the bush if you expect to observe its shier denizens. I have explained again again
Seeing lots
of deer has nothing to do with ‘cheats’ like camo which I eschew. Only wool for
me. Just ‘quiet foot steps’ and don’t stink! And pause. Look, look, look. I can
smell a deer easily 200 paces away. It stands to reason that if you use
deodorant, or wear synthetic clothing so that you smell just awful after five
minutes’ exertion any deer will smell you a mile off too, and be gone.
Between two
largish flats where I often camp I often pause and sit on this rock (below
centre)
and just
watch the river go by (below) – and sometimes a deer on the opposite bank too.
On this occasion a platypus rose continually in exactly the same spot,
something which they rarely do. There must have been something down there he
was worrying at. Four times he popped up down below me and I snapped his photo,
then he just drifted off down the stream and out of sight, which is what they
normally do. He would be clearer save that he is mostly underwater.
There he is:
Closer…
And closer…
And off he
goes!
In this kind
of bush-stalking sambar deer you don’t get very long to gaze at an individual
deer, nor is it ever very far away. I guess you put it up 20-50 yards away. I
have bumped into sleeping deer a few times. Once I actually went to step over
one. It honks and is off. You have maybe a couple of seconds to decide to and
to shoot it. A 12G shotgun would work well and pose less danger than a rifle.
Perhaps lighter too. Buckshot would make certain of it, but it is not
‘approved’. Why do they think it is so named? A telescopic sight is not much
use, and you would likely damage it pretty soon – at least the many knocks and
drops my .308 usually takes over a couple of days would ruin any scope I know
of. The iron sites are fairer to the deer and more reliable anyway. And you can
see what you are shooting at.
As I am there
to hunt deer and not to photograph them, I rarely get a photo opportunity. It
takes a lot less time to load and point a gun than to turn on and point a
camera. The deer would be gone just about every time. Now and then you are
sitting down somewhere and a couple of deer will wander out of the treeline on
the opposite side of the river to have a munch. It would be pointless shooting
them there as it might be half a day or more up or down the river to a crossing
point – if there is one at all. Somewhere like this where the platypus was.
Some sweet clear grass (and forbs) over there. Deer love forbs.
You know,
like this:
Again does
and young stuff. If you want to hunt stags (reliably) you will have to go look
for them. Or cheat. As most do. Lying up on game trails or wallows is the least
of it. So often in forums I notice people ‘proudly’ posting photos of stags
they have ‘shot’ where it is clear that the animal is on the edge of a track or
road, or way out in the middle of a paddock.
Some are not
so careful to conceal their malfeasance. A young bloke I used to take hunting
recently posted such a photo. The animal was clearly lying dead in the middle
of a paddock around mid-day. Yeah, sure. You could tell by the shadows or lack
of them. If you lie in bed that late you will not catch a stag in the middle of
a paddock. This young hunter had even forgotten to change (back) into his
hunting boots. And his shoes were dry even though the grass was wet, so he had
only just stepped out of his car to photograph an animal he had unfairly shot
over the lights the night before and let spoil (by not gutting it quickly) so
he could get a photo-shoot the next day! He was also far too neat for a man who
had spent the day hunting. I was embarrassed for him actually.
If you want
to take stags (reliably – some will just pop up as you walk along), you will
have to go look for them, and to get to them you will have to walk through all
the does and young stuff who camp lower down (their food demands are greater –
all that growing to do) and so act as a signalling device for the mature stags.
I notice too that stags are much less prone to honk. They will more often just
watch you quietly walk on by. The survivors no doubt develop this ability. When
you do spy one (out the corner of your eye) load your gun and make it ready to
swing up quickly before you turn to look as he will bolt the second your eye
rests on him. They will often be found alone or in groups of 2-5 animals quite
high up (relatively) but often in very thick stuff which will act as a screen
and a burglar alarm. It is easier in association with a mate to bolt them out
with dogs of some sort, just like flushing foxes from patches of cover. There
are pairs of old guys out there who have garages full of antlers taken in this
way.
Four out of
eight of my camps were just melted ruins like this with very little that could
even be salvaged. Surprisingly I did salvage a single pot I have owned since
1970 and an aluminum plate I bought in 1963 and used when I was droving
As I had
positioned the camps about 1 1/2 hours walk from each other up the river and I
lost three in a row, this means I have a gap of nearly 6 hours. I will probably
re-establish (at least) the middle one of the three during a canoe trip over
summer as that is too much of a gap for me to be comfortable with nowadays. Of
course each camp could act as a base from which to do day hunts (out to the
sides) or overnight fly camps likewise so that I would cover a lot of ground
laterally as well as lengthwise. There are some very promising side ‘gullies’
joining this river. Some of them days’ long.
You have to
learn where they begin to run again higher up, and where there is a suitable
flat spot high up for a fly camp – or else take a hammock approx 150 grams
I will miss
those huge Tyvek shelters, 16 feet on a side. They were just so protective and
roomy. As you can see from the two photos below I had lain the black drums next
to or under large logs where they would (likely) not be found (in dampish
spots, and above flood level). I suspect they were not found, but it is also
more than likely that the quality of person who makes the large effort to
undertake multi-day backpack hunts is not likely to interfere with what might
(after all) be another person’s safety or survival. It is the ‘golden rule’
much neglected nowadays. ‘Do unto others’…Most of the drums included a
statement that I did not mind if others used the facilities provided they made
an effort to replace anything they may have used. You can get an idea from the
photo below what the shelters were like. I will probably make rather smaller
ones in future as it is usually just me or perhaps two of us.
I think I
will take in a few (approx) 1 metre square sheets of (green) flat iron, or a
square of fire blanket material if it will take dye. Have to experiment. In
future I will bury the drums (on their side) in an open, grassy spot just to
ground level so they are easy to get to and just lift out. I will place the
sheet over them and lay stones around it to keep it down – or peg them if I use
blanket. This way a future fire (which will be traveling very slowly over
well-chewed grass should stop at the edge of the sheet and leave my drums
alone. They will be easier for others to discover but you have to trust the
good offices of strangers sometimes too!
That’s me
with my young American friend Steve Hutcheson from the Dusky Track
I do love a
campfire. Here is a photo taken on my second night out which happened to turn
out quite nicely thanks to a clever feature of my new camera. A wondrous shower
of sparks.
I even made a
video of it which certainly showcases what serene beauty there is in such
wonderful wilderness camps.
This is the
view from the other side, looking in. Not such a serene beauty I know! But note
the wool clothing – and that one is not tidy at the end of a day’s hunting!
Poncho Tent
I figure to
add less than 50 grams. That will be just enough (I calculate) to fit two very
good friends in (me and Dell at least) and yet still weigh (probably) less than
300 grams all up including tie-outs and pegs. Another 25-50 grams or so for an ultralight floor.
You have to
be careful when laying out your ground sheet that none of it protrudes under
the edge of the tent. A tiny pocket handkerchief of such material protruding
will easily collect a glass of water when a shower comes by and redirect it
right under your bum. A wet arse in the middle of the night is annoying.
Polycro really is a great ground sheet material though it will need to be
checked for holes (and replaced) oftener than something made of lead!
I am also thinking
about making my Deer Hunter’s Tent I grew up in one
I also want
to revisit the Forester Tent
I have no
idea whether I will finish all these projects or be able to offer them to
others for purchase. I will be 70 in a few days – as you may have
gathered from the title. Thank you for your good wishes on that occasion. Della
really thinks we have ‘enough money’ and should just ‘smell the roses’ (which
she likes – I loathe the wretched things!) or at least not begin a new
financial venture, but time will tell. You certainly don’t need much money
anyway to be deliriously happy all your life. A wonderful woman help though.
This is a
spot I often used to camp in my big Tyvek shelters. It got pretty badly burned,
as you can see. So much timber down. It makes walking so much slower and more
difficult. The bird song (which had been coming back here and there after the
2006 (?) fires has ceased again. I also find this really tragic. The current
land managers have no idea at all. They are driven by some wicked green agenda
which has no basis in practical reality. The result is the episodic widespread
destruction we see here.
Several
different angles.
So much
timber down everywhere make it so much more difficult to walk. This is what it
used to look like. The tree my gun is leaning against is the same tree in all
the poncho tent photos above.
People ask me
what I carry. Here are the contents of my poncho tent after I took it down.
It’s not a lot for a trip of what might turn out to 5-6 days’ hunting is it?
The gun is leaning against the log I am sitting on while I roll up the poncho.
There is just
so much destruction. This used to be such a pretty little valley:
One plus I
guess is that you can now see (but not for long!) some of the C19th pack tracks
which had completely disappeared into the bush. DOC or Parks Vic (whoever they
are) could give some thought to keeping them open as hiking trails – but I
doubt this will happen as they never get out of their cars or offices and into
the bush, so they wouldn’t know or do anything if they did! These pack tracks
are everywhere in the Victorian bush (wherever there were miners anyway), as so
much stuff had to be transported on horseback or wheel barrow. Most places they
are hard to notice. Of course there are innumerable overgrown old timber trails
now too.
Here we were
just having lunch, hoping that some Voyageurs
Many deer
have survived the fire but most are not in great condition. I found a dead hind
in fairly ordinary condition who had probably died of pregnancy toxemia and a
poddy who had probably starved to death – this long after the fire. It stayed
pretty dry for a long while after the fire (I know we were hand feeding our
sheep from mid summer until very late autumn – in a better rainfall distriict)
so that regrowth was a long while coming on. It is there now but is really what
farmers like me call a ‘green drought’. The bush will be suffering the effects
of this neglectful fire for a generation or more!
If you have
been reading this blog for a while you might remember Tiny’s deer from many
years ago.
It had
disappeared into the forest floor. The fire had uncovered its bones. Gave me
quite a sentimental journey I can tell you what with Tiny now dead these two
years past after having shared the planet with me for 18 years. Tempus fugit my
old son. Time to carpe that old diem. Cheers, Steve.
See Also –
and don’t forget the many links I have placed in the text above:
https://www.theultralighthiker.com/2015/06/15/sambar-stalking-101/
https://www.theultralighthiker.com/2018/05/20/the-deer-hunters-apprentice-1/
https://www.theultralighthiker.com/2017/10/28/the-ultralight-deer-hunter/
24/07/2019: Tinny’s Gnomes: While I was working on
my post about Simmer Stoves
It is very
difficult to get clear photos of alcohol flames. I had to take over fifty snaps
to get two that were this good – and I had to wait for night before I could do
even this well. Both stoves have wonderful patterns both in full flame and
simmer though, don’t you think?
The one on
the left is the Gnomatic Turbo Gnome
Both have a
rolled piece of carbon felt inside so they won’t spill even if you knock them
over. They are easy to blow out when you want to stop cooking. You could
reverse the bottom piece (as shown) on the Gnomatic to make a lid for it and
hopefully contain some of the unburnt fuel.
You push the
burner down on the Gnomatic and add the simmer ring to the Turbo to (instantly)
achieve this result:
Of course you
are going to have to add a pot stand or use something like a Caldera Cone to
use them but they should give you many years of excellent trail food.
See Also:
https://www.theultralighthiker.com/2019/07/08/more-simmer-stoves/
23/07/2019: Johnny
Cakes (or ‘journey cakes ‘ as this post
Shearers,
shepherds and drovers especially used to make them. In C19th Australia these
were folk who were ‘on the road’ (and mostly where there were no roads) for
months at a time. Because of our vast distances (and being afoot) they were
often weeks between supplies, as in this chorus (which I’m sure you recognise):
‘With my
ragged old swag on my shoulder
I have always
loved the old Australian folk songs: Wild Rover No More, Old Bullock Dray,
Banks of the Condamine, Wild Colonial Boy, Moreton Bay, Flash Jack from
Gundagai and the like. One of these old songs, ‘The Springtime It Brings on the
Shearing’ collected by Overton in his ‘Wallaby Track’ collection in 1865 has
the wonderful line, ‘after the shearing is over And the wool season’s all at an
end, It is then that you’ll see those flash shearers Making
johnny-cakes round in the bend ‘.
You could
check out this version of the song by an old (late) mate of mine from the
1960s, Gary Shearston, here: https://www.youtube.com/watch?v=hc0YiR89vXw
I like the
holiday spirit of it. The sense that though the shearers are ‘flash’ (or
‘flush’ – with money) that their preferred abode is nonetheless just where you
would have found that Australian icon the ‘Jolly Swagman’ of ‘Waltzin’ Matilda’
down ‘by a billabong’ or nearby the river’s bend (‘The river on its bars’ as ‘Clancy of the Overflow
‘the
drover’s life has pleasures that the townsfolk never know.
And the bush
hath friends to meet him, and their kindly voices greet him
In the murmur
of the breezes and the river on its bars,
And he sees
the vision splendid of the sunlit plains extended,
And at night
the wond’rous glory of the everlasting stars. ‘ – Aah!
Of course
this is the best spot to camp. You are down out of the wind. Australia is
awesomely flat. It rises (or falls) by only a few feet (on average) from one
side of the vast continent to the other. For vast distances (hundreds, even
thousands of miles) the gradient is less than an inch per mile! The wind blows
almost constantly from the West more or less strongly. It is rarely less than
20 kph. In the summer the wind is a furnace’s breath. In the winter it has an
icy chill. Spring and autumn are best.
Those Western
rivers (of the Murray-Darling) which drain half the continent are very slow and
meandering. There are a million such shady bends and many such billabongs where
the river crosses the bend to make a new course. It is the easiest spot to get
down to the water. There is often (usually) a sand bar, and of course the
occasional floodwaters heap lots of handy firewood up nearby, but trees are
always falling into the river or dropping their branches Australian trees are
‘self-pruning’, so beware. Don’t camp under a large tree.
The Western
rivers of Vic, NSW and Qld (the Murray-Darling Basin) are still today a great
way to see the real Australia. Mostly the river margins are public land and so
can be traveled (by foot or canoe) with great freedom. Of course any scattered
towns are strung out along the rivers like pearls. They still provide
innumerable camping opportunities especially away from roads. River heights and
recommendations here: http://www.waterwaysguide.org.au/AboutUs https://www.adventurepro.com.au/paddleaustralia/ https://paddle.org.au/recreation/where-to-paddle/
The rivers
are alive with fresh fish, eels and crayfish of several different kinds –
yabbies and ghost shrimp mainly, but also ‘Murray Crays’ – in any case some of
the tastiest tucker you could wish for. And naturally countless wild ducks.
When I was a kid the country was also alive with rabbits, sometimes almost
literally. I have seen whole paddocks which seemed to be just a moving blur of
their tawny fur. Not so many these days, but still worth your while to carry a gun
Marie Jones
c1945 Great Dividing Range securing a rabbit for the pot.
The ‘ghost
shrimp’ require a hoop net covered with fine material. They are normally
invisible against the bottom – even in clear streams (which the Western rivers
are not – take a filter). Practically anything will attract them (even a bar of
‘Velvet’ soap)! You will be astonished at just how many there are – though they
are small (2-3″ usually). Still it doesn’t take long to get a feed. Just
bring them to the boil in your billy. They colour when they are ready < a
minute will be enough). You can peel them if you like, but they are fine eaten
whole if you don’t mind crunchy. Yabbies and crays will need peeling.
Many of the
rivers are now alive with European carp which are not great eating from muddy
water. Their (preferably rotting) flesh is great bait for crayfish of all sorts
though. The yellow (and silver) perch – and of course the ‘Murray’ cod are
great eating, as are freshwater eels. You will not go hungry along the Western
rivers. Apart from wild ducks (which can be legally taken – licence conditions
apply) the thousands of miles long fringe of bush along the rivers is home to
an astonishing array of creatures: hundreds of different bird species
(especially obvious are the brightly coloured parrots and finches), many kinds
of reptiles (nothing that can eat you – but there are many poisonous snakes, so
take care) and amphibians, lots of marsupials (the grey kangaroos as the most
numerous), but there are many possums and smaller creatures too. As you ‘travel
the land’ of this vast river basin you will always have several wild creatures
in sight – and that is only in daylight. remember most of Australia’s animals
are nocturnal or at least crepuscular.
The Murray
alone is 2500 km long and the Darling 1500 km. There are over a dozen tributary
rivers flowing into the Darling alone. Some of the Murray-Darling tributaries
are huge themselves: the Lachlan and Murrumbidgee are each 1500 km long!
If you are
traveling inland between Melbourne and Sydney or Brisbane it is well worth your
while to go out of your way and detour from Cowra to Forbes along the
magnificent Lachlan Valley Way which parallels the Lachlan River for nearly 100
km. Here you will see many billabongs and some splendid examples of the remnant
forest I have been talking about. In many places you can simply drive off the
road and across to the river, sometimes a kilometre away. There are many great
camping spots.
My parents
were itinerant beekeepers in Western NSW chasing the honey flow for months at a
time along the remnant forests which skirt the Western rivers. We camped along
those waterways all through the 1940s and 50s but they are little changed
today. My mother often made ‘Johnny Cakes’ for us by the banks of a river on a trusty
much-repaired Primus stove. Every night we slept under canvas on an army cot
wrapped in our woolen blankets, lulled to sleep by the chorus of frogs, the
chitter of possums and the splash of fish jumping in the river…and always, ‘the
wond’rous glory of the everlasting stars’ – as Clancy phrased it. Under
that clear, dry air there are more stars than you will see anywhere else on
earth!
Lawrence
Jones c1945 with 1926 Chev truck . Great Dividing Range. Note honey tins and
hound Felix.
In the C19th
(especially) the Western Rivers became ‘highways’ for itinerant workers (such as
shearers, shepherds, drovers etc) and the river bends became way-stations. My
great grandfather, George Harvey was a carter (as his father before him)
bringing wool down from the great outback stations to the (then) important
river port of Morpeth on the Hunter River upstream from Newcastle. They were
camped one night outside Uralla New England NSW with such a load when the
menfolk decided to go into town to the pub at night for a few drinks. My great
grandmother Margaret and a baby (maybe my grandmother Rose) were camped under
the bullock dray. During the night she heard men’s voices approaching and the
baby decided to cry. She then heard a man’s voice say “Come away there is a
woman’ and they faded into the night. This would have apparently been Starlight
or Thunderbolt the bush rangers. One of them was well known for his delicacy
towards women.
You can
imagine some of the camps becoming quite permanent eg with bark huts popping up
amongst the river red gums. Much construction was done with what would be
considered rubbish today: earth, twigs, bark etc. Rabbit skins for example were
a useful resource (likewise wool). Fencing wire (and netting) found a thousand
uses from toasting forks to building fasteners (See: https://www.theultralighthiker.com/2018/09/08/the-spanish-windlass/
Johnny Cakes
are just a version of damper except that they are fried rather than baked. If
you don’t have a frying pan you can just wrap the dough around a stick and bake
it over the coals turning and turning it until it is brown and crisp on the
outside, yet still doughy on the inside – or you can filch a length of netting
from a farmer’s old fence or a stray sheet of corrugated iron will also serve
as a griddle. Or you can acquire a frypan! I prefer to use a bit of dripping or tallow
I used to
have lots of recipes in my head for them, as I made them all the time, but I
guess that’s over twenty years ago now, and I never wrote them down. My mate
Woody reckoned the best mix was to just add flour to a can of beer until you
had a stiff dough, and then fry that. Tasty I agree but seems like a waste of a
cold tinny – and I usually don’t have one in my pack anyway. There is some
sound advice there though. If you mix this way, slowly and carefully you will
get to the point where the dough is no longer sticky and it all comes off the
surface you are ‘working’ it on and your hands and fingers also become
perfectly clean without washing. Then it is time to cook.
Recipes: The oldest plainest recipe was to use a 1 lb (500 gram) packet of self
raising flour to 1 teaspoon of salt. Mix slowly with about 3/4 of a cup of
water – but remember the earlier advice: add the water slowly until you have a
very stiff dough which removes all the sticky from your hands and work surface.
Make into cakes about 3-4″ wide and 1/2-3/4″ thick and ‘fry’ slowly
on low heat. Turn when golden on one side.
I would add
to that some powered milk (a table spoon?), a teaspoon of sugar, a couple of
teaspoons (perhaps) of desiccated coconut and a couple of teaspoons of slivered
almonds. Of course you can add anything you like to make them a bit tastier
(sultanas or raisins for example). It can be a good idea also to work some ( a
few teaspoons) of the dripping into the cake mixture before you fry them.
On many long
journeys in the past I have made them up to go with my evening meal and held a
few aside to eat with some condiment (jam, peanut butter, etc) for my lunch. I
must be getting old (and I am trying to cut down on the carbs); I am finding
such chores a bit wearisome these days. That being said, having written about
the damned things I really have a hankering to make some now! Cheers.
‘Oh, the
springtime it brings on the shearing,
Chorus: With
my ragged old swag on my shoulder
PS: Of
course, as you know we have been sheep farmers for over thirty years, so we
have more than a passing acquaintance with shearers and shearer’s songs – and
food!
Talking of
Johnny Cakes and billabongs reminds me of our national song:
Deconstructing
Waltzing Matilda, Australia’s Favourite Song
Waltzing
Matilda is an Australian icon. It is quite likely that more Australians know
the words to this song than even their national anthem. There is probably no
other song that is more easily recognised by a populace: young or old: native
or a newly arrived immigrant.
The lyrics to
Waltzing Matilda were (allegedly) written in 1895 by Banjo Paterson, an
Australian bush poet, while holidaying on a huge cattle and sheep station
(ranch) in the Australian Outback. He was inspired by a tune he heard being
played by Christina Macpherson the daughter of the owner of the property.
Banjo and
Christina worked together composing the song. Whether they also got it away is
left to your imagination. She set the music for Waltzing Matilda. The song was
an instant hit. The words were written to a tune played on a zither or autoharp
by 31‑year‑old Christina, one of the family members at the station.
31? Old for such high jinks!
Macpherson
had heard the tune ‘The Craigielee March’ played by a military band while
attending the Warrnambool steeplechase horse racing in Victoria in April 1894,
and played it back by ear at Dagworth. Paterson decided that the music would be
a good piece to set lyrics to, and produced the original version during the
rest of his stay at the station and in Winton.
As with so
many icons of the Left, there is a degree of dishonesty at its heart. For
example, the tune was stolen: The march was based on the Scottish Celtic folk
tune ‘Thou Bonnie Wood of Craigielea’, written by Robert Tannahill and first
published in 1806, with James Barr composing the music in 1818. In the early
1890s it was arranged as the ‘The Craigielee’ march music for brass band by
Thomas Bulch.
This tune, in
turn, was possibly based on the old melody of ‘Go to the Devil and Shake
Yourself’ (https://www.youtube.com/watch?v=xO1DPWLumvw http://aso.gov.au/titles/music/waltzing-matilda/clip1/
Of course
Paterson composed the song in what was to be the birthplace of Australia’s Left
(Australian Labor Party = Barcaldine) just after the great ‘Shearer’s Strike’
of 1891 (itself a consequence more of the 1890’s (climate change) drought than
anything else, and the founding of the unsuccessful ‘New Australia’ in Paraguay
(by the disgruntled leftist insurgents 1892).
All these
things are connected, and connected to the Australian leftist (ortho) doxy! One
day their history will be written, but not be me! In 1890 Bourke was a centre
of ‘culture’ (if you can call anything the left touches ‘culture’), had a grand
opera house, was a centre of ‘civilisation’ and a magnet for the literati. It
was no accident Paterson was there.
Today it is a
hell hole (after a century of leftist social experimentation) with the highest
crime rate of anywhere on the planet, for example. Interesting aside: In the
Western Lands Lease country (West of the Darling) in the 1880s you could milk a
cow on four acres. There were substantial towns all over the place and 100,000
folk lived there. The great drought of the 1890s (which never ended) caused all
those people to move and all their settlements to be abandoned. Climate change!
The ‘New
Australia’ movement wanted to secede and form their own socialist paradise
there. It had to be abandoned as a result of the 1890s drought (that’s why they
went to Paraguay https://en.wikipedia.org/wiki/New_Australia
The socialist
‘experiment in Paraguay (like all such elsewhere) did not work out either, and
was eventually abandoned – the descendants of those settlers were accepted as
Australians by the Whitlam Government in the 1970s when they returned to
Australia. Caroline Jones made a doco (‘And Their Ghosts May Be Heard’) about
it (which was excellent). You can buy it here: http://shop.nfsa.gov.au/and-their-ghosts-may-be-heard
First read
the song Waltzing Matilda (below) again , then I will begin to ‘decontruct’ it
for you:
Waltzing
Matilda, Lyrics to Song
1Once a jolly
swagman camped by a billabong
2Under the
shade of a coolibah tree
3And he sang
as he watched and waited ’til his billy boiled
4Who’ll come
a-waltzing, Matilda, with me?
5Waltzing
Matilda, Waltzing Matilda
6Who’ll come
a-waltzing, Matilda, with me
7And he sang
as he watched and waited ’til his billy boiled
8Who’ll come
a-waltzing, Matilda, with me?
9Along came a
jumbuck to drink at the billabong
10Up jumped
the swagman and grabbed him with glee
11And he sang
as he stowed that jumbuck in his tucker bag
12You’ll come
a-waltzing, Matilda, with me.
13Waltzing
Matilda, Waltzing Matilda
14Who’ll come
a-waltzing, Matilda, with me
15And he sang
as he watched and waited ’til his billy boiled
16Who’ll come
a-waltzing, Matilda, with me?
17Up rode the
squatter, mounted on his thoroughbred
18Down came
the troopers, one, two, three
19Whose is
that jumbuck you’ve got in your tucker bag?
20You’ll come
a-waltzing, Matilda, with me.
21Waltzing
Matilda, Waltzing Matilda
22Who’ll come
a-waltzing, Matilda, with me
23And he sang
as he watched and waited ’til his billy boiled
24Who’ll come
a-waltzing, Matilda, with me?
25Up jumped
the swagman, leapt into the billabong,
26You’ll
never catch me alive, said he
27And his
ghost may be heard as you pass by the billabong
28Who’ll come
a-waltzing, Matilda, with me.
29Waltzing
Matilda, Waltzing Matilda
30Who’ll come
a-waltzing, Matilda, with me
31And he sang
as he watched and waited ’til his billy boiled
32Who’ll come
a-waltzing, Matilda, with me?
Just some key
words: First ‘camped’ (Line 1) rather than ‘trespassed’. This innocuous word
sets the scene for who is in the right and who in the wrong in this interchange
of ideas and clash of social classes. The swagman is innocently ‘camping’ amid
a benevolent nature which will provide him with all its largesse (food, drink
peace) as his ‘right’. The tranquillity and ‘appropriateness’ of the scene is
emphasized over and over again by the choice of words ‘waltzing’ and ‘singing’
for example (Lines 11,12,13,14,15,16!).
There is no
indication that he is a ruffian who has no business being where he is. In
reality the swagman is a shiftless idle derelict, illegally trespassing on
someone else’s private property which the owner has paid good money for and
spent considerable effort and work building up, eg creating mobs of (highly
edible) sheep, which the swagman wantonly kills and steals.
The ‘class’
difference between the protagonists (and the role of the Government in
reinforcing this class system) is emphasized by the choice of word to describe
them their conveyances and possessions. The swagman is on foot (‘waltzing)
whereas the owner (described disphemistically) as a ‘squatter’ (as if he had no
right to the land -though he had actually paid for it!) is ‘mounted’ (to stress
his ‘
High falutin’
nature, and not just on any common nag (it would in reality have been a
‘whaler’) but on a ‘thoroughbred’ (which would in fact have been little use for
mustering sheep – it would break its legs!) His actions are backed up by the
full force of the establishment and the law by the presence of not just one but
by a whole bevy of gendarmes (three) so that at the outset the ‘poor’ swagman
is outnumbered (four to one) by the onerous forces of capital and the law – O,
the injustice of it all!
Of course the
poem was written in response to the Great Shearer’s Strike ‘New Australia’ founding of the Labor Party
In those days
Bourke was a centre of culture. Many people wanted to form a socialist republic
West of the Darling where 100,000 people dwelt then (but no-one does today-
after the drought of 1890 failed to go away – climate change!) Today Bourke has
the highest crime rate in the world!
Let’s look at
how that crime is dealt with: The ‘jumbuck’ (‘sheep’ = Line 9) is obviously
innocently coming to the stream for its evening drink when the swagman ‘grabs’
him and ‘stows’ him. The violence of this encounter is glossed over and the
swagman places the remains of the sheep in his food bag as if it were his own
property.
There is no
hint in the song though of ‘blood upon the wattle’. There is no indication even
that the action was ‘unkind’. The sheep might almost later on extricate itself
from the offending bag after having had a peaceful nap, and saunter on its way
as if the whole episode had been a friendly jape! Performed after all, with
‘glee’.
I’m not sure
however if the wether appreciated the jest! He is a bloody mess of meat after
all, hacked to pieces. It is astonishing to what an extent the passivity of the
crime is glossed over. The swagman just ‘watches and waits’; it is the squatter
and his troopers who are the actors. They ‘ride up’ and ‘come down’, etc.
The squatter
at least comes straight to the point, ‘Whose is that jumbuck’? He says. Every
event in Australia’s history revolves around how you answer this question. We
all are supposed to ‘know’ surely by now (the Labor Party and the Trade Unions
have told us often enough) that the ‘bosses’ have (mis) appropriated all the
world’s wealth for their own nefarious purposes, holding the rest of us in an
impecunious subjugation which will not even end with our deaths.
‘You’ll never
catch me alive’ sings the swagman and ‘jumps into the billabong.’ He almost
certainly needed a good bath anyway having been an indigent derelict sleeping
rough for some time and no doubt carefully boiling methylated spirits (or the
‘White Lady – I know you imagined ‘tea’ – such innocence) in that billy anyway,
a foul habit which can often also lead to incontinence and madness – which it
clearly has in this case!
It was
clearly quite mad to drown yourself simply over the theft of some mutton
anyway, a crime which would most likely only have met with a small fine in
those days. If this event is supposed to have taken place before Samuel Mort
invented refrigerated transport (c1883 and therefore likely – Now Elders
incidentally), then you should know that meat was practically free up until
then as the only usable products of the grazing industry were tallow (fat),
hides and wool as anyone who has played the board game ‘Squatter’, an
Australian version of ‘Monopoly’ ought to know.
Meat was
simply a waste product. At one time for example they used to tip up to 4
million sheep carcasses into the Murray at Echuca annually (after rendering).
The smell (and environmental consequences) are hard to imagine. One thing
though; it did lead to the development of the largest Murray Cod in history
(bigger than a man!), and indeed to an inland fisheries industry, now sadly
defunct!
You will note
that the cops (troopers) do nothing. Just like cops of every age, they are just
in it for the take, eg their fat horses. They do nothing to prevent crime or to
solve it.
I also like
the morsel of moral advice that you should ‘pass by this billabong’. Its
pollution by dead swagmen and sheep is bad enough. I think there is also the
suggestion that ‘you’ should eschew a like fate. Whether this means you should
desist from rustling, drinking meths, bathing, having anything to do with the
police or etc is left to your own imagination – as it should be!
The constant
refrain ‘Who’ll’? and its answering chorus, ‘You’ll’ is just too obvious to
require explanation. If you have been sucked in by leftist gibberish, no doubt
you are totally ignorant and might as well be off ‘waltzing matilda’ with the
fairies or lying somewhere (dare I say ‘unlamented’?) on the bottom of some
Billabong or other suitable receptacle for the disposal of dead bodies!
The swagman
will have his revenge. We are doomed to be haunted by his ghost – just as we
are haunted by the ghosts of Whitlam and Keating! Wait a moment! Keating is not
dead. He just always looks dead. His is the undead hand of capitalism! Or
socialism. Well, something like that.
See Also:
https://www.theultralighthiker.com/2017/07/29/a-hiking-food-compendium/
https://www.theultralighthiker.com/2017/08/07/humping-your-bluey/
https://www.theultralighthiker.com/2018/06/02/mattresses-i-have-known /
https://www.theultralighthiker.com/2018/09/08/the-spanish-windlass/
https://www.theultralighthiker.com/2017/07/01/out-of-the-frying-pan/
https://www.theultralighthiker.com/2019/06/23/the-pack-rifle/
20/07/2019: The Olfa Knife: (Updated) This is just
about the greatest knife ever! I’m just a little late to the party concerning
this knife which has been around nearly as long as I have – at any rate since
1956. As you can see it has a 55 mm blade. That’s just under 2 ¼”. (55mm =
2.16”) You could easily skin and butcher a sambar deer with one of them, and
they only cost a few bucks (with spare blades – and of course you can have as
many spare blades as you want supposing you get very lucky on your hunting
trip!
It is also
very light. The (heavier) Grey one pictured weighs 50 grams, for example. The
Black is 42 grams and its blade is about 1 1/4″. Costs from A$11.50
including delivery! Just what the serious ultralight deer hunter
Available
here:
https://www.ebay.com.au/itm/SET-Craft-cutter-knife-OLFA-S-type-26B-L-34B-with-replacement-blades-XB26-XB34/112868006827?hash=item1a47751bab:m:m7WJg7P3NFcAQEVJlkOYd6Q
Mine arrived
today (in about four days). I bought the whole set for about A$30 delivered.
They will have many uses. The grey one is definitely suitable for butchery. It
is an excellent cross between a folder and a fixed blade knife. The blade is
quite thick and rigid – and comes razor sharp. It is sharpened on both sides
and could easily be re-sharpened.
You can
easily carry a couple of spare blades – you can see the weights on my scales.
If you want to go ultralight you could definitely get by with the black one at
42 grams. They both have a hole in the end of the handle so you can carry them
around your neck on a piece of string. Yes, I think you should get one to try
out.
You can buy a
fancier more expensive one from Titaner https://titaner-store.com/products/heavy-duty-utility-knife
Nitecore have
one too: https://www.nitecorestore.com/ntk10-titanium-utility-knife-p/acc-nite-knife-ntk10.htm
PS: I have
lots of other posts about knives/cutlery. Try a search in the search box eg for
‘knife’: https://www.theultralighthiker.com/?s=knife
See Also:
https://www.theultralighthiker.com/2019/07/07/the-dragonfly-ultralight-titanium-knife/
https://www.theultralighthiker.com/2017/10/28/the-ultralight-deer-hunter/
https://www.theultralighthiker.com/2014/01/26/never-have-to-sharpen-your-knife-again/
17/07/2019: Cuteness Alert: (Photos/Video Added) 3
weeks old, eyes open, 3 little bundles ready to start some supplementary
feeding (to give Honey a bit of a break) and take over the house…for a little
while! Thanks to our daughter for the super photo! One of the puppies is
already spoken for with nearly a month to go before we can advertise them. If
you want one, please let me know. Two girls and a boy: Milky, Dot and Little
Spot. More photos to follow. Check back later…
See
Also:
https://www.theultralighthiker.com/2019/06/26/who-wants-a-jack-russell/
https://www.theultralighthiker.com/2018/02/23/a-tiny-
https://www.theultralighthiker.com/2016/04/30/does-spot-like-to-hunt-deer/
https://www.theultralighthiker.com/2018/03/01/honey/
https://www.theultralighthiker.com/2018/04/25/honey-sticks/
https://www.theultralighthiker.com/2017/02/13/spot-2/
https://www.theultralighthiker.com/2015/05/02/spot/
13/07/2019: Everything you ever needed to know about
down jackets: I have Montbell down clothing Larry Adler (in Oz)
My strategy
is to use them in a layering system when it is very cold and to supplement my
Montbell Spiral Stretch Ultralight Down Hugger sleeping bag (appprox 600 grams)
by wearing the jacket on my top and the vest on my lower body (plus down socks
I think 6-7
oz (180-200 grams) is enough in Australia for a down jacket (as long as you
also have a vest!) as the heavier garments will mostly be far too hot (unless
you are always up in the snow). I mostly camp out in the winter months in the
mountains of Southern Victoria (as I am also a deer hunter). I have found the
above arrangements fine over many years. We also own Montbell Down trousers.
which only weigh a couple of hundred grams – lighter than most thermals! Della
wears hers all the time in camp when it is cold (she feels it more than I do),
and it is a blessing to her. I confess I only take mine when it is going to be
like Antarctica, eg walking up to Everest
I would
recommend a winter mat though. For many years I used the Thermarest Neoair Womens an Exped Synmat HL Winter M here Deer Hunter’s Tent Ultralight Deer Hunter
I found the
spreadsheet belowon a Google search so I cannot recognise the author’s careful
work (or attest to its accuracy) but it gives a very good ground for
comparison.
Down jacket
(Male size M < 11oz)
Hood
Zip
Price
Total
weight (oz)
Fill weight
(oz)
Fill %
Fill power
(US)
Total
Warmth
Warmth per
oz
Warmth per
$
Weighted
ranking
Cumulus
primelite pullover
No
Half
$155
6,35
3,00
47%
900
2700
425
45
1
Nunatak
Shaka UL Sweater hooded
Yes
Half
$400
10,40
5,60
54%
900
5040
485
25
2
Goosefeet
Gear jacket (custom)
Yes
Full
$400
7,58
3,50
46%
950
3325
439
19
3
Borah Gear
Ultralight Jacket
No
Half
$170
5,15
2,30
45%
850
1955
380
34
4
Malachowski
Zion Ultralight
Yes
Full
$260
9,17
4,23
46%
900
3809
415
31
5
Haglofs
L.I.M Essens
No
Full
$210
5,64
2,47
44%
850
2099
372
28
6
Montbell
Plasma 1000 Alpine Parka
Yes
Full
$440
8,40
3,40
40%
1000
3400
405
17
7
Crux New
Halo Jacket
Yes
Full
$300
10,05
4,23
42%
950
4019
400
27
8
Crux Turbo
Jacket
No
Full
$260
8,33
3,30
40%
950
3135
376
27
9
My Trail Co
850 HL Hooded
Yes
Full
$150
11,00
4,58
42%
850
3893
354
50
10
Rab Zero G
Yes
Full
$550
11,00
4,50
41%
1000
4500
409
16
11
My Trail Co
850 HL
No
Full
$100
9,00
3,35
37%
850
2848
316
60
12
Decathlon
Trek 500
Yes
Full
$65
10,22
3,32
32%
850
2818
276
86
13
Cumulus
Inverse
No
Full
$165
6,35
2,29
36%
900
2063
325
32
14
Montbell
Plasma 1000
No
Full
$330
4,80
1,60
33%
1000
1600
333
15
15
Cumulus
Acomay
No
Full
$180
11,10
4,23
38%
900
3809
343
40
16
Montbell Ex
Light Anorak
Yes
Half
$270
6,20
2,30
37%
900
2070
334
20
17
Crux Turbo
Top Pullover
No
Half
$245
7,27
2,47
34%
950
2346
323
23
18
Yeti Strato
UltraLight
No
Full
$400
5,50
1,87
34%
950
1777
323
13
19
Western
Mountaineering Flight Jacket
No
Full
$350
11,00
4,50
41%
850
3825
348
21
20
Stellar EQ
Ultralight Jacket
No
Full
$270
9,63
3,10
32%
1000
3100
322
23
21
Stellar EQ
Ultralight Hoody
Yes
Full
$300
10,83
3,39
31%
1000
3386
313
22
22
Mammut
Broad Peak Light
No
Full
$250
7,34
2,47
34%
850
2099
286
20
23
Feathered
Friends Eos
Yes
Full
$340
10,60
3,70
35%
900
3330
314
19
24
Mountain
Hardwear Ghost Whisperer
No
Full
$325
7,40
2,65
36%
800
2120
286
15
25
Mountain
Hardwear Ghost Whisperer Hoody
Yes
Full
$350
7,80
2,79
36%
800
2229
286
15
26
Stellar EQ
Ultralight Sweater
No
Full
$230
5,89
1,52
26%
1000
1516
257
18
27
Haglofs Essens
No
Full
$230
9,38
3,17
34%
800
2539
271
23
28
Macpac
Supanova Hooded
Yes
Full
$500
9,88
3,60
36%
800
2878
291
12
29
Yeti Purity
No
Full
$360
9,67
3,42
35%
800
2736
283
15
30
Western
Mountaineering Quick Flash Jacket
No
Full
$365
8,00
2,50
31%
850
2125
266
13
31
Montane
Starlight Pull-on
No
Half
$160
9,31
2,82
30%
800
2256
242
29
32
Western
Mountaineering Flash XR Jacket
Yes
Full
$440
11,00
3,50
32%
850
2975
270
13
33
Patagonia
Ultralight Jacket
Yes
Full
$300
9,50
2,99
31%
800
2392
252
16
34
Montbell
Superior Down Parka
Yes
Full
$210
8,70
2,50
29%
800
2000
230
20
35
Western
Mountaineering Flash Jacket
Yes
Full
$390
10,25
3,00
29%
850
2550
249
13
36
Outdoor
Vitals StormLoft Ultralight
Yes
Full
$180
10,00
2,82
28%
800
2256
226
25
37
Montbell
Superior Down Jacket
No
Full
$180
7,30
1,90
26%
800
1520
208
20
38
Macpac Uber
Light
No
Full
$130
8,47
2,61
31%
650
1697
200
28
39
Outdoor
Research Baja Pullover
Yes
Half
$190
9,95
2,72
27%
800
2173
218
23
40
REI Co-op
650 jacket
No
Full
$100
10,50
3,00
29%
650
1950
186
38
41
Montbell
Superior Down Round Neck
Yes
Buttons
$150
5,50
1,20
22%
800
960
175
18
42
Outdoor
Research Illuminate
No
Full
$220
10,51
2,65
25%
800
2116
201
19
43
Marmot
Quasar Nova
No
Full
$275
10,70
2,75
26%
800
2200
206
15
44
The cumulus
range certainly is worth considering. Notice they also make very light sleeping
bags: http://sleepingbags-cumulus.eu/
13/07/2019: Moon Transiting the Earth: https://www.nasa.gov/feature/goddard/from-a-million-miles-away-nasa-camera-shows-moon-crossing-face-of-earth http://www.drroyspencer.com/2019/07/lunar-living-9-weird-aspects-of-living-on-the-moon/
12/07/2019: Della’s Way Bread or Biscotti: You may
or may not have tried Hard Tack
Della has two
(almond flavoured) versions below (a hard and a soft one). The hard one would have
slightly better ‘keeping’ qualities. Remember though that this food was
intended to be consumed continuously on a voyage for years! You can ‘dunk’ them
in a cup of tea, coffee or chocolate – which is what Della does. I prefer to
eat them straight. They are delicious, filling (and quite fattening).
ALMOND
BISCOTTI
1. HARD
BISCOTTI
Ingredients:
3 cups
unsalted whole almonds
¾ cup
granulated sugar
¾ cup brown
sugar
¼ teaspoon
cinnamon
2 teaspoons
baking powder
2 ½ cups
plain flour
½ teaspoon
salt
4 large eggs
at room temp.
1 tablespoon
almond essence
½ teaspoon
vanilla essence
1 teaspoon
lemon zestOr-
2. SEMI-HARD
BISCOTTI
3 cups unsalted
whole almonds
½ cup
granulated sugar
½ cup brown
sugar
1 ½ teaspoons
baking powder
2 ¼ cups
plain flour
½ teaspoon
salt
3 large eggs
at room temp.
1 tablespoon
almond essence
½ teaspoon
vanilla essence
1 teaspoon
lemon zest
½ cup olive
oil (or vegetable oil)
Method: (for
both recipes)
* Toast almonds in oven for 10 minutes at 165 degrees then cool
See Also:
https://www.theultralighthiker.com/2017/07/02/hardtack/
https://www.theultralighthiker.com/2017/07/29/a-hiking-food-compendium/
It is easy to
make an ultralight alcohol stove here here my recipes
There are
Aaron at Brasslite’s written about before
Personally I
think if you are still using a canister stove you have rocks in your head. You
may also have a number of bricks in your pack too – just to improve your
fitness I guess. The empty canister weighs more than an alcohol stove, fuel
bottle and enough fuel for several days as light as 25
It is also
just so easy to work out beforehand just what meals/cups of hot drinks etc you
will be eating on say an 8-10 day hike (eg the Dusky Track
I always
carry a Trail Designs Caldera Cone trace leaving simmer rings’
Caldera Cone
Trail Designs
12-10 Stove
12-10 with
simmer ring
PackaFeather
Zenstoves pepsi-can stove
If you have
not yet discovered the astonishing Minibulldesign Youtube channel Gnomatic from US$15 Turbo Gnome Stove
Gnomatic
See Also:
https://www.theultralighthiker.com/2013/05/08/supercat-hiking-stove/
https://www.theultralighthiker.com/2015/03/09/diy-side-burner-metho-stove/
https://www.theultralighthiker.com/2018/03/04/new-fancy-feast-stove/
https://www.theultralighthiker.com/2013/11/05/alcohol-simmer-stoves/
https://www.theultralighthiker.com/2018/09/28/how-much-weight-in-fuel/
https://www.theultralighthiker.com/2017/09/22/ultralight-windscreen/
https://www.theultralighthiker.com/2018/05/15/corrugated-heat-diffuser-3-grams/
https://www.theultralighthiker.com/2017/06/21/adventures-in-stoving/
https://www.theultralighthiker.com/2016/05/11/soda-can-stove-mark-2/
https://www.theultralighthiker.com/2017/07/29/a-hiking-food-compendium/
08/07/2019: The Dragonfly – Ultralight Titanium Knife:
Things just
keep getting better and better. I was impressed by the CRKT PDK
If you are
not good at sharpening knives these replacement blade knives (such as this one too
If you are
not, you might try one of these lightweight knife sharpeners Gerber Johnson Rive
Or else, get
one of these Dragonflies! Apparently it does have a lock blade but I would not
put too much force on a 1/3 oz knife. A handy tool for the pocket or for the Ultralight Deer Hunter light a fire
‘The
Dragonfly – a Titanium Folding Knife. Featuring an ergonomic design and a
replaceable blade (#24) this knife is perfect for everyday tasks.
Attributes:
Normal price
US$70 (https://titaner-store.com/products/the-dragonfly https://drop.com/buy/titaner-titanium-dragonfly-scalpel-knife#overview
See Also:
https://www.theultralighthiker.com/2017/09/16/crkt-pdk-replacement-blades/
https://www.theultralighthiker.com/2014/01/26/never-have-to-sharpen-your-knife-again/
https://www.theultralighthiker.com/2017/10/28/the-ultralight-deer-hunter/
https://www.theultralighthiker.com/2014/11/16/gerber-knives-light-cheap/
https://www.theultralighthiker.com/2015/05/26/carry-a-knife/
05/07/2019: Down Socks: If it is going to be
particularly cold (winter camping say) I always carry a pair of these. I have a
pair of Goosefeet Gear’s
Zpacks also
make them. Theirs are a mere 1.8 oz (same price). I have owned and used many of
their products over the years. All have been excellent – just that I have never
had the need for two pairs of down socks.
Of course I
use my own 12 gram Dyneema moccasins ultralight galoshes
Another
alternative is these insulated over-booties by Montane
04/07/2019: Poncho Shelters: One of Sea to Summit’s ultra sil nano tarp ponchos Tyvek one I posted about here https://www.theultralighthiker.com/2019/05/30/ultralight-bivy-bag/
I have spent
many nights camped under just such simple shelters in all kinds of weather –
actually usually without any bivy bag at all – usually with just a scrap of
Polycro or a mylar space blanket for an ultralight ground sheet.
Like this on
a trip down the Thomson River
Of course I
have made my own 185 gram Pocket Poncho Tent this dental floss carry a needle length of string
Pocket Poncho
Tent
You can spend
too much money on gear, and carry far too much.
See Also:
https://www.theultralighthiker.com/2018/03/03/ultralight-hiking-on-a-budget/
30/06/2019: Tyvek Sleeping Bag Cover or Ground Sheet. For those of you who can’t sew but don’t
mind spending US$16.99, Flame’s Creed has this little beauty. It should keep your sleeping bag
clean and dry (and only weighs 130 grams apparently). I bought a couple of their ultralight tents and found them to be very good value and quality. You
really don’t need to break the bank to have some very good gear.
I know I have
threatened to make my own and have come up with a few different designs bathtub floor/chair/lounger poncho bivy this
Available
from Aliexpress here
Reader Daniel
says, ‘Got one, surprisingly roomy and good quality ‘.
See Also:
https://www.theultralighthiker.com/2018/09/17/two-great-cheap-tents/
https://www.theultralighthiker.com/2018/08/31/3f-tents/
http://www.theultralighthiker.com/ultralight-hiking-on-a-budget/
http://www.theultralighthiker.com/budget-pack-mods/
http://www.theultralighthiker.com/cosco-quilt/
http://www.theultralighthiker.com/brawnys-tarptent/
http://www.theultralighthiker.com/cheap-insulated-inflatable-pad/
http://www.theultralighthiker.com/ultralight-ultracheap-backpack/
http://www.theultralighthiker.com/60-diy-ultralight-hiker-ideas/
http://www.theultralighthiker.com/emergency-cb-radios/
http://www.theultralighthiker.com/klymit-ultralight-pillow/
http://www.theultralighthiker.com/diy-dry-back-hiking-pack/
http://www.theultralighthiker.com/how-many-clothes-should-i-take-in-my-pack/
http://www.theultralighthiker.com/the-perfect-guy-line-for-a-hiking-tenttarp/
http://www.theultralighthiker.com/tent-stakes-and-tricks/
https://www.theultralighthiker.com/2017/11/22/ultralight-ground-sheet/
https://www.theultralighthiker.com/2018/04/27/ultralight-bathtub-floor/
29/06/2019: Jobs Around the Farm: (Della): So the last little while has been amazingly
busy! (Sorry if I seem to be ignoring everyone here!) Having decided to finally
have a blitz on ALL the major jobs that have needed doing chez nous, Steve and
I started by demolishing the old fallen-down “buggy shed” on the property to
make way for new shedding. Then, this week, starting Wednesday afternoon, we
got really serious and contracted the amazing Hans to do some magic with his
excavator. A day and a half later we have lots of dead trees knocked over, the
old concrete water tank demolished and 2 new ones moved in, a fallen- down
garden archway removed – and much more to come! Things are a little less than
pretty around here ATM, but given time, peace and beauty will reign! (Well,
that’s the plan!) BTW Do check out my little video of the sludge at the bottom
of the old water tank…a lid-less tank, it has accumulated the ash from the
Black Saturday fire as well as the recent Yinnar South one. No, we weren’t
drinking this water, but we were sure as hell washing in it! Anyway, right
smack bang in the middle of all this crazy activity, Honey and Spot’s puppies arrived!
Will share more about puppy love later!
First tank in
and plumbed.
A largish
heap on Wednesday. It is bigger now.
Old tank
being demolished. Just 3 or 4 grabs with that big claw!
There goes
the floor:
2 new tanks
in and old one out.
Sludge on the
floor of the old tank. Ewwww!
https://www.facebook.com/della.jones.16/videos/2249562928445737/?t=
Before:
And after:
See: https://www.theultralighthiker.com/2019/06/26/who-wants-a-jack-russell/
The Buggy
Shed:
The small
tractor della loading wood – ‘helped’ by the dogs:
Going, going…
Gone:
Some timbers
needed the tractor to lift.
Unfortunately
had to take down the old cubby to install the new water tanks:
Made
completely out of scrap for $0.00 back when the kids were little. Like all
cubbies they never played in it. A hexagonal log cabin – I liked the idea.
Way it goes:
I thought of
reusing the roof but it was too far gone, so it went on the fire too. Sigh!
See Also:
https://www.theultralighthiker.com/2015/11/26/the-buggy-shed/
28/06/2019: Tiny Keychain Pen - The Tipen: ‘ The most striking quality of the
Tipen is its size. At 50mm long and weighing only 4.3 grams, the pen stays true
to its name. Combined with its lanyard-compatible keyring attachment point, the
Tipen offers so many ways to carry it so you’ll never be without a pen. The
most obvious way to go is on your keys, but you can also wear it on a necklace,
use it as a zipper pull for a jacket or bag, or even carry it loose in your
coin pocket or travel wallet’. 5 grams in Titanium. 4 grams in Aluminium: from
UK12 (June 2019). This pen is refillable and well-nigh indestructible: both
water and fireproof!
https://www.kickstarter.com/projects/1082442335/tipen-the-samlllest-edc-refill-pen-tool-ever?ref=3m79xm
I always
carry one of these @ 1 gram: https://www.theultralighthiker.com/2016/06/14/ultralight-pen/
And a few
leaves from one of these to write on:
https://www.theultralighthiker.com/2016/06/06/waterproof-notepads/
See Also:
https://www.theultralighthiker.com/2019/04/20/hunt-22/
https://www.theultralighthiker.com/2016/12/09/miniature-pens/
https://www.theultralighthiker.com/2017/12/03/ultralight-pen-2/
https://www.theultralighthiker.com/2016/07/01/tactical-pens/
https://www.theultralighthiker.com/2018/10/02/the-ultralight-persuader/
https://www.theultralighthiker.com/2019/01/02/victorinox-work-usb-multi-tools/
27/06/2019: Who Wants a
Jack Russell: The Jack Russell is the Swiss
Army Knife of the canine world. Regular readers will know we have owned one or two of these
wonderful mutts over the years. This post is to announce that our current pair,
Spot and Honey are as of yesterday now the proud parents of two girls and a
boy. These pups are likely to be top deer hunting dogs and will no doubt be
snapped up very quickly. Let me know ASAP if you would like one and I will add
you to the list.
Some recent
photos:
See Also:
https://www.theultralighthiker.com/2018/02/23/a-tiny-life/
https://www.theultralighthiker.com/2016/04/30/does-spot-like-to-hunt-deer/
https://www.theultralighthiker.com/2018/03/01/honey/
26/06/2019: The Complete ‘Must-Have’ Ultralight Hiking Accessory:
Instaprivy. Only 7 pounds! No, I
don’t think you will be taking this beauty hiking; for that you need this or this . But for
your next 4WD ‘adventure’ it might be just the ‘bee’s knees’.
https://www.youtube.com/watch?v=KsWyb51T5HQ
https://www.instaprivy.com/
Pre-order on Indiegogo from US$75
(July 2019)
See Also:
https://www.theultralighthiker.com/2015/11/20/ultralight-personal-hygiene/
https://www.theultralighthiker.com/2016/11/18/the-rolls-royce-of-back-country-trowels/
23/06/2019: The Pack Rifle: The only
readily available sub 500 gram take down rifle available in Australia is this little beauty. It is
available in .22LR only and single shot. However if you need a bunny or perhaps
a duck for the pot, or some protection from wild dogs (which are becoming ever
more dangerous) in the High Country etc, it may well be your choice.
‘Pack-Rifle
is an incredibly light weight
But the
feather-weight of our Pack-Rifle is only part of the story. In addition to
being light, the Pack-Rifle also takes down to a very small size. The same
mechanism that allows the loading and extraction of spent shells also enables
the rifle to take down into two pieces, in less that 2 seconds
without tools!
Other
features include, but are not limited to, storage in the handle and butt stock
tube of the rifle.’
Specs:
Weight: Only
15.5oz (442 grams )!
Overall
Length: 33″
Caliber:
.22LR
Sights:
adjustable peep
Width: 7/8in.
Height: 4in.
Available eg:
Magnum Sports Oz Gun Sales
There is one
other alternative I am aware of which is RotaLocura’s offerin Crickett Single Shot Rifle action Keystone’s Model 722 single shot model is just 15 oz 428
grams )in the most basic configuration. You will need export and import
licences to get it over from the States.
I am working on one right now for my
70th birthday which is (unfortunately- or fortunately) coming up soon. Even in
the single shot model, being a bolt action it would be much easier to reload
than th epack rifle whose action looks rather cumbersome to me. If the repeater
will not work I will go for the magnum model which though it will add a couple
of more ounces (and make the ammo more expensive) will provide much superior
stopping power. The muzzle velocity of the Magnum round is 50% up on the .22
long rifle, so much more suitable for mid range game such as small deer, wild goats,
foxes, wallabies etc with a well-aimed shot.
Before John
Howard’s draconian gun laws many other choices were available. I had a lovely
.22 automatic Armalite AR-7
I also own a .410 Rossi single-barrel shotgun
Thought it is
also illegal (what is not?) a shanghai can be an interesting lightweight
alternative for birds and small game. This ‘pocket’ model
There is a
choice of a number of other ‘survival’ or pack guns such as Chappa’s ‘Little Badger available in Australia
See Also:
https://www.theultralighthiker.com/2017/07/24/pocket-slingshot/
https://www.theultralighthiker.com/2015/06/15/the-ultimate-survival-gun/
https://www.theultralighthiker.com/2018/08/02/packable-rifle/
21/06/2019: Upper Yarra Track Map: Here is a map showing the whole of the (Extended) Upper
Yarra Track from Lilydale all the way to Moe, approximately 250 km and 8-10
days: Australia’s oldest and best long distance hiking track. It could be a
better map, but it is better than no map. I have used the 1:250,000 Australian
Topo map available free from the Australian Government. You should be able to
zoom in on it if you (Right Click) ‘View Image’, then Zoom (Control +) a few
times. ( Unfortunately a Plugin has shrunk the map. See the Pdf
version below ) In the Track Instructions
you can find suggested maps (and Apps) you should buy for walking the track. I
am working on a better map which will be posted on the Track Instructions page
in the near future. For further information go to: http://finnsheep.com/THE%20UPPER%20YARRA%20WALKING%20TRACK.htm
Upper Yarra
Track Map
NB. Below is
a full-sized copy of it as a pdf. You should be able to open and zoom in on it,
or copy it to your phone and view it with Pdf Maps
17/06/2019: Thermoplastics #101: I have been playing a bit with heat sealable materials . I decided to buy a sealing iron $A50 – a sound buy.
Tried it out on one of the pillows I bought for my sleeping pad side insulation which I had been reluctant to touch as I was finding it
so comfortable, but at 100 grams I didn’t think I wanted to carry it. I have
shaved half its weight off (now less than 50 grams) and if anything it is even
more comfortable. As you can see I have added grommets, some 1 mm dyneema cord
and a micro clam cleat so I can attach it to the mat . If I were using two of them for side insulation I would leave the grommet attachment points on the side
of the pillow instead of the ends as shown here.
You really
need to try a little bit of such experimentation yourself before you start cutting down an expensive mat Exped Winter mat
Original and
modified pillow
A little more
playing around with cutting down pillows for side insulation, and trying to
make a cheap air frame DIY pack raft AU $ 251.67 Jun 2019). I may even get
around to making that inflatable bathtub groundsheet I have threatened. I need
a quantity of more experimentation repair tape
PS: You can
just use a normal domestic iron (though it might be a little more difficult to
control the temperature and to get into those smaller spaces). I have used ours
though in the past to reseal split seams on various pads/pillows.
PPS: These pillows from Amazon
See Also:
https://www.theultralighthiker.com/2019/05/15/cheap-comfy-hiking-pillow/
https://www.theultralighthiker.com/2019/05/04/stop-losing-your-pillow/
https://www.theultralighthiker.com/2016/09/09/modifyingshortening-hiking-mats/
https://www.theultralighthiker.com/2017/01/02/new-diy-pack-raft/
https://www.diypackraft.com/shop/merchandise/adhesives-sealants-merchandise/outdoor-repair-tape/
https://www.theultralighthiker.com/2018/10/27/diy-air-frame-pack/
https://www.theultralighthiker.com/2018/07/04/how-many-of-these-needed-to-make-a-pack-raft/
11/06/2019: Lumir-k: Cooking oil fueled LED lamp:
https://www.indiegogo.com/projects/lumir-k-the-one-and-only-cooking-oil-led-lamp#/ https://www.kickstarter.com/projects/525554173/lumir-c-candle-powered-led-lamp
& https://drop.com/buy/biolite-campstove-bundle#overview
11/06/2019: Elon Musk is
amazing: https://en.wikipedia.org/wiki/Starlink_(satellite_constellation)
09/06/2019: A Wider Lighter DIY Sleeping Pad: Unless you are tiny (like my wife Della) I’m sure that you
have found that when you sleep on your back your arms fall off the sides of a
‘standard’ 20″ sleeping pad such as my wonderful Exped Winter
mat shown. This is both uncomfortable and cold. Of course you could buy a
(much) wider mat – but they are usually only 24-25″ so not much better,
particularly if you are (likely) larger than me, and they can add hundreds of
grams to your pack load too.
Though
enjoying a good night’s sleep is just about the most important thing you can
have in the wilderness (to which add, having a great time and getting home
safe), a wider pad is not necessarily going to do it for you, particularly with
all that extra weight. What you see here is a way of doing it without adding
any weight at all – as the three pillows shown likely weigh less than the one
pillow you are currently using!
The little
$20 gadget which did this for me is a Kleva Seal Bag Sealer Graham Air pillows
I have added
four small (sewing) grommets to the two side pillows. I will attach them to the
sleeping mat like I did the Stop Losing Your Pillow these clam cleats
You will also
notice the foreshortened pillow I wrote about before. It weighs 12 grams. You
will have to be careful with these pillows, but I used one for over two years
(until I replaced it as it was so shamefully grubby), so if you are careful you
will get some miles out of them – and anyway they only cost about $2 each.
I was going
to use the two pillows I wrote about here
Of course you
could place some insulation (eg Primaloft Gold, or etc) inside the pillow
before you sealed it up to make for a winterised kit.
PS: You could
also use the Kleva Seal to create a long, thin plastic tube with which you
could make one of these, an Inflatable Bathtub Groundsheet
https://www.theultralighthiker.com/2018/06/30/exped-synmat-hl-winter-m/
https://www.theultralighthiker.com/2017/08/25/diy-super-ultralight-pillow/
https://www.theultralighthiker.com/2019/05/15/cheap-comfy-hiking-pillow/
https://www.theultralighthiker.com/2019/05/04/stop-losing-your-pillow/
https://www.theultralighthiker.com/2014/12/14/the-perfect-guy-line-for-a-hiking-tenttarp/
https://klevarange.com.au/products/kleva-seal-bag-sealer-instantly-reseal-the-original-bag
09/06/2019: Upper Yarra
Track Instructions: I have posted dozens of times
about this wonderful trail which (in an extended version) can be walked all the
way from Moe to Lilydale. Here is some indication of track times and distances and here is a detailed set of instructions . Below you can find some of my posts about it in the
order you would encounter them if you began from Moe Railway Station.
You will see
here Gerard White’s trip vivid report
The route no
longer goes past the tallest falls in Victoria the Yarra Falls on Falls Creek
in the Upper yarra Catchment. There is a spot on the Forty Mile Break rd where
you are only about a kilometre from the falls which intrepid visitors still
sometimes illegally access. They are clearly well worth the visit.
Section One: Moe-Yallourn North Rail Trail
This lovely
trail starts @ 200 metres East of Moe Railway Station. It passes through Moe’s
wonderful Botanic Gardens nestled along Narracan Creek and follows a fringe of
bush to the splendid Latrobe River where the awesome cooling towers of the
Yallourn Power Station are a reminder of the unity of mature and artifice. (10
km – 2.5 hours)
Section Two: Yallourn North to Wirilda Park
This section
is easy going along quiet country lanes with lovely vistas and ample shady
spots if you need a roadside rest to enjoy the view. You look out Southwards
over the verdant Latrobe Valley towards the beautiful Strzelecki Ranges, a
tongue of forest which extends all the way down to Wilsons Promontory. (15 km –
3.5-4 hours)
Section Three: Wirilda to Moondarra
The track
follows the true right bank (ie facing downstream) of the Tyers river until it
crosses on an old pipeline. There are numerous spots where you could stop for a
picnic, overnight or for a fish. The impressive cliffs below Peterson’s lookout
are a feature. Birdlife, wildlife and wild flowers abound. There are a number
of side tracks which can be explored. Keep your eye out for signs of the old
pipelines one of which was made of wood! (15 km – 6 hours)
Section Four: Moondarra to Erica
When you come
to the end of the Wirilda Walking Track, our walk continues on East along the
W18 through beautiful serene forest. The first suitable campsite, a really
beautiful spot with water is when the trail crosses Jacob’s Creek on the Old
Traralgon ‘Road’. (20 km – 5.5 hours)
Sidetrip: Horseshoe Tunnel/Coopers Creek
Only a bit
over a km from Platina Station on the walk from Erica to Walhalla you can take
this lovely walk down to the historic Horseshoe Tunnel. The tunnel was created
over a century ago to divert the river so the dry river bed could be sluiced
for gold. The sidetrip takes about 1.5 hours (or several days if you decide to
camp out!) This early section is fringed with wild cherries. Seats are provided
at strategic intervals for the weary traveler.
Section Five: Erica to Walhalla
This is a
delightful easy section following historic tramways linking two of the most
beautiful small towns in the world. It perambulates gently through majestic
mountain ash and tree fern gullies with splendid views of the awesome Thomson
River. It offers numerous opportunities to sightsee, sidetrack or camp. ( 12 km
– @ 4 hours.)
Side Trip: Poverty Point
From the
Thomson River Bridge/s (‘Thomson Station’) you can walk a lovely 8 km circuit
up along the West bank of the river then down along the East bank. If I were
walking the entire UYT I would come down to Thomson Station as soon as it
joined the Mormon Town Track and walk up the West bank as it is far more
beautiful, and would otherwise be missed – as would the two excellent campsites
to be found along it. ( 8 km – 2-3 hrs)
O’Shea’s Mill
Now (also)
called East Tyers Campground I see. This is the first major stop after you
leave Walhalla (12.5km away), some of them fairly steep. As you can see it is
where the Alpine Walking Track crosses the East Tyers River. Campsites, Water,
Toilet available. You could have dropped by Rawson on the way here for
supplies. It is also where you would turn off for the Winter Route to avoid
snow/cold dangers on the Baw Baw Plateau.
Winter Route:
East Tyers Walking Track
I spent six
hours yesterday working on this excellent track which had been long neglected
and overgrown. Apparently there were six other people on it too, though I never
saw them – which indicates you can have a lovely solitary experience on the
track. It connects O’Shea’s Mill to Caringal Scout camp and thus comprises an
interesting addition to the Upper Yarra Track Winter route
A Beautiful World
We did a
little afternoon excursion today to check on the existence of some old walking
tracks around Erica. The first pic is of Steve Jones with Spot where the
walking track disappears at Tyers Junction near the Caringal Scout Camp. It
seems to be one of the ‘roads less traveled’ judging by the overgrowth of
blackberries and abundance of fallen timber.
Caringal Scout Camp: Tyers Junction
You might
reach here by walking down the rail trail from Collins Siding (10 km – 2-3
hours), where the cottages are on the main Erica-Moe Rd at the Caringal
turnoff. The trail runs along behind the cottage on the West side starting to
the North of them. Or, you might come down the East Tyers Walking Track (I will
check whether this is still open). We came along Finns Track from O’Shea’s Mill
via the South Face Rd, a pretty quiet forest path. All three routes are a
similar distance (and time)
Western Tyers: Morgans Mill & Skinners Camp
From Caringal
you can journey to Western Tyers via Morgans Mill Rd (open forest) or Buckle
Spur, cool wet forest tree ferns and mountain ash. Probably 2-3 hours either
way. There used to be a walking track along the river which followed the old
railway line all the way to Growlers, but it has grown over (we checked). It
was really beautiful. A job of clearing for someone, but maybe not me.
Western Tyers River – Great for Crays
Escaping the
heat: The Western Tyers is the BEST place I know to spend a couple of hot days:
nestled under the South face of Mt Baw Baw, enclosed by Antarctic Beech and
majestic Mountain Ash, it is always a lovely spot on such a day. You can brave
the icy water (if you dare) or just lounge around in the shade on a folding
chair, betimes catching the odd spinyback crayfish or mountain trout – or a
platypus if your fancy so takes you
The Western Tyers
Spent a
couple of days at our old campsite on the Western Tyers (haven’t camped there
for years). Still as beautiful as ever. We will be going back for a longer
stay. So many beautiful places in Victoria. This tree has had thirty years to
fall on us. Just have to give it another chance. Lots of trout and crays we
haven’t eaten from this excellent stream
Western Tyers to Tanjil Bren
After you
have camped the night, cooked and eaten your trout &/or crayfish, walk West
along the Tyers. The Western Tyers Road follows the course of the old timber
tramline which carried the forest’s products via Caringal to Collins Siding
(Erica) and onwards to a wider market where they were used to construct houses
and buildings elsewhere in Victoria – and sometimes much farther afield.
Kirchubel: If you go nowhere else in the world, at least go
here
Just a few
kms walk outside the small township of Tanjil Bren in Gippsland Victoria is the
most beautiful place in the whole world! You go out along Saxtons Road
beginning in the heart of Tanjil Bren.
Downey to Newlands
Last Monday
we spent ‘beating around the bush’ near Downey (Tanjil Bren area). Downey is
another one of those ‘lost’ towns of the Victorian mountains. Pretty much all
that remains is this huge sawdust heap in the forest: how many woodland giants
went to make it up I wonder? Mostly the trees milled here were fire killed
mountain ash from the vast ‘Black Friday’ fires of 1939
Up Into the Singing Mountains
Our family
celebrate Xmas tomorrow (due to work commitments), so what better day to
continue our exploration of the ‘closed track’ which used to link Downey (North
of Tanjil Bren) with Newlands Rd (Baw Baw Plateau)? We are hoping that this track
will complete our ‘Winter Route’ of The Upper Yarra Track
NB: You can
alternatively walk from Tanjil Bren to Toorongo along the Link Rd ( a couple of
hours at most – water every couple of km). There is a camp at Toorongo Road
intersection with toilets and water! Just before you reach Toorongo you can
take the Mundic Road and head for Toorongo Falls and Noojee.
End of Winter
Route
Section Seven: Mushroom Rocks Carpark to Phillack Saddle
This is a
beautiful easy section comprising widely varying vegetation and topography, the
spectacular ‘Mushroom Rocks’, the ruin of the Talbot Peak hut, Mt St Phillack,
the highest point on the Baw Baws, and a delightful camp at Phillack Saddle.
Side trips can be taken to Mt St Gwinear and Baw Baw Alpine Village.
It is about
20 minutes walk from the car park (toilets, water, scenic side-trip) to the
Mushroom Rocks where there is scout hut accommodation if you have arranged it.
It is another hour to Talbot Peak hut site (each way). From there it is about
2.5 hours to the St Gwinear turn-off and about another half hour to the
Phillack Saddle and and the Baw Baw turn-off and a further 1-1.5 hours to the
Baw Baw Village. Say about 5.5 hours from the car park to the Village each way.
Sidetrip: Baw Baw to Mt St Phillack
What a way to
escape the heat! Others may flock to the beach. We give our hearts to the
mountains. Mt Baw Baw was to be 8C cooler than home (with no power) and with a
delightful cooling 30 kph breeze. When we left our car at the bottom of
Candleheath Drive (Go down Frosti Lane next to the shop until you come to the
sign for Mueller’s Track) it was a balmy 24C with a cool breeze blowing.
Section Eight: St Gwinear Track Junction to Whitelaw’s Hut
The route
along the tops is a delightful mix of alpine heath and snow gums. Every couple
of kms you will find a small stream (sometimes to the side of the track) with
fresh water. For example there is water near the St Gwinear turnoff, just after
Mt St Phillack, at Mustering Flat and in the valley next to the Mt Whitelaw Hut
site.
Section Eight: Baw Baw to Newlands Rd
Della: Steve
and I, with Tiny and Spot, spent the last 2 days walking over the Baw Baw
Plateau from Baw Baw across to Newlands Road on the Upper Yarra Walking Track.
It was a delightful walk and we selected good weather for it (which is
needed!). One section on the first day was particularly hard-going, and only on
the second day did we discover that we had taken an old, heavily overgrown
route to Phillack saddle instead of the (apparently!) new route which now
exists.
Section Eight: Phillack Saddle to Block 10 Road
What a lovely
section of track! The high country has so much beauty, so many surprises.
Phillack Saddle is a wonderful spot to camp on lawns tended by nature’s
gardeners amid the alpine heath. There is beautiful clear water just off the
saddle and a lovely stream (below) at Freemans Flat. It will be about 7.5 hours
to our car at the Block 10 Road – if we make it!
Escaping the Heat
Who needs an
air conditioner? Go up a thousand metres and you lose approx 8C. The Baw Baw
Plateau this week has been beautiful with maximums in the low twenties whilst
folks below in the Latrobe Valley or Melbourne sweltered in the high thirties.
We are so lucky we have the Upper Yarra Track (http://www.finnsheep.com/THE%20UPPER%20YARRA%20WALKING%20TRACK.htm
Upper Yarra & Australian Alps Walking Tracks
There is
secure water (and good camps) at O’Shea’s Mill, along the Baw Baw Plateau, from
the Thompson River in Newlands Rd and at the Link Rd Recreation grounds on the
corner of Toorongo Rd. You should have the maps and App I recommended in my
post on 29/11. It will probably take you 3-4 days to get to the camp at the
secure water on the Forty Mile Break Rd about 5km short of Mt Horsefall. The
next day you would aim to get to the the Ada Tree. There is running water 1 km
down the Lock North Track, at a dam 1 km before the 15M track & running
water at the corner of Lashos Track;
Upper Yarra & Australian Alps Walking Tracks 2
If you simply
followed Siseman’s instructions after @ 10km (from New Turkey Spur Rd) without
water you would come to a DRY water point at the 21km post on Boundary Track
and would not know that there is a (muddy) water hole a further 6km ahead, so
would almost certainly, sensibly give up! Personally I prefer clear running
water with grassy campsites nearby.
Section Eleven: Ada Tree to Big Pat’s Creek
As you can
see the track is well made, delightful and easy to follow from the Ada
Tree all the way to Warburton, with numerous signposts. If you have a couple of
days to spare, this is a pleasant jaunt.
More Side
Trips
Yarra Falls
A reader
writes: ‘We decided to use the day searching for the lost ‘Yarra’ Falls. Quite
a lot of bush bashing (nearly three hours in, one and a quarter out) brought us
to the top of the first cascade, No #1 of SIX (!) which plummet hundreds of
metres down the valley!) Perhaps Victoria’s greatest treasure!
Yarra Falls 2
A reader
writes: ‘Spent another seven hours yesterday pushing ever closer to this ‘lost’
treasure. From the top fall, the prostrate scrub was unbelievably thick for the
next kilometre or so. I was wondering whether I should give up. I
guess I spent three hours hacking my way through it, then after about
another kilometre of ‘hill-siding’ I was on a relatively clear ridge.
Yarra Falls 3
There are
some amazing wilderness areas in Victoria. Some maybe only a half dozen living
eyes have seen. Such as this. People have been forbidden to venture here since
c1955. This is the junction of Falls Creek and the Yarra River forwarded to me
by an anonymous reader. Falls Creek is seen entering from the left.
Yarra Falls Shelter House
A reader has
located the ruins of this magical place and forwarded some wonderful photos:
‘It is on the South West side of the junction fairly high up, where the tree
ferns diminish (beneath one of the highest on the edge of the spur). It is
extremely difficult to find and you could walk within a few metres and pass
it.’
PS: I realise
that the above is still very incomplete, but I’m sure you will fill in more of
it with your won explorations.
07/06/2019: Helium Too Good to Miss: Outdoor Research’s Helium rain jacket (and pants) are
available at the moment on (Mass)Drop, the jacket at US$99 and the pants at
US$70! This is outstanding value for a highly praised set of rain gear. Whether
they are the lightest/best is always arguable. I have Montbell’s offering which I am quite happy with (but at the time I bought
them they cost me much, much more). If I were currently to be in the market for
rain wear I would be snapping up this offering from Outdoor Research.
Specs
Specs
As you can see
at Outdoor Research’s own page
Massdrop: Helium Jacket
Massdrop Helium Pants
04/06/2019: Ultralight Cutlery: How much can you say? I remember buying my first set of these (I guess ) when I set about hitch-hiking to Cairns and back with a
back-pack when I was about 13-14 years old. I had this, a home-made nylon
sleeping bag cover, a billy and not much else. During the several cyclones I
encountered on the way I found myself sleeping on school and church porches,
covering myself with door mats to try and keep warm even though it was the
middle of summer!
I was
involved in a fatal car accident, the driver who I was with being killed
outright (failure to give way to the right!) even though I did not receive a
scratch, though I was mighty scared trapped in the car with him bleeding all
over me and the smell of petrol everywhere. I camped on the side of the road
near Armidale that night in pretty miserable conditions, waiting for my wet
clothes that I had washed in a stream to dry. Of course I never told my mother
as she might have forbidden further such adventures!
It was one of
these type of sets (below) , and I was immensely proud of it. It no doubt
resides yet in one of the many canoe drums I have secreted in the Victorian
mountains against occasional deer hunting trips – hopefully not one of those
which might have been destroyed by last summer’s wildfires. I still haven’t
been out to check yet. Soon.
You can still
buy them, or much fancier (and no doubt lighter sets) eg this titanium one from
Esbit at 1.3 oz, (40 grams) which is not too bad for three pieces of cutlery
actually eg from Bogong
By the time
Della and I traveled to NZ to live for a year in 1974 (my first time on a plane
actually) I was impressed by the lightweight cutlery Qantas issued on their
747s – and ‘souveneered’ a couple of their light-weight tea spoons. A bit too
small for a big appetite actually – though perhaps I should have reserved them
myself for such rationing!
We journeyed
all over NZ’s South Island on my Honda CB250 road bike with all our camping
gear, sleeping under the stars in all sorts of improbable places. Our long love
affair with NZ had begun. See eg: https://www.theultralighthiker.com/2018/01/17/south-coast-track-fiordland-nz-waitutu-to-westies/
I have tried
out a variety of lightweight cutlery since: lexan, titanium etc. At the moment
(and for a few years now) we are both using Sea to Summit’s Alpha Light
Of course
some people feel they need to have a longer spoon which weighs 12 grams –
wholly unacceptable! – so that they can get at the last of the spag in the
bottom of the pot without burning their fingers! I favour a spoon over a spork
(even though the spork is better for eating fish porridge ablutions
I can get
away with just a single spoon for a journey lasting weeks. However, I always
carry a fixed blade knife as well which is handy for cutting salami, spreading
peanut butter, filleting fish and etc. Its most important use is for splitting
wood to get at the dry ‘heart’ or shaving it to create excelsior when you need
to light a fire in the wet. Kabar Johnson River Piggyback
Some other
lightweight cutlery ideas:
The KA-BAR Tactical Spork
The Light My
Fire Titanium Spork at 20 grams solves the dilemma of whether to take a spoon
or a spork – and if you love titanium, it is a must:
If you would
rather eschew metal altogether – perhaps to avoid check-in luggage you might
choose Gossamer Gear’s Bamboo Spoon long-handled version
If you really
love Gerber gear which I do. I love their pocket knives and their machetes for
example then you should try their Compleat
If you really
want something different (and to drive yourself mad eating with them), you
could choose some Kizer Titanium Chopsticks
Happy
Tramping!
01/06/2019: The Upper
Yarra Walking Track: My friend Gerard White walked
the Upper Yarra Track last week – from Waburton to Walhalla. With his kind
permission here is his account of the trip:
Day 1: Big
Pats Creek to New Federal Mill (21km) (4 people)
Last week
(Sunday) I set off from Warburton headed for Walhalla on the Upper Yarra Track.
I’d read some negatives about the amount of road walking involved but was keen
to see it for myself and the close proximity to home meant I didn’t need to
travel far to start. My usual walking partner had work commitments so it was
solo for me this time, something I wasn’t that used to. I allowed 7 days to
cover the 130k so we agreed to meet in Walhalla lunchtime the following Sunday.
Many of the tracks had closed 1st May so I expected it to be pretty quiet. The
weather forecast predicted snow falls on Baw Baw the following weekend so I
thought that would add another dimension to the walk. Originally it was to be a
bike ride but restrictions on vehicles after closures unfortunately included
bikes.
It was also
my first outing with some new lighter gear; Granite Gear pack, Zpacks Duplex,
EE Quilt, NeoAir, 15g diy fuel stove (made from a couple of beer cans) and diy
CF poles which was strong enough to use as a walking pole (I used one and
carried the other). I was happy to have dropped 4 kg off my base weight.
To avoid the
6k road walk from Warby I started at Big Pats on the ‘Walk into History’
towards Ada Tree, a section I’d done before in cold wet muddy conditions,
stopping at Starlings Gap for lunch. On reaching Federal Crossroads I dropped
my pack and strolled down to Ada Mill No.2 site (a nice camp) to take some
photos teh continued on. About 1k later I realised my diy CF tent pole wasn’t
in my hand and I’d left it leaning against a tree back at the crossroads. I
dropped the pack and raced back to get it, all the way telling myself I
wouldn’t do that again. After collecting water from Little Ada River (filtered)
I eventually reached New Federal Mill around 5pm. It certainly gets dark early
this time of year. Had my usual dinner of dehy rice, veg and tuna and settled
into bed.
Start of the
‘Walk into History’ track
Big Pats
Creek
Tree ferns
Typical track
conditions
Starling Gap
Fallen tree
Boiler
Little Ada
River log bridge
Eucalypt
New Federal
Mill camp
Day 2: New
Federal Mill to Boundary Road (21km) (2 people)
Today’s
walking would take me past Ada Tree onto New Turkey Spur Track, Lashos Link
Track, McCarthy Spur Track then north on Boundary Road along the eastern edge
of the catchment towards Road 20. Info on water sources was sketchy so the
forecast for rain was welcome. There was supposedly a dam on Boundary Rd I was
hoping to reach. After completing the Ada Tree river walk and reaching the
carpark it was time for some of the road walking. With no cars, beautiful
forest each side, wind and birds the gravel road walking wasn’t as bad as I
thought. Rain started pelting down as I reached Lashos. The shower only lasted
30 minutes but it was enough to fill the road runoffs with water. I arrived at
the dam around 4pm and camped on a rather unattractive clearing by the road.
The dam was full but brown and murky. I filtered the water.
Little Ada
River Walk
Ada Tree
New Turkey
Spur Rd
Lashos Link
Track
Lashos Link
Track
McCarthy Spur
Rd
Boundary Rd
Boundary Rd
Boundary Rd
Boundary Rd
Day 3:
Boundary Road to Mt Horsfall (20km) (3 cars)
Up and at it
early I was heading north on Boundary Road towards Road 20 (Whitelaw Track) by
5.30am with a full moon and headlamp (not that were any obstacles). Again tall
forests each side of the road and the rising sun made it quite relaxing. I
reached Road 20 by 8am then headed east along the southern edge of the
catchment within the Yarra Ranges NP. Road 20 was surprisingly unroad like as
it meandered between the trees along a 30m firebreak. Most of the water from
the rain had disappeared and with plans to camp on Horsfall a detour down North
Loch Rd 2k was needed for water, which I collected from a gully then took a
track north through a logged area back to Road 20. Shortly after Road 20
becomes Forty Mile Break. I arrived at Horsfall at 3.30pm settled in and
enjoyed the views to the north to Lake Mountain and south toward Mt Toorongo.
Mt Horsfall is 1134m and has a large clearing on the summit. Just as the sun
was setting three 4wd came past lights on heading west down Road 20. I gave
them a wave and thought to myself aren’t these roads closed? I had phone
reception so called the missus. I also have a Spot which I set off each night.
Early morning
on Boundary Rd
Road 8 into
the catchment
Track marker
Road 20
Road 20
Shortcut from
North Loch Rd to Road 20
Forty Mile
Break
Forty Mile
Break near Mt Horsfall
Sunset on Mt
Horsfall
Camp
Day 4: Mt
Horsfall to Newlands Rd (22km) (1 person + 2 trucks)
Todays route
would take me along Forty Mile Break to Toorongo Rd, Block 10 Rd and Newlands
Rd near the base of Baw Baws NW end where the Thomson River runs. I headed off
early along FMB aiming to reach Toorongo Picnic Ground by lunch. One of the 4wd
passed me as I was packing up heading east. There were a couple of ‘Fire
Suppression Streams’ marked on the map a few km further on 500m south of the
road which were likely water sources. Walking along FMB I could hear a chainsaw
in the distance. It was the chap that passed me on Horsfall who worked for PV.
We had a quick chat and told him my plans. What a great office he has! The
stream at the water point was flowing well and the water was crystal clear. I
didn’t treat it. FMB turns SE at Road 12. At this point you’re only 800m from
the Yarra Falls to the north but I wasn’t taking the risk and going in there.
After reaching Toorongo Rd I made my way to the picnic ground. The place was in
a state of total disrepair; not even a table and chairs. A couple of logging
trucks passed by as I ate lunch, you can hear them coming for miles. The 6k
along Toorongo Rd was a bit of a drag so I was glad to reach Block 10 Rd,
climbed the gate and head east towards the Thomson River to Newlands Rd (marked
as Neuylands on the Rooftop). I’d read there was a nice dam 1k north of
Newlands Rd so that’s where I was headed for the night. The tracks around here
don’t appear to have had much traffic for a while. I found myself a spot on the
track up from the dam and settled in for the night. I was kind of wishing I had
a fishing line, trout for dinner would be nice.
Forty Mile
Break
Track to
‘Fire Suppression Stream’ off FMB
Forty Mile
Break near Toorongo Rd
Toorongo
Picnic area (a bit of a mess)
Block 10 Rd
Newlands Rd
Newlands Rd
Newlands Rd
Track to dam
north of Newlands Rd
Camp near the
dam
Day 5:
Newlands Rd to Whitelaw Hut (15km) (0 people)
Today would
involve the climb up to Baw Baw from Newlands to meet the AAWT NW of Mt
Whitelaw. I’d looked down this track from the AAWT a couple of years ago and
thought OMG and any info I could find suggested it was totally overgrown and
hard to follow. Sounds like fun! I made my way back to Newlands Rd from the dam
and continued SE toward Frangipani Saddle for lunch, crossing the Thomson River
4 times. The track leading up to the AAWT has a sign leading into the scrub
about 400m before Frangipani Saddle which would be a great place to camp. Well
fed on salami/cheese flatbread I headed back to the turnoff, took a few deep breaths,
checked the time and headed east up into the scrub. It’s only 3km to the AAWT
from here but I expected it to take just as many hours. You could see the
remnants of a road and the gap in the trees above but there were plenty of
fallen trees and bushes to push through. A couple of times I lost the way, in
particular where the route dog-legged but I was able to pinpoint my position on
the map and get back on track. Eventually I reached the last Thomson river
crossing only 700m from the AAWT. The river is only 30cm wide at this point and
was flowing well. I bit more of a bush bash and I could see the blue sign at
the track junction with the AAWT. I’d made it. What a relief to be out of that
hell hole and back in familiar territory. It had taken me 3 hours to cover the
3k. It was only 5km to Whitelaw so I could take my time arriving by 4pm. I’d
expected other walkers to arrive at Whitelaw but nobody did…good. The wind
increased and it got pretty cold so I quickly cooked dinner in the chimney and
retired to the tent.
Dam north of
Newlands Rd
One of four
Thomson River crossings on Newlands Rd
Another dam
Approaching
Frangipani Saddle on Newlands Rd – route to Whitelaw on the left
Frangipani
Saddle
Sign post
pointing the way
Overgrown
track up to the AAWT
Crossing the
Thomson
I recognise
that sign – at the AAWT
Camp at
Whitelaw Hut
Day 6:
Whitelaw Hut to Talbots Hut (15km) (0 people)
Today was an
easy day…all I had to do was get to Talbots. I slept in and left Whitelaws 9am
along the AAWT to Phillack Saddle for lunch. Again I had phone reception. It was
still pretty windy and the forecast was for gale force and damaging winds in
West Gippsland tonight …woohoo…but where’s the snow? I arrived at Talbots about
3pm, nestled myself between the rocks and battened down the hatches. At about
6pm it started to pour and the wind was howling through the trees but I was as
snug as a bug in a rug. My only concern was a tree falling on me as I slept
crushing me in an agonising death but obviously that didn’t happen because
you’re reading this. The Duplex performed great (as did my CF poles and other
new gear) and I didn’t have any dramas with condensation.
Baw Baw
Turnoff
Phillack
Saddle, very windy
Baw Baw
Mt St
Phillack
Snow poles
near St Gwinear
View from
AAWT
Rest near a
rock
More views
AAWT
Camp at
Talbots Hut
Day 7:
Talbots Hut to O’Sheas Mill (15km) (6 people)
Another easy
day with only 1200m descent to the Tyers River. That’s easier than going
up…right? Left Talbots around 9am, mucked around at Mushroom Rocks looking for
THE Mushroom Rock but I couldn’t remember where it was. Arrived at Erica carpark
by 11.30am, a real toilet…what a luxury. Sat at the table, had some lunch when
a van pulls up with 5 people, one of who’s face I recognise. Fellow BW member
JohnStrider who runs a group called the Hiking Society. They were headed to
Mushroom Rocks and Talbots for the night. From here to Walhalla was a section
of the AAWT I hadn’t done. Down Mt Erica Rd to the turnoff onto Firebreak Track
to the Tyers River. There’s a nice waterfall near the campground which also has
a toilet and table/chairs and fireplace. Shortly after dinner it started to
rain heavily so it was into the tent and radio on for ‘Dreamtime at the G’…go
the Tigers. . What a life. It rained steadily most of the night but again the
Duplex was excellent.
Mushroom
Rocks
Mt Erica
Carpark
AAWT turnoff
from Mt Erica Rd
Firebreak
Track
Huge eucalypt
Firebreak
Track
Firebreak
Track
Firebreak
Track
Waterfall at
O’Sheas
O’Sheas
campground
Day 8: O’Sheas
Mill to Walhalla (14km) (10 people)
I’d agreed to
meet my missus (Bridgette my walking companion) in Walhalla at the rotunda
between 11-12 so got moving pretty early, crossing Thomson Valley Rd and down
the Fingerboard Spur towards Poverty Point Bridge. It’s a nice walk along the
valley high above the Thomson River. For some reason I thought the track was
down on the river but that wasn’t the case. The rock table and chairs along the
way was interesting and crossing Poverty Point Bridge offers some nice views up
and down the valley. Only a few km to go now I could hear cars below me on
Walhalla Rd then the town comes into view. Past Long Tunnel Mine and down the
stairs to the rotunda and there’s the missus…I’m right on time. Let’s grab a
hot pie and sauce.
Wasn’t a bad
walk and best done when the roads have closed. I just wish it had of snowed two
days earlier.
Gate on the
AAWT near O’Sheas
Fingerboard
Spur Track on Thomson Valley Rd
Fingerboard
Spur Track
High above
the Thomson River
Table for two
please
Poverty Point
Bridge
View back to
Baw Baw
Walhalla
Long Tunnel
mine
Rotunda and
end of journey
It is without
a doubt Victoria’s (if not Australia’s) premier hiking track. Many more people
should be doing ti. From now (31 May 2019 until spring) you should follow the
‘Winter Route’ along the Tyers river -as there will be too much snow along the
Baw Baw Plateau.He did tell me by private communication that my posts about the
track had been a big help.
Here are my
main pages about it:
http://www.finnsheep.com/THE%20UPPER%20YARRA%20WALKING%20TRACK.htm
http://www.finnsheep.com/Track%20Instructions.htm
I have heaps
of posts about this fabulous trtack as you will find if you do a search in the
facility in the upper right hand corner of one of my pages, eg: https://www.theultralighthiker.com/?s=upper+yarra+track
31/05/2019: Ultralight Bivy Bag: How much is your
life worth? Is it worth laying out $80 and carrying 273 grams for example? This
is the Outdoor Research Helium Emergency Bivy, a trimmed down version of their regular Helium Bivy raincoat shelter f foam insulation
Most people
who die on the trail are day walkers. The next biggest group are track walkers.
Bushwackers being more experienced suffer much less. It is worth developing the
experience, but also always being prepared for the worst.
A couple of
other survival shelters to think about: This this cheap ultralight bivys Escape Bivy lighter model
These survival sleeping bags hunting day pack
You can easily make your own bivy for a couple of bucks this
Mind you you
can get a whole tent for 500 grams. One such as this this this little floorless mid A$59.98 delivered is hard to
beat
Here is another
Mind you if
you carry nothing else, carry one of these: If you could only carry two things in the bush, what would
they be? own model
thermal poncho for US$8.
The
Helium Emergency Bivy is on Massdrop now Regular Price
See
Also:
The Compleat Survival Guide
Hatchet
The Ultralight Deerhunter
31/05/2019:
Lake Baikal: 20% of the world’s
freshwater frozen into astonishing shapes: https://www.theatlantic.com/photo/2019/05/lake-baikal-ice-formations-photos/590374/
30/05/2019:
Even More Free Stuff for Hiking: Yet
another sixteen ‘free’ ultralight hiking ideas. Enjoy.
A Cure for Slippery Mats: Big Agnes AXL Air
A Taut String Will Act as a Tripod or a Gun Rest
Fire Umbrella:
World’s Lightest Tarp Clip:
Ultralight Clothes Pegs for Hiking
The Ultralight Trail Baker:
Attaching Tie Downs to Your Pack
Linelok Pack Tie Downs: 7 grams:
Supercat Hiking Stove: Jim Woods
More Fun With Sticky Tape: Ultralight Mylar Vest:
See
also: http://www.theultralighthiker.com/fun-with-sticky-tape-mylar-poncho/
Whoopie Sling Guy Line Tensioners
Adjustable Hammock Ridgeline A
Great Idea: It adds 6 grams to my hammock set-up but improves comfort
much more than that by allowing a flatter ‘hang’ – and it allows for somewhere
to hang your gear. It works on the same principle as the Whoopie Sling
The Spanish Windlass
Side Insulation: Sitlight Pads
Tick Eliminator Tiny
Impregnable Gun Safe:
See
Also:
https://www.theultralighthiker.com/2019/04/29/free-stuff-for-hiking/
You
will find a heap of other DIY ideas here:
https://www.theultralighthiker.com/2017/07/13/60-diy-ultralight-hiker-ideas/
https://www.theultralighthiker.com/2017/07/29/a-hiking-food-compendium/
https://www.theultralighthiker.com/2015/06/14/diy-hiking-gear/
29/05/2019:
Tim Tinker: I am tossing around some
ideas concerning DIY tent stoves as you know https://timtinker.com/
It
had not occurred to me that anyone could beat Titanium Goat’s Cylinder Stove there you are
The
stove uses about 400 grams of wood per hour and produces approx 1,000 watts –
quite enough to warm a two person tent to a delightful temperature – even in
snow!
Tim
has this really ingenious method of rolling an unrolling the chimney:
There
is a glitch. When you get to Youtube select the chimney video.
Tim
has innumerable other good ideas on his website, including food, clothing, DIY
tools, candles…it is quite encyclopaedic. look forward to a long read.
Certainly
his stove has prompted me to think more about simply cutting down the helium
cylinder to make a stove. That will be a fine idea for a relatively fixed camp as I am contemplating,
I
am envisaging pretty much a one-piece stove perhaps around 4″ x 6″
x 12″ inside which you can store the chimney (and other things) and which
you would carry in a small bag on top of your pack (attached perhaps like this this Tim’s excellent website
Some
ideas:
1.
I think the chimney damper can be a slider.
2.
The fuel feed can be either a length of pipe with an air-hole in the top, the
air inlet adjusted with a cup or can (as in the 3rd photo above – but it would
be harder to add wood), or
3.
I would have a rotating or sliding air intake on the front and use a small
titanium plate like this 13 gram one
4.
I will weld three (approx 2″ lengths) of tubing to the bottom rear and
front of the stove (at 45 degrees), then use wooden legs to lift it off the
ground (so I could dry wood under it, another excellent idea from Tim) – I
would have a small bolt half way down the length of this tubing so that the
wood does not touch the stove and smoulder – or I could just have three pieces
of Easton aluminium tubing – and shorter pipes to slot them into…
Lots
to do!
PS:
Tim kindly gave me permission to re-post his excellent photographs.
27/05/2019:
Seamless Tyvek Tipi: a small wood heater to warm it on winter nights new ‘hidden valley’ hunting spot
Two
possible stoves from the scrap metal, one steel the other aluminium I guess. I
will have a play with these and see what I can make. I realise we also have an
old stainless steel cook pot might be adapted.
I
will have twice as many tie-downs as shown (every 2′) sewn in and the
material catenary cut. I will secure them to pegs with line locks so that there
is no vertical force. It will certainly not blow down or leak. The floor will
come up the side walls 4-5″ for a ‘bathtub effect. I will sew some 6″
x6″ vinyl windows in on four ‘sides’ to let in a bit of light and so you
can look out a bit. I will have to also sew in a fireproof fibreglass ‘boot’
for the chimney.
I
have some waterproof zips left over from another project but the way I have cut
this in one piece leaves quite a large overlap which I will utilise just in
case the zips give out – or I can’t be bothered doing them up. Some of this
excess material will make a rainproof hood for an openable vent at the lee-side
top. I will probably also sew on a small verandah above the doorway (which I
will prop up with a couple of small bush poles) as it is nice not to have rain
come in when you open the door. I want to be warm and dry in this shelter at
all times.
I
still have to ascertain the true centre which I won’t know exactly until I have
finished the bottom and the tie outs. I will need a piece of Dyneema
reinforcing in the roof (for the pole – likewise in the floor) I will have a
long cord hanging from the top centre with many knotted loops. I will wind it
round and round the pole to make a clothes line which will dry things nicely as
it will only be inches from the chimney. The tipi including floor will weigh
about 40 oz in Tyvek (22 in silnylon) – 1200 grams (or 660)
I
guess the first trip I will take in a canoe drum, cook set, the tipi and a
cheap raft. The following trip I will take in a second drum, the stove and
other items- unless someone else volunteers to come along with me on the first
trip. After a while I should have lightened my load in considerably, and
as I will have eaten all my food there will be space in my pack for a little
venison on the way out. I wonder whether I will be able to dry venison over the
stove?
The
two dogs assure me that they are coming. I still have to make them some new
beds – even though I bought the material a couple of years ago. This project
will spur me on to doing that as I will be able to leave their old beds in the
canoe drums – likewise a cook set, saw, hatchet, fishing lines etc. Eventually
I will probably leave some old warm clothes, a sleeping bag, raincoat…I want to
carry in as little each time as possible. I might even be able to resupply the
site with winter food on summer canoe trips – though I have not yet canoed this
river. I don’t even know for sure it is canoeable, at my age at least.
About
that stove: There are any number of youtubes
about making propane/helium bottles etc into stoves. As usual most of them miss
several points eg the ability to cook on top, no air leaks (so that you can
have slow combustion). The door needs to be substantially airtight which means
two (hinged) flat pieces of metal tightening against each other when you close
the door, and an air feed slider – a disc would work well. It needs a flat top
with the fire immediately under so that you can pace 1-2 small pots there, or
cook directly on it.
Maximum
surface area is achieved by lying the helium bottle (2.3 kg as compared with 4
kg+ for the propane bottle – both are steel) on its side. You would then cut a
slice off the top so that you could weld a flat top on. It can hang over the
edges and front so that you can simmer.
Right
at the back corner you would cut a <3″ hole and weld a >3″
collar so that you can sit a 3″ chimney inside it. The collar will have
slots on either side for sitting the damper in (a must if you are to have slow
combustion and fuel efficiency).
Another
slice off the front of the stove big enough to weld a flat disc with a square
hole in the middle for the square hinged door, which will have holes drilled in
it so that a round slider (with matching holes)can be rotated in it to control
air flow. Hope that helps.
I
will post some more photos when I am finished the project…
27/05/2019:
This is environmental pollution:
https://www.independent.co.uk/news/world/asia/mount-everest-climbers-dead-traffic-jam-overcrowding-seamus-lawless-a8929761.html https://www.news.com.au/travel/travel-updates/incidents/mount-everest-tragedy-disturbing-story-behind-this-photo/news-story/77b580504abe2bfea1c1dd8f6ddd30f6
26/05/2019:
The Ultimate Camp Shoe:
https://www.theultralighthiker.com/2017/04/14/19-gram-dyneema-camp-shoes/
I
guess that not everyone can sew (which is one reason why I am always coming up
with new ‘no-sew’ ideas (watch this space eg for inflatable quilts), but a
search turned up a multiplicity of such shoe covers on dhgate many of which
might be very good for camp shoes when you only want to keep your socks dry
when answering a ‘call of nature’ in the middle of the night.
They
range form just a few cents each, so you should take a look: https://au.dhgate.com/waterproof-plastic-shoe-cover-australia.html https://hellosunnyshop.com/products/covers?fbclid=IwAR2PbVL929OHMCsjvySi0_gkEtcdyzzTLmfFf__rgA819LOb_7b52DqbTug
Some
borrowed pics to whet your appetite:
26/05/2019:
About those knees: And about that ‘seeming to need a new
knee’… pain is frequently a ‘great deceiver’ (not that it has quite the good
looks of the ultimate artificer). Though you know in your heart of hearts that
your pain has no useful purpose (in that nothing you are doing is causing it or
can do will alleviate it) nonetheless you keep pandering to it like a pampered
child as if if you did not, you would break. Certainly that is how backs and
knees are.
Della
has a new doctor whom she consulted recently about her own troublesome knee.
Like my own orthopedic surgeon (good to find an honest one!) who advised me to
wait on further developments in knees as I would not be happy with anything he
could do right now, Della’s new doctor (an ex-student actually – like
Androcles’ lion good turns are frequently returned) pretty much said the same
thing to her.
Hopefully
something better than a new knee will be along in a little while. This may be
eg a perfection of stem cell treatments (which are currently fraudulent) or
maybe something like this artificial cartilage
Anyway
Della’s doc advised that the only thing which seems to ‘help’ is persisting
with squats until you can do 200 in a row. This is pretty ouchy stuff to begin
with, but for a start try this: you can do about 150 ‘half’ squats while you
clean your teeth at each end of the day. Then sometime during the day (morning
is best) just grin and bear it and do 200 full proper squats. You can work your
way up (numerically) over a few days. It will not be fun. However your knee
will not break, though you may think it will. Surprisingly after a couple of
days of this it will start to feel much better, and you might consider a major
hiking enterprise – as we did (above). I am now hoping (after this Dusky Track Everest Base Camp Trek Bartle Frere
25/05/2019:
Extempore Hiking Poles: You can use Pipe Insulation to make extempore hiking poles or tent
poles when you are in the bush.The piece shown weighs 5 grams. It certainly
saves you carrying hiking poles when you don't need them. When you do you can
cut them to length with this 28 gram DIY ultralight saw
It
comes with an internal diameter of 12/19/25mm- ie 1/2", 3/4", 1' etc.
19 is quite enough for a very stout stick, say 1". It does stretch
substantially. Of course it is not going to last a 3,000 km trek, but it does
make a comfy handle so that you can make a couple of sticks to get you out of a
tight spot (or carry a heavy load of venison out etc) without tearing your
hands to pieces. A couple of sticks reduces the effort of walking out of some
steep gorge by over 50%.
The
foam tube can also be used to protect your tent from damage by your extempore
tent poles by bending it over like this:
Available
Bunnings eg: https://www.bunnings.com.au/k-flex-9-x-19mm-x-1m-elastomeric-pipe-insulation-suits-3-4-pipe_p4920089
24/05/2019:
Winter Tent Stoves: A blast of
Antarctic air is coming through Victoria in the next week so that it might be
time to consider how to warm your tent. This great company Titanium Goat have
extremely lightweight titanium stove (heaters), stove pipes, stove accessories,
and a tent boot you can sew into an existing tent to vent your stove pipe
without burning/melting the tent. They do ship to Australia.
cylinder
stove
Their
lightest and smallest cook-on-top stove weighs a mere 12 ounces (342 grams) for
the original 12″ cylinder stove original small wifi stove tent boot (or jack)
So
at total weight of 29.6 oz or 844 grams – but you may not need any other stove
to cook on (so subtract that from your pack weight). Figure also that you will
have a shirtsleeves warmth in your winter camping tent, and use much less wood
than an open fire (just a small armful for a night’s warmth which it will be
easy enough top carry in from further afield) – and that is is easy to have a
fire and be toasty warm in the snow or rain! Note, they also have larger models
for different purposes. You may be rushing out to buy one or more of
these.
Cylinder: 12oz, Stove body and parts, 4oz pipe wrap, bag, platform, 10oz for 7′
Ti pipe, 1lbs 10oz total weight with 7′ Ti pipe. Capacity:
~485 cubic inches 7.5″ X 12″ Price: US$240
with 7ft titanium pipe )
Wifi: 13 oz. Construction: Titanium body, aluminum legs.
Pipe: Titanium, 1.5oz per ft, 2-3/8 in diameter. Weight: 13 ounces with out
pipe. Size: 11 in long, 5 in wide, 8 in tall. Overall Height: 12 inches. Packed
Size: 13 in long, 8 in wide, 2.5 in tall. Damper: Yes, real stoves have
dampers. Price: US$240 with 4 ft pipe.
wifi
stove
Note:
They also make Tipi style tents Vertex 6.5 Weight: 4lbs 2oz Total
weight, Tent and stuff sack 2lbs 6oz, Stakes 6oz, Aluminum pole
1lbs 6oz Length: 144″ (12′) Width: 132″ (11′)
Height: 78″ (6.5′) Square footage: 102 sq/ft
Stakes: 12 aluminum stakes Pole: Adjustable aluminum pole Currently 2-3 weeks delivery … Grey, Tan, Forest Green.’
Versa
6.5
You
could save quite a bit of weight (600 grams) by cutting your own pole using one of these
I
intend to make my own tipi style tent in Tyvek (coming soon). It will be approx
9′ wide, and should weigh about 25 oz (750 grams) (without floor, stakes,
pole of stove boot). Adding a Tyvek floor will add approximately 13 oz (390
grams). My winter tent and stove will therefore weigh 844 grams (stove plus
boot) plus 1140 tent plus floor), a total of 1984 grams. Not so bad for winter
warmth and shelter for 2-3 people. The load can obviously shared out.
I
may also have a go at making my own stove eg out of a used Helium cylinder. I
have made a number of tipis in the past using poly tarps. One is (from memory)
12′ wide, and one 16′ wide. I heated them with a kerosene heater.
They were magnificent when the frost and snow lay all about. We used to
use the larger one to display stud sheep in at winter shows. We always
attracted a crowd! I will feature them in a future post.
NB:
Images ‘borrowed’ from Titanium Goat. Hope they don’t mind.
Links:
http://www.titaniumgoat.com/cstove.html
http://www.titaniumgoat.com/stove-WiFi.html
http://www.titaniumgoat.com/pipe-parts.html
http://www.titaniumgoat.com/tents.html
http://www.titaniumgoat.com/vertex6_5.html
See
Also:
https://www.theultralighthiker.com/2018/09/09/how-to-carry-a-saw/
https://www.theultralighthiker.com/2017/09/16/fire-umbrella/
https://www.theultralighthiker.com/2018/03/02/tyvek/
https://www.theultralighthiker.com/2017/05/28/tyvek-solo-fire-shelter/
23/05/2019:
The Ultimate Hunting Trip: (or, A Further Use for Toilet
Trowels
I
had noticed on Google earth a piece of country which was likely overlooked by
others as it is well-nigh inaccessible except by Herculean effort. One way in
would involve (to begin) a 20 km trek along a closed track (likely completely
overgrown – as ‘Management Only’ tracks invariable are, as no management is
ever done – public ‘servants’ never work). The other involves a lengthy amount
of 4WDing, then a several hours ‘hike’ down a precipitous slope including finding
one’s way down some pretty scary cliffs, then a pack raft paddle across what
might turn out to be a suicidal section of river. Sound like a sensible
recuperation strategy to you?
If
we succeeded we would have access to a couple of lovely fertile flats (more
than a square kilometre in total) which was bound to be brimming with
Bambis which had never seen a man (or woman). It might just also be that
‘hidden valley’ of our very own we all dream about which we can enjoy alone in
peace and tranquility. And Della (suicidally) agreed to come along with me.
What a wife! (I have known that for nigh on fifty years).
So,
off we went. God knows how much weight I had in that pack – as I brought along
my rifle and my (double) pack raft, two life jackets – and the two dogs’ gear!
Over 18 kg it turns out. Ultralight indeed! In retrospect it would have been
more sensible to have traveled light as a ‘reckie’ and brought along more gear
at a later time if the reckie proved successful. I can tell you that pack
nearly killed me struggling back up that precipitous hill on Day Two. Mind you
there were a lot of very big dingoes along the river there, so that although I
did not raise the rifle in anger, it might have come in handy had we not
‘camped’ where we did! Unfortunately we never got to use the pack raft so it
was completely wasted n this trip. If it had been a $30 one I would have left
it there in the fork of a tree.
I
guess it is almost inevitable that one never gets away when planned, nor that
the journey takes the same duration as you thought it would, nor that the going
proves as easy as it might. I expected to be beginning the walk down to
the river about 10:30am (instead of 2:00pm). Still I never anticipated that it
would need more than four hours to walk that short a distance – but so it
proved to be. Darkness was falling yet we were perched on a 45 degree slope
only about 30 metres (vertically) above the river. The light was just too poor
to see whether we could find a safe way down to a perfect little sandy flat
below! You lose depth perception in low light first. We would just have to camp
where we were.
Getting
‘bluffed out’ is an inevitability of wilderness travel. Just get used to the
idea you will betimes have to spend an uncomfortable night perched on top (or
bottom) of a precipice and be prepared for it. Descending a cliff in near dark
(or in haste) is just foolishness – the kind of thing which gets the young
killed. This is one important difference between being old or young. We were
standing on a horizontal deer path less than a foot wide – say about 25cm. We
could sit there all night and see if we could get some sleep, but then I did
have the handy toilet trowel!
With
(quite) a bit of effort that 25 cm game trail could be (and was) widened to 2′
(60 cm) wide and long enough (say 12 feet – or 3.6 metres) so that we could
both stretch out. Della was (rightly) worried about rolling out in the night –
though we never seem to fall out of bed. I placed some dead tree branches and
excavated rocks along the edges where this seemed likely. It was not forecast
to rain, so that we would only have the dew to contend with (which might dampen
our sleeping bags but would not much effect their insulative ability), but if
it did, we could spread the tent and tent floor over ourselves to prevent a
total drenching. If you do this when it s not raining you will just get a lot
of condensation from the interaction of your body’s warmth and the dewpoint
that will over time saturate your bag. The reason why swags are cursed cold
things really – and were never used by ‘swagmen’
The
most major problem was that (by now) we had less than 1 litre of water (amongst
the four of us!) If we did not eat any of our dehydrated food we would be
‘fine’. Digestion particularly of carbohydrates and protein needs a lot of
water. If you are short on water, best not to eat. Strangely some of us had
brought along two apples and two bananas, and the dogs had two small (wet) 100
gram cans of dog food. We saved one of the bananas for breakfast. We were
pretty cautious of that litre of water as we did not know whether there was a
way down or whether we would have to make it last on the four hour walk back to
the car the next day, so we still had over half a litre come morning. We also
had some chewing gum which is a great source of ‘dehydrated water’ – as I have
mentioned many times.
It
was not the most comfortable of nights we have spent; neither was it the most
uncomfortable! We were warm and dry and our new (winter) mats were very comfy
actually even in such an unlikely place. We both got quite a number of hours of
sleep by sunrise and were significant;y refreshed. In the morning I thought I
should try to ‘slip’ down the cliff with just a daypack containing (mostly)
empty Platypus water bottles. Where we were even the deer had not (quite)
managed to get up and down, though they had been trying. We had also been
trying without success to spot a deer path that went down the cliffs for the
last hour or so of daylight. They will make it into a deer ‘highway’ now.
I
was very cautious descending that precipice, breaking new ground through thick
vegetation, zig-zagging as I went, never descending anything I would not
(easily) be able to ascend. I guess I took about an hour to descend that thirty
yards. By the time I had been down it and up again I had a path I could get
Della safely down (and up). I also had three litres of water- more than enough
for a sumptuous breakfast for all! We just about made ourselves drunk on it! In
any case that was about the best cup of morning coffee I have ever had.
After
dining we both went down for a longer (but not a long) look. It is a very
beautiful part of the world – as the photos show, and I will be back! By the
time we were back at our packs (on the deer path) though it was already 12:00
mid-day and so (past) time we needed to be heading back (as we had a dinner
engagement we had to meet – we were late), and so could not stay a third day
(unfortunately). It took us another (hellish) four hours to crawl our way back
to the car, followed by another four hours driving home – so all in all a
tiring day. We were both ready for a good night’s sleep!
At
least I now know that I have one way down to the river- perhaps the only (safe)
route for many miles (though on a future expedition I will try for another – on
the way out). There is a ‘ridge’ downriver which is less steep (and there is a
flat on ‘our side’ at the base of it should suit camping), but all along the
river there are vertical precipices (and the satellite pictures did not show
this) . Once down the river is easy and safe to cross via pack raft (there is a
very long pool – more than a kilometre) between major drops. There are numerous
‘beaches’ on both sides, and this will make for a safe crossing even when the
water height is much greater. The relevant gauge height this time (I am not
going to tell you where we were) was .65-.7 metres which is quite low for this
river, though it is ‘canoeable from about .5 to 2 metres apparently – if you
are suicidal). I only add that here as a mnemonic for my own records.
I
have never been to a spot where the reek of deer is so strong. Everywhere it was
like a fresh wallow smell. Or where there is so much deer sign – and the deer
are almost totally undisturbed except by the occasional pack rafter perhaps.
Two very large stags spent quite a portion of the night fighting with each
other just below us. They do make noises. They were watched by at least two of
the largest dingoes (judging by their prints) I have ever seen. I am glad they
did not know of a path up the cliffs to us – though they undoubtedly smelled us
and knew we were there.
‘Next’
time I will tie a canoe drum to my pack on the way in containing a tent,
cook-set, cheap packraft /paddle and other things which I will not have to
carry out again. After a couple of trips I will have reduced my carry-in pack
weight (and the carry out weight), by 5-8 kg, and I will have established a
perfect camp site on ‘this’ side of the river, so that I need never be trapped
by floodwaters that I was unaware of overnight. I should also find a lighter
gun! I will also (hopefully) also have a better route. There is so much rock
there I might even find a dry rock cave to stow the drum in (the one in the photo
would flood) so that they will never be harmed by wildfire, else I can perhaps
place them on a rock shelf and build a dry rock wall around them. They could be
pitoned to a cleft in the rock so that they could not be rolled away by
wombats, etc.
Setting
out. The dogs are keen.
Setting
out – the view down.
The
first bluff. As a warning, there was only one way down here too. a narrow
one to the left of this obelisk. I heaped a few stones on top of it as a
cairn/marker after Della took the photo.
A
yellow breasted robin has fallen victim to a wild cat. in Western Australia
they have a bait for these terrible pests – the cats I mean.
First
view of the river about two-thirds of the way down. Still looks a long way.
But
I am optimistic.
However,
we became ‘bluffed out’ and had to sleep like this on an (enlarged) deer pad.
Spot’s
compulsory photo bomb.
Then
he wants to sleep in my bag.
I
climbed down to the river behind this dead black wattle. Looks pretty
forbidding, doesn’t it?
But
there is a great camp site right here.
And
what a front door! View opposite.
Upstream.
And
downstream – you can just start to see the beginning of the large flat opposite.
After
breakfast Della is all packed up and ready to come take a look too. A pretty
narrow sleeping ledge would you say?
Panoramic
view at the bottom of the cliff.
The
flat downriver will be explored on a future trip.
So
many forbidding cliffs. Glad I didn’t have to climb down this one
(opposite).
Just
upstream there was a cave.
Which
Honey was keen to explore. You could camp here (at low water) and leave the
tent at home.
Not
yet sick of climbing up and down. I am trying to get a better view upriver.
And
this is the view upriver.
As
is this.
And
this.
It’s
quite a nice rapid isn’t it. At my age (and with the level of remoteness)
though I think I would be portaging it. It would be difficult to get a
helicopter into a narrow gorge like this.
The
sides are quite precipitous. I would not have been able to get down this,
though there is another fine camp here.
Just
a couple more glimpses upstream,
And
then we are heading home. I love the way the light changes.About
those knees: And about that ‘seeming to need a new knee’… pain is
frequently a ‘great deceiver’ (not that it has quite the good looks of the
ultimate artificer). Though you know in your heart of hearts that your pain has
no useful purpose (in that nothing you are doing is causing it or can do will
alleviate it) nonetheless you keep pandering to it like a pampered child as if
if you did not, you would break. Certainly that is how backs and knees are.
Della
has a new doctor whom she consulted recently about her own troublesome knee.
Like my own orthopedic surgeon (good to find an honest one!) who advised me to
wait on further developments in knees as I would not be happy with anything he
could do right now, Della’s new doctor (an ex-student actually – like
Androcles’ lion good turns are frequently returned) pretty much said the same
thing to her.
Hopefully
something better than a new knee will be along in a little while. This may be
eg a perfection of stem cell treatments (which are currently fraudulent) or
maybe something like this artificial cartilage
Anyway
Della’s doc advised that the only thing which seems to ‘help’ is persisting
with squats until you can do 200 in a row. This is pretty ouchy stuff to begin
with, but for a start try this: you can do about 150 ‘half’ squats while you
clean your teeth at each end of the day. Then sometime during the day (morning
is best) just grin and bear it and do 200 full proper squats. You can work your
way up (numerically) over a few days. It will not be fun. However your knee
will not break, though you may think it will. Surprisingly after a couple of
days of this it will start to feel much better, and you might consider a major
hiking enterprise – as we did (above). I am now hoping for the Dusky Track Everest Base Camp Trek Bartle Frere
See
Also:
https://www.theultralighthiker.com/2018/08/11/the-compleat-survival-guide/
https://www.theultralighthiker.com/2018/01/10/hatchet/
https://www.theultralighthiker.com/2017/05/28/trowel-peg/
https://www.theultralighthiker.com/2016/11/18/the-rolls-royce-of-back-country-trowels/
https://www.theultralighthiker.com/2015/11/20/ultralight-personal-hygiene/
19/05/2019:
Embryo Wire:
You
can quickly tie a length of it to a couple of sticks. It then makes quick work
of horn and bone. If you hanker to be an Ultralight Deer Hunter
I
am currently using it to lift some ceramic floor tiles without breaking them
(for a bathroom renovation we are ‘working’ on – in between demolishing the
1924 buggy shed, a general farm tidy up, sorting and loading stud sheep for
export, a heap more fox-proof fencing, & etc. We am making a walk in shower
recess (as against our geriatric ‘progression’) where I will re-use them. This
beats re-tiling the whole bathroom, and saves money besides.
PS:
This approx 1 metre length weighs only 5 grams! Pretty good for an ultralight saw
You
can purchase it here:
https://www.ebay.com/itm/OB-Saw-Wire-40-17mm-Stainless-Steel-Rust-Restistant-Dehorn-Large-Horns-/153043302730 https://www.outbackvetsupply.com/product.jhtm?id=687&cid=182
I
just bought two rolls from the eBay store for US$12.52 each (40′ rolls).
See
Also:
https://www.theultralighthiker.com/2016/08/20/a-gorilla-in-the-hand/
https://www.theultralighthiker.com/2017/10/28/the-ultralight-deer-hunter/
https://www.theultralighthiker.com/2017/10/14/ultralight-saws/
https://www.theultralighthiker.com/2018/09/09/how-to-carry-a-saw/
17/05/2019:
Thermarest Lite Seat: I recently bought one of these for Della for
canoeing (weight saving is still relevant if you might have to portage). Her
glutes are a bit underwhelming so she gets a very sore behind after a few hours paddling Klymit’s Ultralight Pillow cuben tape Tenacious Tape
Available
here: https://www.thermarest.com/seating/lite-seat budget pack Crown
PS:
I particularly like the bungee roll up:
See
Also:
https://www.theultralighthiker.com/2019/05/15/cheap-comfy-hiking-pillow/
https://www.theultralighthiker.com/2017/08/25/diy-super-ultralight-pillow/
https://www.theultralighthiker.com/2016/04/14/ul-pillows/
https://www.theultralighthiker.com/2016/08/23/klymit-ultralight-pillow/
https://www.theultralighthiker.com/2016/04/14/ul-pillows/
https://www.theultralighthiker.com/2016/06/10/a-soft-pillow-and-a-warm-bed-under-the-stars/
https://www.theultralighthiker.com/2017/04/04/breathing-trick-that-puts-you-to-sleep-in-seconds/
https://www.theultralighthiker.com/2018/02/24/knee-pillow/
16/05/2019: A Crowning Achievement: I just saw the Granite Gear, the Crown X60 (ie 60
litre) pack on Massdrop for US$120 which has to be very good value for such a
robust award winning hiking pack. As I already have $50 credit from folks whom
I have recommended who have joined, it is hard to pass up. Perhaps for my (70th )
birthday (in August) of father’s day (in September)? The regular price is
US$199.95. I do like the two brown colour options: Highland Peat./ Black and
Fatigue/Dried Sage.
Fully
kitted out it weighs 1140 grams – or 657 grams stripped. You might make your
own simple waist belt as I did for the Gossamer Gear Gorilla
‘We
kept a lot of what you loved about the Crown2 around in the Crown X60. For
mile-after-mile comfort, there’s the removable Vapor Current Mark 2 frame and
molded foam back panel with mesh ventilation channels. For additional hydration
options, there’s a hydration port and an internal bladder sleeve. And for
all-weather reliability, there’s the roll-top main compartment, DWR/Barrier
repellent treatment, and DWR-treated zippers. The side and front compression
straps keep the pack weight close to your body to minimize shifting and
bouncing. Along with a large stretch mesh pocket, there are straps across the
front where you can put something like a tent.’
For
your $120 you also get the Granite Gear Vapor Airbeam Frame
This
is one of the few packs which comes in a torso length option
(15-19”configuration suitable for vertically challenged folks such as Della
(5’) and I. Unfortunately this length is not offered in the Massdrop model, but
18-21” is which might suit folks around 5’6”.
I
personally like a rear pocket but I’m sure we can manage to add one (as Della
did here this beaut pack
It
is made from the virtually bullet-proof 210d high-tenacity Robic ripstop nylon
and 100d Robic high-tenacity nylon, the same as the Gorilla.
‘Specs
Regular
Pack
Torso
length: 18-21 in (46-53.5 cm) Torso
weight: 2.27 lb (1.03 kg) Weight,
total pack: 40.2 oz (1,140 g) Pack
interior dimensions: 23.5 x 13 x 8 in (60 x 33 x 20 cm) Weight,
stripped pack: 23.2 oz (657 g) Weight,
pack without lid or straps: 34.4 oz (977 g) Weight,
hipbelt and lid in day-pack mode: 10 oz (283 g) Weight,
lid: 3.8 oz (108 g) Weight,
hipbelt: 6.1 oz (174 g) Weight,
frame: 5.1 oz (145 g) Weight,
lid connection straps: 0.16 oz (4.5 g) each Weight,
water bottle cords: 0.16 oz (4.5 g each)
Long
Pack
Torso
length: 21-24 in (53.5-61 cm) Torso
weight: 2.37 lb (1.07 kg) Weight,
total pack: 41.3 oz (1,170 g) Pack
interior dimensions: 23.5 x 13 x 8 in (60 x 33 x 20 cm) Weight,
stripped pack: 24.1 oz (684 g) Weight,
pack without lid: 37.6 oz (1065 g) Weight,
hipbelt and lid in day-pack mode: 10 oz (283 g) Weight,
lid: 3.8 oz (108 g) Weight,
hipbelt: 6.1 oz (174 g) Weight,
frame: 7.2 oz (203 g) Weight,
lid connection straps: 0.16 oz (4.5 g) each Weight,
water bottle cords: 0.16 oz (4.5 g each)’
Links:
Massdrop Offer
Granite Gear Site
15/05/2019: Cheap Comfy Hiking Pillow: I was after a couple of
cheap light weight pillows for another project (more about that later), so I
sourced two of these on eBay for less than A$20 delivered (the pair). These
pillows are approximately 18” x 12’ x 4” (45 x 30 x 10 cm) and weigh 100
grams.They have a delightful soft, warm surface, and clearly contain some kind
of insulation material. I slept on one last night and found it to be the
warmest, most comfortable hiking pillow I have ever tried!
The
inflation valve is also more convenient than any I have seen on more expensive
brands – it is so easy to adjust the pressure (with the touch of a button). The
pillow was robust enough for me to sit on (though this may not be recommended)
– Della split a Klymit ultralight pillow
As
is usual with these inflatable things it is obviously made from some sort of
heat sealable fabric. I was planning to cut them down for another purpose
(which I will), but I am sure you could cut yours down to make it a slightly
smaller pillow. I think you could get it to about 2/3 the weight without
compromising its comfort or warmth. Even so, many people would be prepared to
carry this pillow (which is about double the size and weight of my ‘normal’
ultralight hiking pillow (this one
You
should never compromise about a good night’s sleep. After you have had one you
will hike further and happier the next day than if you were tossing and turning
on the hard ground all nght, for example.
Links:
https://www.ebay.com.au/itm/Ultralight-Portable-Air-Inflatable-Pillow-For-Hiking-Camping-Travel-AZ/113675329058?ssPageName=STRK%3AMEBIDX%3AIT&var=413798983665&_trksid=p2057872.m2749.l2649 https://www.amazon.com.au/Trekology-Ultralight-Inflating-Camping-Pillows/dp/B073XH2YND/ref=sr_1_1?keywords=hiking+pillow&qid=1557879557&s=gateway&sr=8-1
See
Also:
https://www.theultralighthiker.com/2017/08/25/diy-super-ultralight-pillow/
https://www.theultralighthiker.com/2016/04/14/ul-pillows/
https://www.theultralighthiker.com/2016/08/23/klymit-ultralight-pillow/
https://www.theultralighthiker.com/2016/04/14/ul-pillows/
https://www.theultralighthiker.com/2016/06/10/a-soft-pillow-and-a-warm-bed-under-the-stars/
https://www.theultralighthiker.com/2017/04/04/breathing-trick-that-puts-you-to-sleep-in-seconds/
https://www.theultralighthiker.com/2018/02/24/knee-pillow/
15/05/2019: 2 Tonnes of Gear off to the International
Space Station: https://wattsupwiththat.com/2019/05/12/liftoff-of-spacexs-crs-17-dragon-cargo-craft/
14/05/2019: You always wanted a transparent tent –
now US$119.99 from oometry.world
13/05/2019: A
Home-made Flamethrower: Boys will be boys…Don’t do this at home: https://imgur.com/LZGM7AB
12/05/2019: Astonishing: Bird that went extinct
136,000 years ago comes ‘back from the dead’ after evolving again: https://www.independent.co.uk/news/science/bird-extinct-back-from-dead-madagascar-white-throated-rail-a8908211.html
11/05/2019: But Stay Away from Chipmunks: Mongolian Couple Died of Plague After Eating
Raw Marmot: https://www.livescience.com/65438-mongolian-couple-plague-raw-marmot.html?utm_source=notification
06/05/2019: Stop
Losing Your Pillow: Does your pillow creep away from you during the
night – or do you sometimes lose it altogether in the dark? I know I do. Here
is a method of preventing that for a weight penalty of 1-2 grams. Well worth
it. i think it is self-explanatory. I have just tied a piece of 1 mm dyneema to
the tabs on either side of their excellent Exped pillow Klymit’s Graham Air
PS:
Some people use a spare garment (eg a t-shirt) to do this, placing both the end
of their mat and the pillow in it.
See
Also:
https://www.theultralighthiker.com/2017/08/25/diy-super-ultralight-pillow/
https://www.theultralighthiker.com/2016/04/14/ul-pillows/
https://www.theultralighthiker.com/2016/08/23/klymit-ultralight-pillow/
https://www.theultralighthiker.com/2016/04/14/ul-pillows/
https://www.theultralighthiker.com/2016/06/10/a-soft-pillow-and-a-warm-bed-under-the-stars/
https://www.theultralighthiker.com/2017/04/04/breathing-trick-that-puts-you-to-sleep-in-seconds/
https://drop.com/buy/xc-carbon-carbon-fiber-playing-cards#overview
91
grams. US $60 (May 2019)
‘No
more frayed edges, stains, or fading: if cared for correctly, carbon fiber
playing cards can last a lifetime. Made from 100 percent carbon fiber, these
thin and durable cards have a twill pattern and a matte surface. In case things
get a little rowdy during gameplay (it happens), they’re waterproof as well.
Spades and clubs have crisp white faces; hearts and diamonds are styled in striking
red.’
From
XC Carbon carbon fibre goodies
See
Also:
https://www.theultralighthiker.com/2019/01/24/a-carbon-fibre-lighter/
https://www.theultralighthiker.com/2018/08/02/packable-rifle/
https://www.theultralighthiker.com/2017/11/03/ultralight-compact-hiking-pole/
https://www.theultralighthiker.com/2018/11/02/the-ultralight-comb/
https://www.theultralighthiker.com/2017/09/17/ultralight-chair-the-litesmith-qwikback-2/
https://www.theultralighthiker.com/2014/08/08/lightest-carbon-fibre-canadian-canoe/
https://www.theultralighthiker.com/2018/11/09/ultralight-cigar-case/
02/05/2019: More Free Stuff for Hiking: My first
sixteen posts about free stuff for hiking
Home Made Pack Raft
Car-Camper Conversion: $50
Catenary Curves:
New Fancy Feast Stove Super Cat Stove Shipito
A Hands Free Umbrella: https://ramblinghemlock.blogspot.com.au/2014/03/umbrella-rigging.html
Simple Hammock Double Up poly plumbing fittings
Ultralight Ground Sheet:
Col Townsend Whelen’s Forester Tent
The
Forester tent is the cheapest of all wilderness tents, either to make yourself
or to buy. It’s the easiest and quickest to construct and pitch, too. And
considering its scant weight and bulk, it’s the most comfortable in which to
live and do your few camp chores. Also, with the exception of the Whelen
lean-to tent, it’s the easiest to warm with a campfire out front.
DIY Super Ultralight Pillow
Budget Pack Mods this one this one
How to Carry a Saw in the Tools section of Bunnings
More about DIY PFDs: 114 grams
Tyvek Jack Russell (Rain) Coat: 13 grams!
Raincoat Shelter:
Ultralight Cups Fancy Feast Stove small aluminum containers
Ultralight Toothpaste: ‘ Tactical
skills weblog Imminent Threat Solutions shares a simple method for making
toothpaste dots by squeezing small, chocolate-chip sized “dots” of toothpaste
onto aluminum foil, allowing those dots to harden for a week or so, and then
transferring to a small waterproof bag. To use, all you need to do is pop a
toothpaste dot in your mouth, chew for a few seconds, and start brushing.’
See
Also:
https://www.theultralighthiker.com/2019/04/29/free-stuff-for-hiking/
You
will find a heap of other DIY ideas here:
https://www.theultralighthiker.com/2017/07/13/60-diy-ultralight-hiker-ideas/
https://www.theultralighthiker.com/2017/07/29/a-hiking-food-compendium/
https://www.theultralighthiker.com/2015/06/14/diy-hiking-gear/
30/04/2019: Free Stuff for Hiking: You really
don't need to spend up big to have great stuff for hiking, hunting etc as I
posted recently here: https://www.theultralighthiker.com/2019/01/30/best-5-spent-on-camping-gear-ever/ https://www.theultralighthiker.com/2018/03/03/ultralight-hiking-on-a-budget/
The Ultralight Fisherman
A Ball of String and a Feed of Cray: http://www.theultralighthiker.com/the-ultralight-fisherman/
Collecting Water: http://gossamergear.com/wp/ever-have-trouble-collecting-water
Ultralight Glasses Case: 12 grams
Straws Into Containers http://briangreen.net/2011/07/diy-single-use-antibiotic-packs.html pliers
A Further Use for Drinking Straws: http://www.instructables.com/id/Fire-Tube-Drinking-Straw-Hack/
Hiking Yoghurt
Bathtime on the Trail: The One Gram Platypus Shower: https://www.platy.com/bottles-storage ( https://www.thermarest.com/mattresses/womens-neoair-xlite
DIY Simple Hearing Aid Safety Clip such as this
No Sew Sandals 80 grams:
DIY Crampons Yaktrax Pros Everest Base Camp walk Vargos
Sawyer Water Filter http://www.backpackinglight.com/cgi-bin/backpackinglight/forums/thread_display.html?forum_thread_id=78861
19 Gram Dyneema Camp Shoes https://goosefeetgear.com/products/down-socks/
The Ultralight Bush Chair
Reader
Jenny wrote to tell me about these wonderful chairs she makes when hiking. She
thinks she could get the pack weight of her chair down to 50 grams. She writes,
‘The material is just a rectangle of fabric, with big seams top and bottom
(bottom for the cross piece of wood to thread through; and top for the cord to
thread through and tie off at the top of the tripod).
The Egg-Ring Ultralight Wood Burner Stove:
Bush Shower: Mechanical Advantage https://www.theultralighthiker.com/2018/08/17/ultralight-camp-shower/
You
will find a heap of other DIY ideas here:
https://www.theultralighthiker.com/2017/07/13/60-diy-ultralight-hiker-ideas/
https://www.theultralighthiker.com/2017/07/29/a-hiking-food-compendium/
https://www.theultralighthiker.com/2015/06/14/diy-hiking-gear/
29/04/2019: Google can do a pretty good job of a
picture. I should run more of my pics by them. Google even knew where we
were from the photo (Pearsondale). i had never heard of it but when I checked
with Maps, it was right! Della has just sent me this version: It really makes
the unedited version look pretty flat. You can read more about the canoe trip
(and what I was trying to photograph) here: https://www.theultralighthiker.com/2019/04/18/long-and-lazy-river/
29/04/2019: The surface area of a sphere is 4pir2
which makes the surface area of the earth about 510 million square kilometres. Divided
by 6 billion people gives about 8.5 hectares or 21 acres per person – but 70%
of the earth is water, so only 30% of that or 6.3 acres, but only about
one-third of the land is good for anything so less than 2 acres per person. An
acre is about 60 metres by 60 metres. 2 acres is about 90 metres by 90 metres.
We feel very fortunate indeed to own 25 lovely acres here at Jeeralang
Junction!
27/04/2019: A new anti-oxidant for heart health: https://newatlas.com/antioxidant-blood-vessel/54338/
27/04/2019:
Wirilda Reflection: We knocked off
early on Anzac Day to have a stroll along the Wirilda Track from the W3 ‘road’
downstream. (I am still recovering
The
river used to be clearer (and may be again) but if you do not mind a bit of
bottom scraping and the odd portage it is a very enjoyable 3-4 hours pretty
much anytime – as there is a constant water release for environmental purposes.
The
river is ‘canoeable’ from at least Growler’s Track on the Western Tyers from
where it would take nearly a week to get to the pumping station – by which time
you might even have grown sick of eating fresh trout, blackfish and spinyback crays
After
you descend to the river you have to cross on some of the old water supply
pipelines – the oldest ones were made of wood, and can still be seen here and
there. There used to be a number of weirs on the river to supply the Latrobe
Valley with water before they constructed the Moondarra Reservoir. If you carry
a pruning saw such as this
There
was no-one else about, even on a public holiday, and a beautiful day!
There
are many little drops like this.
And
splendid limpid pools.
In
which the surrounding bush was mirrored.
The
surface only rarely disturbed by water boatmen or trout.
Della's
Snaps (she is a better photographer than I):
The
dogs certainly enjoyed themselves.
You
can use the Wirilda Track as an introduction to the Upper Yarra Track https://www.theultralighthiker.com/2015/11/17/upper-yarra-track-update-section-one-moe-yallourn-rail-trail/
See
Also:
https://www.theultralighthiker.com/2015/11/22/upper-yarra-track-update-section-two-yallourn-north-to-wirilda-park/
https://www.theultralighthiker.com/2015/11/23/upper-yarra-track-update-section-three-wirilda-to-moondarra/
24/04/2019: Lightest Hiking Garment: I am a big
fan of Montbell gear Ex Light Wind Vest 28 gram shorts
'This
vest is made from our ultra-light, ultra-thin material that offers excellent
breathability. Water repellant and small enough to fit in the palm of the hand
when packed down, this vest is perfect for trekking and running. Its slimmer
silhouette prevents movement in the wind. Packs easily into integrated stow
pocket.'
22/04/2019: Places with too many elephants and too
many lions: https://www.takimag.com/article/the-elephant-in-the-room/
21/04/2019: Hunt 22: World’s Smallest, Lightest
Torch - 6 Grams: 'At barely 1" in length...you wouldn't expect this torch
to be able to do much. You'd be wrong. This multi-purpose flashlight is made
with a titanium body and UV LED rated for a lifetime of use and guaranteed to
be iceproof, smashproof, waterproof, and fireproof. UK25 (Apr 2019) on
Kickstarter.
https://www.kickstarter.com/projects/1025589920/hunt22-worlds-coolest-uv-flashlight?ref=project_link
21/04/2019: Telstra’s Go Repeaters: Your mobile
connectivity problems solved. We have had two different Telstra repeaters over
the years: a mobile CDMA version and a 3G home version. Where we live the
mobile service does not work at all without an external
antenna (See this post
This
used to be a real nuisance until we installed one of Telstra's 3G phone
repeaters ($880 then) in the house (connected to an external omni-directional
antenna). Then our phones suddenly had full 'bars' both in the house and within
about 20 metres of it.
Now
they have upgraded the service to 4G LTE/X which means we could access 64 meg
internet speeds if we had one of their new Go Antennae and an external antenna
- which would be great. I am just waiting to see whether they roll out the 5G
network here this year (unlikely - but who knows?) before I invest (quite a lot
) of money on an upgrade. 5G will provide terabytes of speed per minute, so one
would not want to miss out on that! It will clearly kill the NBN! Telstra has
already rolled it out in lots of places: https://www.telstra.com.au/coverage-networks/5G
The
mobile (CDMA) repeater was also great. I used to use it all the time when I was
deer hunting Fiordland
These
Go Repeaters aren't cheap but if your communication needs are important to you,
you should investigate them.
You
need: https://exchange.telstra.com.au/new-telstra-go-repeaters-bring-mobile-coverage-to-more-places/ https://www.telcoantennas.com.au/antennas/home-office/outdoor/
Telstra Go Repeater Mobile Above Fixed Below
20/04/2019: Neat Feat
Sore
feet will sure slow you down. You need to take good care
Before
I started using this stuff I had cracked heels which were often very painful
and would bleed. After a couple of weeks' use I had heels (feet) like a baby's.
I use it every day now and have never had any problems with my feet again -
including blisters.
Hill-siding
(and ill-fitting shoes Blister pads
See
Also:
https://www.theultralighthiker.com/2015/08/07/foot-care/
https://www.theultralighthiker.com/2016/05/03/keen-shoes/
20/04/2019: A Slow Boat to China – Imagine: you can
still travel by freighter: https://www.youtube.com/watch?v=zaK7-Rmnyn8
I
expected it would take approx three weeks to get any relief but I had very
significant relief after a bit over a a week. The only other effect I had was a
slightly dry mouth which has eased now that I have dropped back to 600. My knee
pain (bone on bone arthritis) which had been very painful all the time has
eased to no pain at all most of the time. Usually I can walk for five km now
with no pain at all – this is after only two weeks! I have just been able to
complete a two day canoe trip
I
bought it from these
See
Also:
https://www.theultralighthiker.com/2018/08/01/count-dracula-had-it-right/
https://www.theultralighthiker.com/2018/10/03/cure-back-pain/
https://www.theultralighthiker.com/2018/11/29/spinal-fusion/
19/04/2019: How much water do you need to drink? http://maggiesfarm.anotherdotcom.com/archives/33182-How-much-water-do-you-need-to-drink.html
18/04/2019: Long and Lazy River
The
Lower Latrobe is a delight particularly like now when most of Gippsland’s
rivers are too low for a canoe trip. From Thom’s Bridge (Morwell) to Lake
Wellington (Sale) is approximately 165 km (by river) or about 8 days paddling
at our normal speed (4 km per hour) and five hours per day. Of course it is all
flat water.
It
can be completed in sections: Thoms’s Bridge to the Tyers-Traralgon Rd
(Sandbanks Reserve) 20 km; Sandbanks to the Traralgon Heyfield Rd 20 km;
Traralgon Heyfield Rd to Rosedale 45 km; Rosedale to Longford 60 km; Longford
to Lake Wellington 20 km. The Rosedale to Longford section can be shortened by
a day by putting in at Crooks Lane bridge off Settlement Rd, Kilmany South which
is what we did on this occasion.
This
section is arguable the most scenic: the river is bounded by a strip of
magnificent riverine gums on both sides, though there are some quite
large sections of forest too. Bird life is particularly varied and plentiful.
There are vast numbers of perfect camping spots along the river.
We
canoed this section in two five hour days with an overnight stop. It would have
been better to have done it over three days and to have spent more time
exploring and fishing but we had to be back. The Vicmaps Rosedale South and
Sale South 1:25,000 are useful along along with the PDF Maps
The
river banks are often quite steep until the river splits (take the right fork).
From then on they are almost always vertical and there are only 1-2 spots you
can exit the river at all in that 2 1/2 hour section! The best of these is on
the left where the river used to rejoin about half an hour below the junction.
Don’t pass it up. The last good flat camp is on the right at the
junction.
For
our trip the river height at Rosedale was .95 metres. The river was in a very
low ‘flood’. It had risen from .75. The Catchment Management Authority had been
letting water out of Blue Rock Dam for environmental flows. I would say the
river would be canoeable at .75 metres but would be very much slower and
require more careful negotiation of the many snags of fallen trees along the
route. It might be a good idea to carry a buck saw in the boat with you
as you might not be able to get out on the bank to portage if it became
necessary. ( I had one of these
All
the photos are in approximately the order that you will see things on the
river:
There
are many magnificent riverine gums.
It
is extremely rare to have a glimpse of ‘civilisation’
Mostly
you just cruise along between parallel strips of gum trees.
This
is the most silent peaceful river I have ever canoed – except for bird song.
Very
serene.
And
relaxing. The temperature was the mid 20s C.
So
many magnificent specimens of timber.
Just
gliding along.
Time
for lunch on this sandbar about an hour after starting out.
Lunch
view.
Then
we are off again. The dogs are anxious about Della negotiating a tricky bit.
But
she makes it easily. She is a veteran of many such canoe trips.
I
think you could to a photo study on historic pump houses.
What
a beauty this one is.
And
this. Must be ancient – you can see where earlier people have cut a canoe from
the bark.
In
its top a magnificent wedged tailed eagle.
There
are plenty of grassy flats along either bank.
And
sandbars to climb out on.
Lots
of things to attract your attention along the river.
You
need to be careful of the snags though so that you don’t end up like this cow.
What
a beauty!
Our
camp site for the night about half way on the right. There was a section of
forest about a km above this on the left where I should have stopped.
Honey
photo bombing the view out the front door of the siligloo.
Time
for a morning coffee.
Off
Spot and I go again.
Lots
of bird life. We were seldom unable to hear or see one of these noisy sulphur
crested cockatoos.
So
many beautiful serene straights.
But
you do have to watch out for the snags.
The
vegetation changes. A bit over half way you start to get rushes and paper bark
trees.
The
banks become steeper.
What
a spread.
Lots
of thought has gone onto the construction of these pump houses. This one does
double duty for picnics.
The
reed beds thicken. You start to see (and hear) marsh warblers and lots of
wrens.
Most
of the anabranches and billabongs are blocked off like this so that you don’t
have to worry if you are going the wrong way (as the map might indicate you
could)
A
fine strand of tea trees – people really did use an infusion from these as a
substitute for tea.
This
is the junction – the only place you might think you are going the wrong way.
Follow the current. It goes to the right.
The
junction would make a fine last camp site. It is nearly the last place you can
get out of your boat. There is another closed off anabranch about half an hour
further on your left. I suggest you have a spell there as you will be in your
boat for 2/12-3 hours without a break after the junction.
A
fine flight of black ducks.
And
a many trees full of straw necked ibis. These dead trees on the left bank must
have been flooded by the river changing course. There does no seem to be any
stock on this long ‘island’, but there are animals: kangaroos and deer.
See
how many dead trees there are behind the reed beds.
I
just can’t help but admire the beauty of these river giants.
A
tragedy here I suspect – an unsuccessful attempt to drain the flooded lost
land.
A
sea eagle watches me going past.
And
Della snaps me practically leaning over backwards to take a photo of him.
Sometimes
the snags nearly block the river. From the junction down you cannot portage, so
you may need to saw your way through sometimes. We were able to easily slip
past every such tangle. You my need to be able to climb out of your boat onto a
log, lift it over then climb back in. Pack rafters will have to watch out they
do not puncture their boats on sharp branches.
A
lost giant of the river.
How
many critters call this beauty home?
The
river flattens out and the banks become lower, but still perpendicular. You are
not getting out of your boat along here.
Spot
would like a run too.
This
$2,000 Hereford has slipped off the bank and been unable to get back into the
paddock. If he could not, how much chance would you have? Be careful not to
fall out.
Longford
Bridge is just around the corner now – and journey’s end for us. We will do
this trip again though, spending a bit more time exploring and fishing next
time. I would go again over easter but we are working in our daughter’s shop –
the Yinnar General Store. Drop in for a chat!
The
water release information can be found here: https://www.wgcma.vic.gov.au/our-region/waterways/current-environmental-water-releases
You
will notice (at 18/4/2019) that the releases will continue all over Easter and
until the end of the following weekend. Now is definitely the time to canoe
this river!
The
River Heights information can be found here: http://www.bom.gov.au/cgi-bin/wrap_fwo.pl?IDV60154.html
Other
great Gippsland rivers: eg the Thomson Wonnangatta
PS:
As you will see from this post my recovery from the back operation
PPS:
There is nearly a week’s canoeing upstream of Thom’s Bridge on the Latrobe
putting in at the Toorongo Bridge at Noojee. The first two days are through
beautiful serene forest. With the release of water from Blue Rock the Tanjil
10/04/2019: The view from L1 – this could be your
descendants’ front window. Notice the huge weather systems continually
peeling off Antarctica, the largest on earth and clearly responsible for most
of the weather we get here in Oz: https://www.youtube.com/watch?time_continue=86&v=CFrP6QfbC2g
25/03/2019:
4” of rain at Mt Hotham overnight. Hopefully
that puts the fires along the Wonnangatta out (though not before several of my
camps there were burned out): http://www.weatherzone.com.au/station.jsp?lt=site&lc=83085&dt=09%2F01%2F2017
10/03/2019:
Asteroid mining is on the way: https://www.gizmodo.com.au/2019/03/new-video-shows-the-critical-moment-hayabusa2-fired-a-bullet-into-ryugu-asteroid/
07/03/2019:
Home Invaders Beware: Length: 2.75
inches. Weight : 602 grains. Speed: 1200 Feet Per Second. Muzzle Energy: 1,925
Foot-Pounds. The 100% Copper Projectile 12 gauge TSR (Tango Shotgun Round)
Nylon is the most accurate, hardest hitting, shot gun round in the world. With over 3 inches of expansion, the TSR
Plastic is equivalent to the power of a
308 Rifle round with the size of a small mortar.http://www.oathammo.com/tango-shotgun-round-plastic
05/03/2019:
510 Gram 2 Person Double Walled Framed
Tent: Not so long ago people thought this was impossible. I have been
complaining for years that hiking manufacturers could not get their heads
around making their products seriously light, so I have been making my own
(such as this this The Fly Creek Hv-2 Carbon this
There
has been a lot of serious thought gone into this tent. There is even room for
my Jack Russell, Spot
I
have been using an 8' x 8' Dyneema tarp for years as a shelter. It weighed 150
grams (I have since added 'wings to it) - I use a piece of Polycro or a space
blanket as a ground sheet. I have slept under it, either on the ground or in a
hammock many, many times. I am careful and I have not punched a hole in it
(yet!) If I had, cuben tape Here
Big
Agnes recommends a footprint to protect the floor. I suggest a piece of Polycro get some Tyvek and make your own
I
have owned a number of Big Agnes products for over 20 years. You probably
already know my favourite is their Cyclone Chair a 6' uninsulated mat which weighs 270 grams
https://www.bigagnes.com/Fly-Creek-HV-2-Carbon
05/03/2019:
Fire at Jeeralang: Just one of the
reasons posts are light at the moment is all the fire activity around. There is
a big fire (less than) 2 km to the South of us. It has so far burned out nearly
2,000 hectares! Such things seem to only ever occur when the wind decides it
will blow from such an unlikely direction (as South) too, so it has sometimes
been heading our way! When we were threatened by fire for two weeks back in
2009 (It got to 200 metres from our east fence that time!) the wind wanted to
blow from the east (which it practically never does).
A
few weeks ago there was a big fire over near Rosedale to the East of us which
also had us worried for a while. There is a lot of forest between that (Holey
Plains) fire and us. The season started well enough, but it has dried out badly
since January. We have missed several promising rain bands. Usually (?) it is
wetter than this around here - and some water in the rivers for canoeing
Fire
along the nearby Jumbuk Rd ridge (or to the South of it) 02/03/2019 (Taken from
Jeeralang Junction). Those flames must be enormous.
Fire
near Jumbuk Rd 03/03/2019 (choppers working furiously to stop it!) It looks
from the fire map as if it got across the road (mainly into grassland) at one
point at least but from what I can see appears to be extinguished on this side.
I can't imagine on that steep country anything but aircraft would have been
able to stop it.
Mind
you, a friend of mine (Neville Somerfield) used to live in 1939 in Jumbuk Road
just where the fire seems to have crossed it this time. Somehow, his father and
the other nearby farmers managed to stop the fire with horse drawn ploughs and
wet bags from engulfing their steep hill farms. (Many elsewhere did not
succeed, and lots of folks were horribly burned). There was nowhere near as
much wilderness of native vegetation and waste land back then though.
Of
course, everyone had hessian bags in the past. They were a excellent fire
suppression devices. I have often used this method to smudge out a grass fire.
You can still buy them from McRoberts feed and grain in Morwell (I have) though
curiously practically nothing comes in them any more. Imagine trying to put out
a fire with one of the new poly bags!
The
fire is now in part of the Morwell National Park (more or less just over the
hill behind us). It is steep, heavily forested, difficult country. I know they
have taken heaps of dozers and other earth-moving equipment past here though.
I'm hoping they can keep it out of the Billys Creek section. So far, so good I
think. I have just been for a drive around on our side of the Jumbuk Rd. All
seems OK.
The
weather is quite calm today (with slight rain forecast tomorrow) so it may be
stopped before it reaches us, or on the road at the top of our property -
otherwise it will be at the edge of Della's garden! It is cooler weather today
(32C) with 30 tomorrow and 20s the rest of the week and no alarming winds
forecast that I can see - so there is hope. About an hour ago (10:00 am
04/03/2019) they downgraded the risk from 'Emergency' to 'Watch and Act', so
clearly the risk has moderated somewhat this morning.
Of
course there has been no fuel reduction or firebreaks etc since they created
the park, previously state forest and much better maintained then. The long
grass in it used to be grazed down by sheep for one thing. Hundreds of koalas etc
will be burned to death if the fire can't be stopped. This idea (National
Parks) is the worst conservation imaginable.
This
young koala was at our mailbox just the other day. They are certainly cute
little guys.
The
sheep have the paddocks fairly well eaten down. There is still some dry grass
on the hill paddocks, but it is thin. We have pushed all the sheep into one mob
in a two acre paddock along the creek where it is either green/bare earth, and
we are feeding them big round bales of silage inside weldmesh circles. They
should survive there. If the fire does come here it will have to first creep
across the dry grass of the paddocks (downhill) to the house which is
surrounded with reasonably well-watered green grass and plants.
We
have three fire pumps, (one mounted on one of the Landies with a 1,000 litre
cube of water). We have two generators which will keep the house and pumps
running if/when the power goes out. We have lots of 3/4" hoses all around
which we can pick up to hose down approaching flames. We have sprinklers on the
roof and under the verandahs. Of course there are only two of us (not counting
dogs who are going 'stir crazy'), and we are not as fit as we might like to be
at present - but we will cope! It was a bit more tense last night. We were
sitting for hours outside on the verandah with the sprinklers going all around
us watching the ash fall like snow all about!
As
a last resort, we can jump in the dam which is surrounded by bare earth or
green grass, so we expect to live. (Everyone always expects to live: The
Spanish have a saying, 'Everything has been going well up to now, said the
peacock at the oven door'!) Of course we would also like to save the house and sheep which we have spent a large chunk of our lives
creating
Other
people are also busily making their preparations all around us. There are all
sorts of strange loads going by. Police have a road block at the Jeeralang
Junction turn-off keeping all but locals (or those with a legitimate business)
out. It is sad to think that there are low-life who will jump to take advantage
of other people's misfortunes. For far too long there have been too many people
just 'voting for a living'. Now almost half the population - it is no longer
the Australia in which we grew up, and alas for that!
Local
people have been posting some amazing photos of the fire. You can view some of
them at a Facebook website my daughter, Merrin set up here.
https://www.facebook.com/TyersFireBrigade/videos/155325458721356/
(I
had the link wrong earlier. Sorry.)
Della:
'03/03/2019: The fire just behind us last night. Not looking good for today.
The emergency map has us well inside the red zone now. The wind, when it picks
up, is expected to blow away from us, so we might be lucky. Staying to defend
at this stage, but the car is packed with a few things. Houses reportedly lost
nearby: My heart goes out to those people. Emergency workers, volunteers and
our amazing community are second to none in co-ordinating this emergency. This
morning feels like the calm before the storm!
04/03/2019:
All quiet and calm here, 5.00 a.m. Hardly a breath of wind in our valley. We have
both slept reasonably well under the circumstances (with an ear to emergency
updates). So far, so good. Thanks to everyone for kind messages and support'.
We
will keep you posted. The firefighters (especially CFA) are as usual doing
heroic work. I used to be a member for years (until I used up about 7 of my
nine lives!) but I feel it is a younger man's task today. With this back and
knee, and being all too likely to collapse with exhaustion from extreme heat
and over-exertion it is wiser to not make myself a problem for others.
PS:
Thanks for all the kind good wishes and statements of support.
PPS:
I had hoped to be doing a post about a day trip on the Thomson River pack raft
There
is more water in the Lower Latrobe. It is a flat muddy river downstream from
Morwell (so take your Sawyer Mini water filter
PPPS:
We drove around the Deep Creek fire last week. Much of the area burned had been
burned as recently as 2013 which shows how low their 5% 'target' fuel reduction
is! Interestingly logged areas (even those which had been logged up to 10 years
ago) did not burn! There is a lesson there! Before (and after) European
settlement people used to burn as often as you could - so at least once a year,
more often twice, just not allowing a fuel load to build up, and also creating
an environment which supported abundant wild life (for hunting and eating!)
When
we had the hill farm, Dobbins Hill (Jeeralang) I was always burning off. I used
to be praised for this by the fire brigades who were nonetheless always being
called by troublesome neighbours who refused to care for their surrounding
land. When the 2009 fires swept through the property would not burn and so created
a fire-break which saved many nearby lives! I can't imagine what good folk
think all this unburnt fuel is doing. Creatures can eat/shelter in fresh
growth, but dry dead stuff is no good for anything.
Someone
I know has from time to time (naughtily) been making their way in to look at
the Yarra Falls
Note:
Wind Direction: On the Vic Emergency App or
website if you want to know which way the wind is coming from you can click on
'Filters' and when you refresh the map it will show you. I usually use Ozforecast . If you click on the day it will reveal the wind speed and direction
for every hour of the day.
27/02/2019:
'Beautiful' dinosaur
tail found preserved in amber: https://www.bbc.com/news/science-environment-38224564?SThisFB&fbclid=IwAR2JP-EYy1NKWQqt2-Sk9sYCADUhFLTsiECUIHrz43rP5avqddtsT4BDcNU
25/02/2019:
Twenty Most Popular Ultralight Hiking
Posts: Just to whet your appetite as to what this blog contains I have
gathered together some of my most popular posts over the last three years into
one spot – and here they are. Each of them has been read by tens of thousand of
people. Hope you enjoy them too:https://www.theultralighthiker.com/2019/02/21/twenty-most-popular-ultralight-hiking-posts/
20/02/2019:
The Saddest Story Ever Told: As a
deer hunter and farmer I am bereft at this awful story. Chronic Wasting Disease
(CWD) has been slowly spreading through deer populations across the USA. As yet
there are no reported cases in Australia I am aware of, but old sheep farmers
such as ourselves will be aware of its similarity to the Scrapie Epidemic
during the 1930s which necessitated over one-third of Australia's sheep being
slaughtered to eliminate it. Ever since the Australian Quarantine Service
(AQIS) has had to maintain the strictest protocols to keep it out from
countries where it is endemic (such as eg in Europe).
Elk infected with CWD[/caption]
Our
Finnsheep
CWD
(like Scrapie) is a prion disease similar to 'Mad Cow' Disease and
Creutzfeldt-Jakob in humans. It is 100% fatal, and unless checked would lead to
species extinction. No vaccine is even possible. For twenty years we spent over
$10,000 pa testing for Johnes disease, a similar wasting disease (but caused by
a bacterium) in order to ensure that the sheep we sold were 100% free of it. Money
we will never recoup in sales, but such costs are just part of the immense
public service farmers do to protect the public and provide them with cheap,
safe food and other agricultural products. Now, fortunately we are able to
administer a simple $2 per head vaccine on a once-in-a-lifetiime basis. Only
yesterday we had clients here from the the Gulf Emirates buying sheep which we
could guarantee are disease free and representing the world's best Finnsheep
genetics.
You
can see from the photo that the poor animals suffer horribly. There are sound
reasons why we have strict immigration and quarantine laws. It is not hard to
imagine that a similar disease might have put paid to the Neanderthals or the
Denisovans, our giant 'cousin' species which are (mysteriously) no more. Both
were fairly obviously smarter and stronger than we are, so strictly speaking
you would expect it would be them who are common and us who are extinct. Such
diseases can be grim reapers.
Hunters
in the US and Canada have a serious problem. It would be well-nigh impossible
to eradicate the disease from the wild populations now that it has spread over
tens of States. Meat testing is available to prevent its spread to hunters but
obviously much greater care with carcass handling will be necessary to ensure
you are not infected.
Here
in Australia we managed to eliminate Srapie and Foot and Mouth Disease and to
prevent the introduction of so many other 'nasties' - Lyme Disease for
example.I note however that a small child recently died horribly from Rabies
contracted from a bat bite. Nonetheless, as you can see such terrible things
can spontaneously arise, so we need to be ever vigilant. If you see animals
behaving strangely in the bush and suspect that they might be infected with
something unusual, you need to report it.
There
is a sheep breed known as Booroola Merinos which are also hyper-fertile like
Finnsheep except their fertility is carried on a singe gene so that in the
normal course of events only half their progeny will have it. By enormously
careful breeding the SA Dept of Ag managed to create a line of them which had
two copies of the gene so that all their progeny would carry it. Some sheep
have a gene which confers an immunity to Scrapie. You can imagine engineering
sheep to have two copies of this gene and so eliminating the disease in sheep
(in Europe for example).
In
wild elk with CWD it would be more difficult but you would expect the animals
which had such an immunity to have superior survival characteristics – which is
no doubt why the animal in the photo above carries an ear tag ie so that
scientists can learn about the disease, even though it seems awfully cruel to
keep it alive. Scientists have engineered sterile mosquitoes in much the same
way in order to eliminate malaria. Perhaps this dread disease (above) can be
controlled before it causes shocking ecological damage.
Many
of us dream of one day drawing a block for the wapiti (elk) ballot on NZ's
South Island. It would be so much nicer to see the elk in this condition. I'm
sure you will agree:
See:
https://www.popsci.com/chronic-wasting-disease-humans-hunting#page-2
16/02/2019:
A truly ultralight tool
kit: https://www.atlasobscura.com/articles/cia-issued-rectal-tool-kit & https://www.atlasobscura.com/places/international-spy-museum https://www.youtube.com/watch?time_continue=1&v=98cl0z2YPzs
15/02/2019:
Landing in Nuuk,
Greenland: https://twitter.com/RayRedacted/status/1089387557941661696
13/02/2019:
Sand and Sea Training: I am starting
to recover a bit from my back op so time for a wedding anniversary toddle
around Sandy Point/Shallow Inlet South Gippsland Vic. As usual Spot leads the
way through the Tea Tree tunnel to the inlet.
Where
we are greeted by this wonderful view. Wilsons Prom in the distance.
You
can see it a little more clearly here.
You
can see why it is called ‘Sandy Point. (I do love these unimaginative, evocative
names (Stony Creek, Deep Creek, Murderer’s Hill etc)
It
might be the Sahara Desert.
Those
beautiful patterns in the dunes.
Just
the odd succulent finding some nutrients somehow.
The
inlet is such a deep azure.
As
you can see I had to sit down frequently, but I am getting there.
You
can walk all the way around the inlet. There are even a couple of small
freshwater creeks as well as water at Sandy Point township (supermarket, liquor
take away etc), and the Shallow Inlet Caravan Park. There is not much between
there and the Darby River or Fairy Cove however. Lots of birds to see though.
Afterwards
we had a delightful meal at McCartins Hotel, Leongatha. Some people can eat an
enormous chocolate mousse like this without putting on weight.
This
is my first 5 km ‘outing’. I had planned to be on the Dusky Track by February’s
end, hoping to hear a moose roar echo around the fiords one more time in my
life, but I just won’t be fit enough this year. Perhaps next. They do sound
something like a Koala Bear such as this little fellow who was at our mail box
this morning when I went to bring it in. There are lots of koalas to be seen in
the sugar gums all along the South Gippsland Coast too.
We
have lots of blue gums in our road for guys like this to eat. View from our
mail box.
See
Also:
The Great Gippsland Circuit
Here
are some sections of it beginning at the Phillip Island end:
http://www.theultralighthiker.com/george-bass-coastal-walk-2/
http://www.theultralighthiker.com/a-walk-on-the-wild-side/
http://www.theultralighthiker.com/venus-bay-no-4-beach-gippsland-victoria/
http://www.theultralighthiker.com/andersons-inlet/
http://www.theultralighthiker.com/liptrap-to-the-five-mile/
http://www.theultralighthiker.com/the-five-mile/
http://www.theultralighthiker.com/liptrap/
https://www.theultralighthiker.com/2018/11/05/liptrap-to-the-five-mile/
http://www.theultralighthiker.com/waratah-bay/
https://www.theultralighthiker.com/2019/02/12/sand-and-sea-training/
http://www.theultralighthiker.com/killer-bees/
http://www.theultralighthiker.com/the-isthmus/
http://www.theultralighthiker.com/on-the-tip-of-the-tongue-2/
http://www.theultralighthiker.com/to-the-lighthouse/
http://www.theultralighthiker.com/glamping-wilsons-prom/
http://www.theultralighthiker.com/nooramunga/
http://www.theultralighthiker.com/there-is-simply-nothing-like-an-old-port-walking-trail/
http://www.theultralighthiker.com/sale-common/
http://www.theultralighthiker.com/blond-bay-lake-tyers/
http://www.theultralighthiker.com/blond-bay-roseneath-reserve-hollands-landing/
http://www.theultralighthiker.com/beautiful-east-gippsland/
8/02/2019:
DIY Crampons: I bought a pair of Yaktrax Pros Everest Base Camp walk Vargos
https://www.instructables.com/id/Better-No-Cost-Crampons/
https://www.instructables.com/id/No-Cost-Crampons/
https://www.instructables.com/id/Emergency-Crampons-for-Ice-and-Snow/
https://www.instructables.com/id/Assured-Foot-Ice-Cleat-Walkers/
See
Also:
https://www.theultralighthiker.com/2016/07/02/4wd-boots/
6/02/2019:
To Build a Fire: Jack London was one
of my favourite writers when I was a kid He wrote lots of stories especially
about the Klondike gold rush at the turn of the C20th. If you have never read White Fang Call of the Wild https://www.theultralighthiker.com/2019/02/04/to-build-a-fire/
1/02/2019:
A Complete Cure for cancer Next Year –
that would be nice: https://www.jpost.com/HEALTH-SCIENCE/A-cure-for-cancer-Israeli-scientists-say-they-think-they-found-one-578939
31/01/2019: Best $5 Spent on Camping Gear Ever: What
is the most useful piece of gear you can buy for $5? Over the years I have
posted about lots of things I carry which cost less than $5 – and some which
cost nothing at all! You will notice many such items in my gear list on this
post: A Gorilla in the Hand
Reflective
Guy Line and reflective clam cleat cord
locks, I posted about these here: The Perfect Guy Line I saw both these items over at Amazon
(.com.au actually) when I was looking for something else – I had just put
in a search for ‘Tent’ and then selected “Cheapest First’ (as you do) and
these soon came up (eg 10 cleats for $1.38!) – and so too many other
interesting items which also answer the question, the Loop Alien (under another name, for example). I realise
even this early in this post that I could have posed the dollar limit of
the question at $2 (or even $1, or ‘For Free’!) and still had quite a long
answer. A
100 ml plastic ‘spice’ bottle as the
foundation for the fishing kit as featured in The Ultralight Fisherman . Mine cost me $1.39 (the sticker said) but I
could have used an empty Nurofen bottle ‘For Free’ (I have gone through
enough of them with this bad back – it is slowly getting better, Thank You)
– though it would have been a little heavier. A number of fishing
essentials to fill out the fishing kit would also come in at well under
$5: a couple of bubble float, a small collection of flies, swivels,
leaders… Self Threading Needles I bought a set of 4-5 for around $3 from
Spotlight. I have only ever used one as I have never managed to lose it
but it strikes me as almost certainly false economy not to carry two – how
much can they weigh? I have done some pretty fancy repair work with it.
Della would be quite proud of my seamstress work. The needle now lives in
the fishing kit as I would use the line for the repairs. Minibic
Lighters. I always carry 2-3 of these.
They are cheap, light and reliable. Sometime (as I have often argued eg How to Light a Fire in the Wet ) they will save your life – either by
preventing you freezing to death or being killed by a wildfire (you start
a back burn to create bare ground to survive on before the fire arrives).
You could include in this category some commercial firelighters or a
section of bicycle inner tube which works really well and does not
deteriorate over time. It can also be used as a ‘springer’ on a set line
overnight so you have fresh fish for breakfast. Is there anything better
in life? I will leave the answer to that question up to you…Still talking
of fishing these Speedhooks are also great. Ultralight Tripod A piece of string and a plastic thumbscrew are
all you need to make an excellent 4 gram tripod. A very few pennies well
spent. I found the crews on eBay – where else? Photon Torch I still like these little 7 gram guys guys even though there are
now better ultralight torches such as these which will make an 11 gram rechargeable
head torch – though they cost more than $10! Minnow Gripper These are a good choice for a spare ultralight
tarp clip, though there are others to choose from (which can even be used to make a kayak) . These are the lightest though. A
whole variety of stoves can be had for
$5. For example there is my own Egg-Ring Stove . There is Jim Wood’s classic Super Cat Stove . The Soda Can Stove. Ray Garlington’s YACC Stove. The Fancy Feast Stove . Wrist
Band Compass: I always have one of these on my watch band.
They cost around $2, as do these excellent watch bands which ensure you never lose your self-winding
watch which you should always use as they don’t go flat and let you down.. Ultralight
bottles and jars. You can use the
micro-dripper bottles for liquids (the kind that eye-drops come in). The little screw top aluminium jars (in various sizes eg from eBay) are excellent
for creams – and no doubt many other uses I have not dreamed of. Cutlery
& Crockery. Most of my stuff in this
category either comes from $2 stores (though often costing $1!) or they
are containers left over from some type of food – like the bowls which
come with Sirena tuna and beans for example. I used also to use Chinese
takeaway soup spoons (as I have not found anything so light and
serviceable. Carrying two is a good idea in case one breaks. This would
still be good advice even if they had cost you $100 each, as it is very
annoying finding you have lost your only spoon about 8 hours walk behind
you! This is the voice of experience speaking! Mini
Carabiners. Lots of these are available
even for less than $1 each though the better ones (which will hold 150
lb!) such as those often sold by businesses such as Zpacks (US$6.95 Jan 2019 for 4) or Mountain Laurel Designs (from US$3) with their company logos printed
on them are much better – and weigh less than 3 grams. They have many
uses: I use one to attach my tent to my pack so that I don’t find myself
at the end of the day without it! Ultralight Ultra Sharp Knives from 3 grams. These plastic scalpels are great too – and will butcher a mature
sambar deer. I have. Ultralight Pillow . Tyvek
Usually costs me about A$6/metre so many useful things (such as a dog coat for example) can be made for <$5, but a bit
over 3 metres or $20 worth will make a variety of excellent DIY tents
which have the added advantage that they are reasonably fire resistant so
that sparks anyway will not melt a hole in them. I have even trialed a
square metre (around $2 worth) as a fire umbrella to keep my fire from going out in the rain. We
allowed the fire to get a little big and the Tyvek a little close but the
concept worked fine and weighed zilch – a couple of ounces anyway – far
better than having your warming fire go out in the rain anyway! Whoopie Slings adjustable centre line guy lines A
Variety of hut booties No Sew Sandals blue foam shoe inserts Windscreens titanium windscreens this trail baker The Ultralight Bush Chair Ripstop by the Rolls Robic or Mountain Series Dragon’s Breath Shot-Shell (each). Probably not available in Australia,
and not really about hiking or even hunting – but I just love them!
What the folks at Reddit thought
Some other interesting suggestions
Other
Ultralight Hiker Budget Ideas:
http://www.theultralighthiker.com/2018/03/03/ultralight-hiking-on-a-budget/
http://www.theultralighthiker.com/2018/03/24/budget-pack-mods/
http://www.theultralighthiker.com/2018/11/04/beginning-hiking/
http://www.theultralighthiker.com/2018/08/31/3f-tents/
http://www.theultralighthiker.com/2018/09/10/make-your-sleeping-pad-warmer/
https://www.theultralighthiker.com/2017/07/13/60-diy-ultralight-hiker-ideas/
See
Also:
https://www.theultralighthiker.com/2016/08/20/a-gorilla-in-the-hand/
https://www.theultralighthiker.com/2014/12/14/the-perfect-guy-line-for-a-hiking-tenttarp/
https://www.theultralighthiker.com/2017/05/10/the-ultralight-fisherman/
https://www.theultralighthiker.com/2016/10/08/self-threading-needles/
https://www.theultralighthiker.com/2015/05/26/how-to-light-a-fire-in-the-wet/
https://www.theultralighthiker.com/2015/03/30/photon-torch/
https://www.theultralighthiker.com/2016/09/27/11-gram-rechargeable-head-torch/
https://www.theultralighthiker.com/2018/10/06/minnow-gripper/
https://www.theultralighthiker.com/2015/03/15/best-tarp-clips-link/
https://www.theultralighthiker.com/2017/10/07/willow-kayak/
https://www.theultralighthiker.com/2015/08/26/worlds-lightest-tarp-clip/
https://www.theultralighthiker.com/2013/05/08/supercat-hiking-stove/
https://www.theultralighthiker.com/2015/07/24/soda-can-stove/
https://www.theultralighthiker.com/2015/03/09/diy-side-burner-metho-stove/
https://www.theultralighthiker.com/2018/03/04/new-fancy-feast-stove/
https://www.theultralighthiker.com/2014/11/13/watch-bands-for-hikingbushwalking/
https://www.theultralighthiker.com/2017/05/19/ultralight-ultra-sharp-knives-3-grams/
http://www.theultralighthiker.com/2017/08/25/diy-super-ultralight-pillow/
http://www.theultralighthiker.com/2018/03/02/tyvek/
http://www.theultralighthiker.com/2015/08/30/tyvek-jack-russell-rain-coat-13-grams/
http://www.theultralighthiker.com/2017/09/16/fire-umbrella/
https://www.theultralighthiker.com/2017/06/02/whoopie-slings-what-a-great-idea/
https://www.theultralighthiker.com/2018/09/21/whoopie-sling-guy-line-tensioners/
https://www.tiergear.com.au/11/products/adjustable-hammock-ridgeline
https://www.theultralighthiker.com/2018/09/21/whoopie-sling-guy-line-tensioners/
https://www.theultralighthiker.com/2016/10/23/toughened-foam-flip-flop/
https://www.theultralighthiker.com/2016/10/23/no-sew-sandals/
https://www.theultralighthiker.com/2016/09/22/fifteen-gram-blue-foam-flip-flop/
https://www.theultralighthiker.com/2015/02/24/spare-shoes-great-for-river-crossings/
https://www.theultralighthiker.com/2015/07/09/windscreens/
https://www.theultralighthiker.com/2017/09/22/ultralight-windscreen/
https://www.theultralighthiker.com/2018/06/27/clever-titanium-windscreen/
https://www.theultralighthiker.com/2016/08/26/the-ultralight-bush-chair/
https://www.theultralighthiker.com/2018/04/21/dragons-breath/
14/01/2019:
Well, it is certainly summer-time: 38 degrees on the verandah, and the garden
offering its bounty of stone fruit. Our newish apricot tree offered its first
picking this morning, while a batch of apricots from Bryn
14/01/2019:
‘How to Grow Old’ by Bertrand Russell (1872-1970). Great advice from the
modern world’s greatest philosopher, a three time Nobel prize winner: https://sites.google.com/site/gobenyan/essay
11/01/2019:
What a great 'whodunit': https://www.popsci.com.au/science/nature/did-a-gigantic-bird-really-eat-a-neanderthal-child,514746
07/01/2019:
Dry Change 5.7 oz: The Massdrop Veil range has to constitute
just about the lightest and cheapest dry change you can carry when hiking. I
have had the similar thing in Montbell (a few grams lighter) and dearer for
many years. I have used them a lot (of course mostly in camp) and they are
still as good as new. I have never found that they grow at all clammy in the
temperatures I generally am out in (ie autumn and winter Victoria, Australia).
So
long as you don’t require warmth in your dry change they are fine. I usually
carry some Montbell down garments and some down socks, as well as an insulated
beanie for when it it going to be really cold. When it is going to be
particularly cold I carry some wool thermals instead of the ‘wind’ gear
https://www.massdrop.com/buy/massdrop-veil-wind-pants
https://www.massdrop.com/buy/massdrop-veil-wind-shell
Total
= 162 grams 5.7 oz & $119.98.
NB.
Some people wear these ‘wind’ garments as their everyday hiking garments. This
would work out fine on the trail, and they would likely last as long as you
would expect – but they would certainly not be suitable for bush-bashing.
See
Also:
http://www.theultralighthiker.com/2018/09/28/a-wind-shell-and-an-umbrella/
http://www.theultralighthiker.com/2018/08/16/how-many-clothes-should-i-take-in-my-pack/
http://www.theultralighthiker.com/2018/01/23/ultralight-clothes-pegs-for-hiking/
http://www.theultralighthiker.com/2018/08/17/hiking-washing-machine/
http://www.theultralighthiker.com/2017/10/01/ultralight-shorts-28-grams/
http://www.theultralighthiker.com/2016/09/17/vapor-barrier/
http://www.theultralighthiker.com/2016/09/21/montbell/
http://www.theultralighthiker.com/2013/12/29/hiking-pants/
07/01/2019:
Rubisco. You may not have heard of
it but it is the enzyme responsible for photosynthesis and thus practically all
life on earth. Unfortunately it is woefully inefficient (ergo there is no God)
but photosynthesis can be engineered to be more efficient using different
enzyme pathways. These scientists have improved plant productivity by 40%. That
is seriously big news: http://science.sciencemag.org/content/363/6422/eaat9077
‘The
Victorinox @work collection is for the rugged outdoorsman who embraces modern
technologies. Each item in the series features a host of versatile stainless
steel tools and a removable 16GB USB 3.0/3.1 stick with a read speed of 115
MB/s and a write speed of 25 MB/s. The Jetsetter@work has six tools including
scissors, a bottle opener, a Phillips screwdriver, and a wire stripper. It
comes with silver Alox scales. For more functionality, go for the Midnight
Manager@work. Featuring a whopping 10 functions, it also includes an LED light.
Small
Pocket Knife with Removable USB Stick
USB
stick 3.0/3.1 tweezers pressurized
ballpoint pen small
blade
scissors nail
file screwdriver
2.5 mm key
ring
Jetsetter@work
Midnight
Manager@work
02/01/2019:
What a wonderful approach to thieving bastards. Do play the video: https://www.businessinsider.com.au/nasa-engineer-mark-rober-makes-glitter-bomb-parcel-thieves-2018-12
01/01/2019:
More Fun in the Rain: Ponchos,
Umbrellas or Raincoats? That is the question. What’s the best way to stay dry
in the rain and enjoy yourself in the outdoors while doing so? I have been
soaking wet, all over, every ‘warm’ layer down to my skin, more times than I
can count. Mostly of course it was when I was hunting sambar deer with hounds
in the Gippsland mountains, a pastime I loved passionately and pursued
enthusiastically for over thirty years. I regret nothing.
This
was my second ‘Harpoon’ whom I had to give away to fox hunters when foxhounds
were (stupidly) banned by the ‘government’ of Victoria in 2005. The Government
alleged that these hounds would attack deer or other game, but my beloved
hounds never laid a glove on anyone or any thing. He had gotten a bit fat from
his enforced retirement here. On a single hunt he could run himself from this
condition to looking more like a greyhound in shape – and might have covered
70-150 kilometres in a day. (On the flat he could do 40kph for a sustained
period). I had often covered 30 myself chasing after him – I could take some
short-cuts; he had perforce to follow wherever the deer led!
This
is he in the dog pens on the day he left me forever, a very sad day for me as
three generations of Joneses had hunted with hounds in Oz (four, counting my
kids) – but no more! – strangely I do not have a (decent) photo of a single
hound in the forest in all that time, or more than a handful of blurry photos
of my actual hunting.
It
was all much more about ‘doing’ than anything else – and pictures were very
expensive. I mostly have to rely on memory alone to conjure up images of those
faraway days. He would be long ago dust now, but what a magnificent hound he
was – and so too the first Harpoon. I hope he has descendants somewhere,
and that they still get to hunt something.
A
Flourbag Stag 1990 – another wet day by the look of the raincoat, the
waterproof hat and the sodden woolen trous. I often used to hunt it by myself
back then sometimes taking a deer bailed in the Thomson at sunset, perhaps
below Bruntons. After the 2008 fire there was a huge pile of the poor beasts
boiled alive in a hole just below the Flourbag Bridge not quite being able to
make the refuge of the deeper water of the river in time before the awful
flames consumed them. Poor forest management is such a dreadful thing.
This
chap I put up just by myself. He was on the other side of this overgrown track
which I was running along towards the hunt. He foolishly decided to cross it
just as I came around the corner. The old SMLE or Mauser (I forget which)
spoke, and stopped him in his tracks. There are lots of folks think you have to
own some expensive gun, but there is no better gun than these old WW1 weapons
that you can have for a song (just A$100 or so) – and they are indestructible!
They were the only ones I owned until my wonderful wife gifted me a new gun for
my 50th birthday in 1999! A Browning Lightning.
A
Deep Creek Stag 1990. You can see I wore heavy wool clothes back then. I recall
I had to wear yet another layer in the 80’s and warmer socks too – it was much,
much colder back then, though it was warmer still than it is today earlier on
than that. Weather is changeable.
A
Ross Creek Stag also 1990 – I must have afforded a roll of film for the camera
that year. Times were often that tight! This stag was so large bodied that it
needed the two of us to roll him over to gut him – even on that steep slope. He
probably weighed well over half a tonne!
Frankly
I loved wet day hunting. Everything seems slowed and quieted by the prevailing
dampness. Usually there was no-one else about. Most folks think they will
dissolve. Once you find a deer, it is easy to follow his tracks in the moist
earth. Though the echoing voices of the hounds are somewhat muffled too, the
sound is controlled by the rain; everything seems to move more slowly yet you
can keep up better as you don’t overheat so much. There has never been rain
wear made which will not soak you to the skin while pushing as hard as you can
go through wet bush in a deluge.
Remember
too that I always did this in winter in the mountains where the temperature was
never much above freezing. Moving along a ridge or walking up a creek where the
vegetation was thinner would enable your body heat to dry you out somewhat,
then you would be ploughing through the thick stuff again trying to get to a
bail-up or to cut off a deer eg heading for a saddle, and you would soon be soaked
with ice-cold water again.
Maybe
you can imagine me thundering around this rock pile, slipping and sliding.
And
then splashing on upstream hoping to get to a bail-up, or forcing my way
through that thick wet stuff to the side of the creek?
Of
course I would often also fall over in a creek when I was hurrying up or down
it, my feet slipping on wet rocks (some boots are better/worse for this, mostly
worse) and over I would go, often completely under the water.
Yet
I was young(er) and fat enough I never felt cold till the end of the day when I
stopped. And of course I always wore wool which insulates you well even
when it is wet. Then I was back at my truck and had a dry change of clothes and
(soon) a warm fire (you really must learn to light a fire in the wet
A
couple of stubbies of beer never hurt either! In recent years I swapped to
overproof rum – when hiking at least, as my toddy at day’s end. Now I am
completely tea total, which at least lightens your pack substantially on a
multi-day hike – in my case by more than a kilo! The penalties one has to pay
to be ‘the ultralight hiker’!
And
of course I always had a shelter such as the one below to keep me dry while I
ate my evening meal and maybe waited for a few last hounds to come in – or
often enough I would sleep in the shelter and hunt again the next day – rain or
shine. I do so miss those days, but I am enormously glad I had them. I am
greedy for such pleasures – thirty years or more was not enough! I have had
another dozen years hunting without the hounds now – and they have brought me many pleasures
Here
is one of my old mates Brett Irving enjoying a couple of cans of VB as he
shelters from the rain before a cheery fire on the Tambo years ago (c2000). A
couple of blokes can easily sleep dry and cosy under such a simple shelter –
you might drop the height a bit for sleeping to create more horizontal room.
This height is for standing or sitting. This tarp probably cost me less than
$A10 and was used for decades and is most likely still hiding in a corner of my
shed even now! Well I know exactly where actually.
Brett
had to go home to his wife but I had a couple more wet days of it to myself
which was grand! The river flooded and neither deer nor hounds could cross, yet
I was out all day every day sloshing through it, and loving it. I don’t
remember whether I took a deer or not, but it doesn’t matter.Being out in the
wet bush enjoying yourself while all the world is at work (and thankfully
somewhere else) is just delightful!
Actually
I recall I did take a deer, a small doe on the third day, small enough to carry
out whole, rigged like a backpack (I was younger then). They have mysteriously
closed most of this splendid area to hunting now (hounds anyway). I don’t know
who is supposed to manage the very numerous deer there in this case. On one of
the days walking up a side gully I put up a mob of over ten of them. There
would be more than that now!
Oh,
here are two of my favourite old hounds: Poono (Triclour) and Belle her mother
a Bloodhound-Foxhound cross – no better bitch was ever whelped. In Jacob’s
Creek in 1996.
There
was a time (as you can see) when Della and I (at least) wore ponchos. Here we
were in 2008 just after the fires walking along the Moroka (to have a good look
at the fishing in the Gorge, apparently) These ponchos don’t look the height of
sartorial elegance do they, but this was a sub-zero day even though it was
February? It was so hot at home we were looking for somewhere cool to go, but
not that cool.
The
thermometer on Stephen’s truck read -6C when we started hiking. I own I was all
for heading home (Della gets cold) but Stephen was all for forging on, so we
did. We walked all day in the rain and camped that night somewhere by the
Moroka. It was cold enough to freeze the water in your drinking bottle if you
left it outside! Some of us did.
All
day I had been being chyacked for collecting small bits of dry kindling along
the way into a shopping bag I happened to have in the back pocket of my pack.
Sometimes I would find a handful of dry leaves or twigs inside a hollow log, or
some small dry twigs under an overhang, or s strip of the dry inner bark of a
stringybark on the lea side of the tree – and so on. By day’s end I had the
beginnings of a fire – and Stephen did not. The Cleavers, needless to say had
to warm themselves by our fire!
Mind
you Stephen did catch a fish – something he was brilliant at. Here is one of my
last photographs of him doing the same on the Tyers River in 2009. I can’t
believe it is eight years since I last talked to him. Carpe that old diem
little ones. Tempus Fugit.
The
home made ponchos kept Della and I perfectly dry whilst the Cleavers’ much more
expensive (bought & guaranteed) rain coats had them wet to the skin by the
end of the day – and cold. You do get more air flow in a poncho, particularly
one that your pack thrusts up like this to make you look more like a pregnant
camel! Nonetheless their roof-like structure has plenty of air under it so that
you don’ t drown in that dreadful humidity we ran into that day, and this other
day (below) on the South Coast Track, Fiordland New Zealand.
Della
is still smiling through it as is her wont: she is a trooper.
But
mind you we were all much more comfortable back in the lovely shelter of the
Moroka Hut.
I
walked to the Wilsons Prom Lighthouse with the Cleavers in 2006. They had even
worse raincoats then…
I
had this small ultralight home made poncho. They both laughed at it when I put
it on as it began to shower as we were coming down onto Little Waterloo Beach –
as good a beach as anything they have anywhere in Qld, or anywhere in the world
for that matter. By the time we had walked back up to the Telegraph Track
(maybe two km) such an icy rain had fallen that they were both soaked to the
skin and were starting to suffer from hypothermia. The top half of my body was
perfectly warm and dry in my ‘ridiculous’ poncho (though my hands were very
cold). We retired to the tea trees at the intersection and I brewed a cuppa for
us all and rifled through my back pack for dry clothes and emergency ponchos
for them for the walk out. Though I am ‘the ultralight hiker’ I always have
just a little too much gear ‘just in case’. It never pays to be ‘dead right’.
This
is my new ‘pocket poncho tent’
Here
we were on the South Coast Track Fiordland New Zealand 2016 on the last day (or
eight) coming out from the Port Craig Schoolhouse. The day turned very
wet, humid and cold. Della is still smiling bravely here as she admires this
swollen stream but by the time we reached the relative shelter of this bach’s
woodshed for a lunch stop she was pretty wet and cold. Lunch and a cuppa
cheered her, but she put all her layers on for the afternoon’s walk out to our
car – and a hot meal and a bottle of champagne (for her) at the Hotel in Tuatapere.
It
was so humid in the woodshed that my waterproof camera fogged up so completely
I was lucky to be able to snap a photo of her finishing a last apple – yes, an
apple at the end of an eight day hike. You will have to read about it here: http://www.theultralighthiker.com/2016/04/25/south-coast-track-fiordland-nz-dellas-version/
The
benefits of an umbrella are seriously overlooked. I have written many posts
about them. My lightest is 86 grams http://www.theultralighthiker.com/2017/12/14/a-hands-free-umbrella/
There
are folks who claim that the humidity will not soak you if he raincoat is tight
enough. Now often I put on a bit more weight in training than I would
necessarily want to, so last year’s raincoat is pretty well skin tight before I
have run off a bit of that condition. I can assure you it is not true. The
wicking action does not overcome the humidity but an air space such as an
umbrella or a poncho affords certainly does.
See
Also:
https://www.theultralighthiker.com/2018/02/23/how-to-have-fun-when-hiking-in-the-rain/
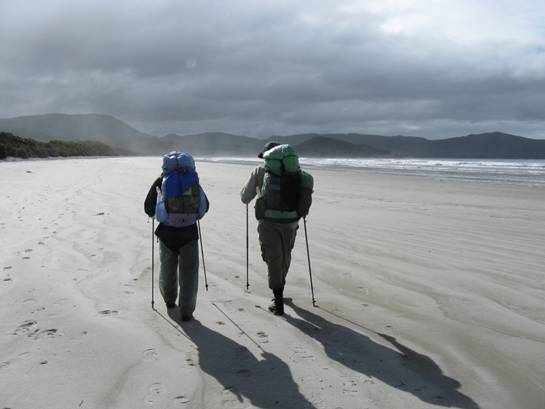
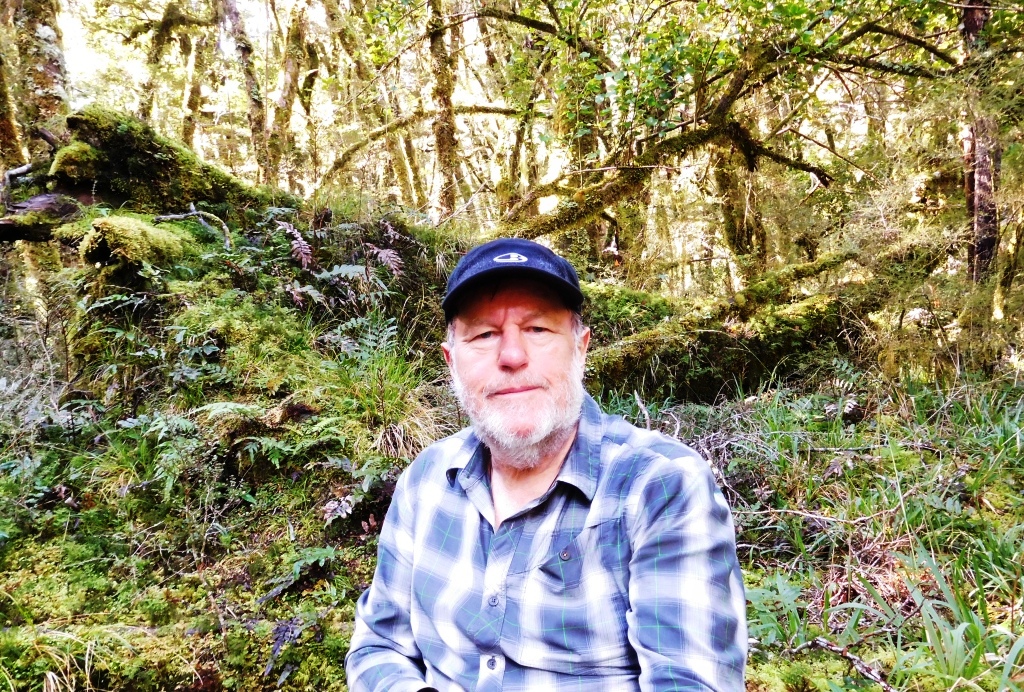
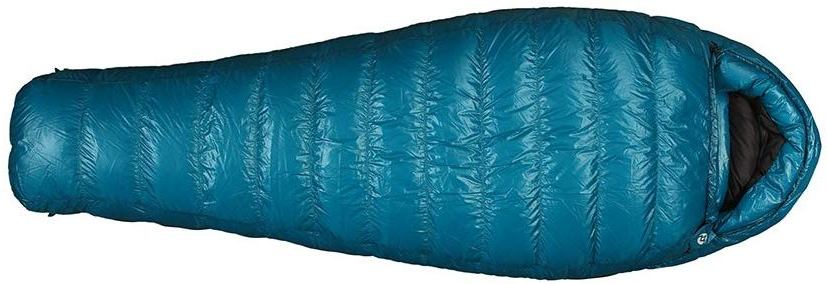
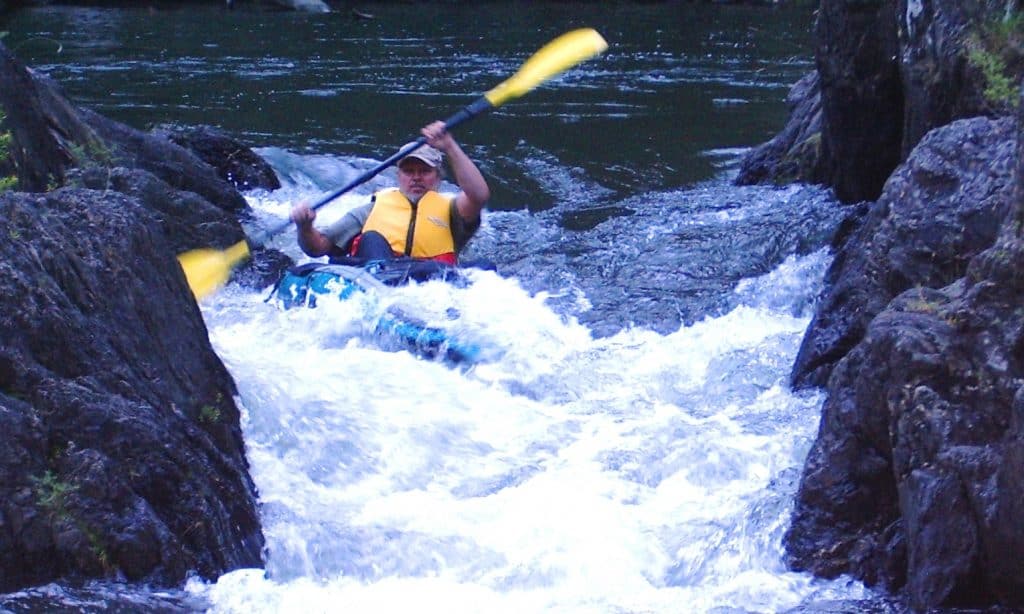
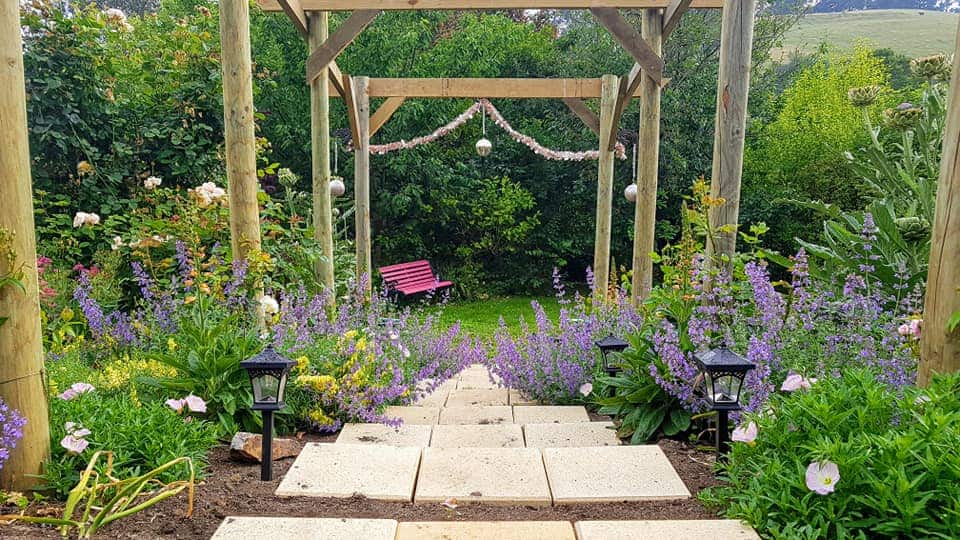

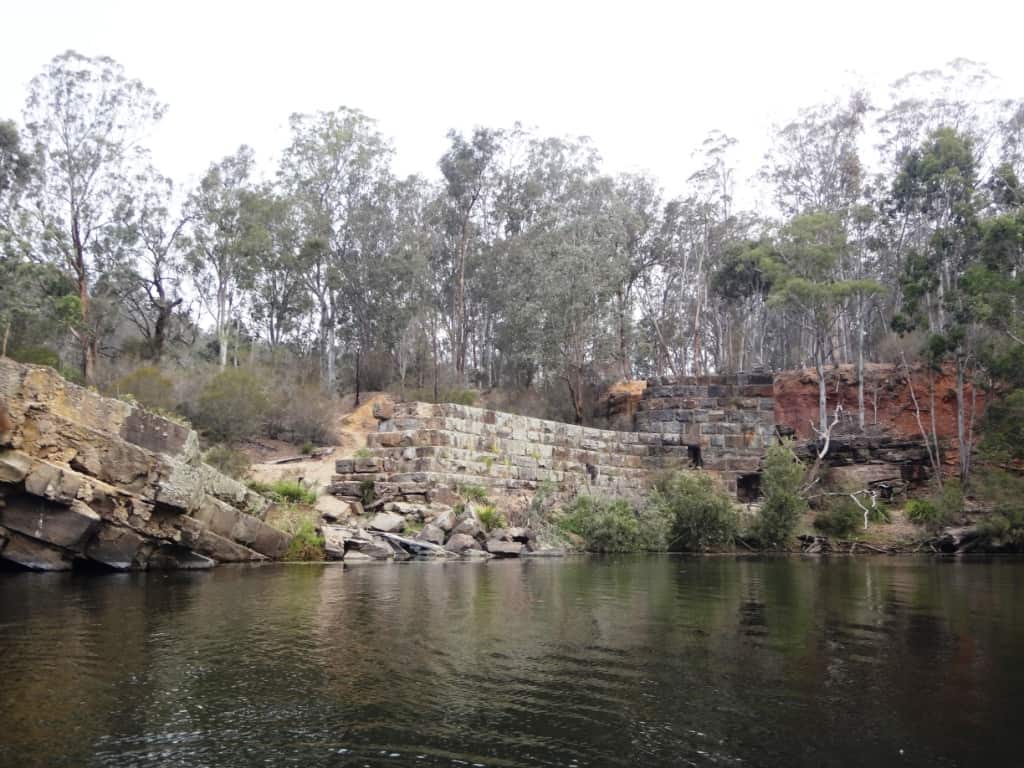

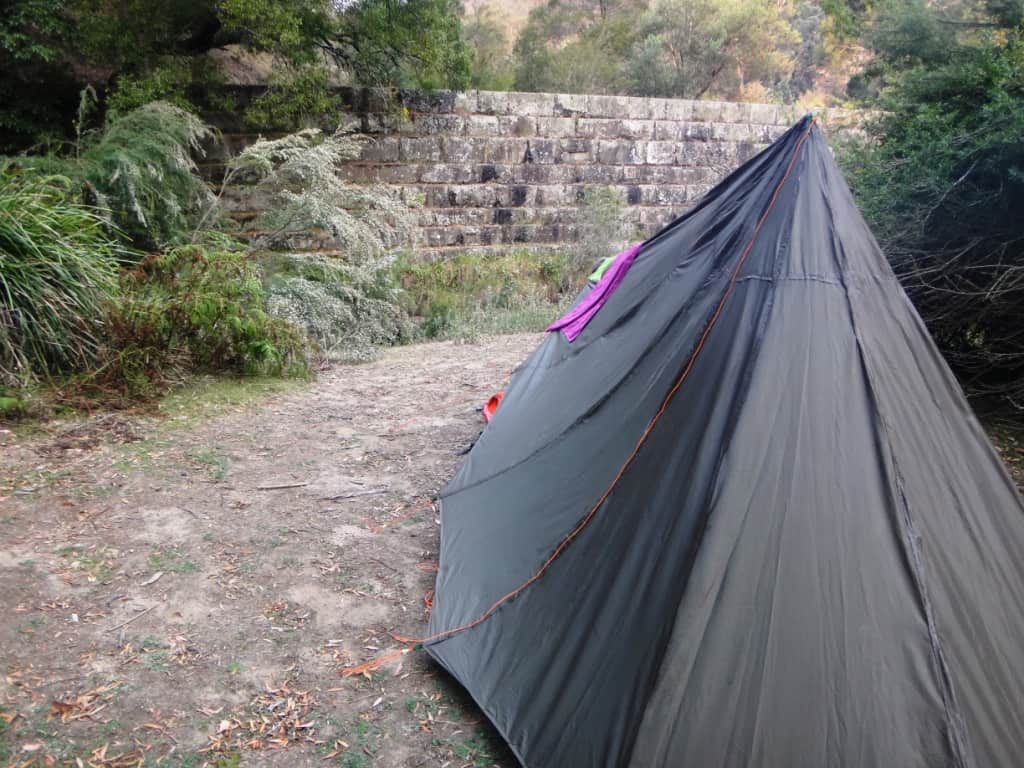
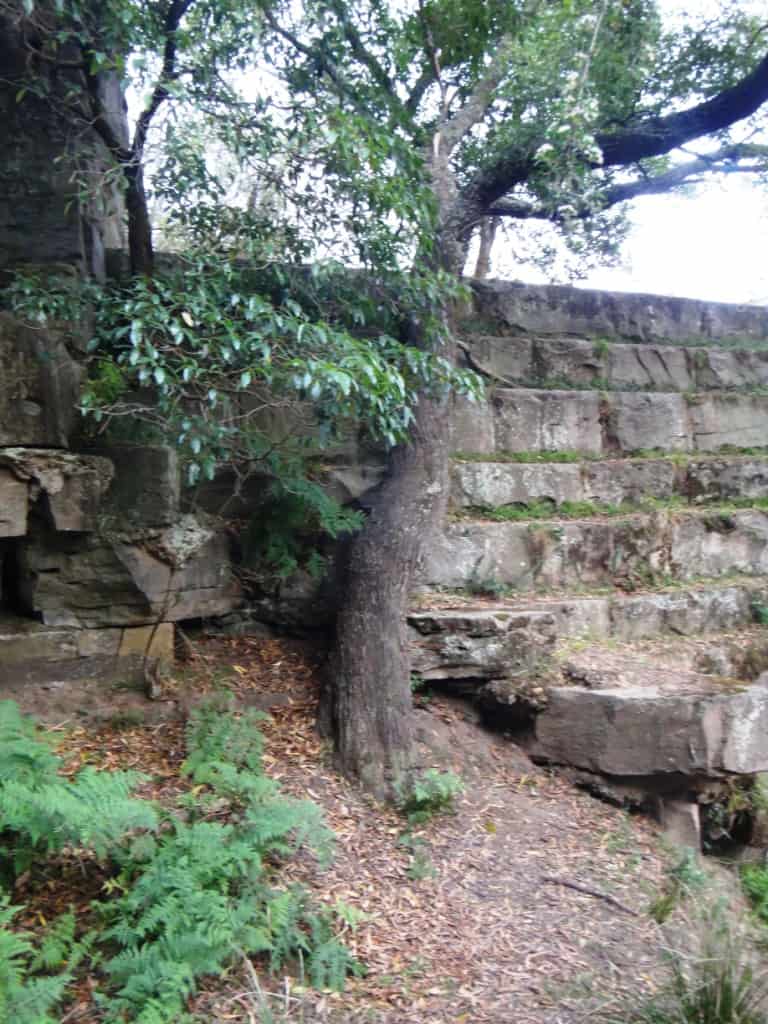
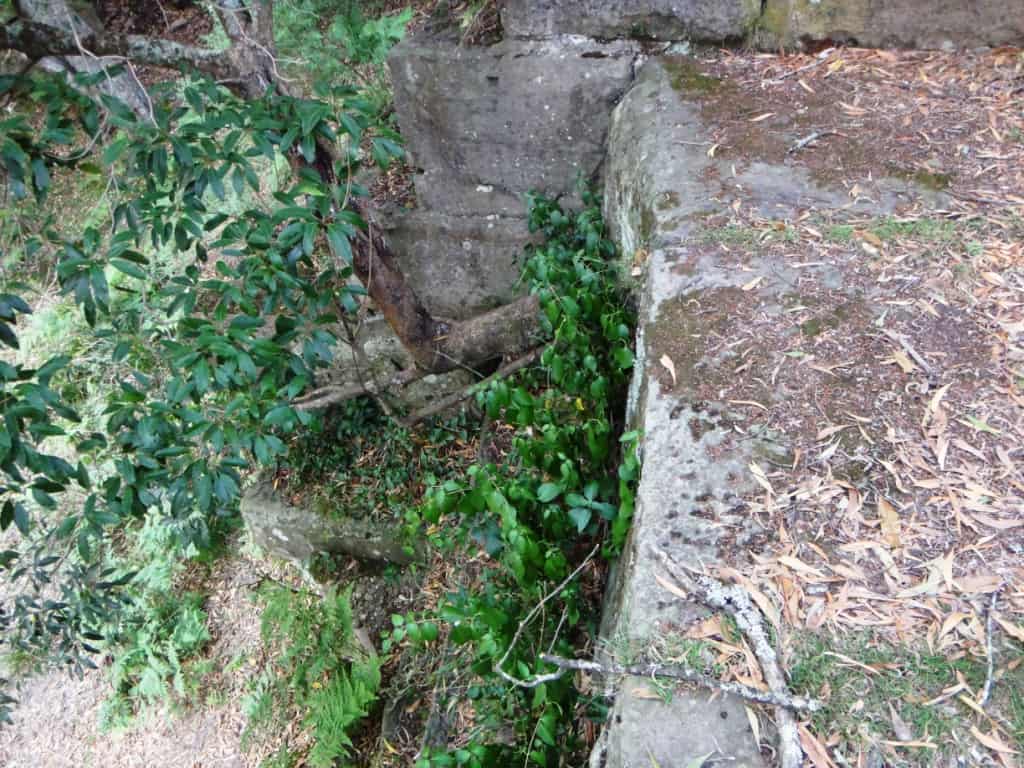
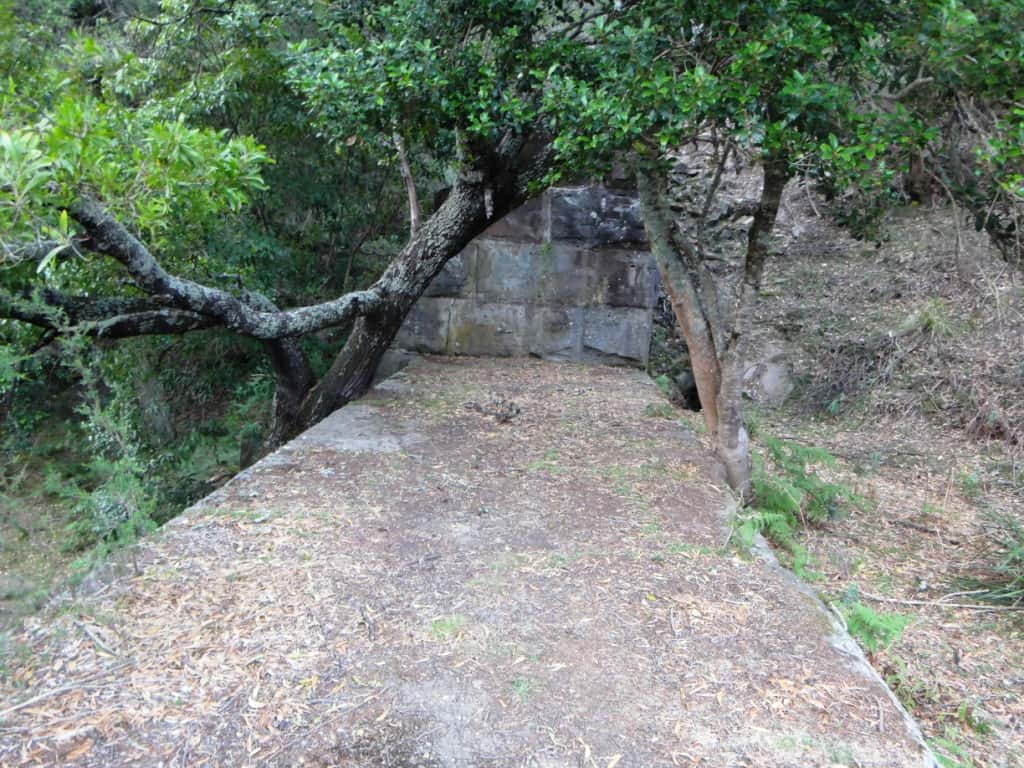
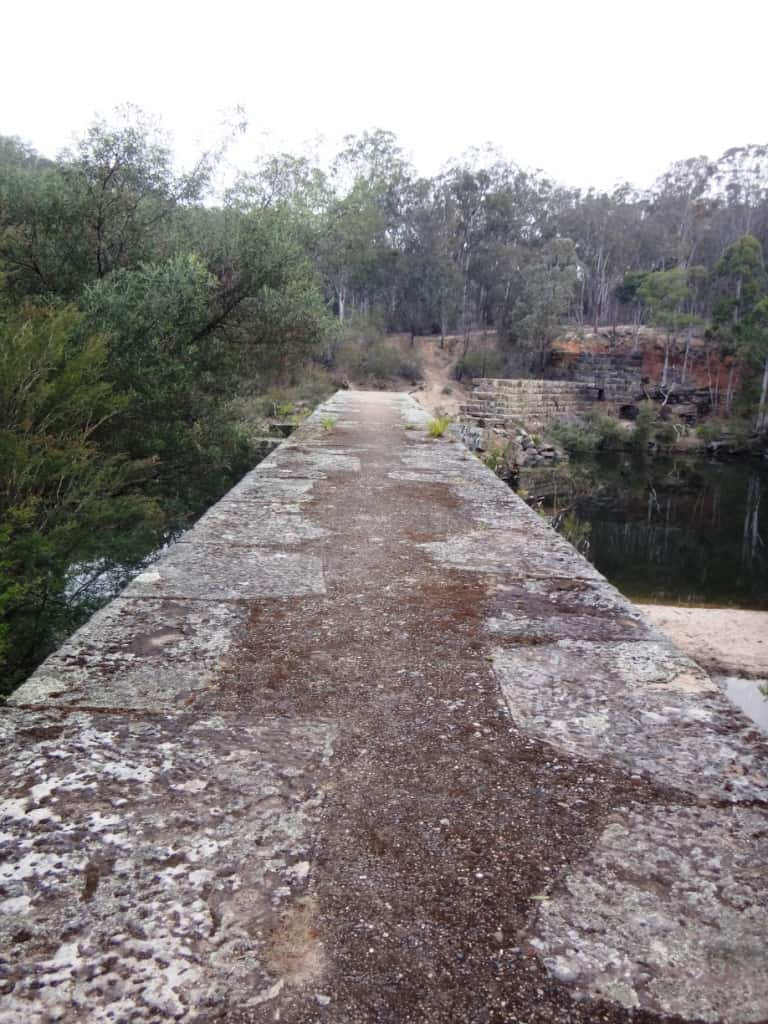
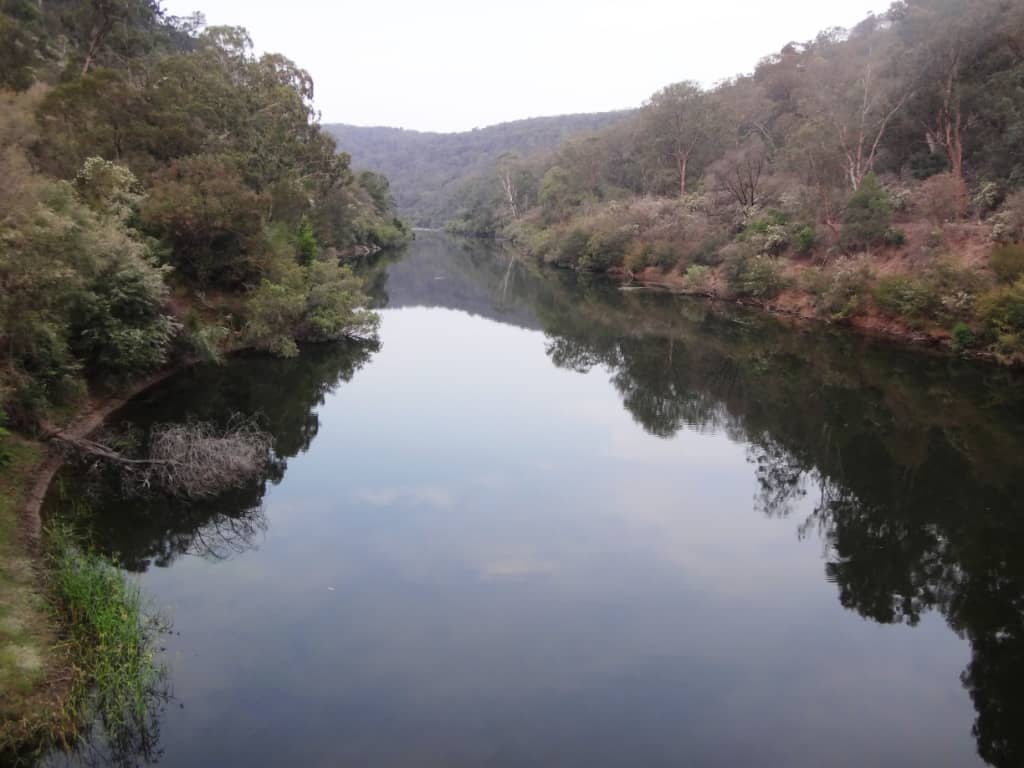
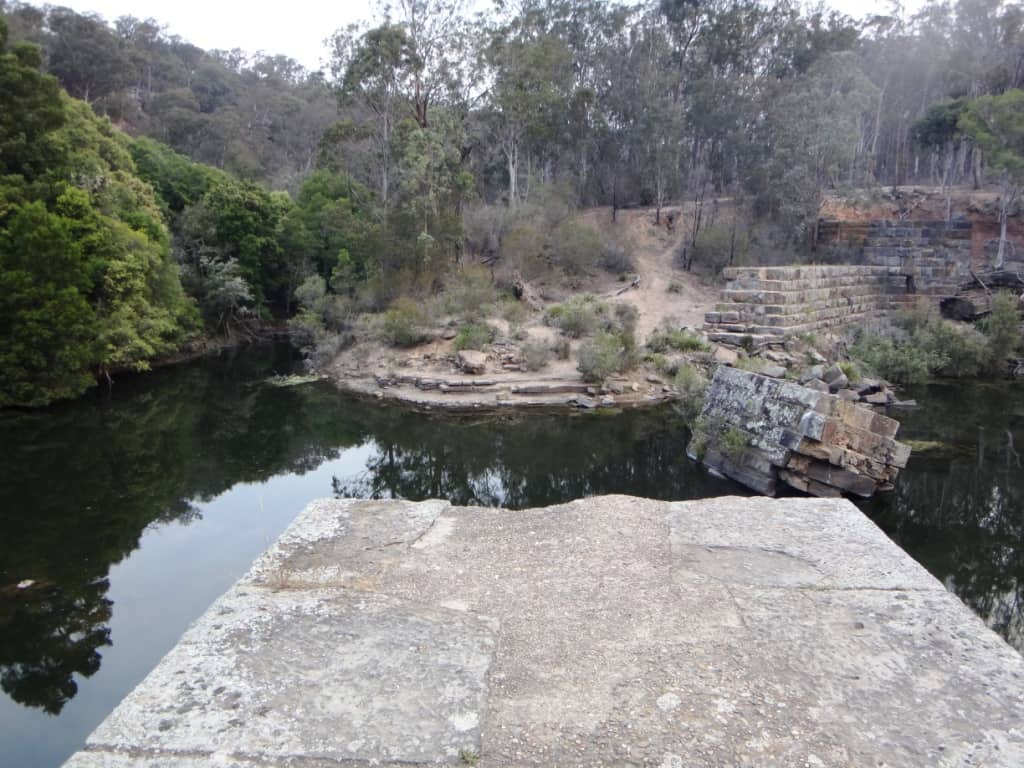

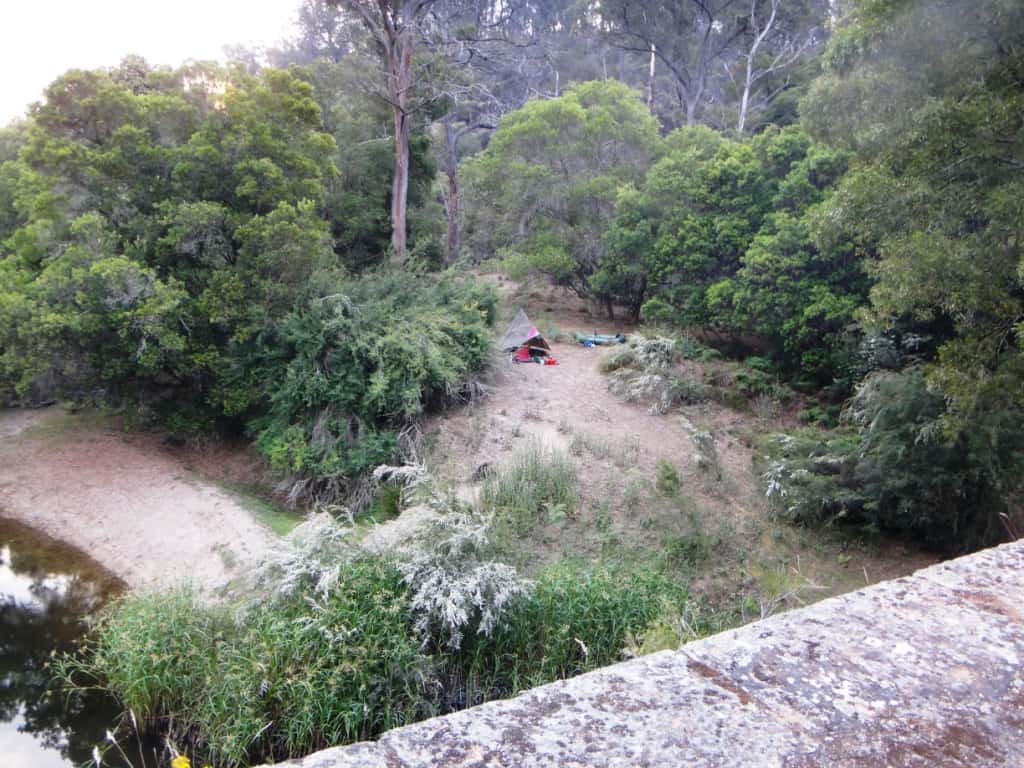
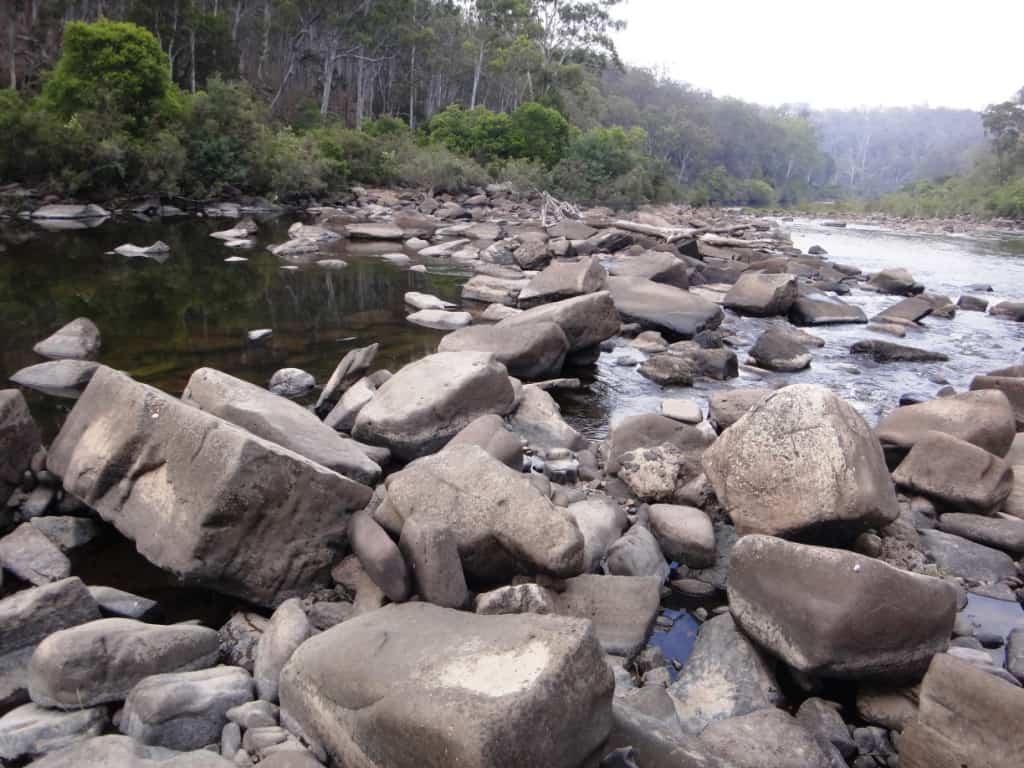
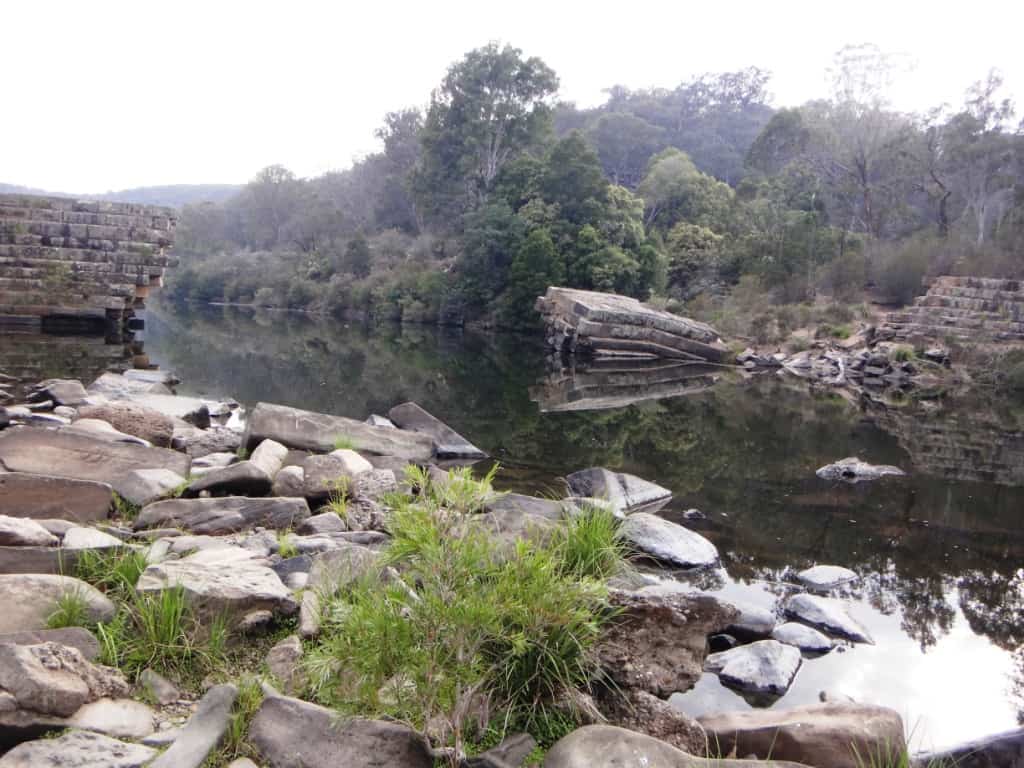
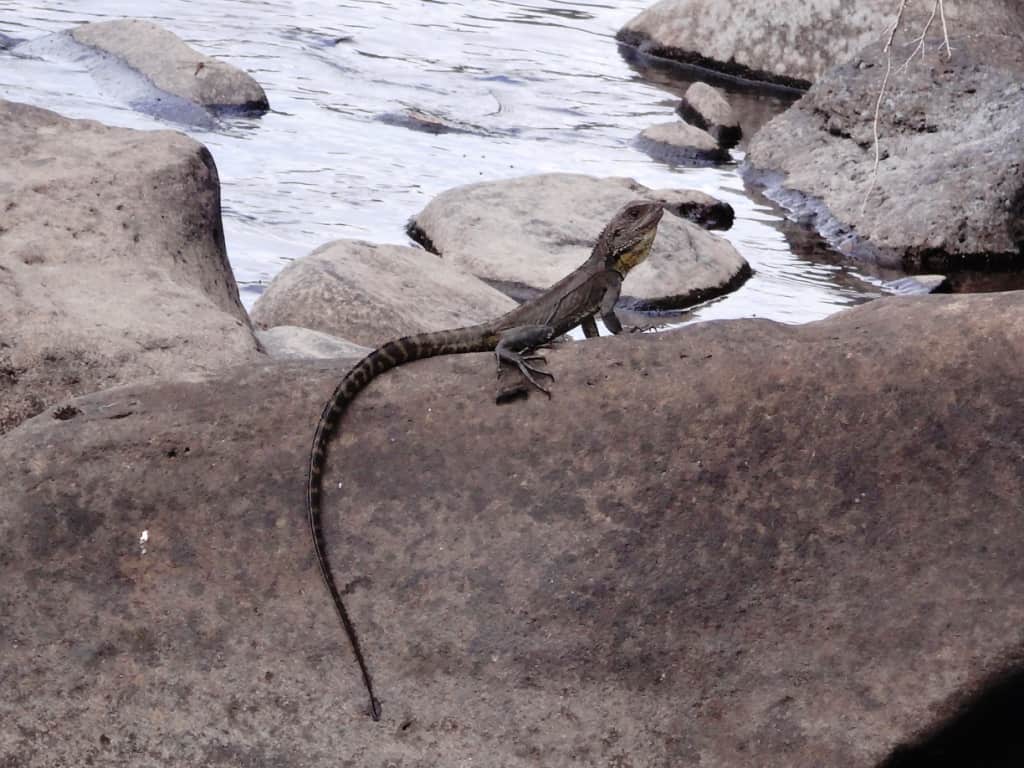
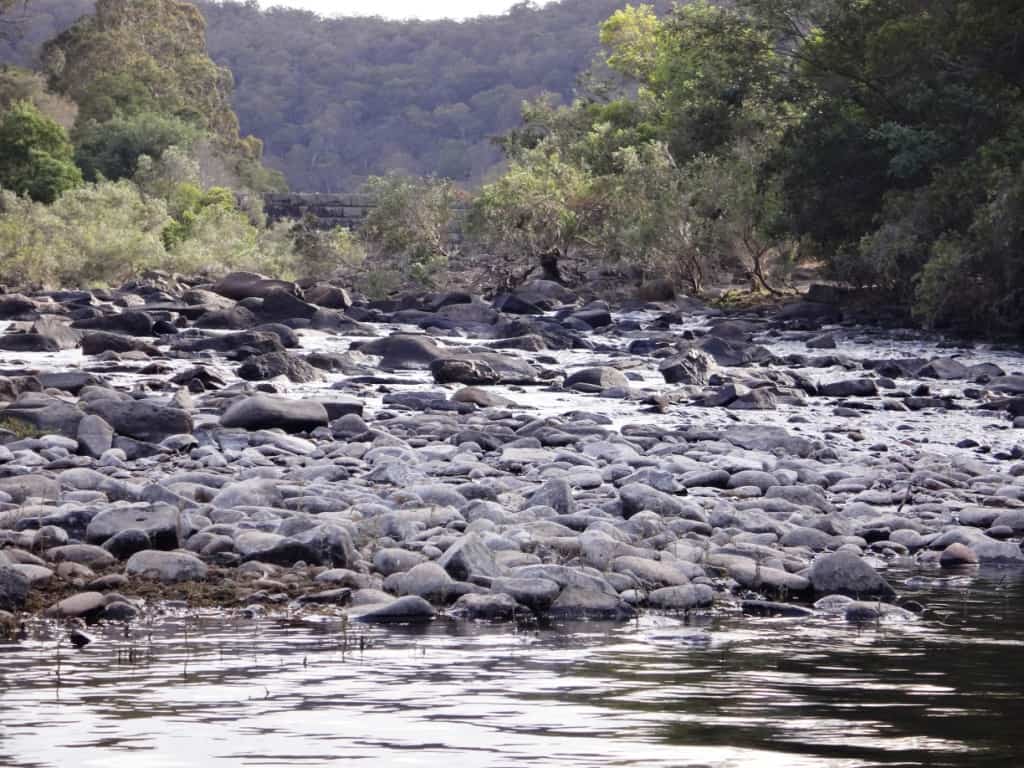
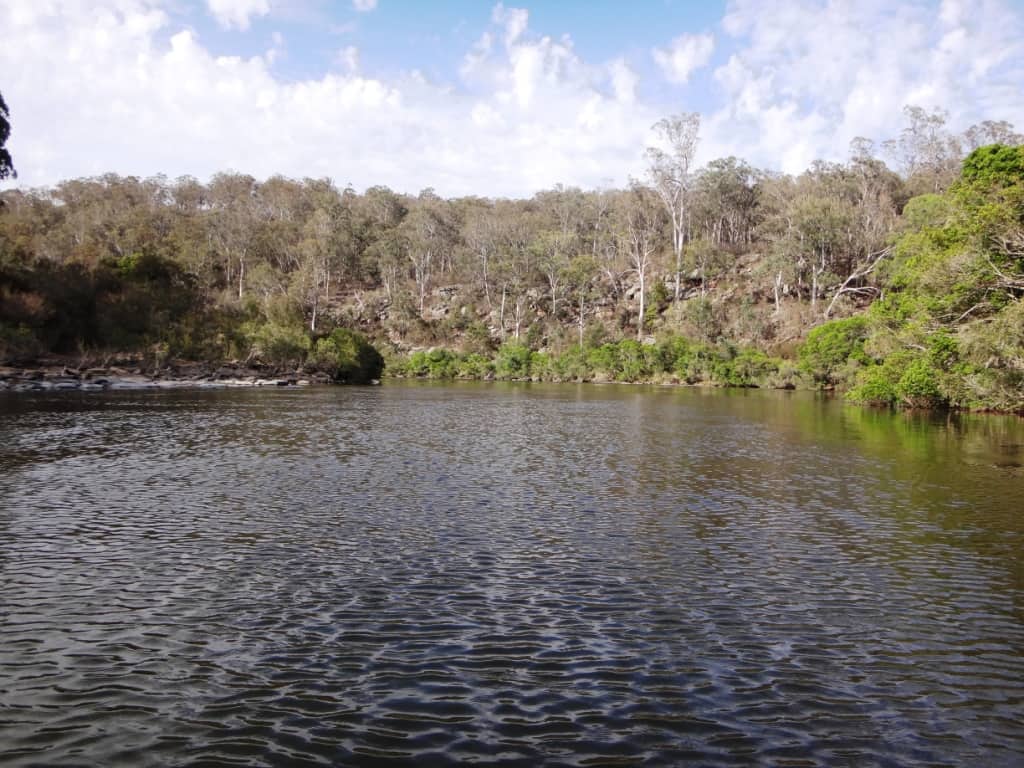
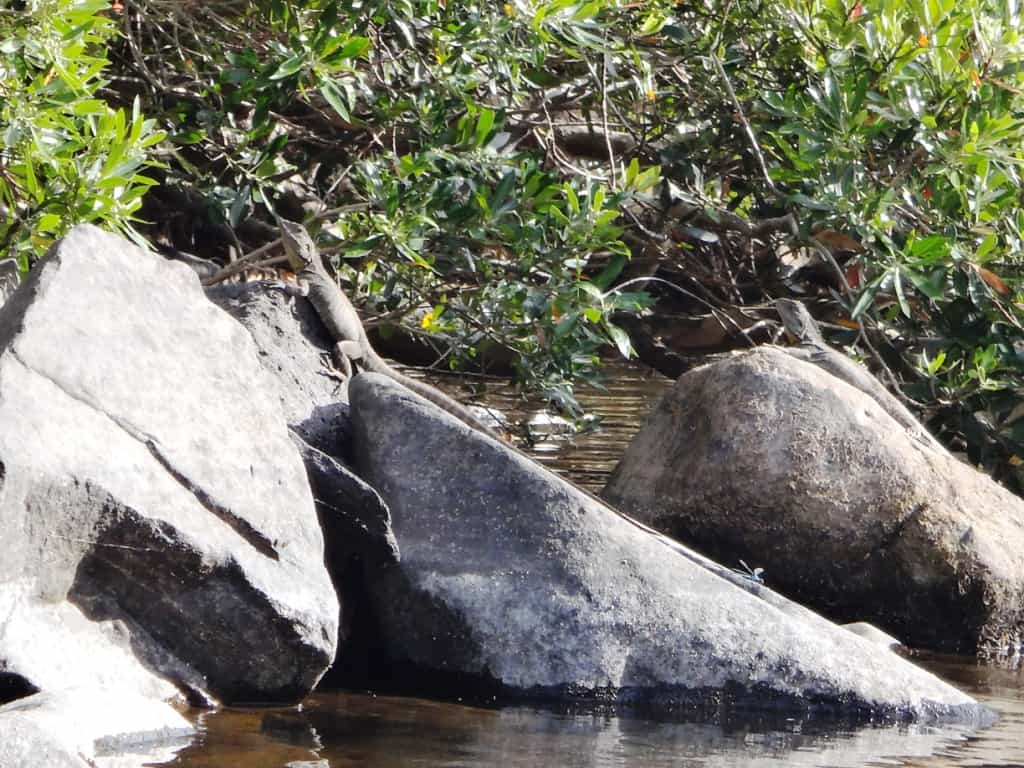

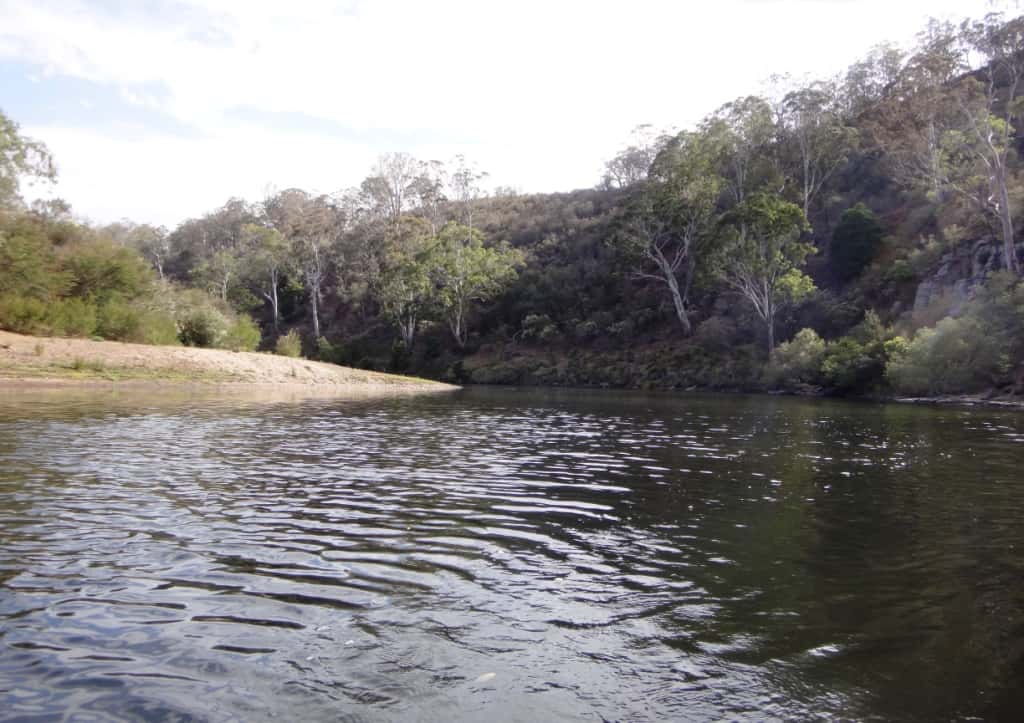
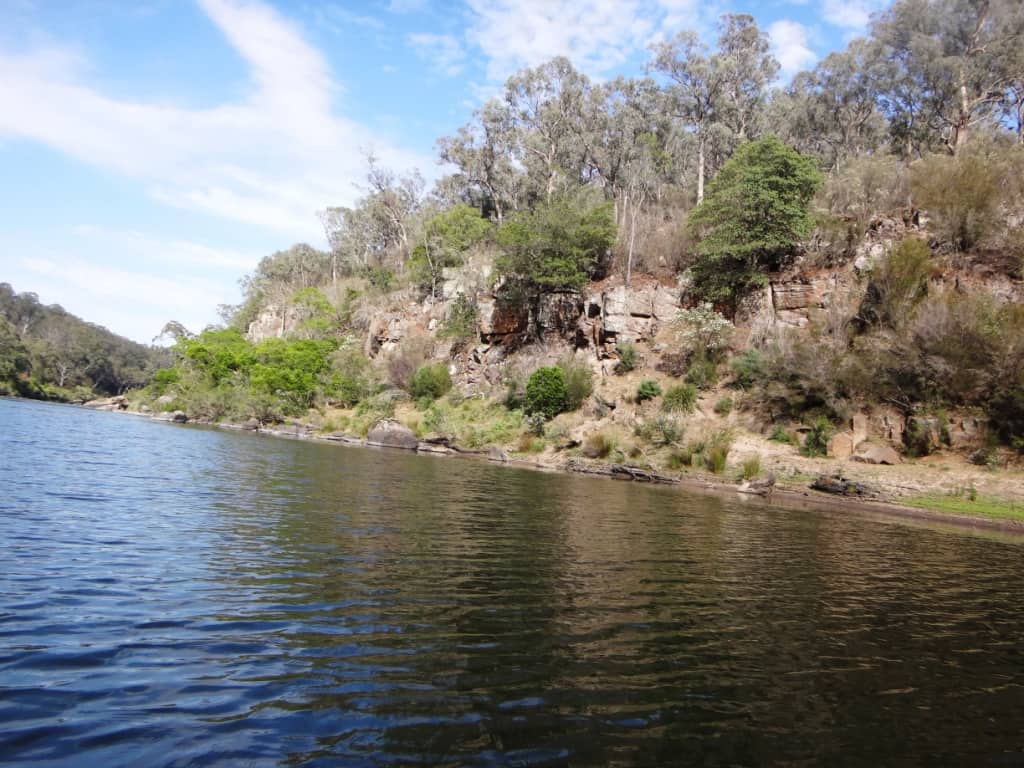
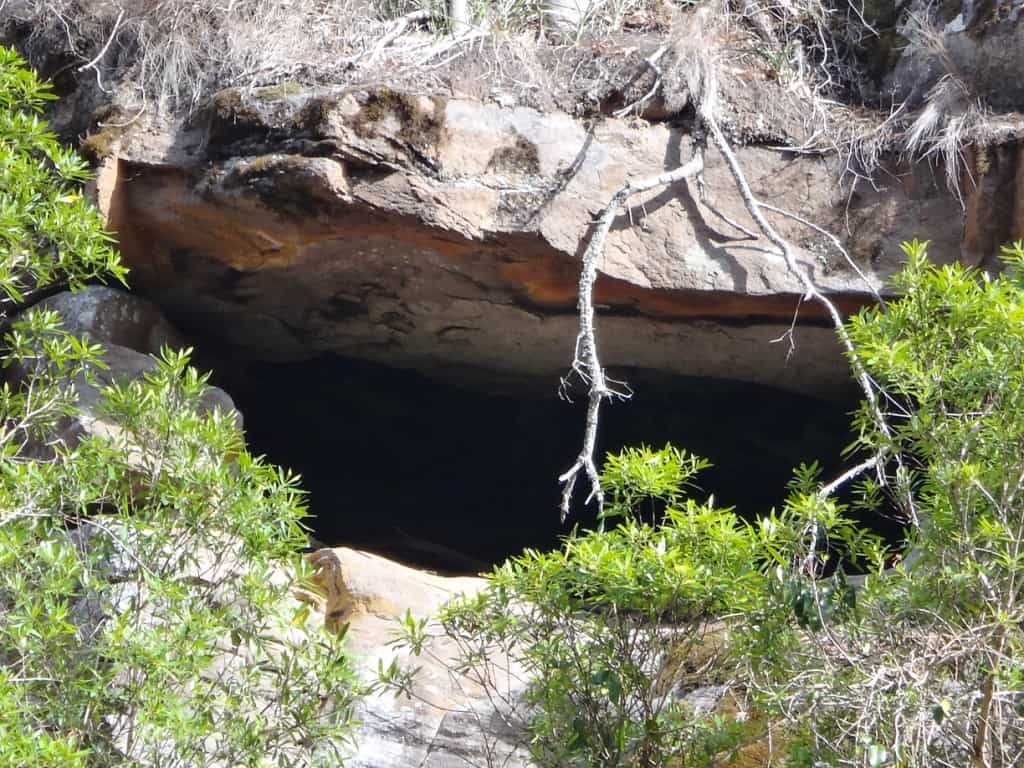
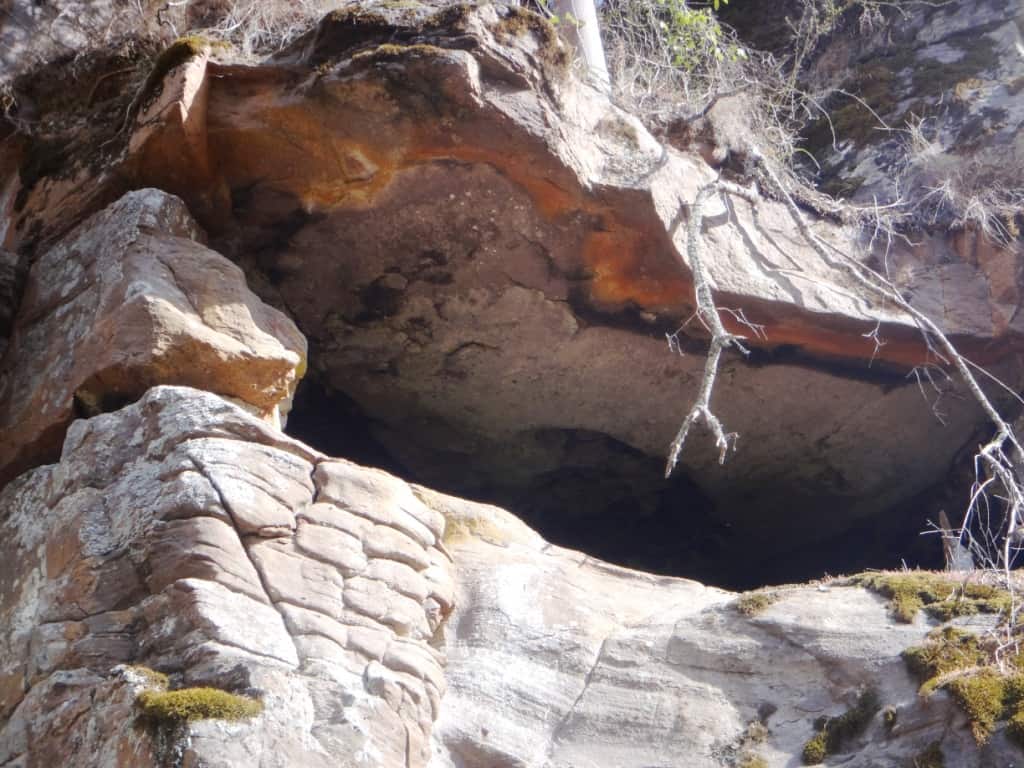
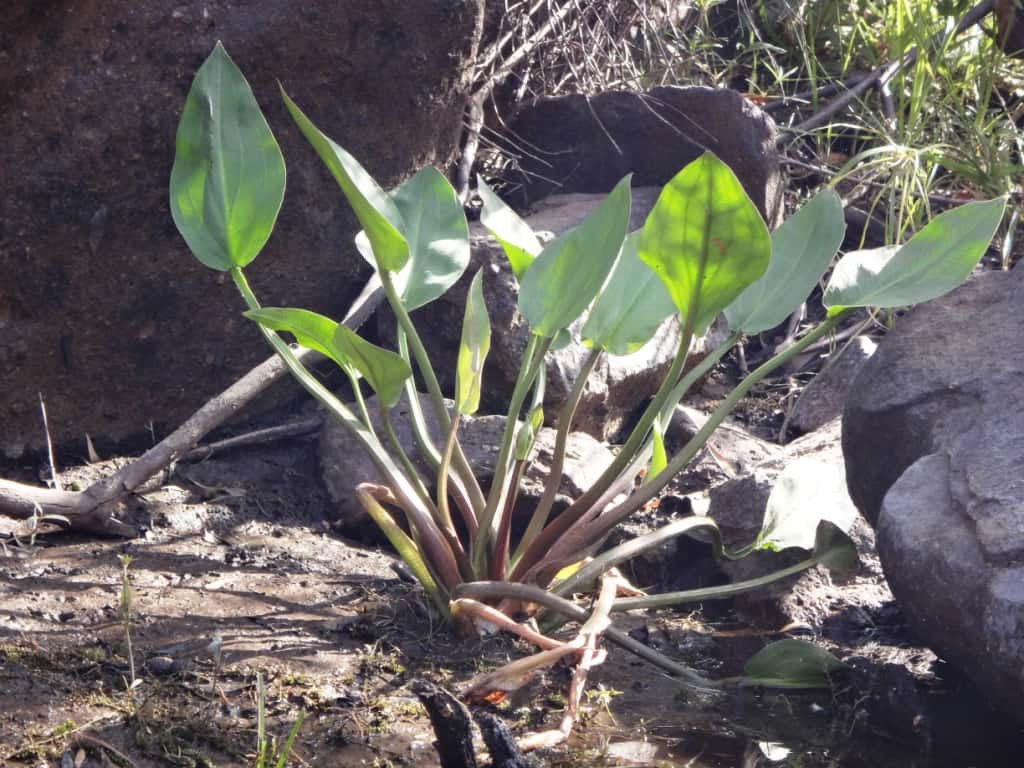
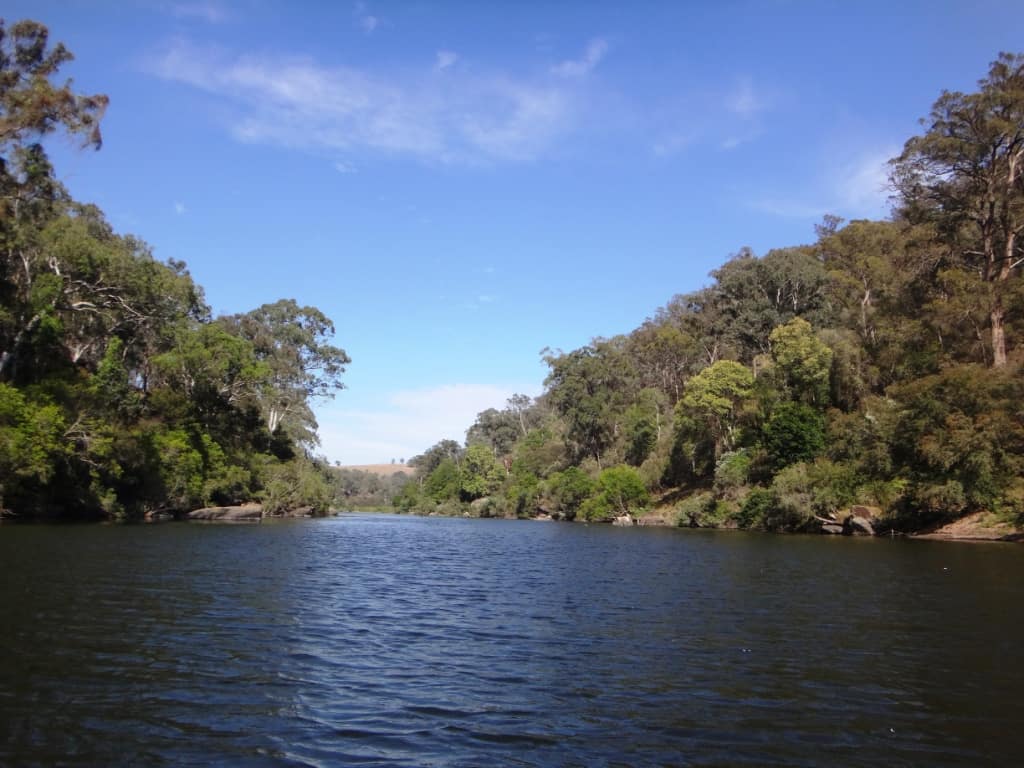
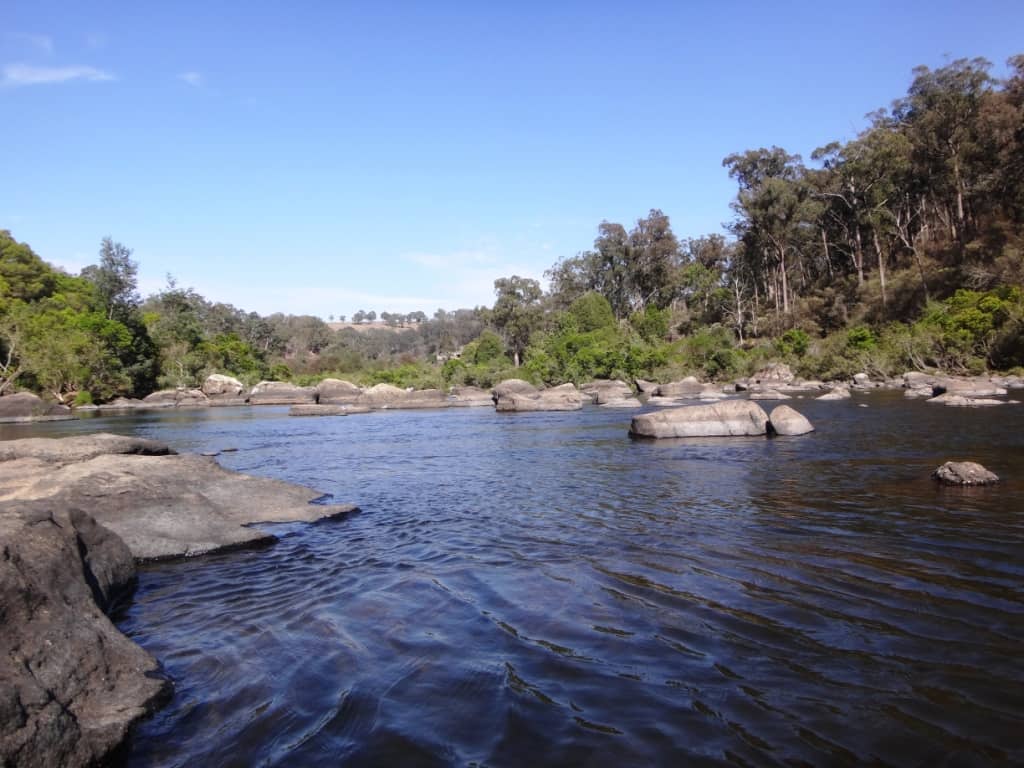
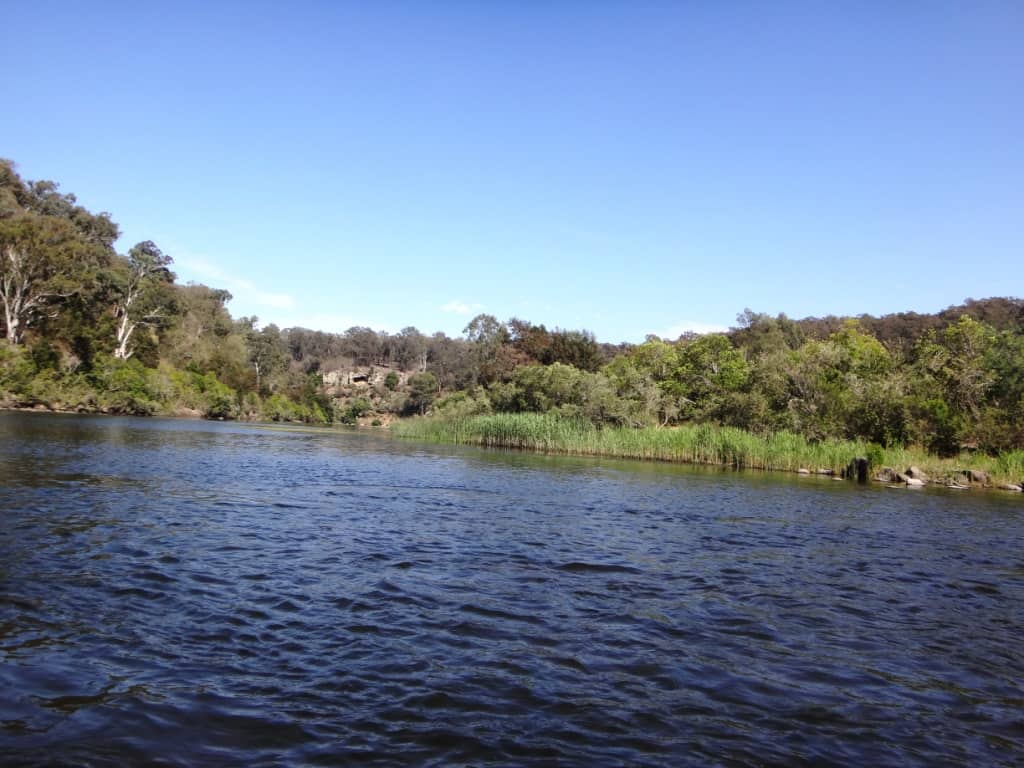
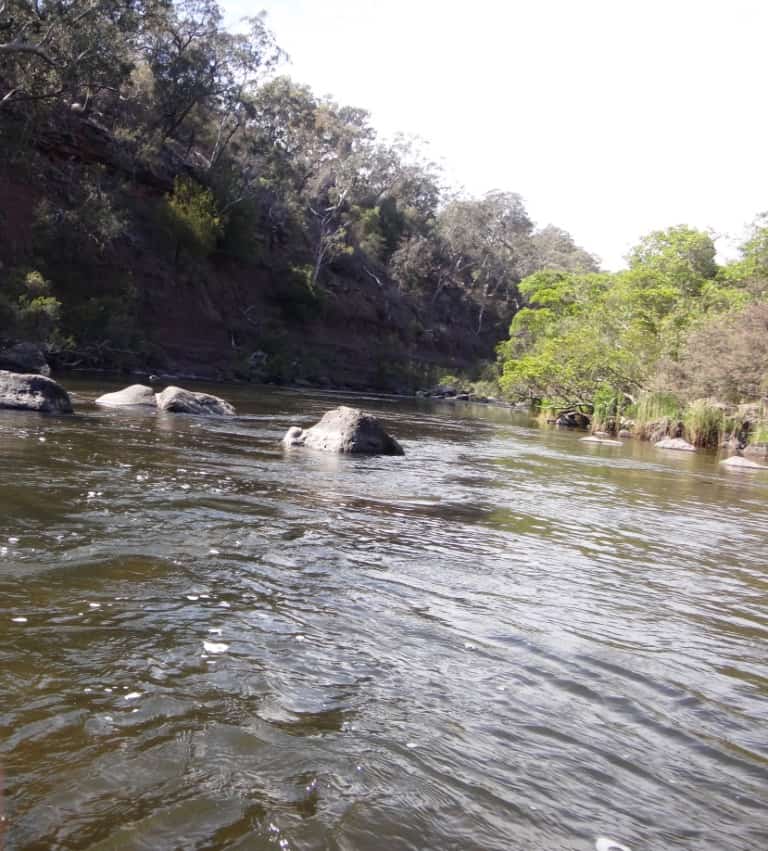
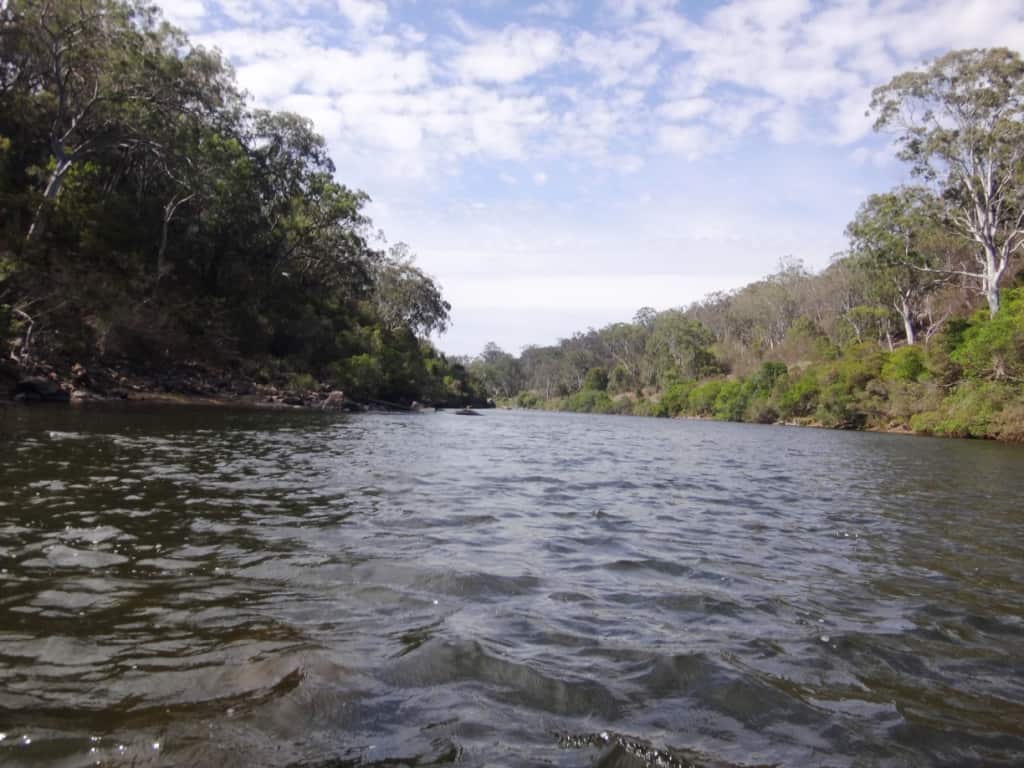
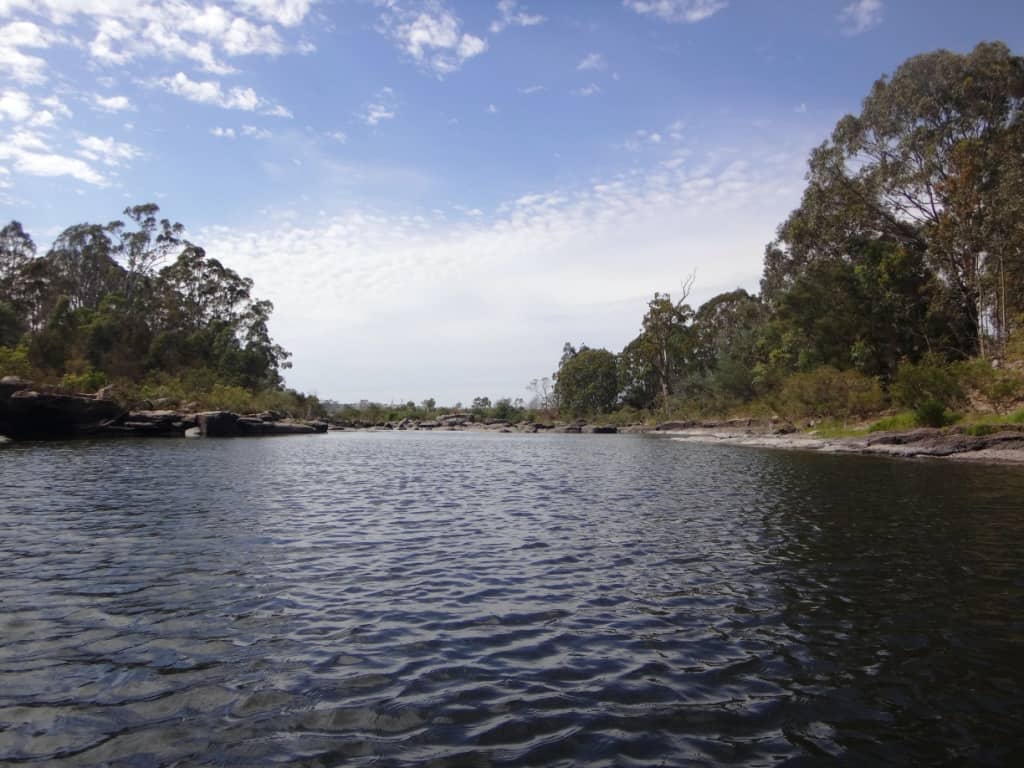
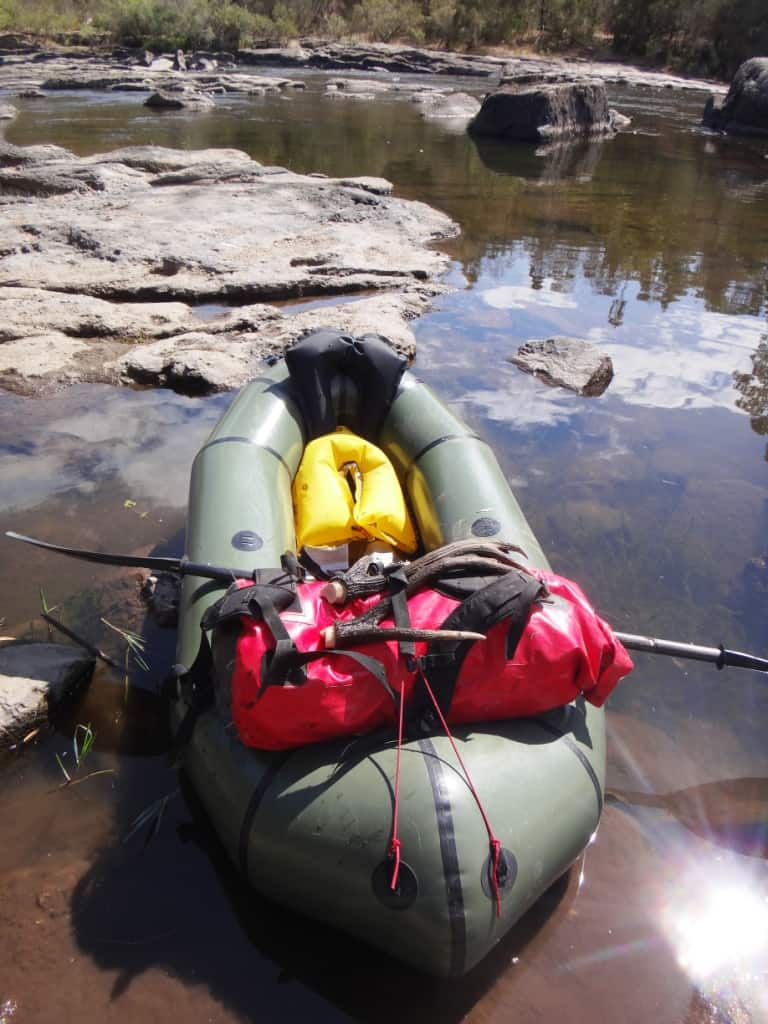

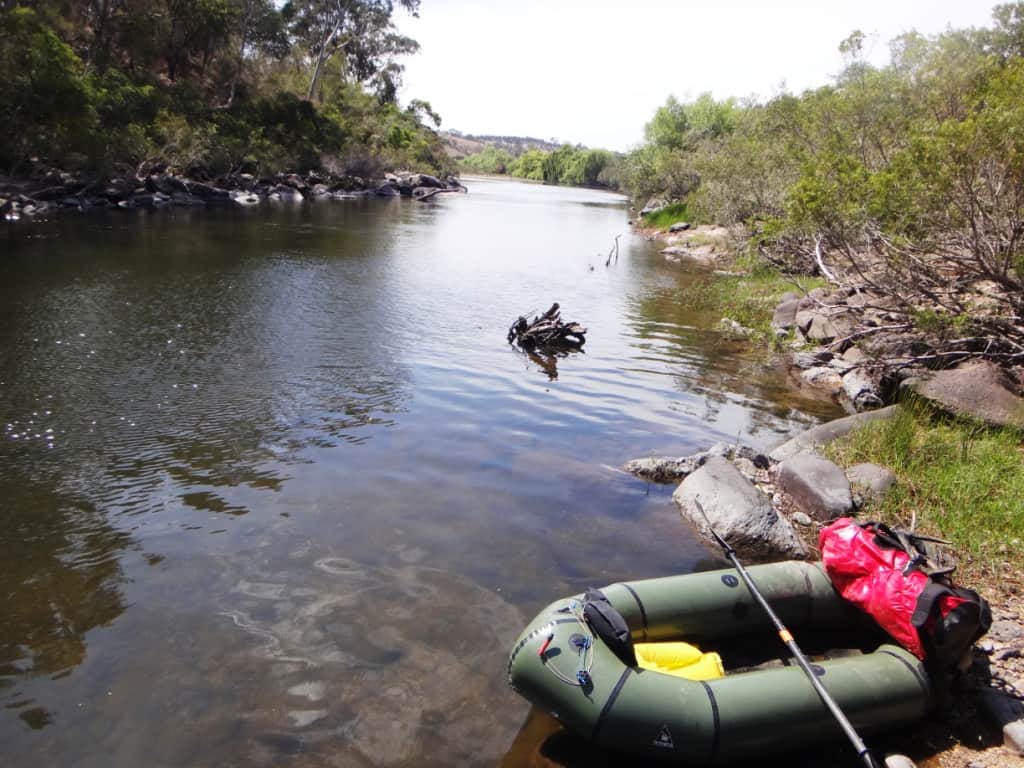
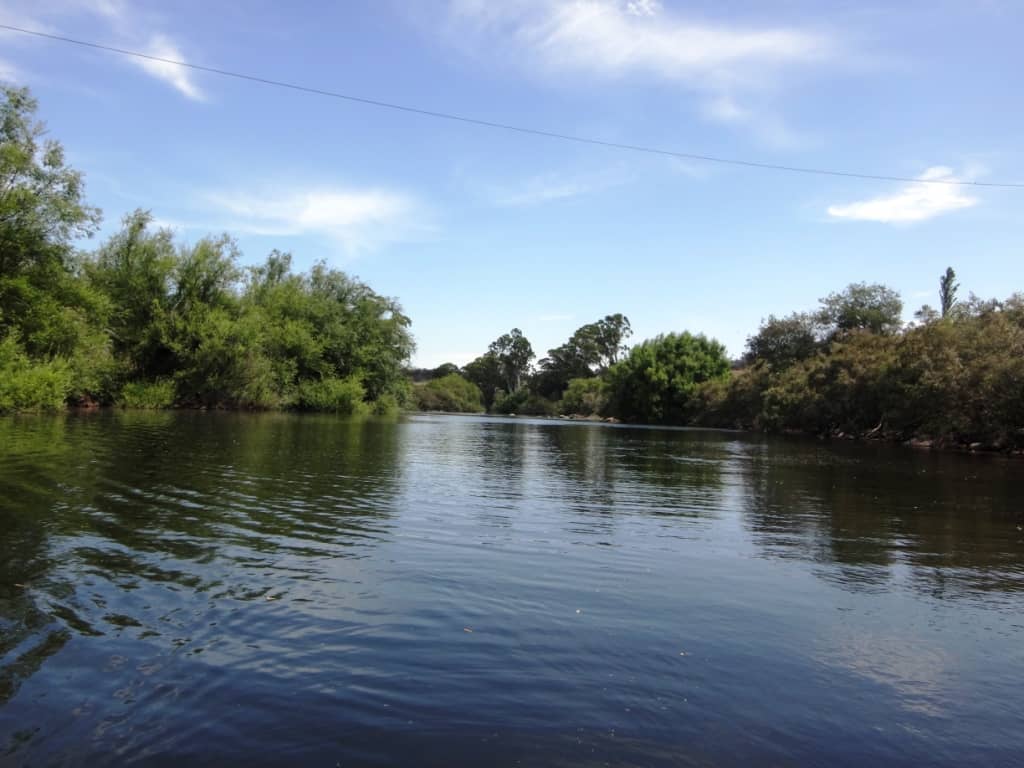

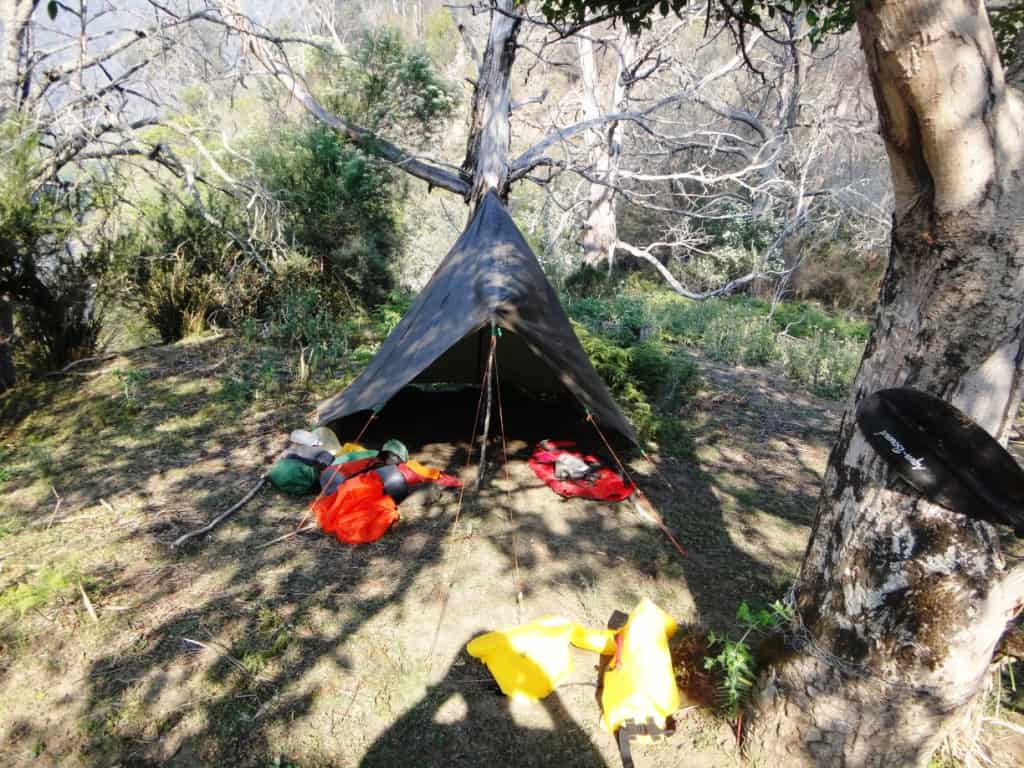


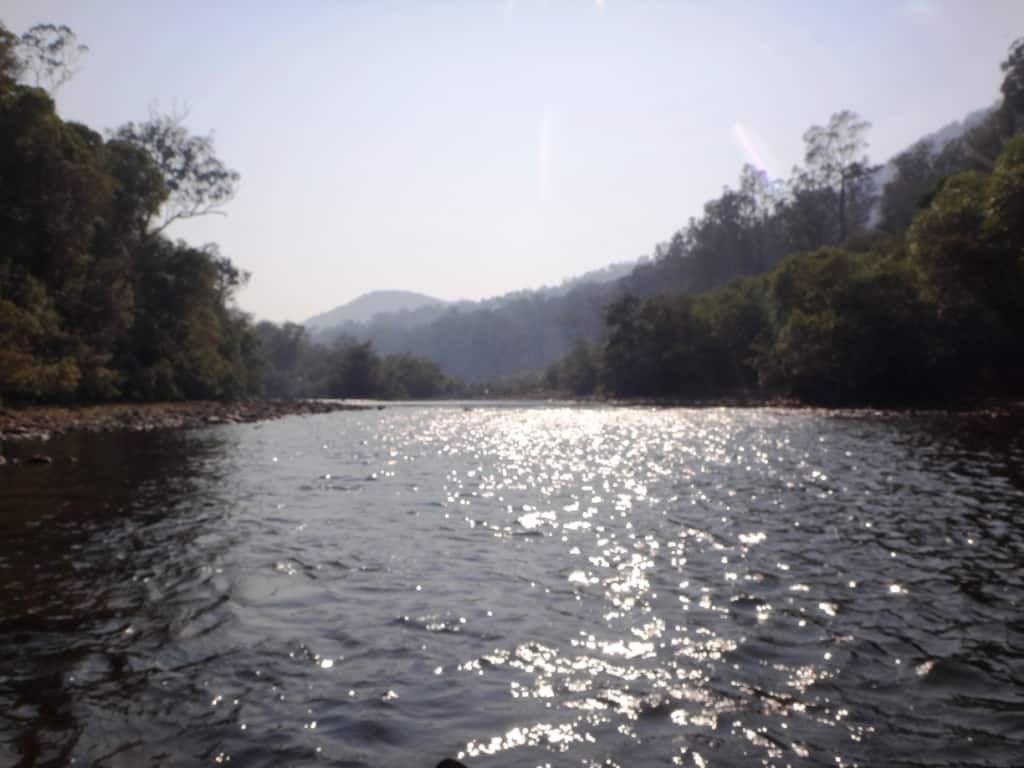
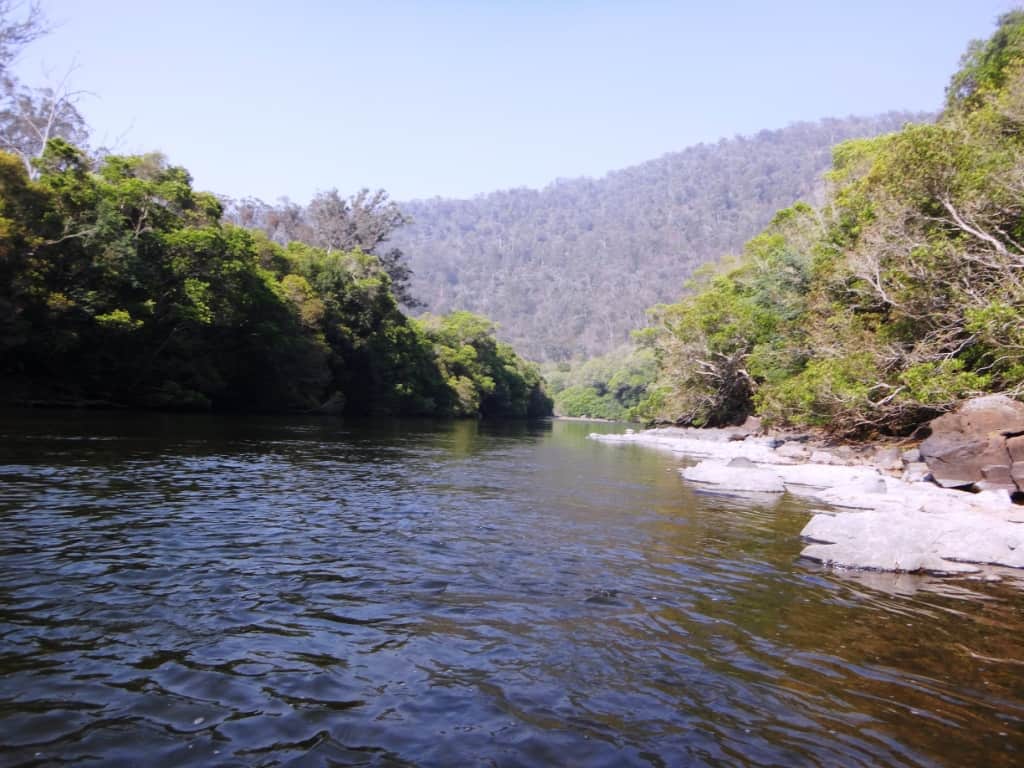
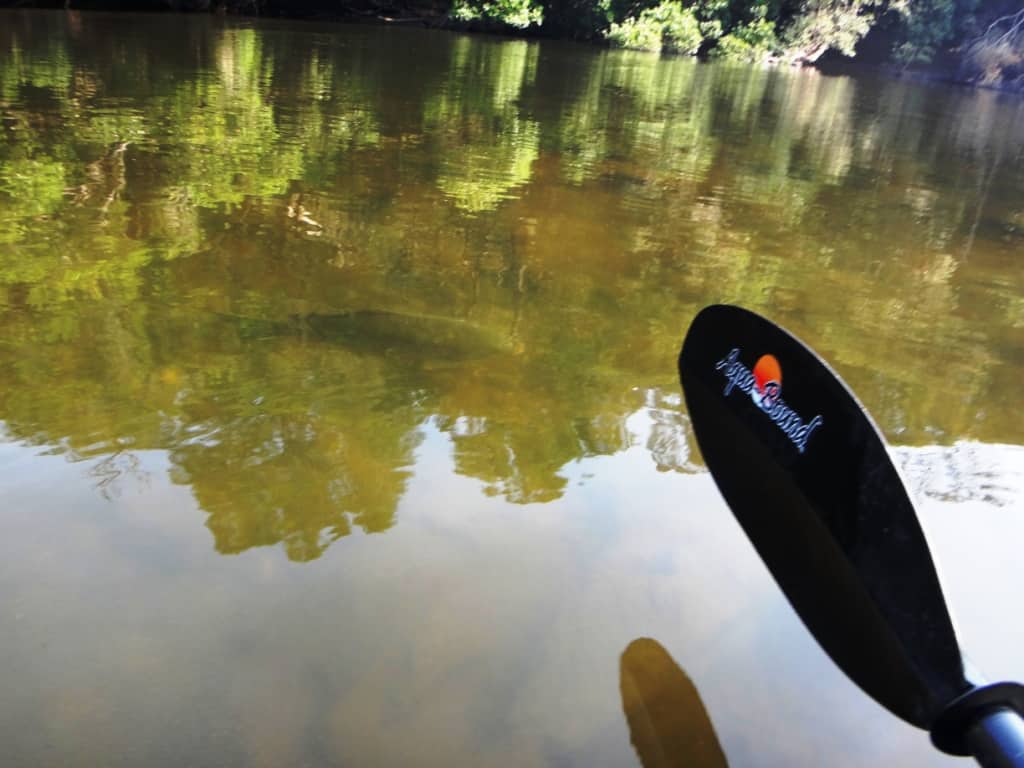
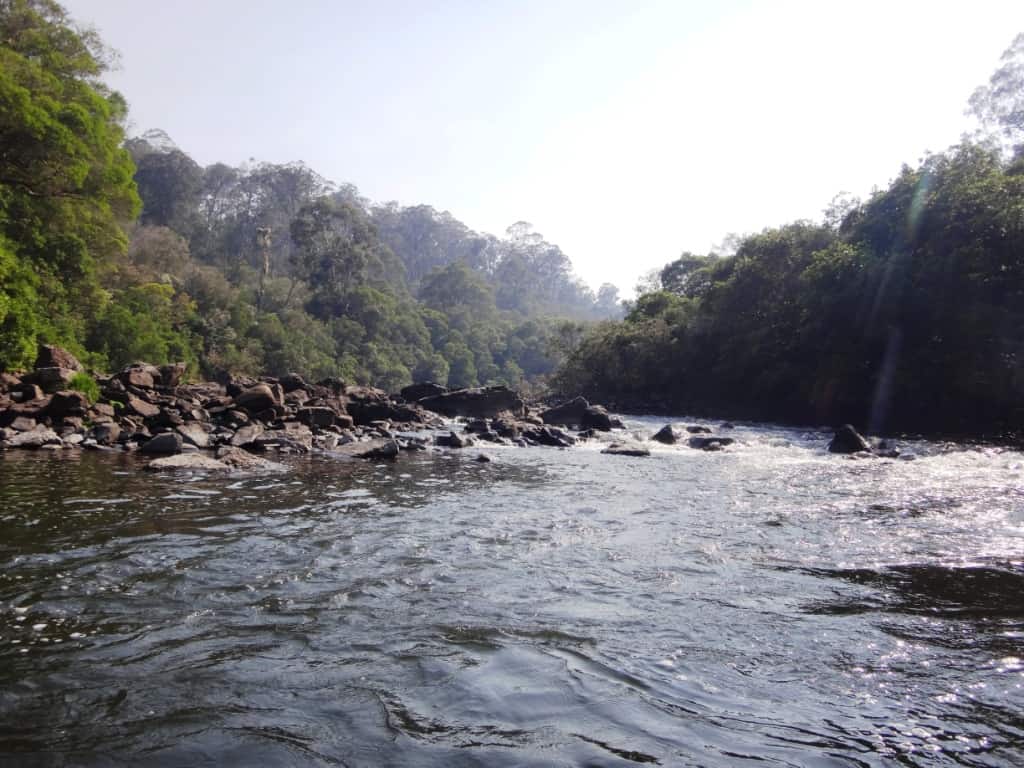
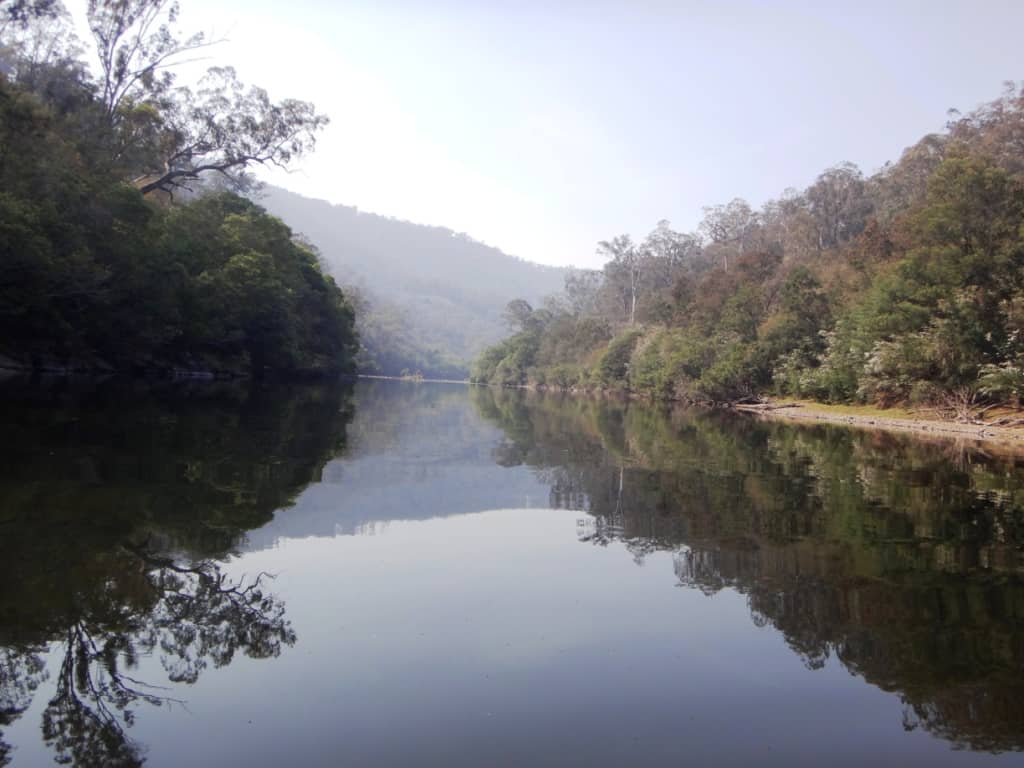
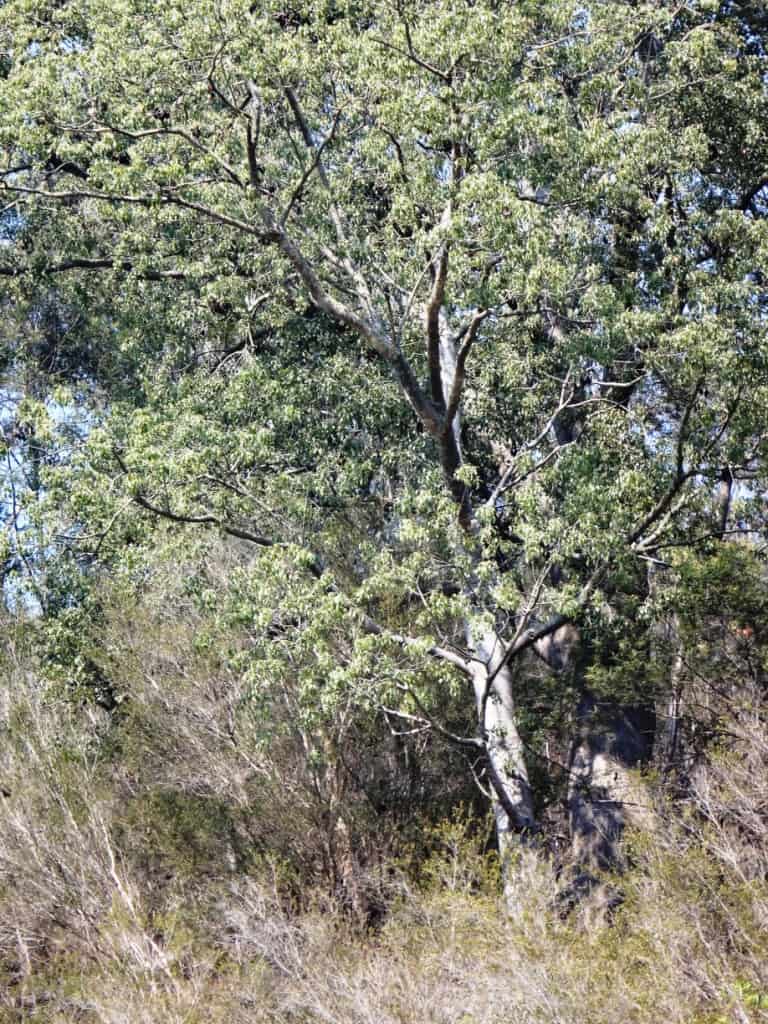
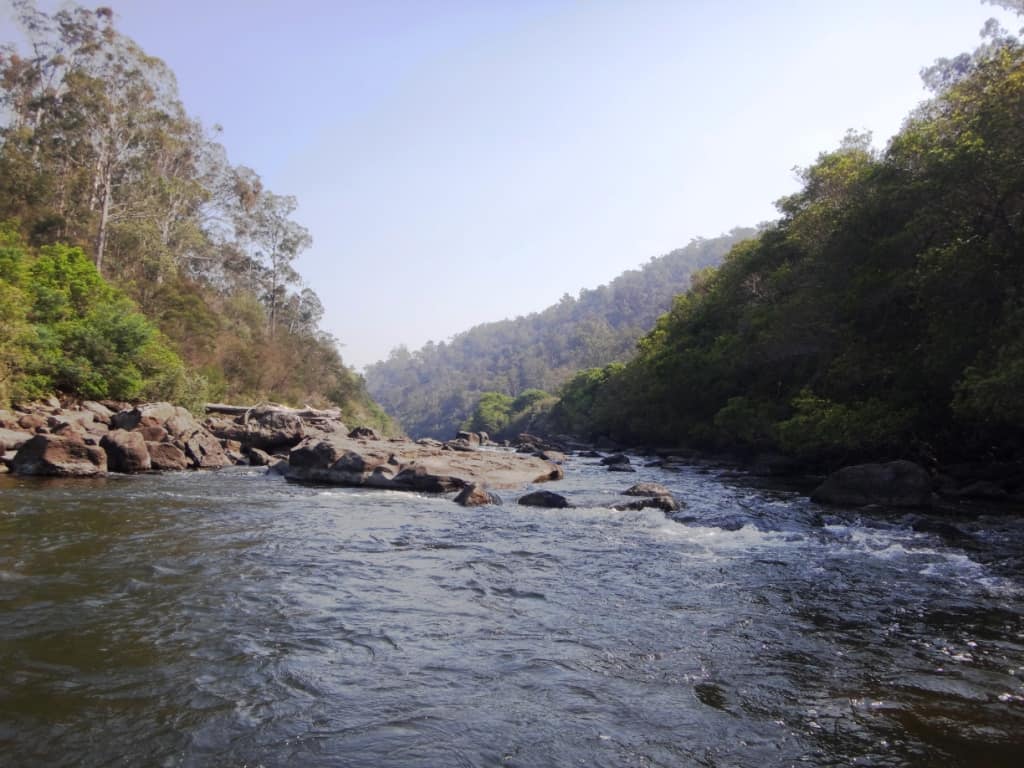
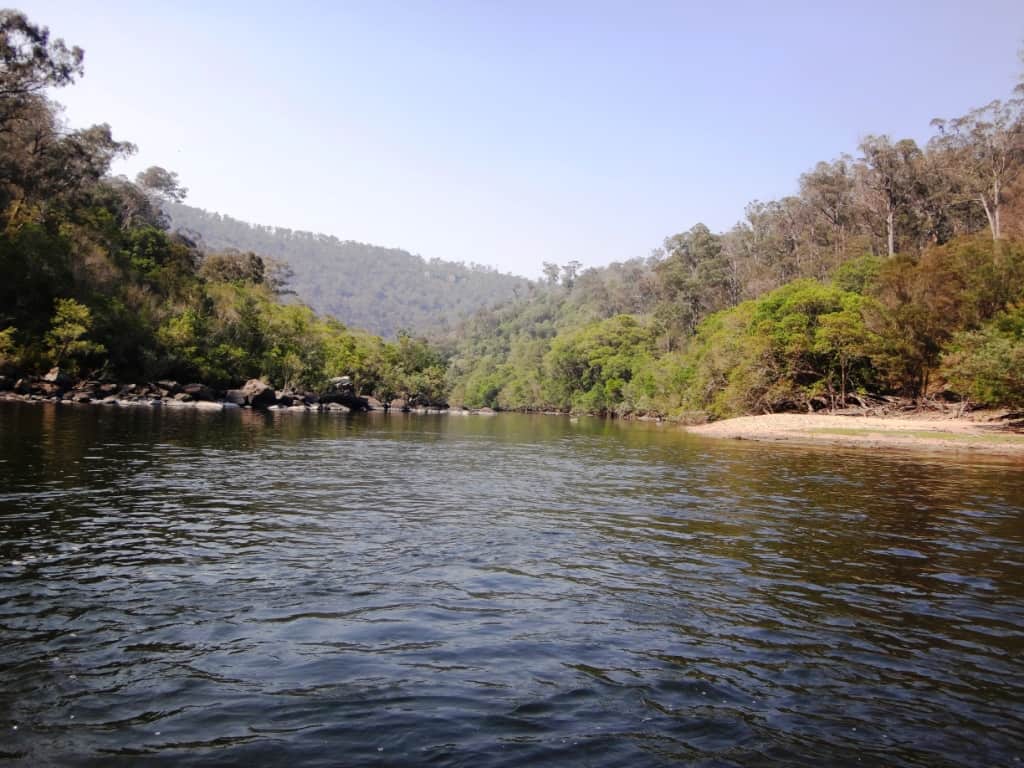
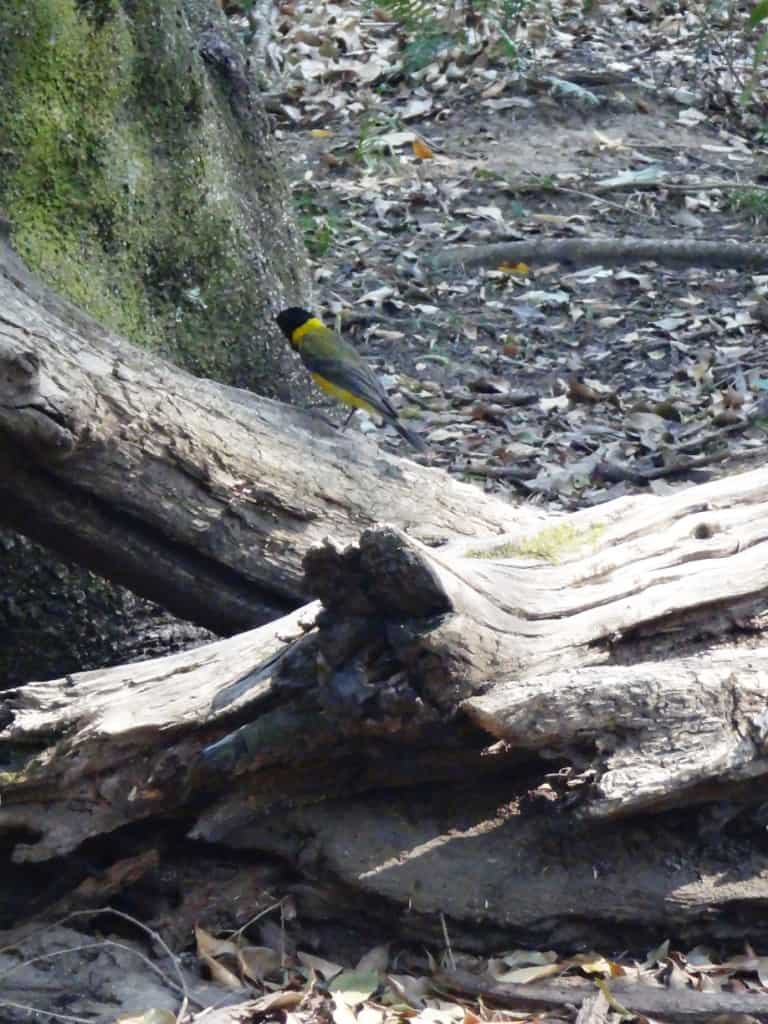
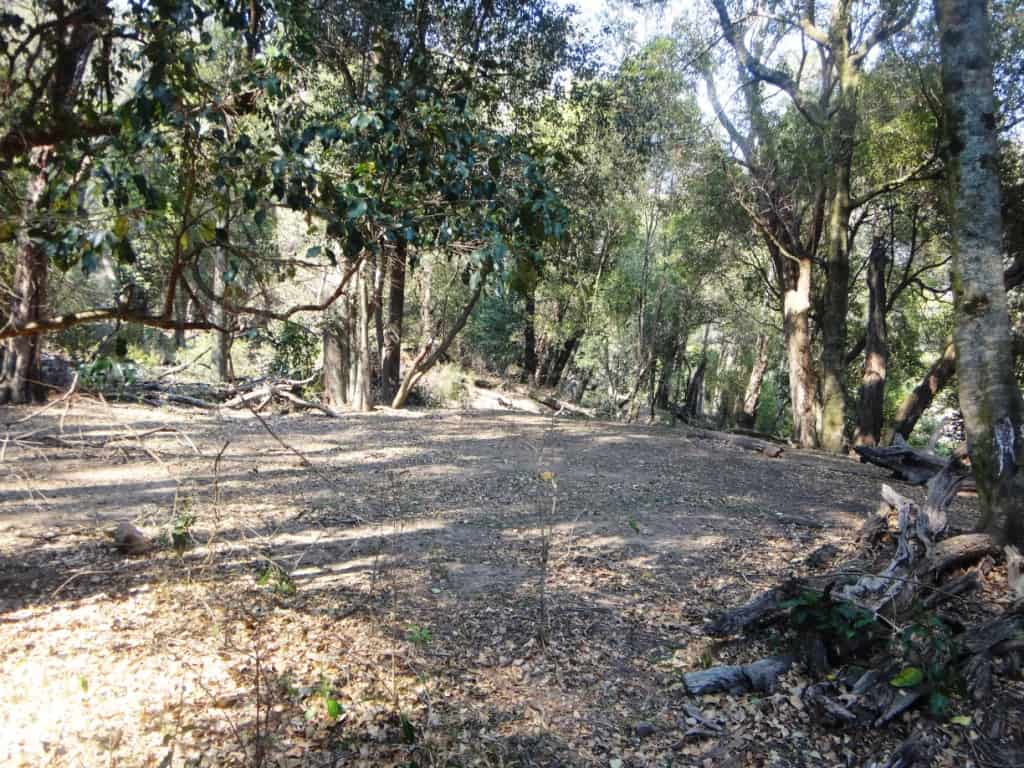
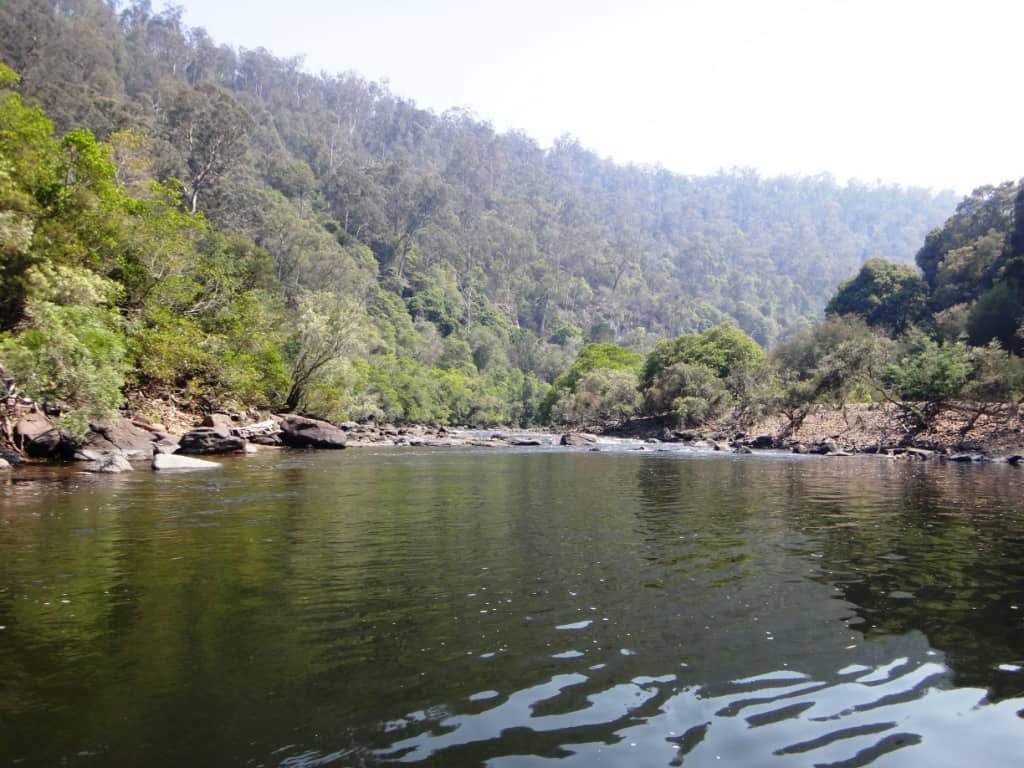
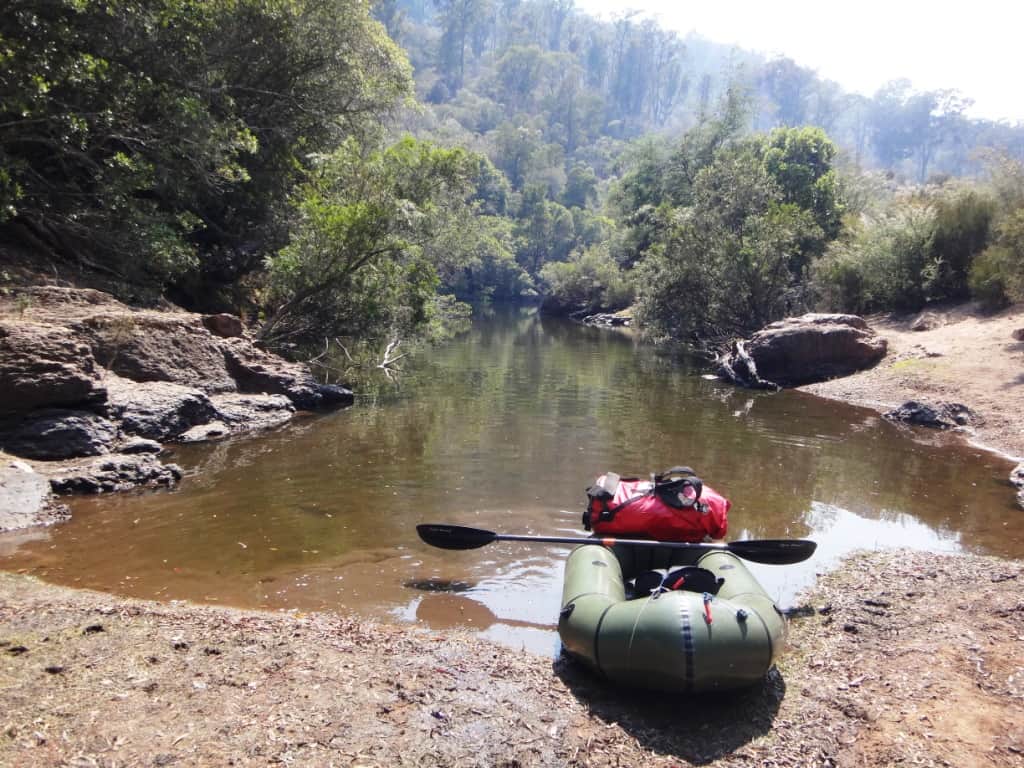
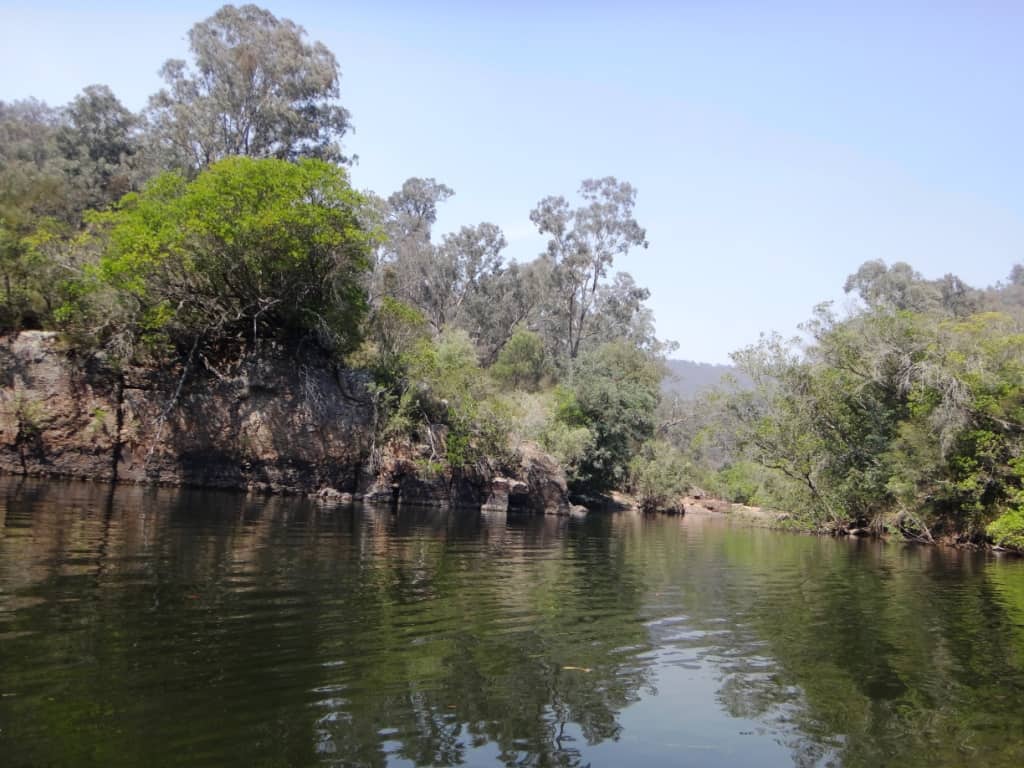
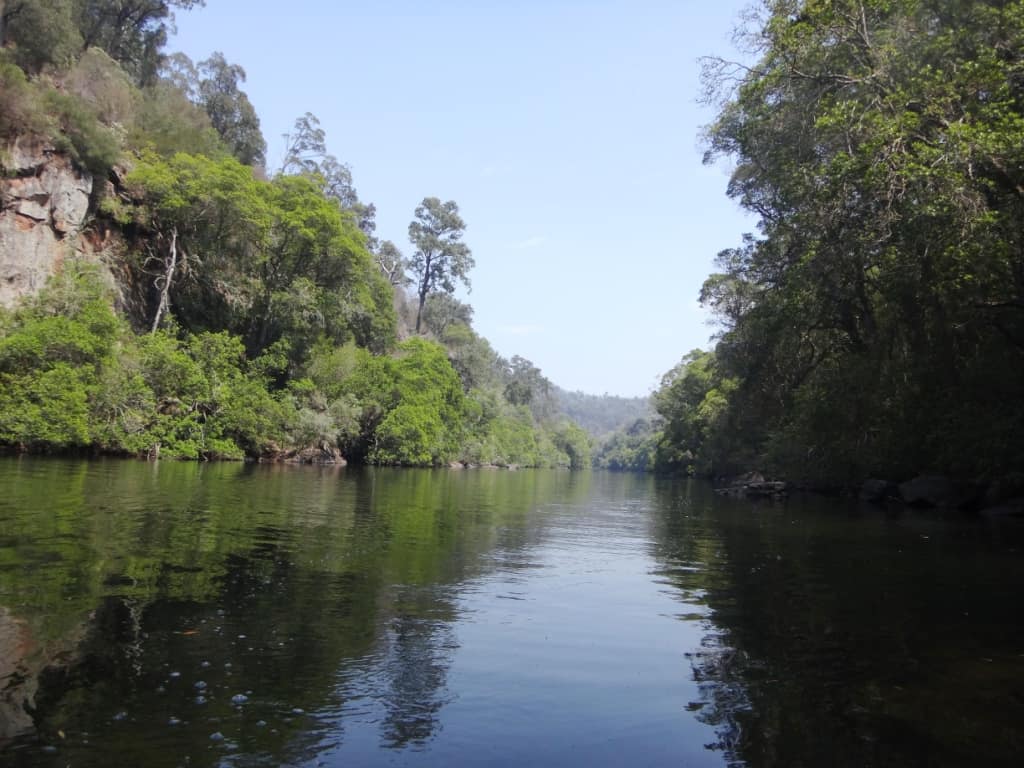
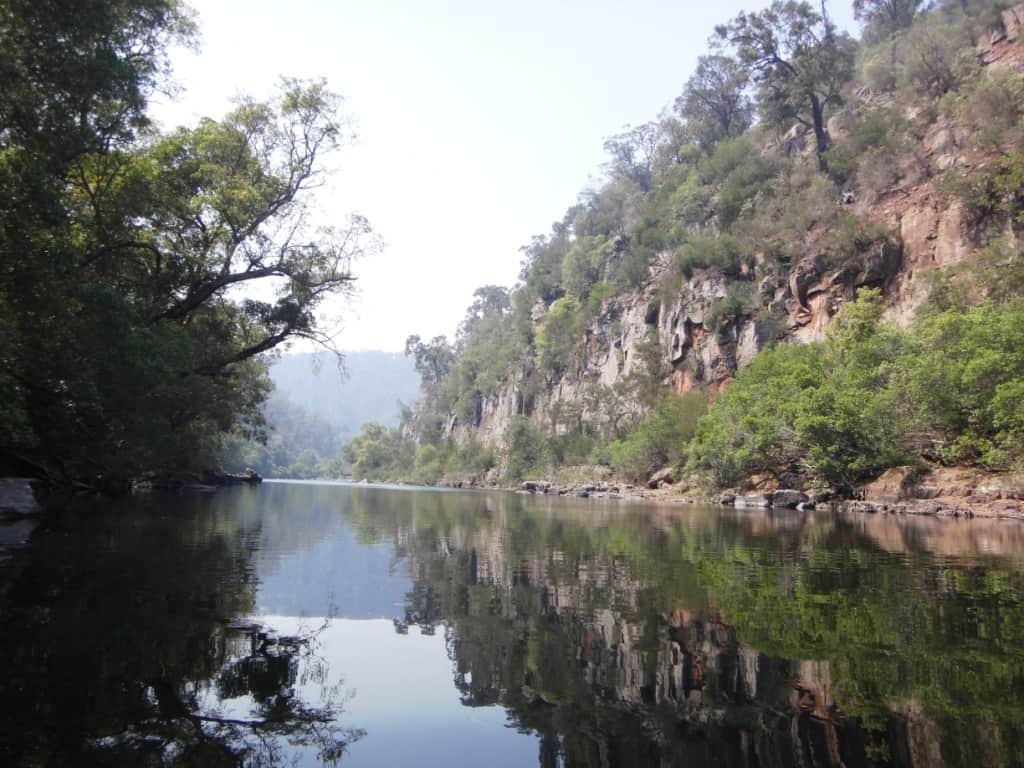
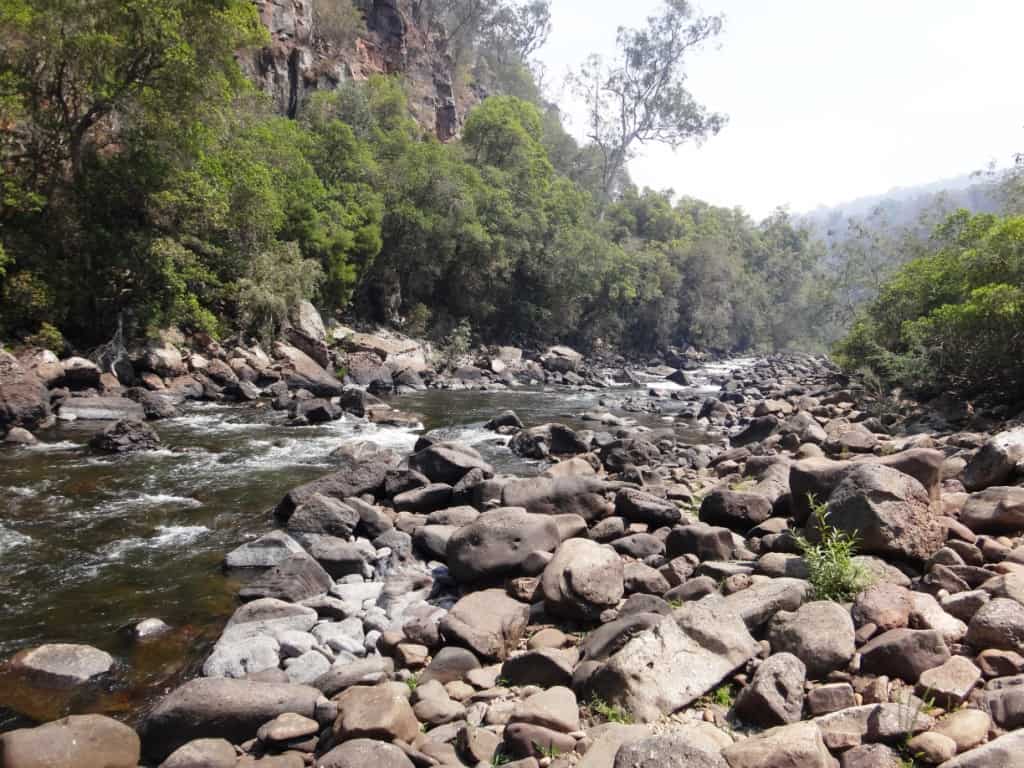
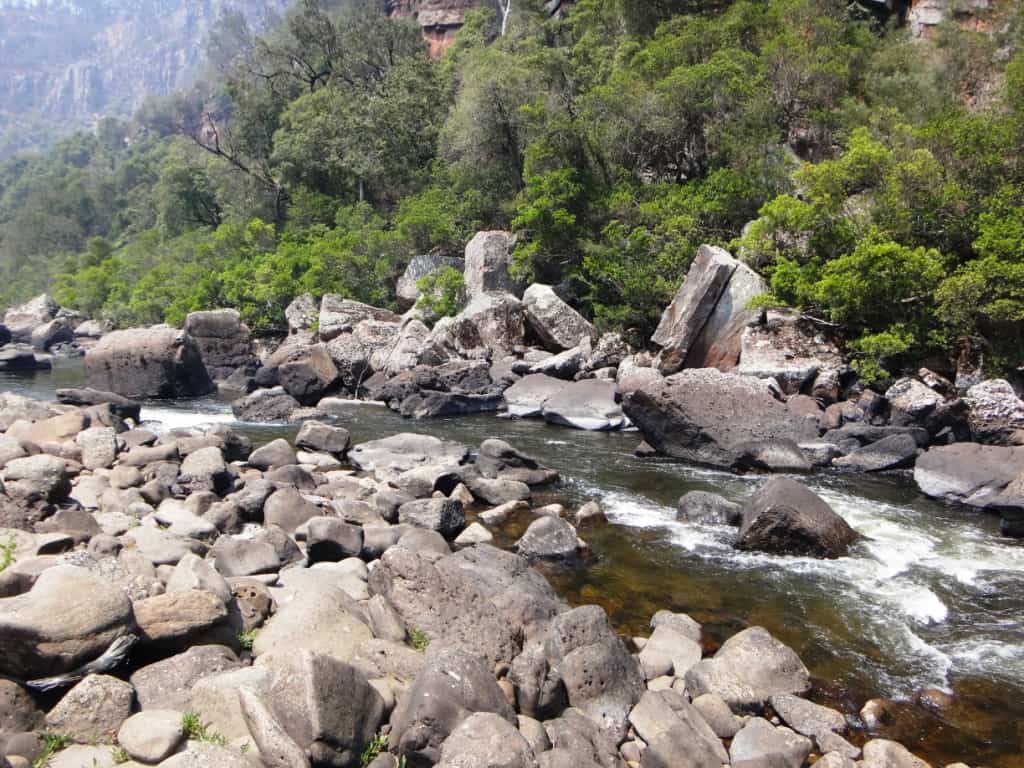
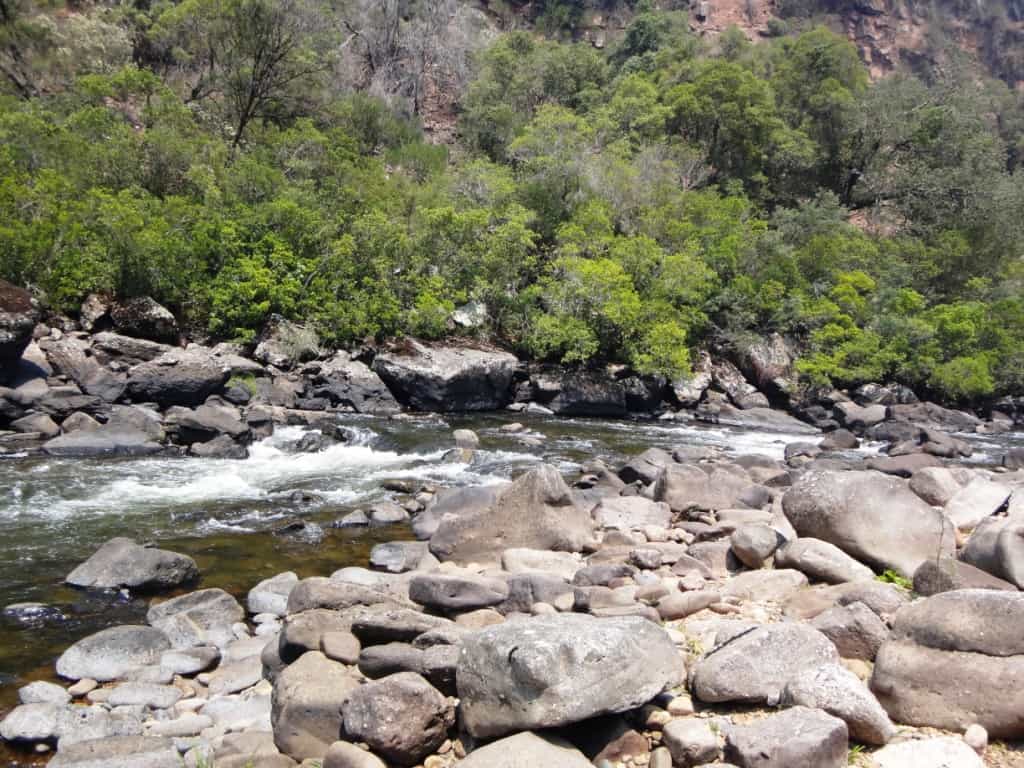
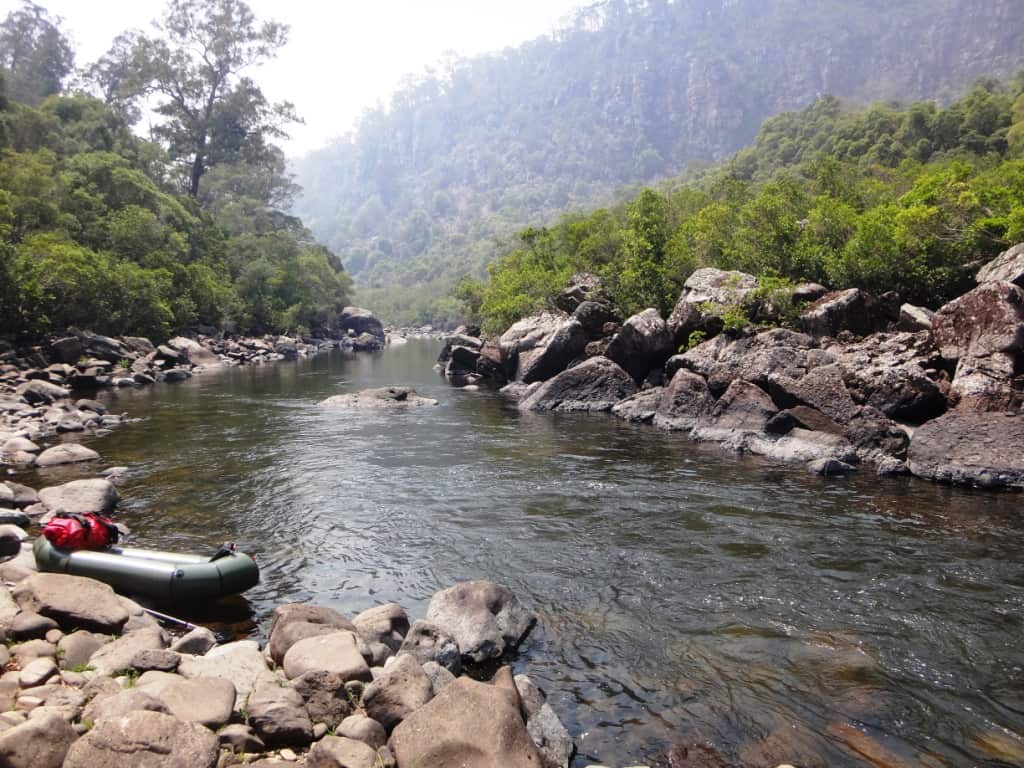
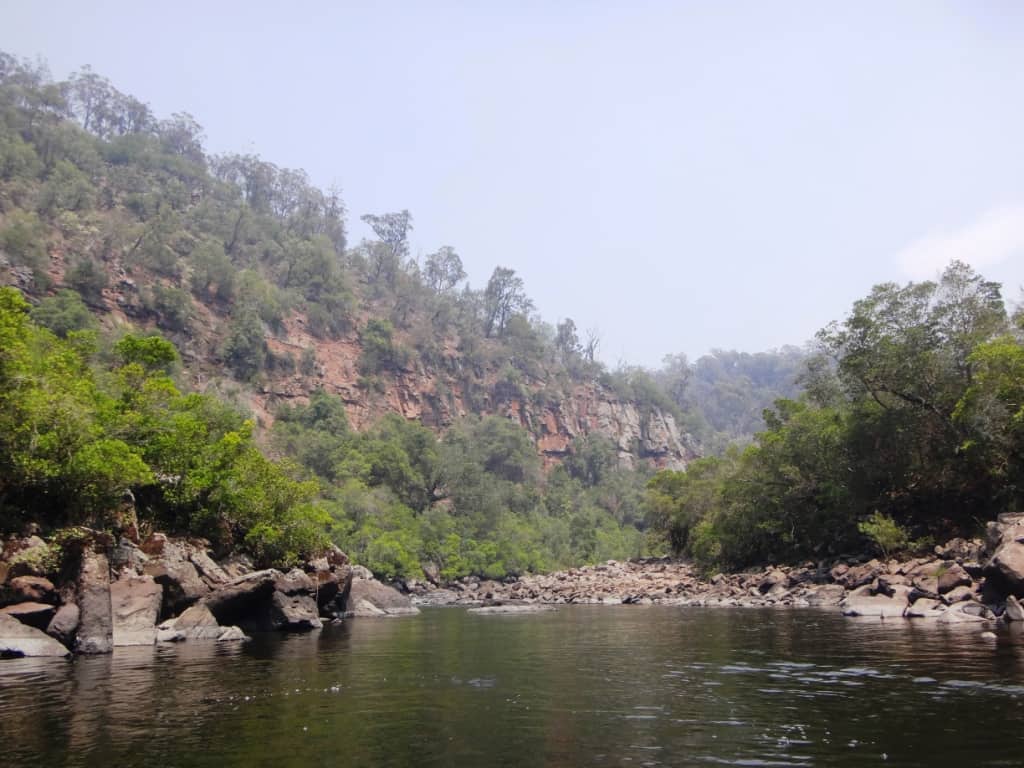
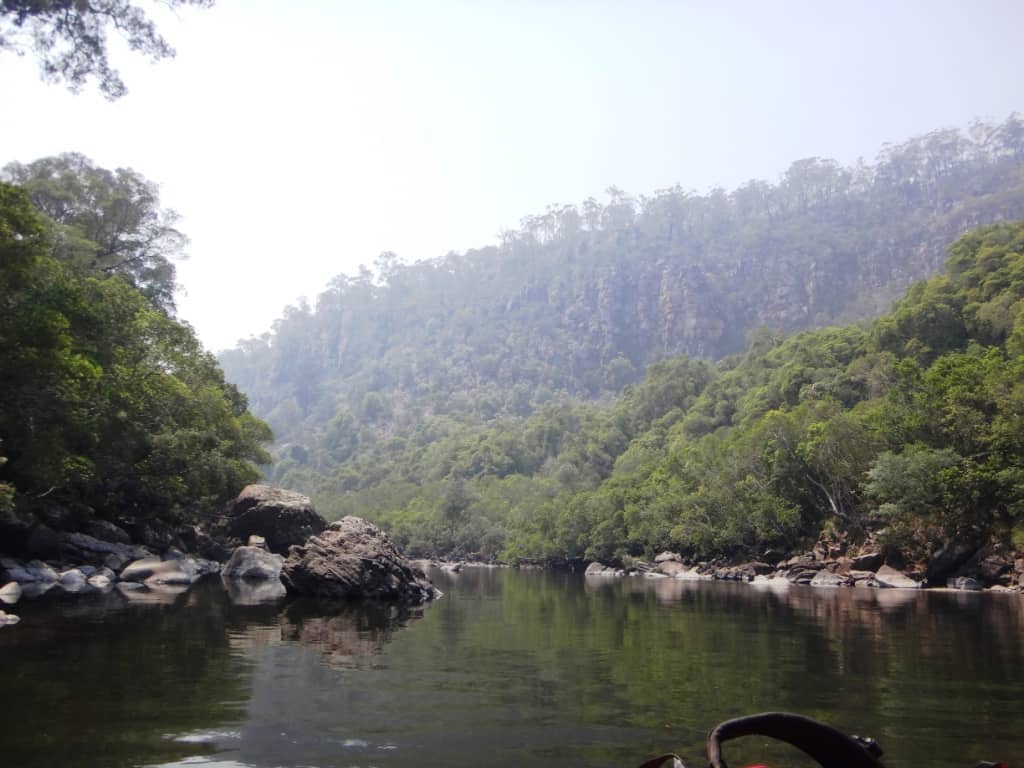
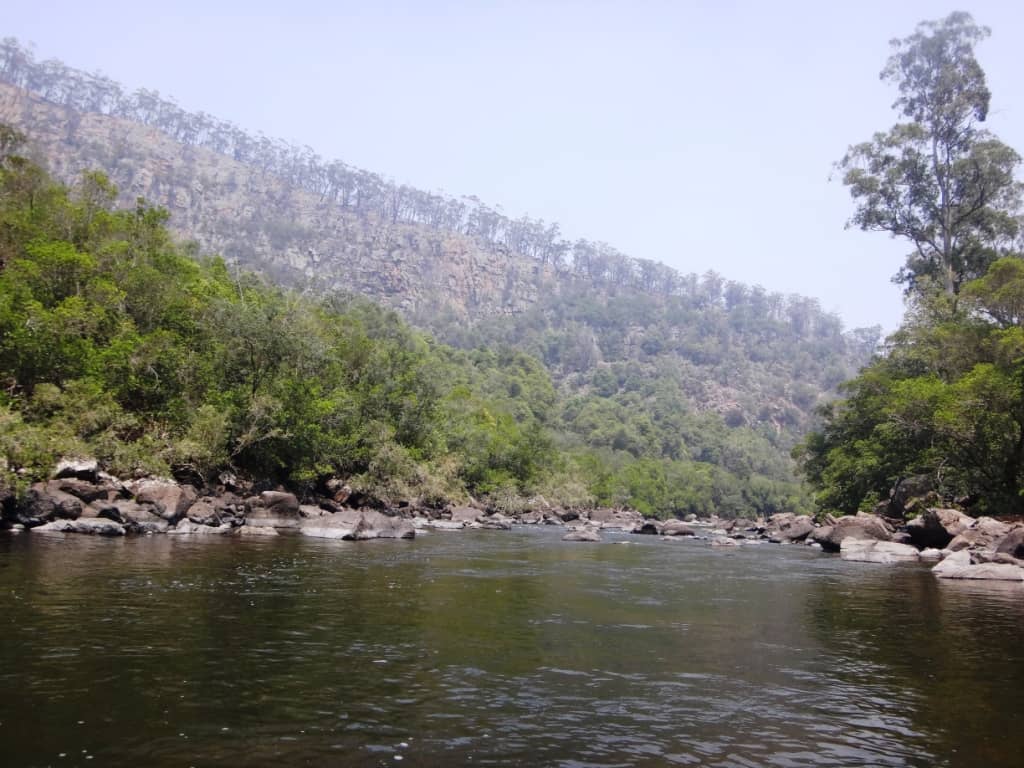
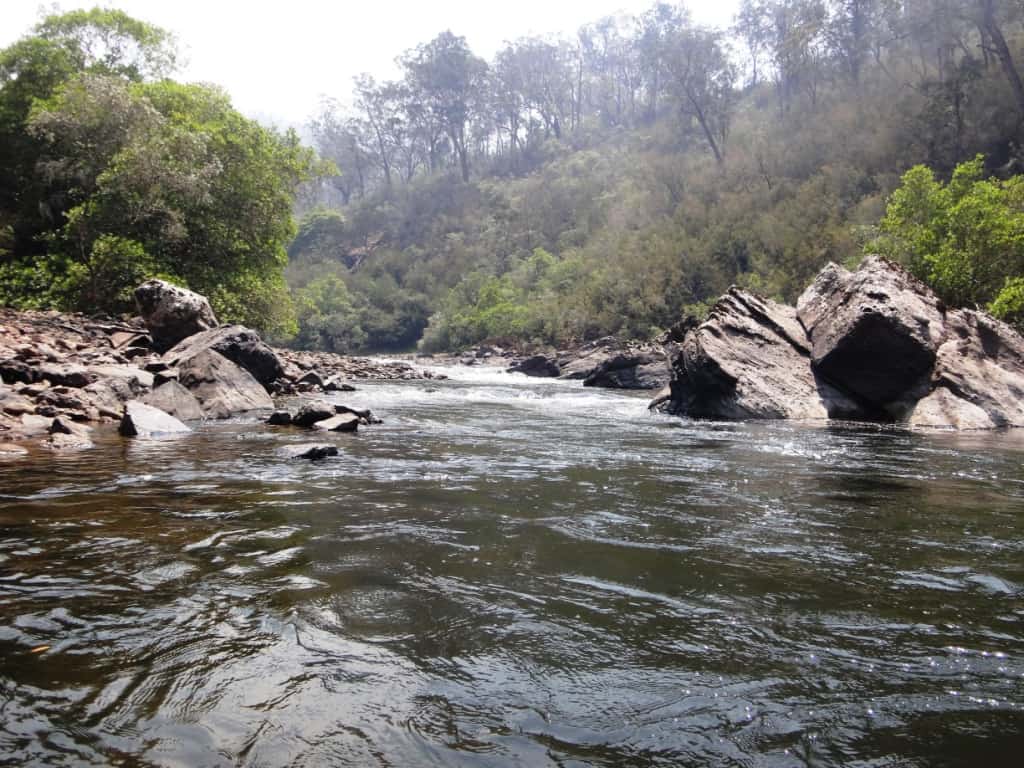
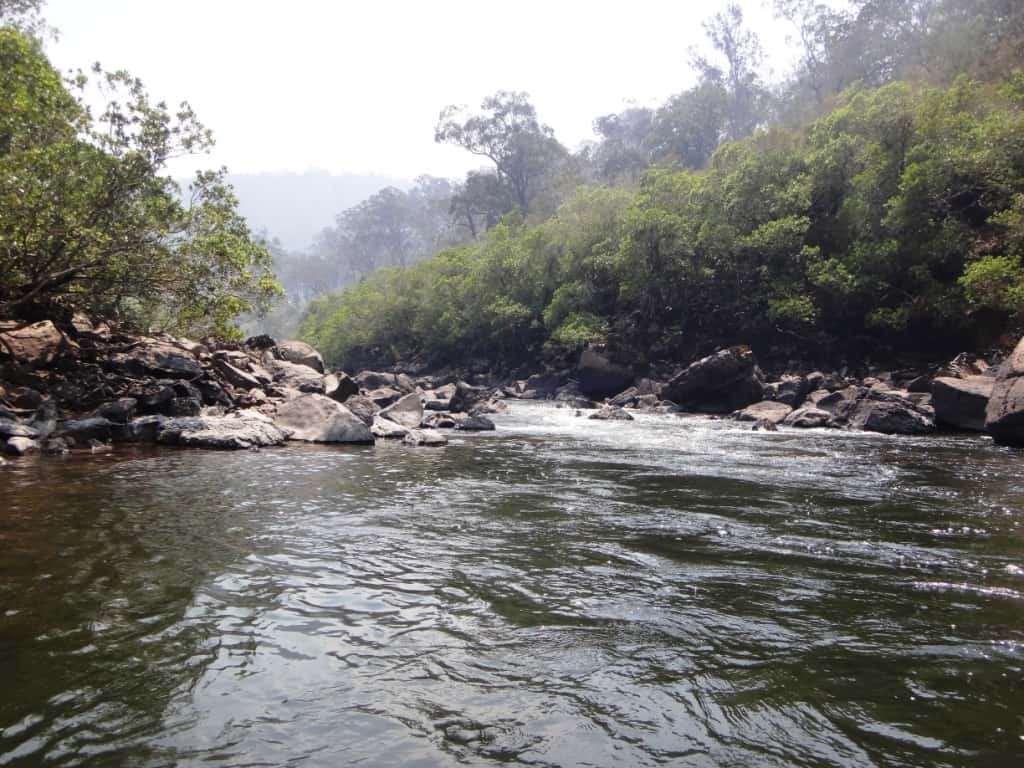
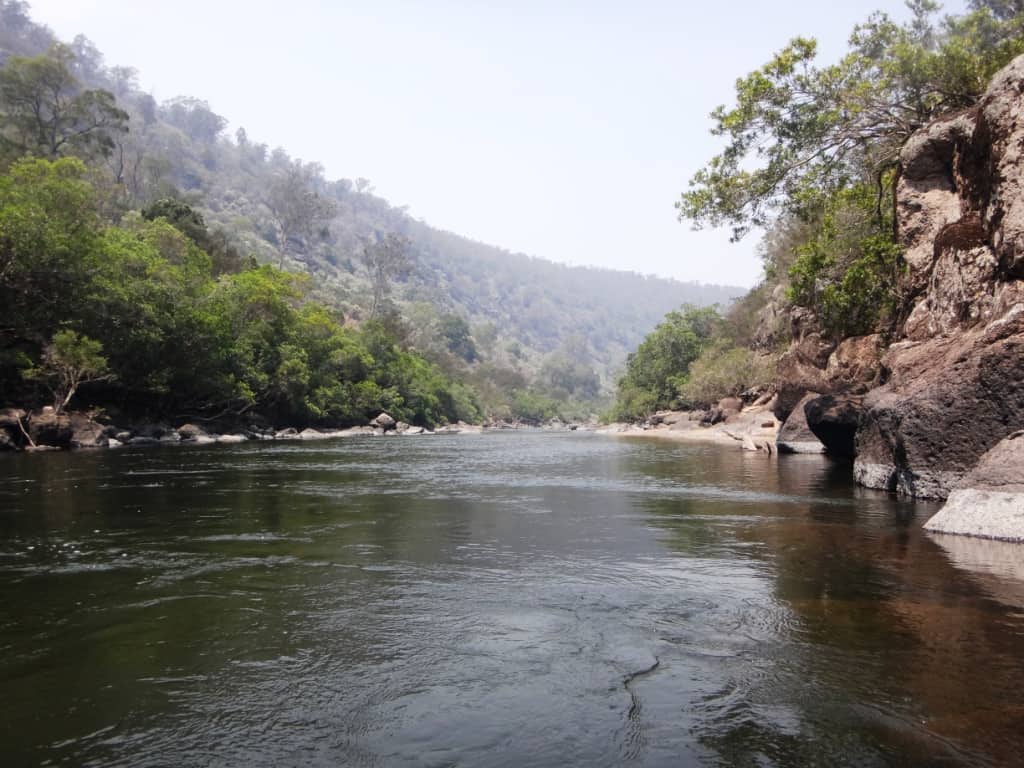
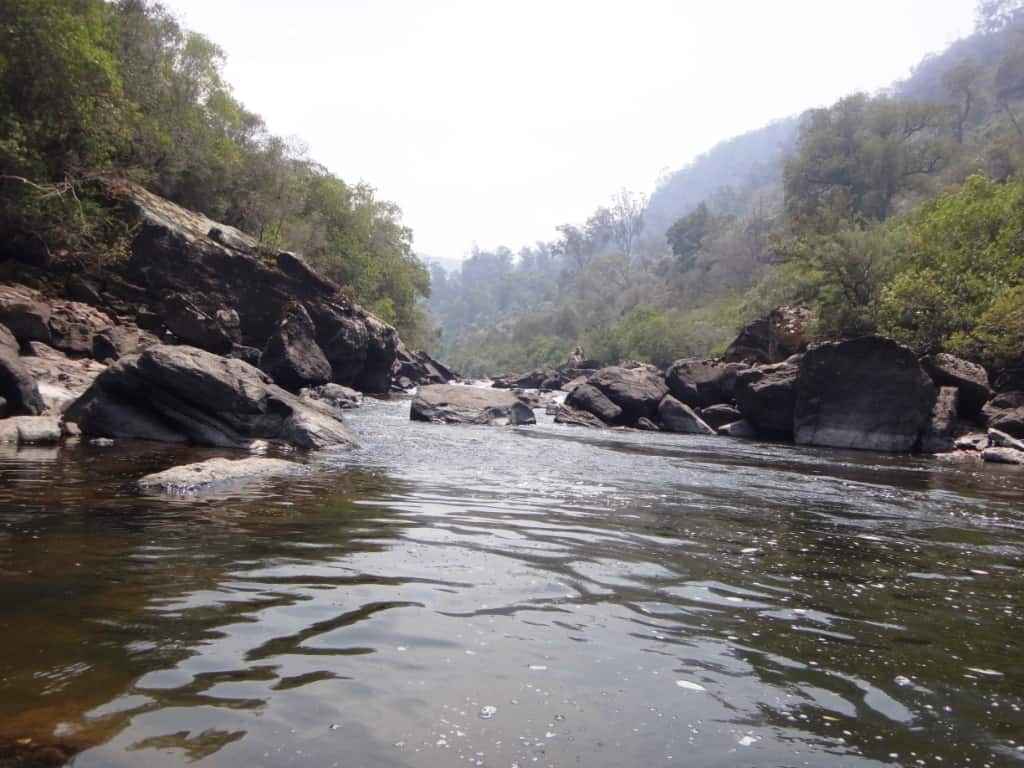
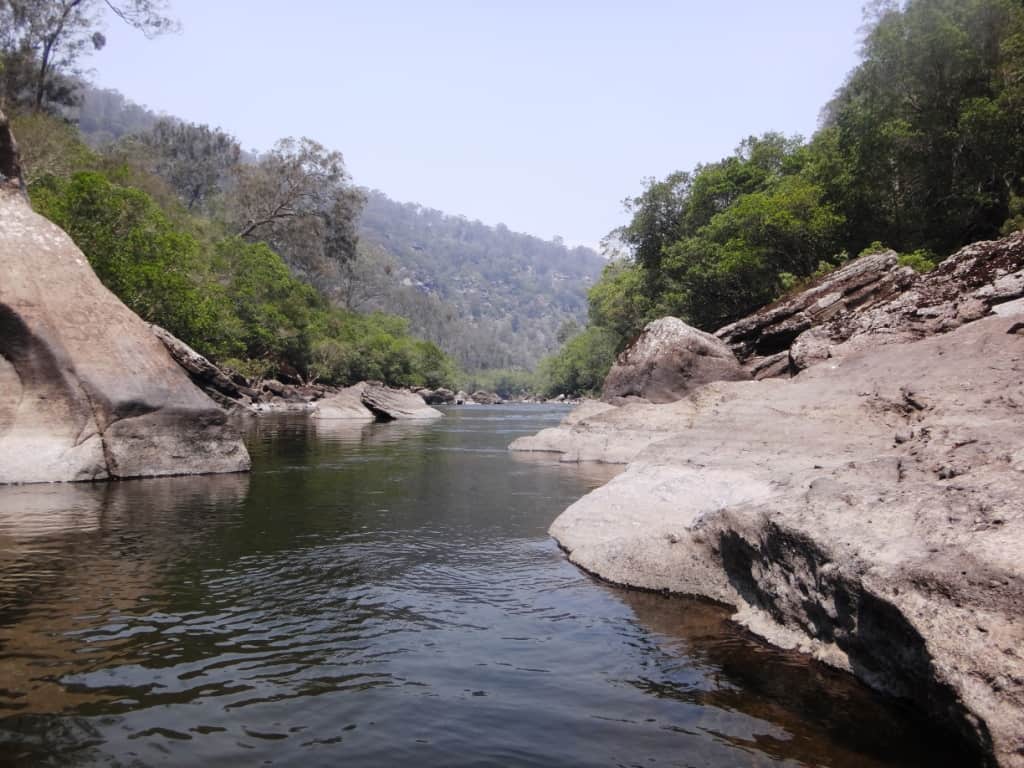
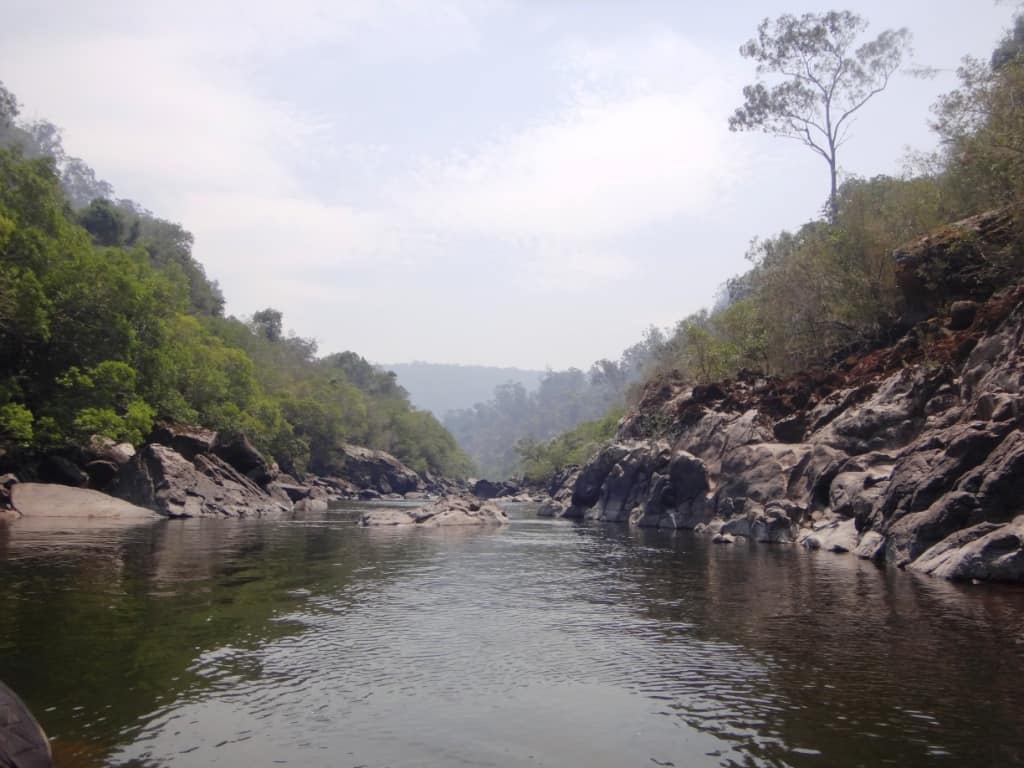
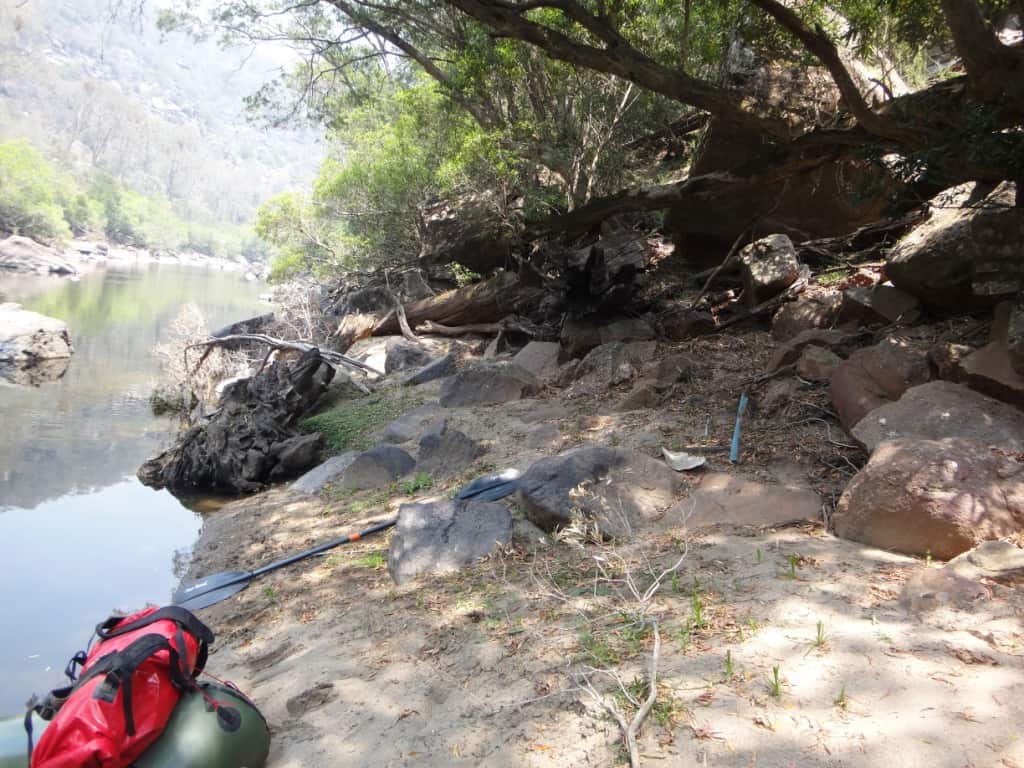
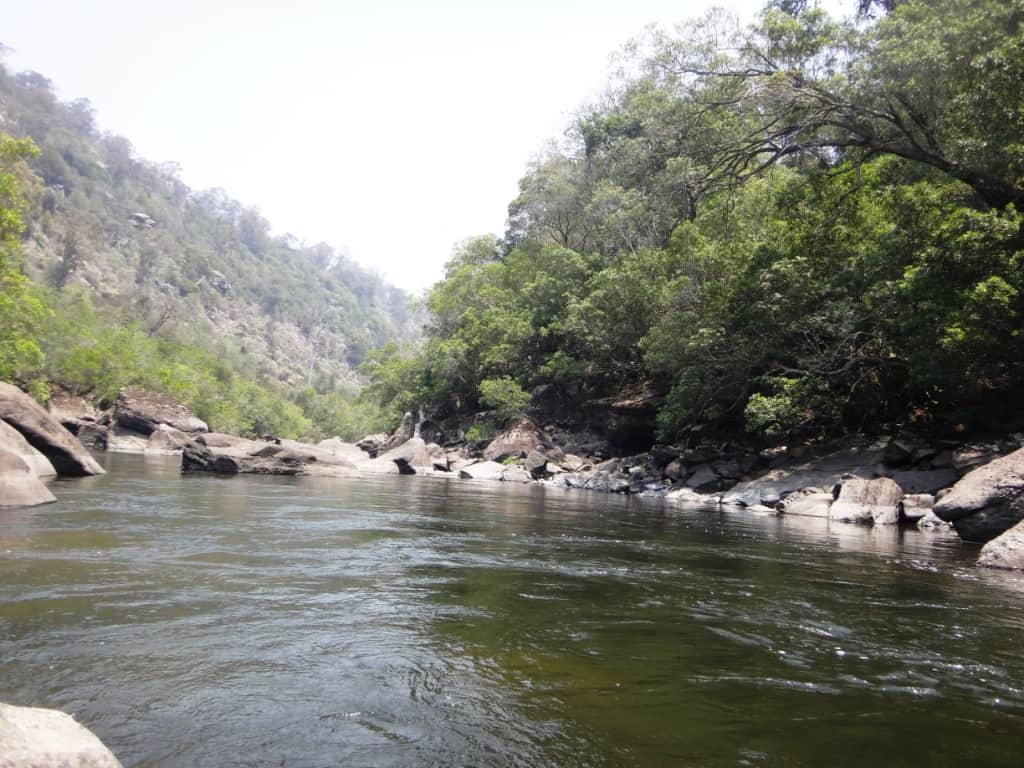
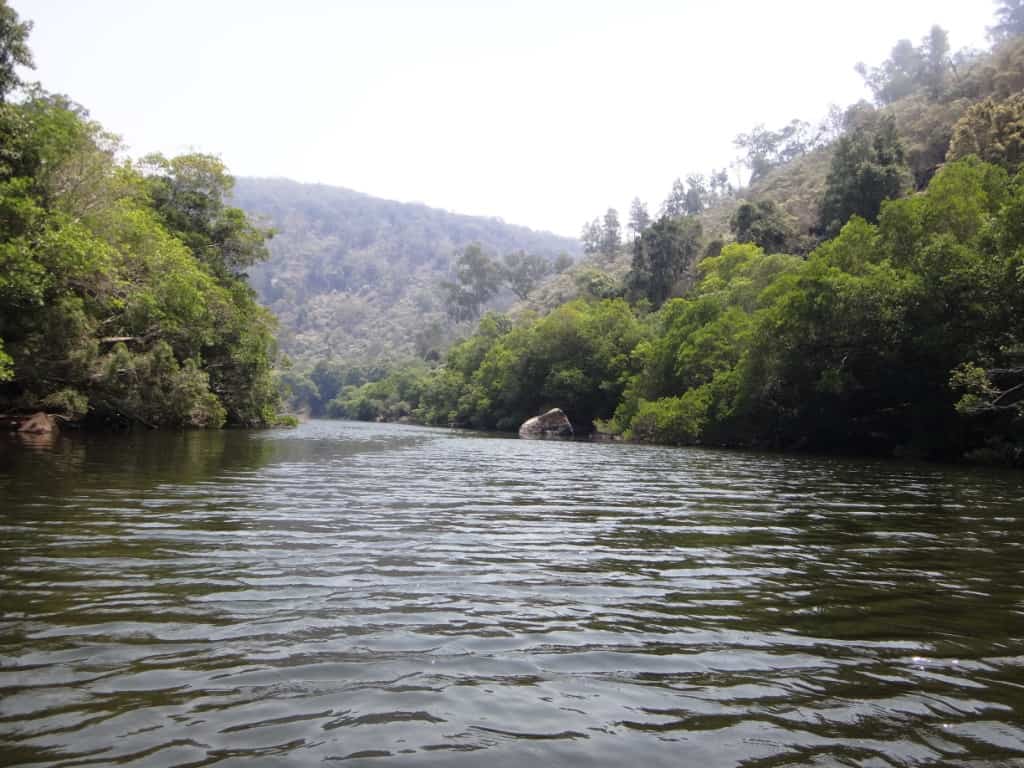
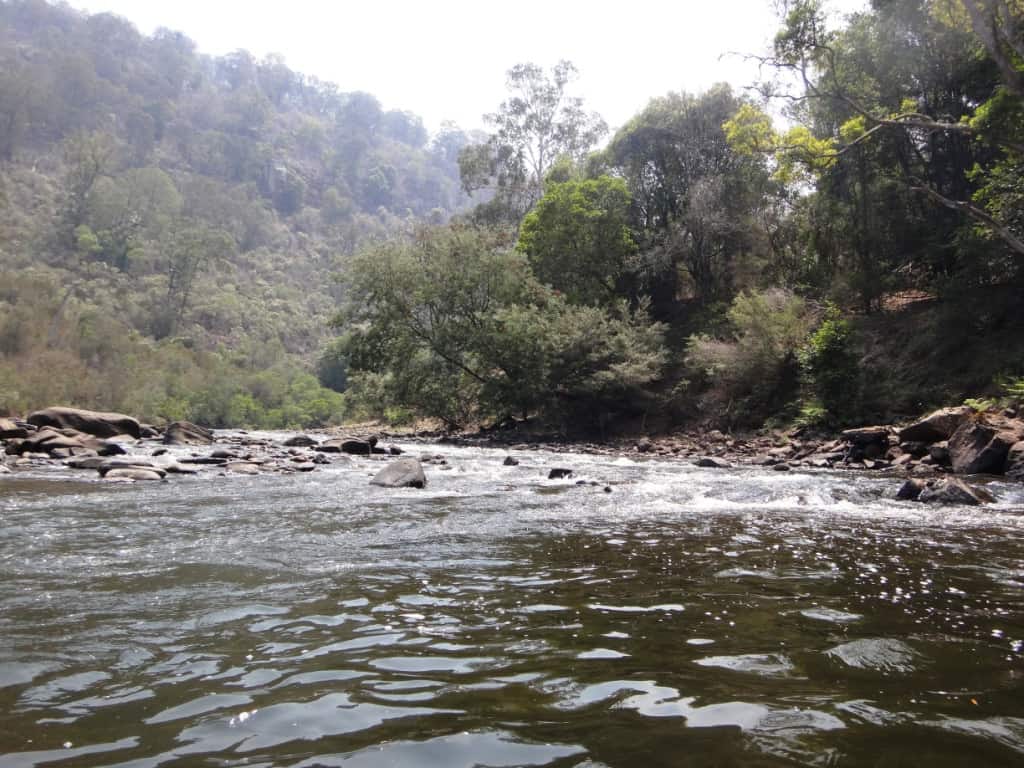
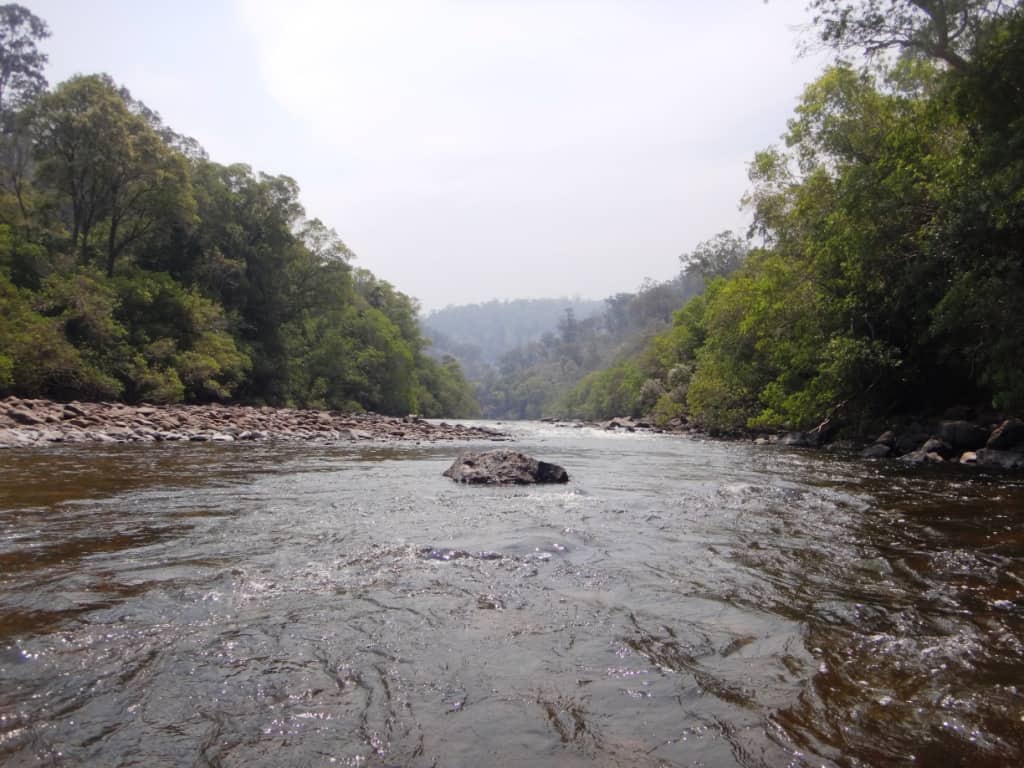
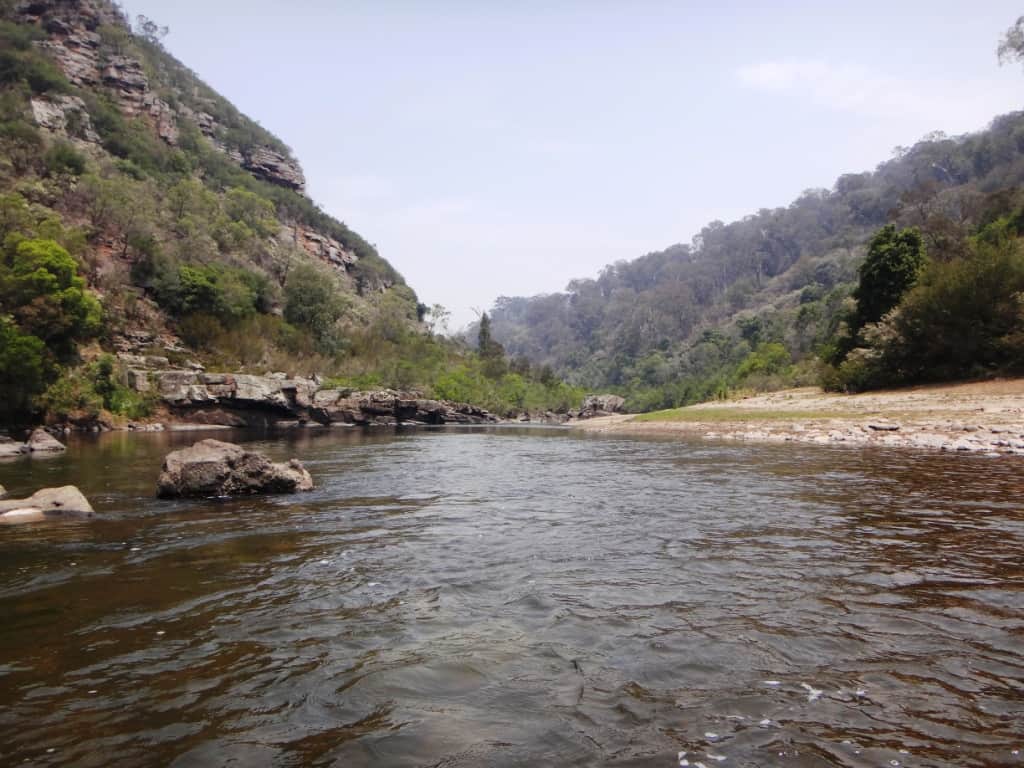
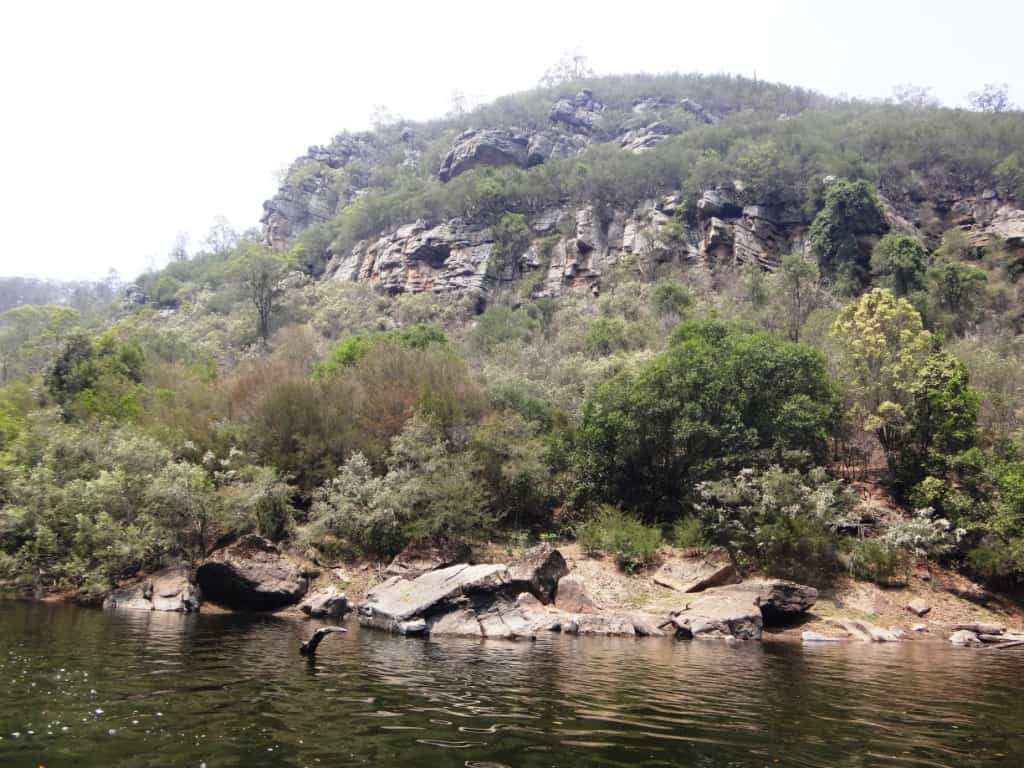
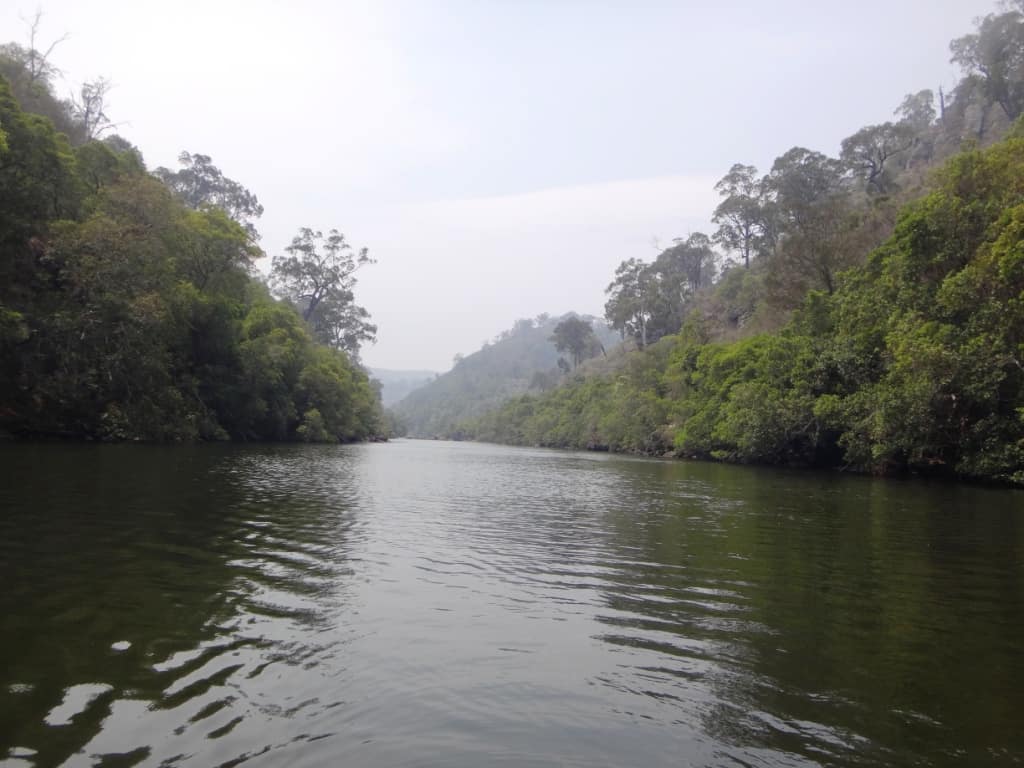
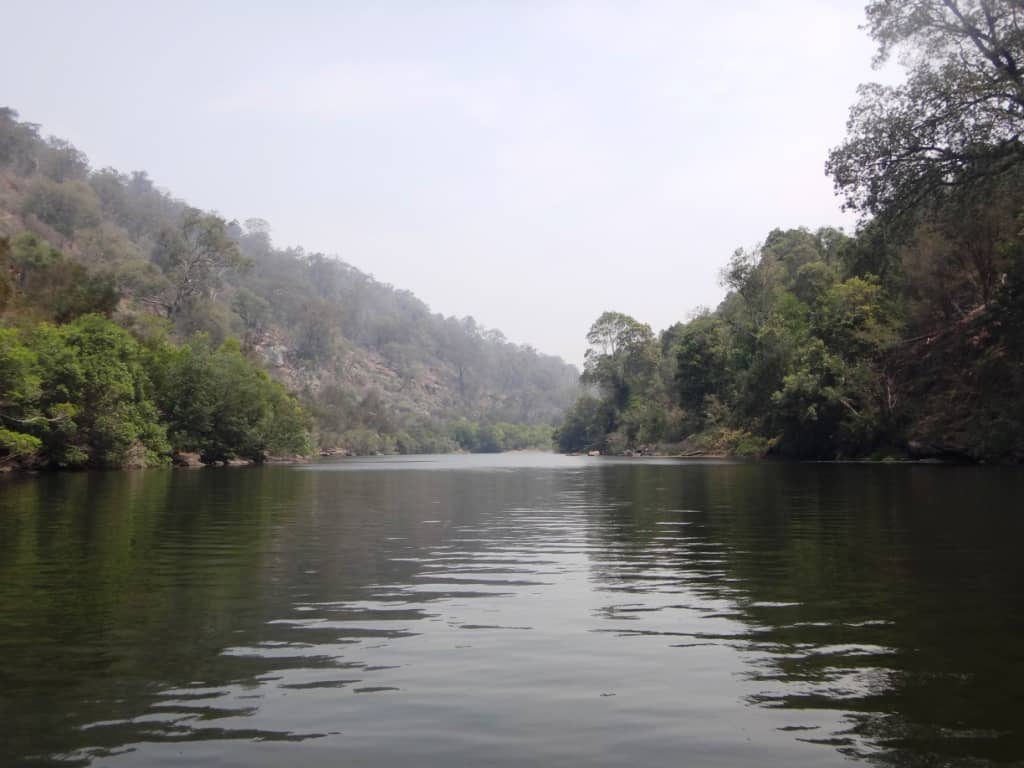
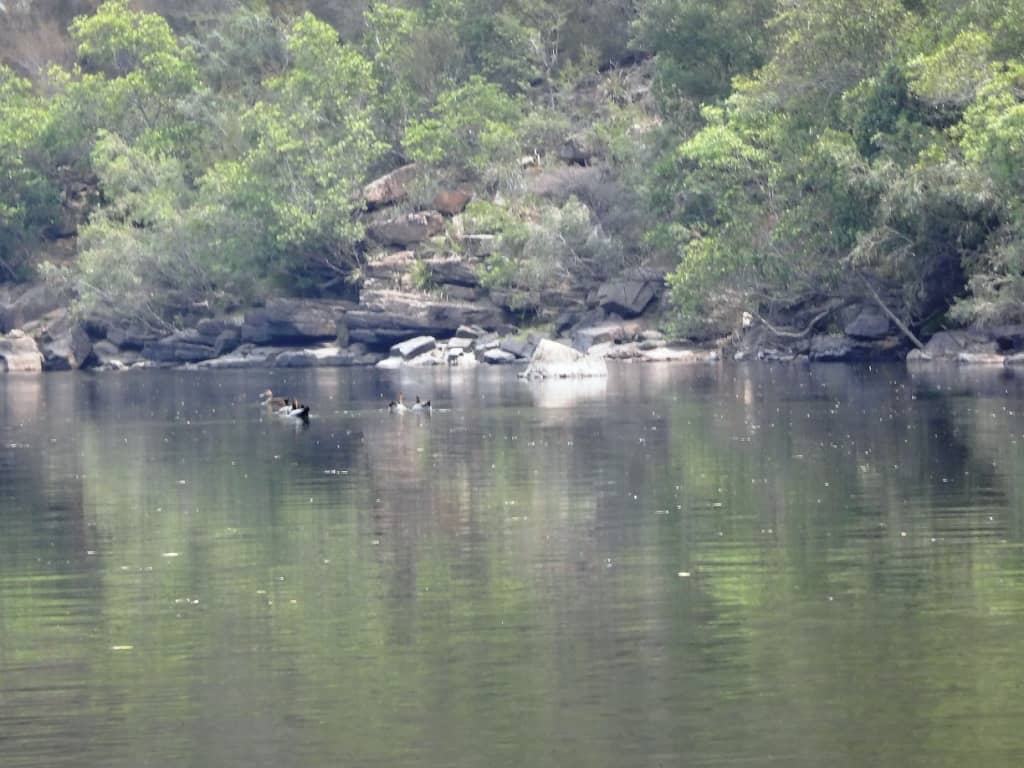
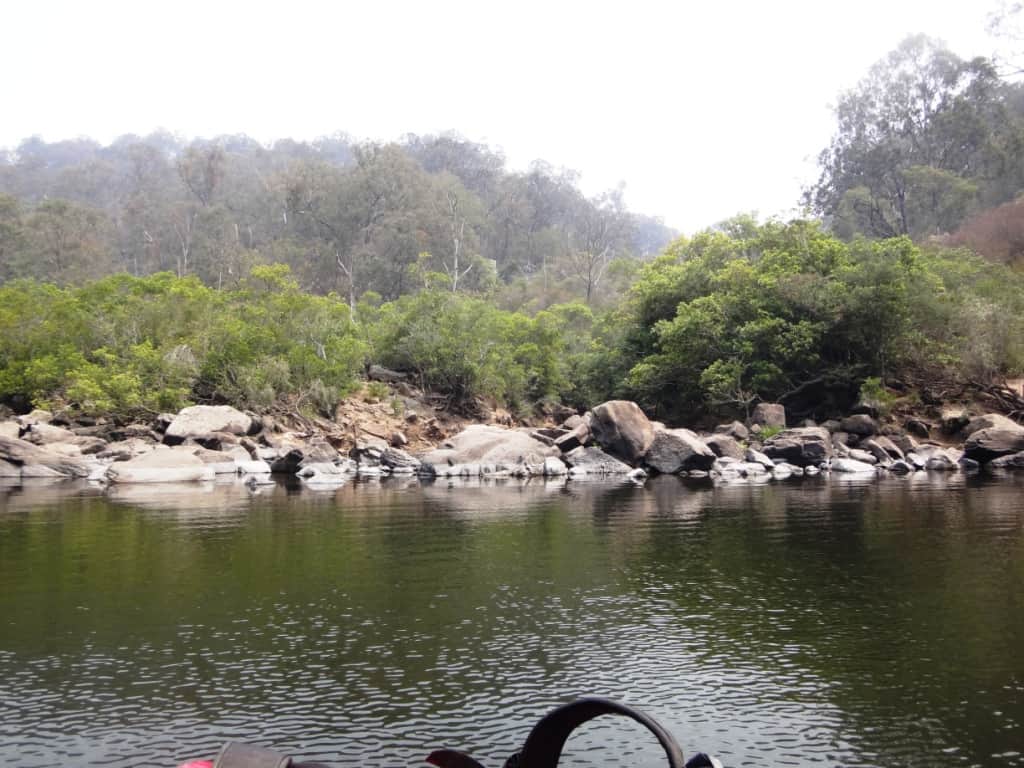
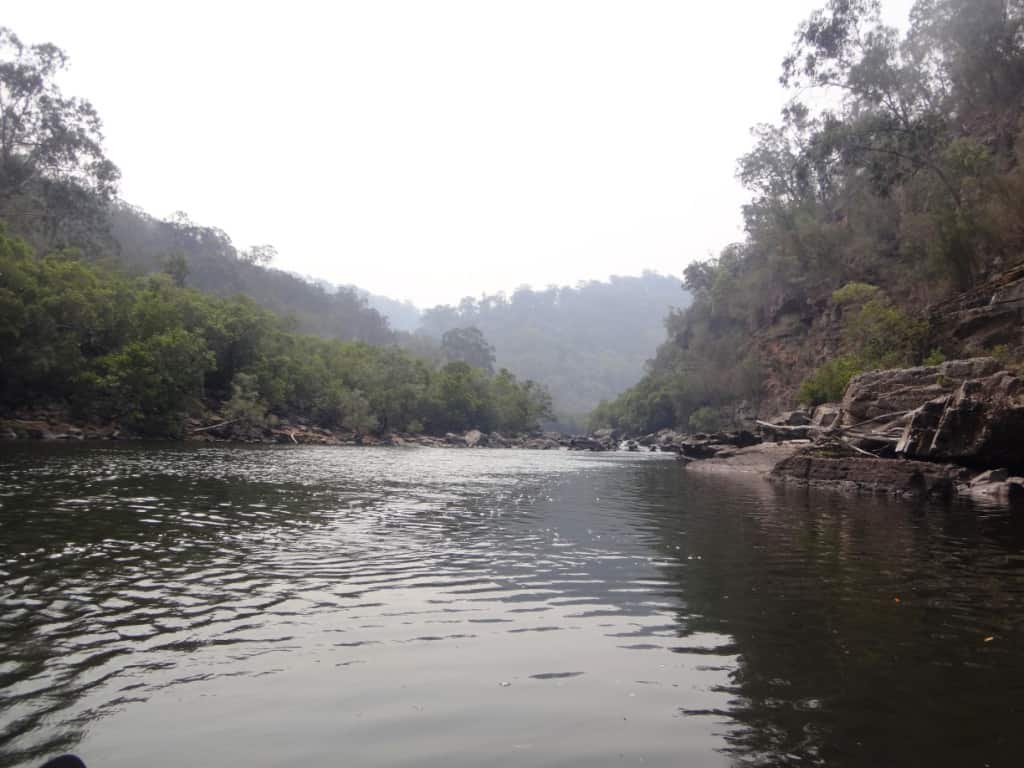
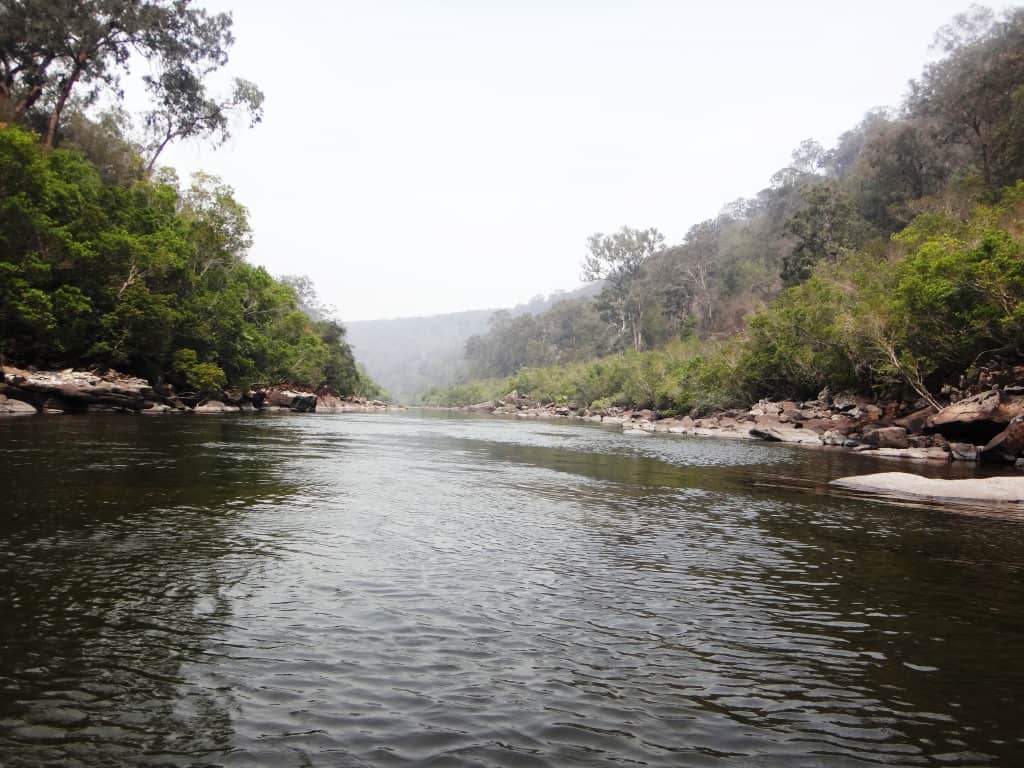
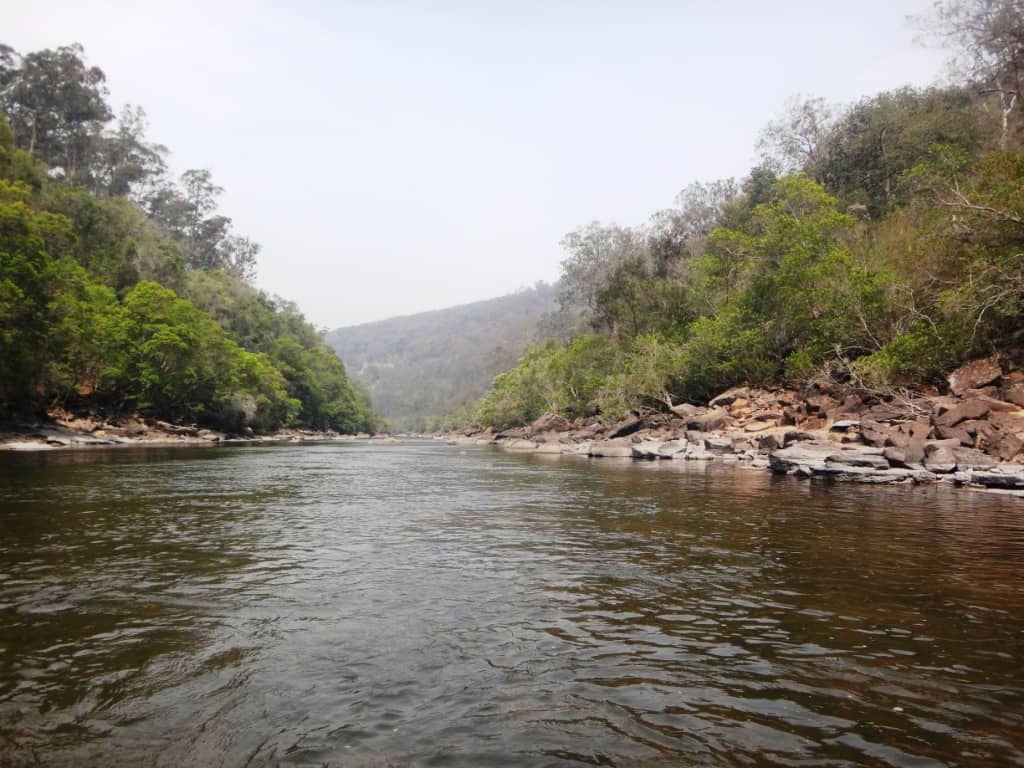
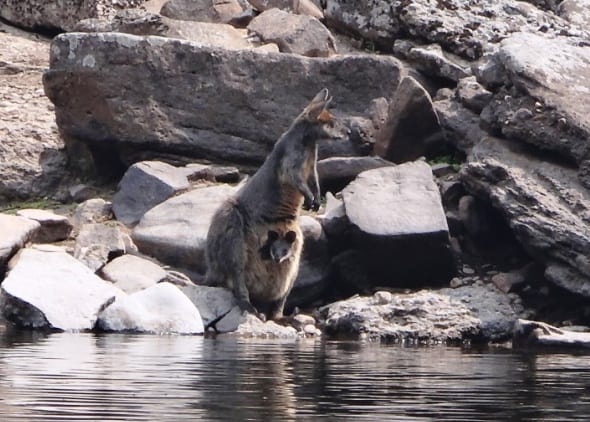

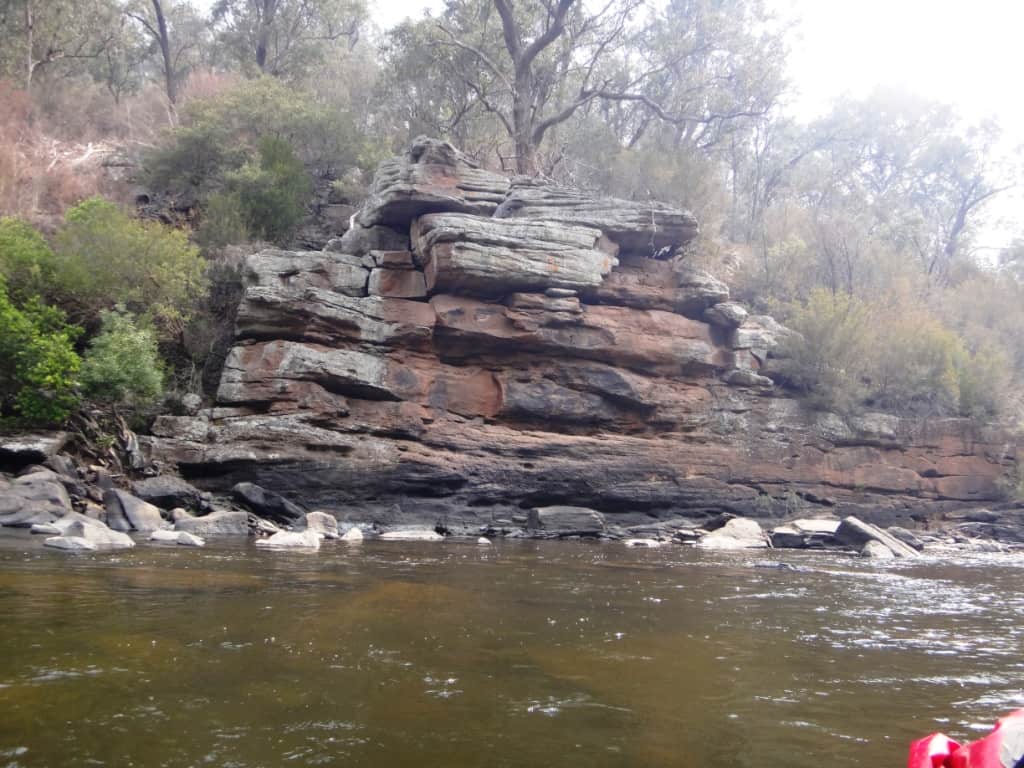
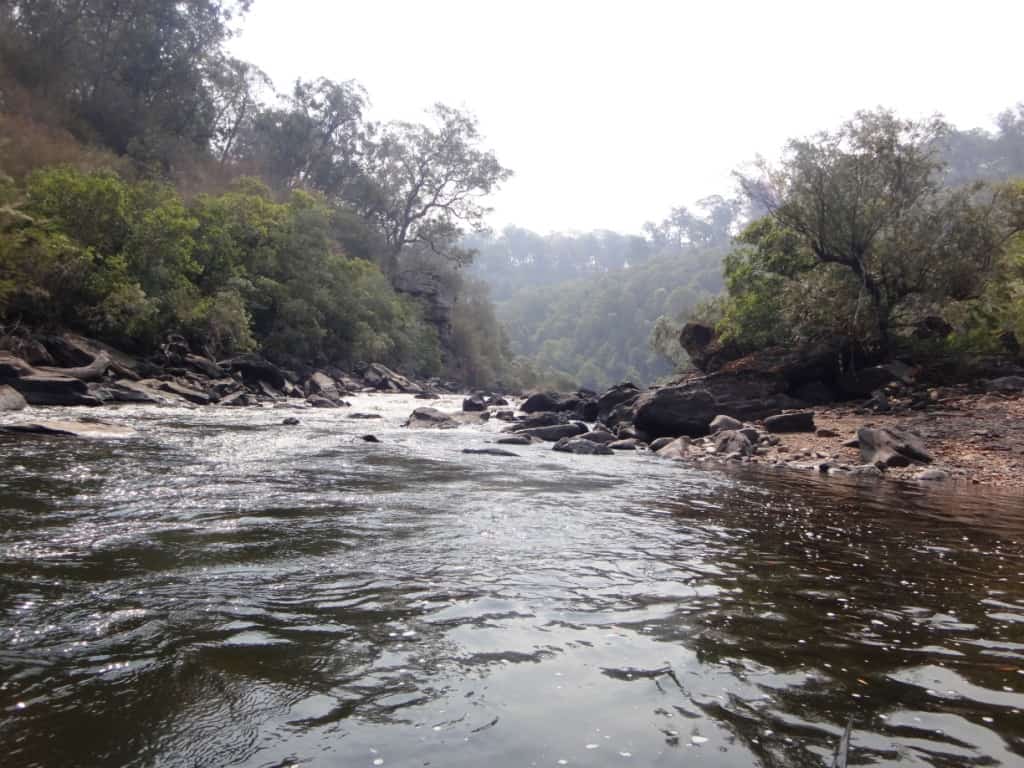
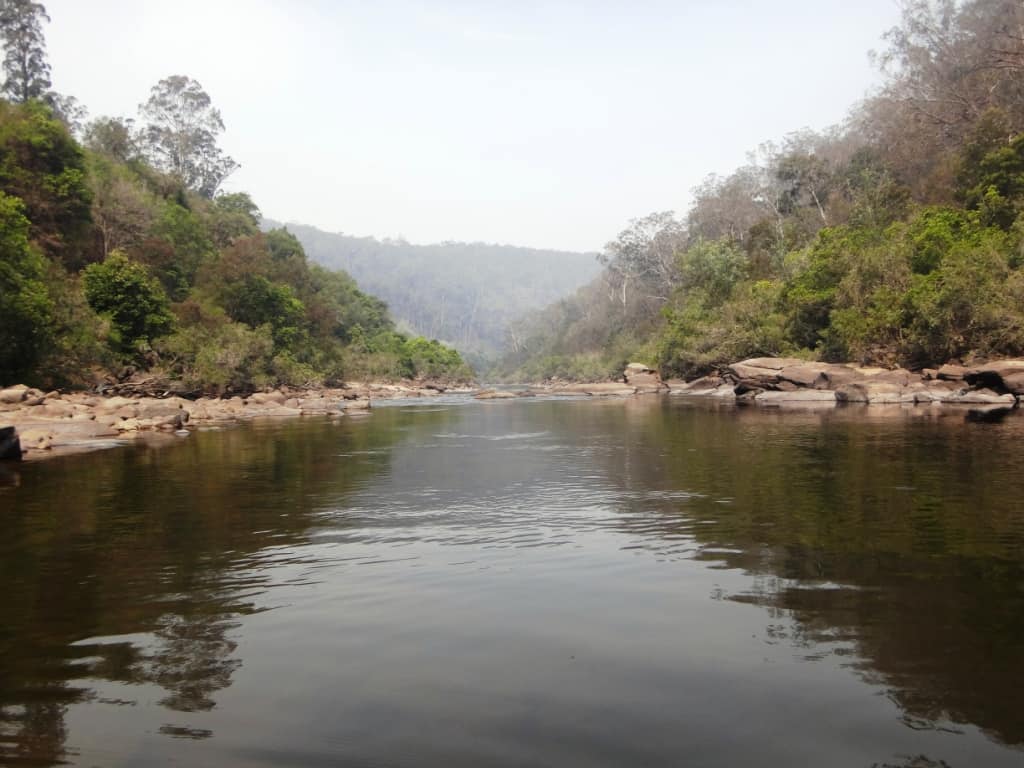
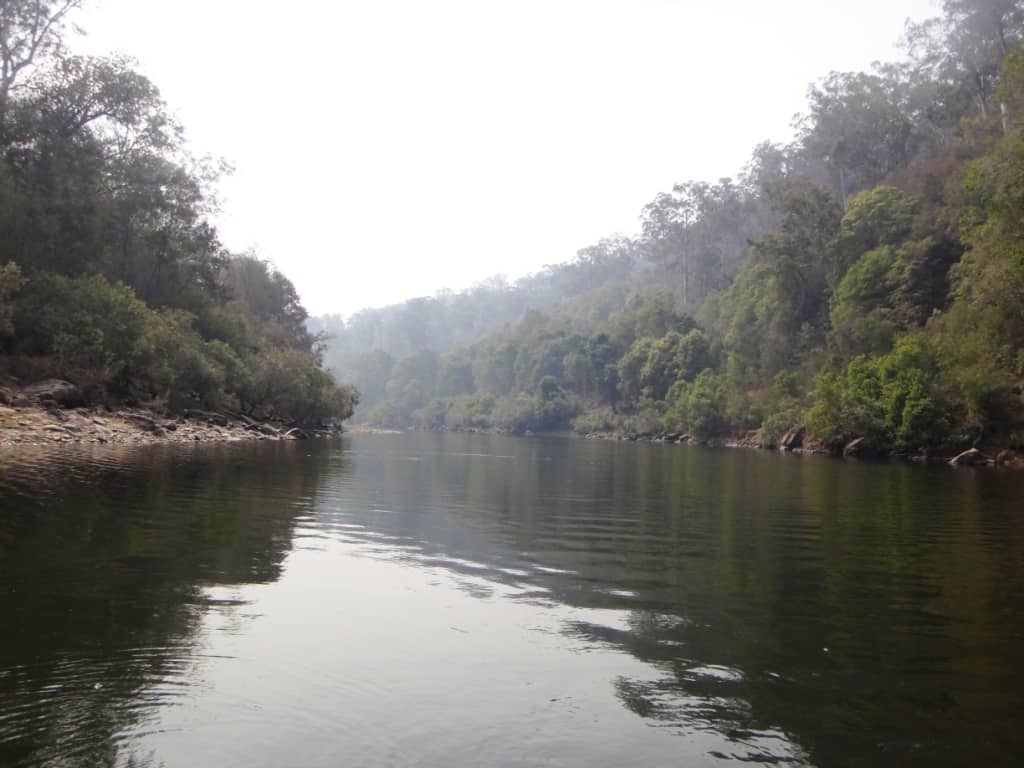

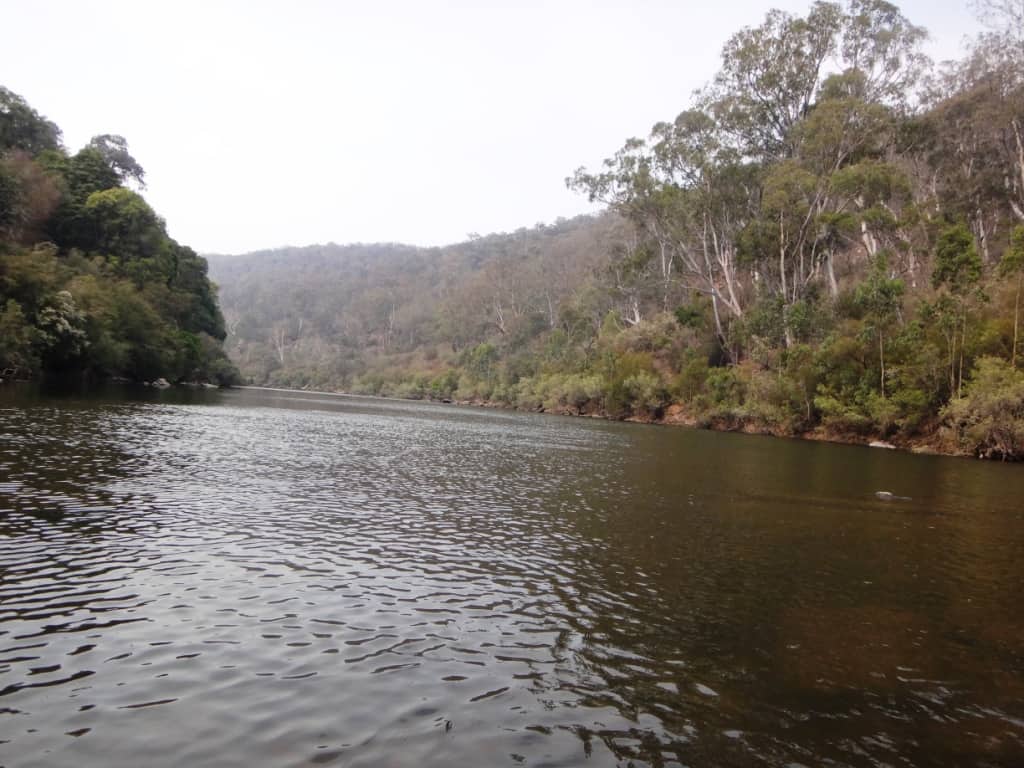
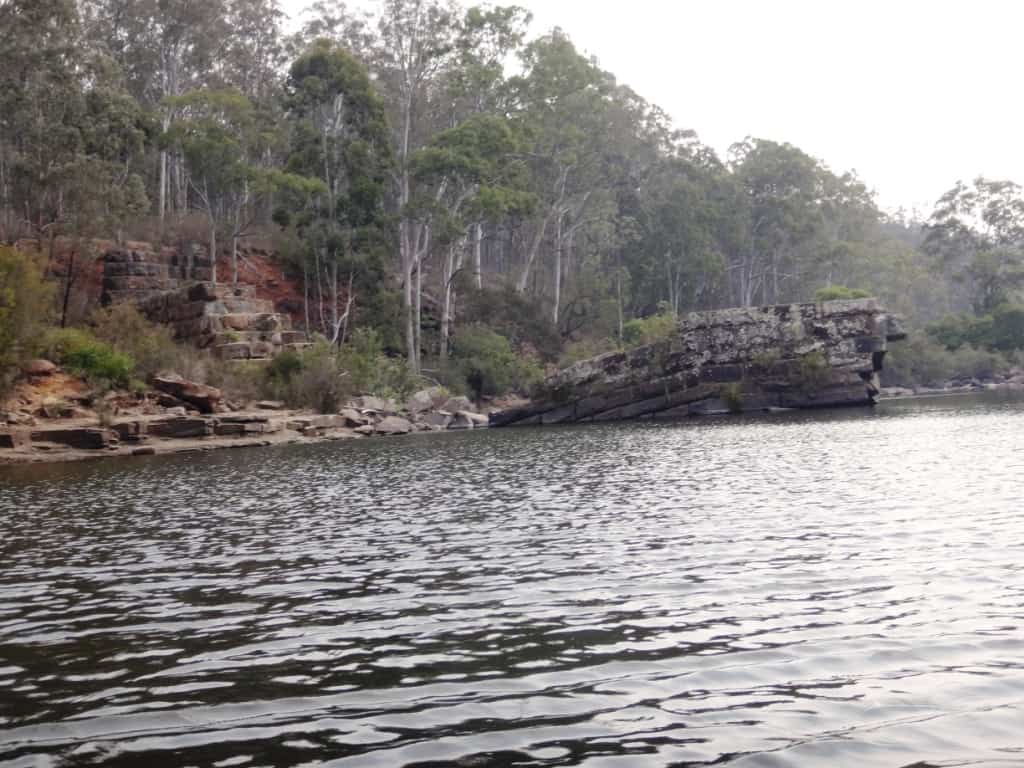
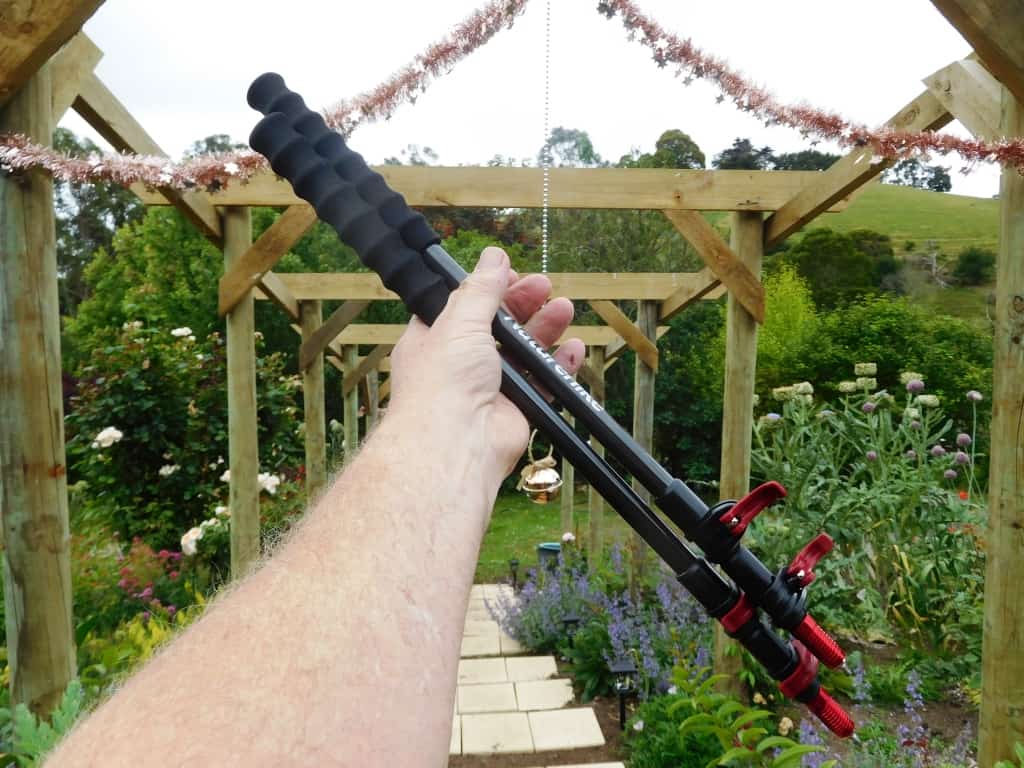

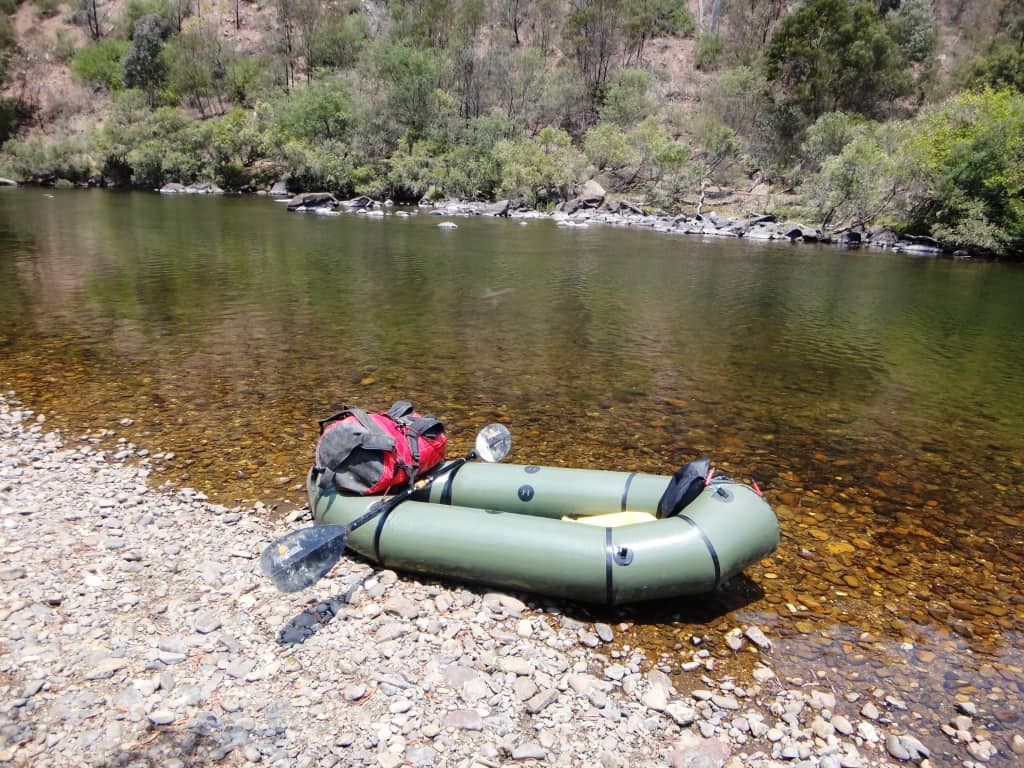
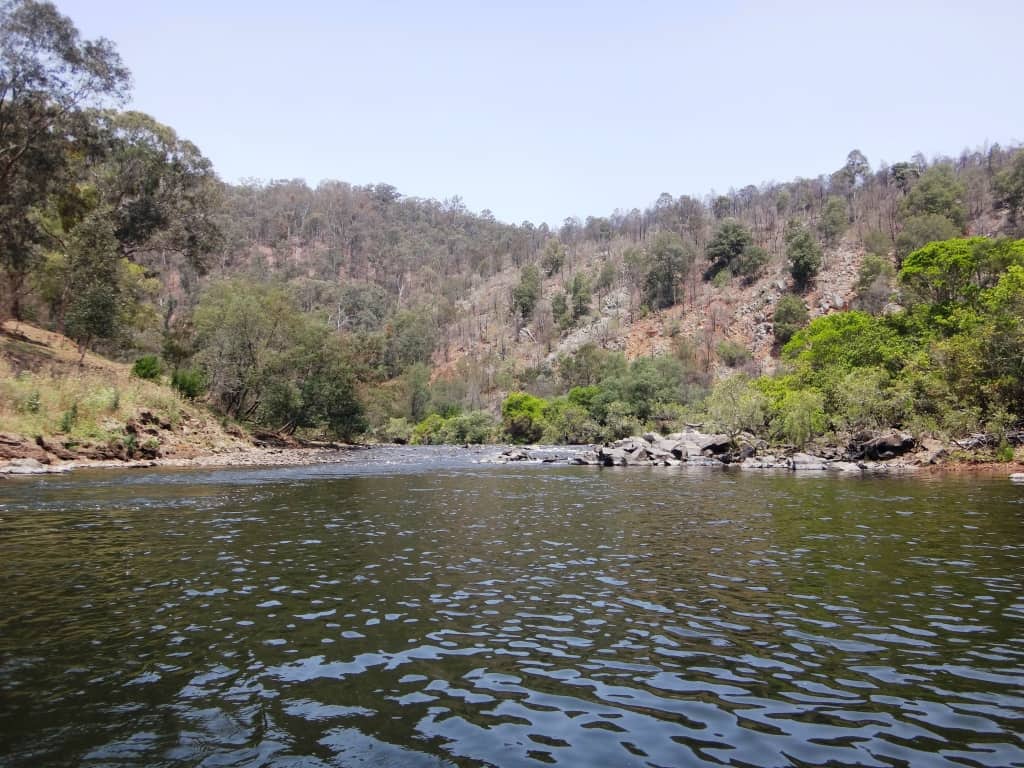
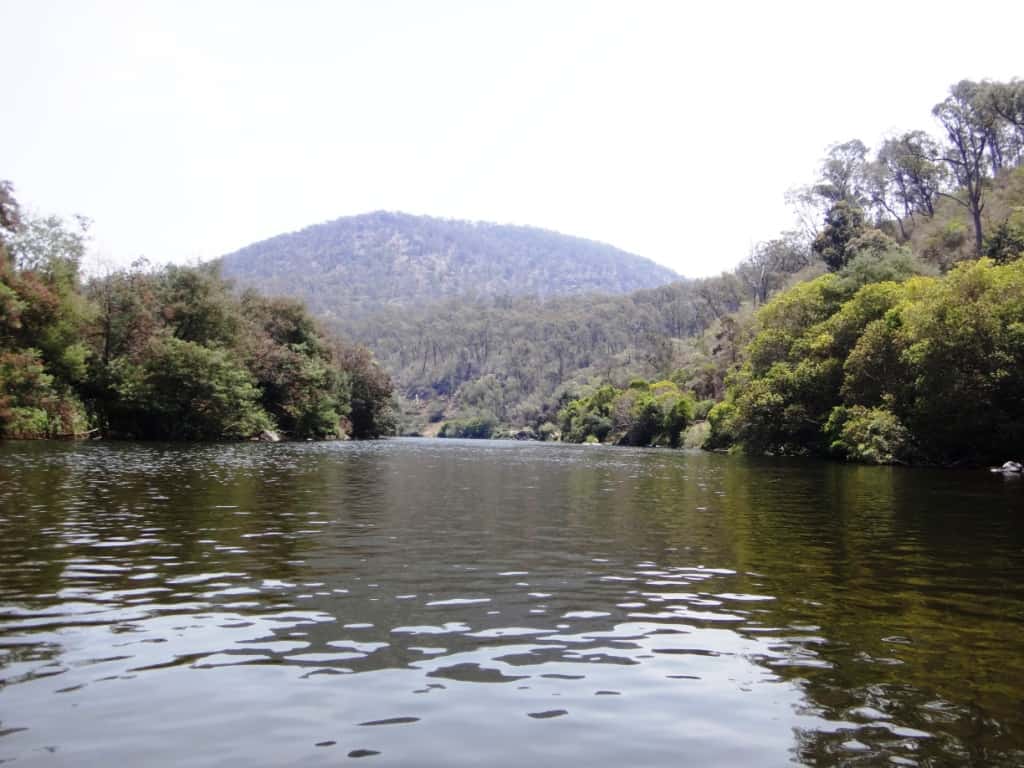
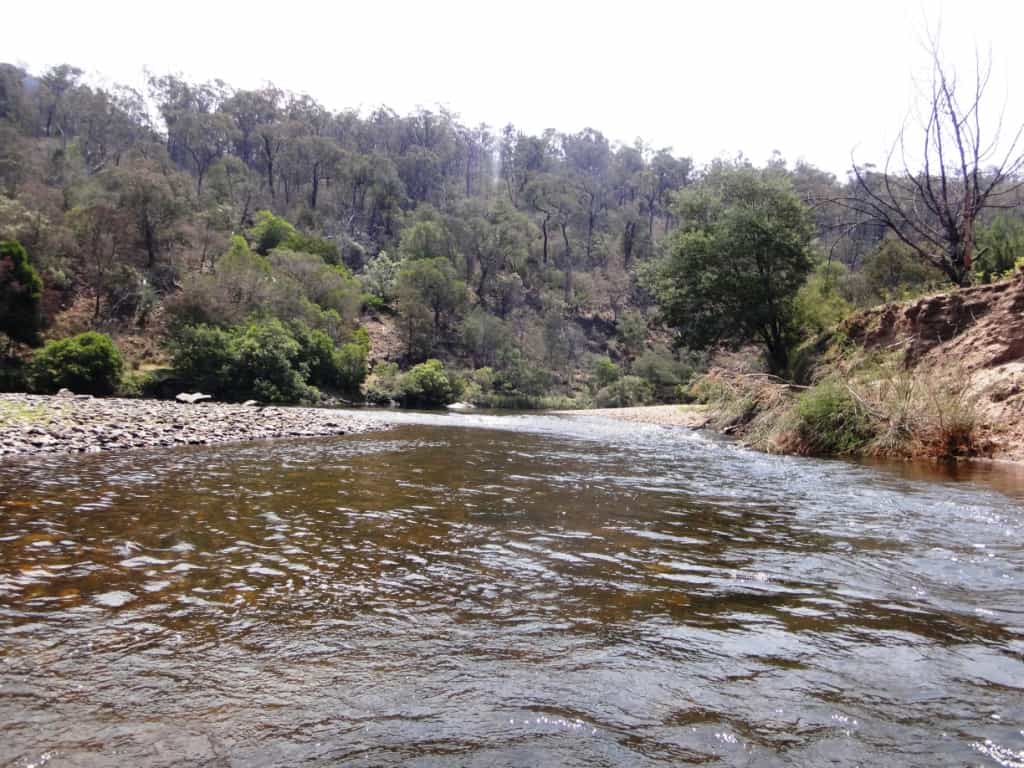

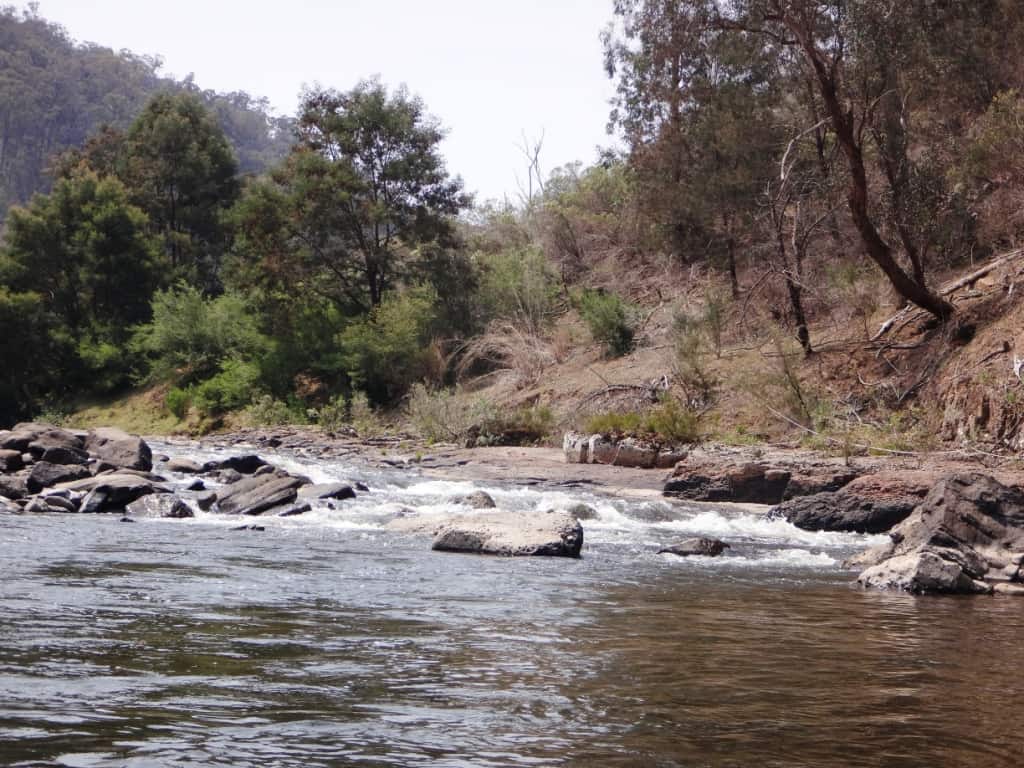
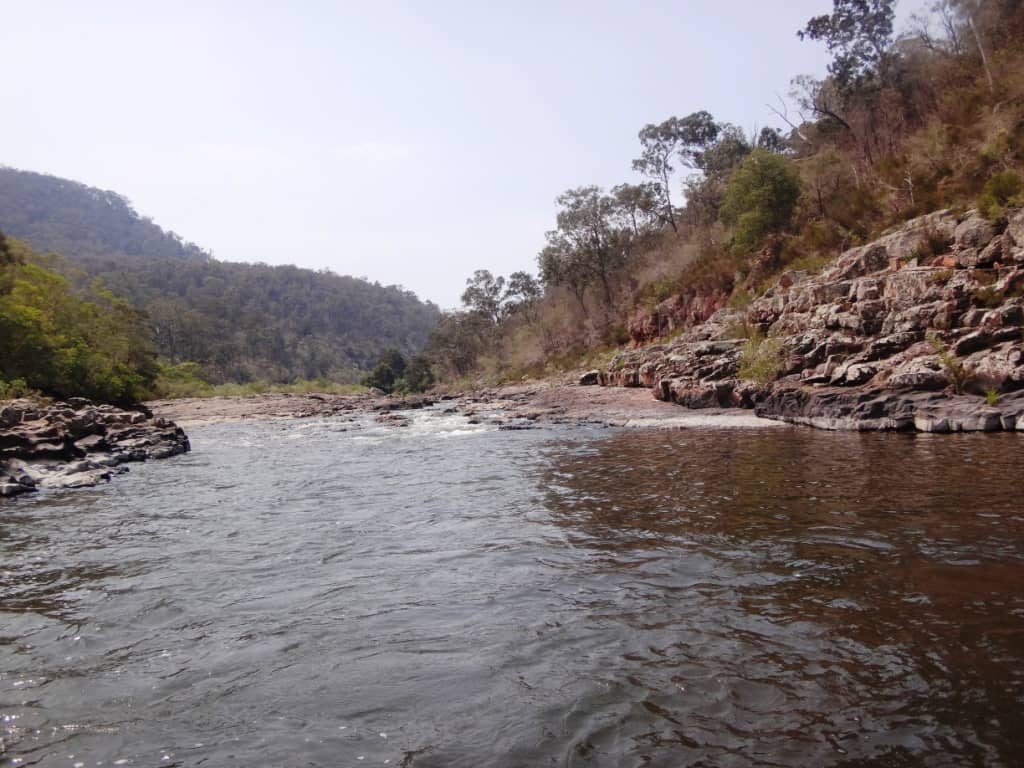
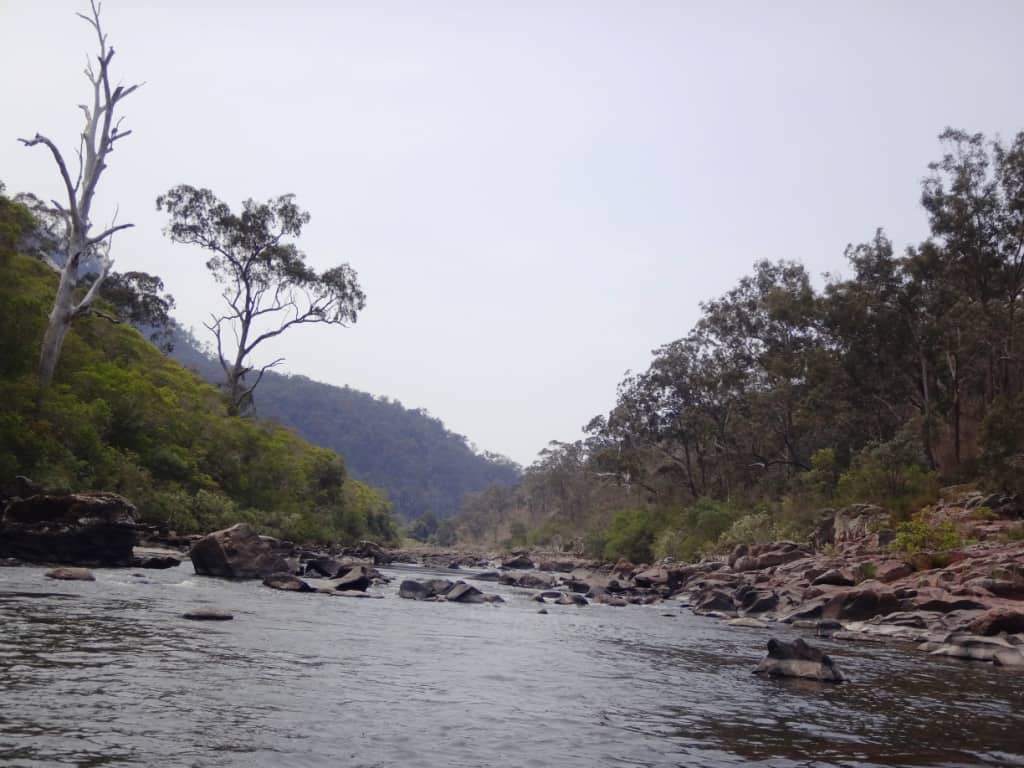
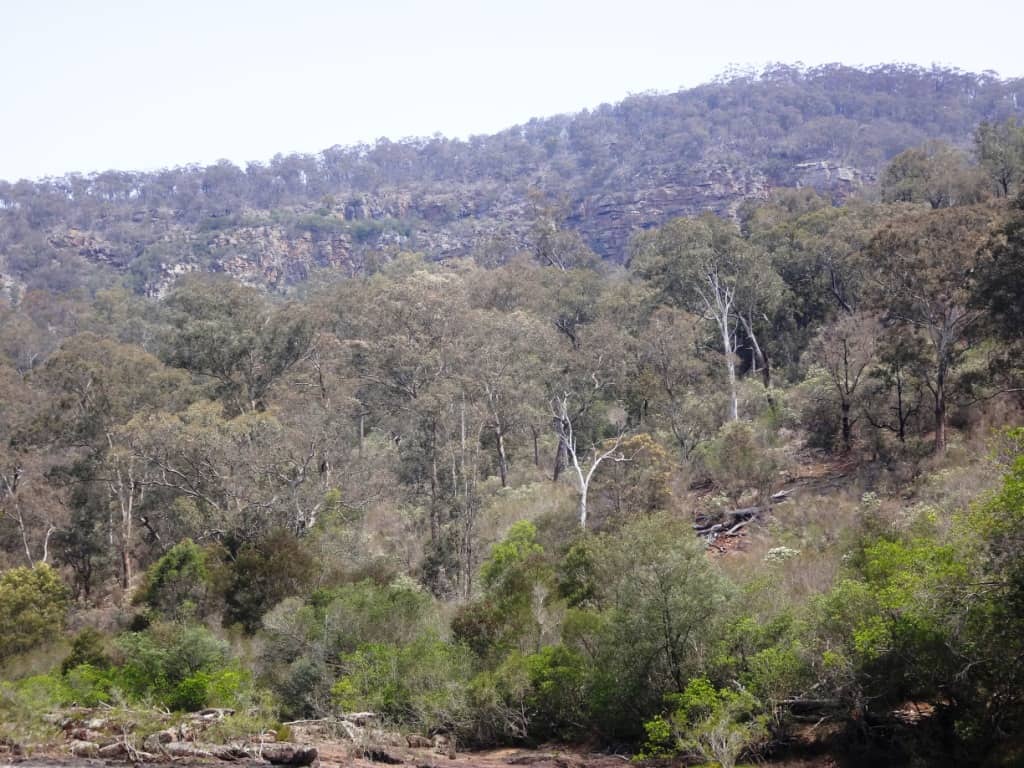
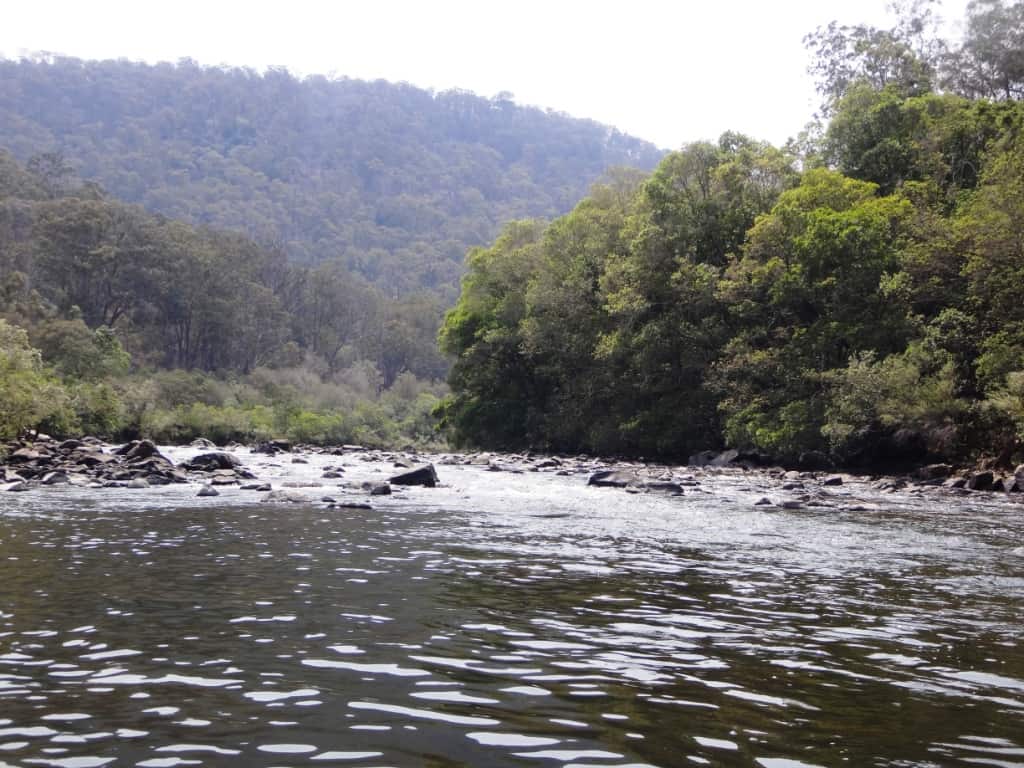
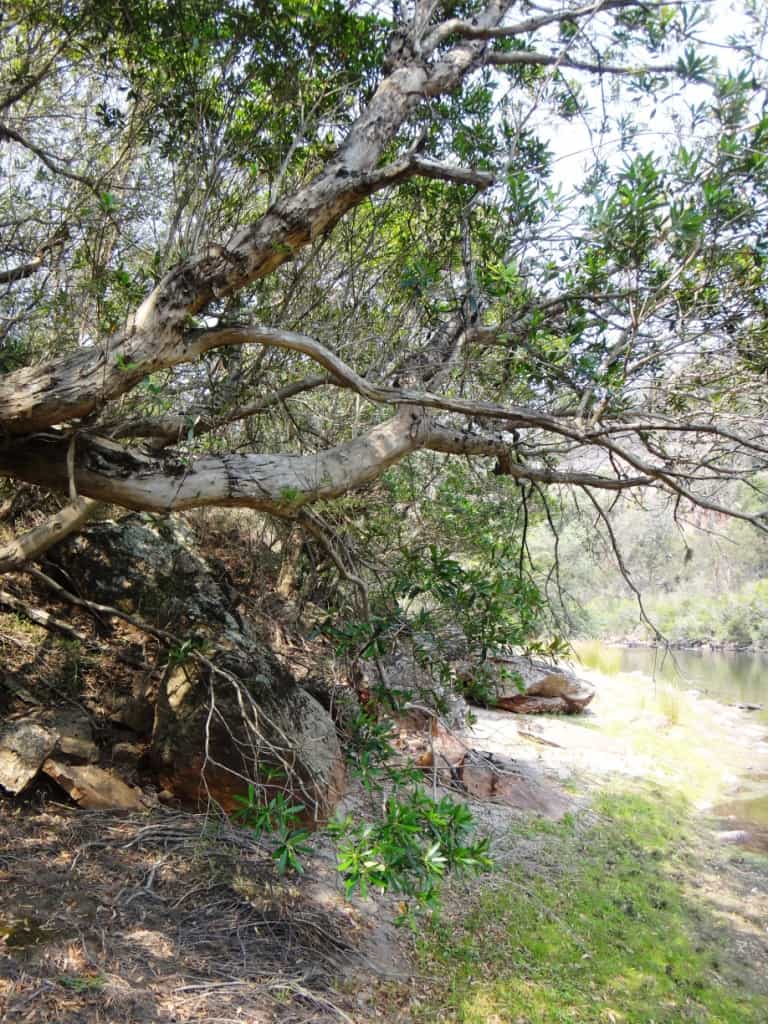
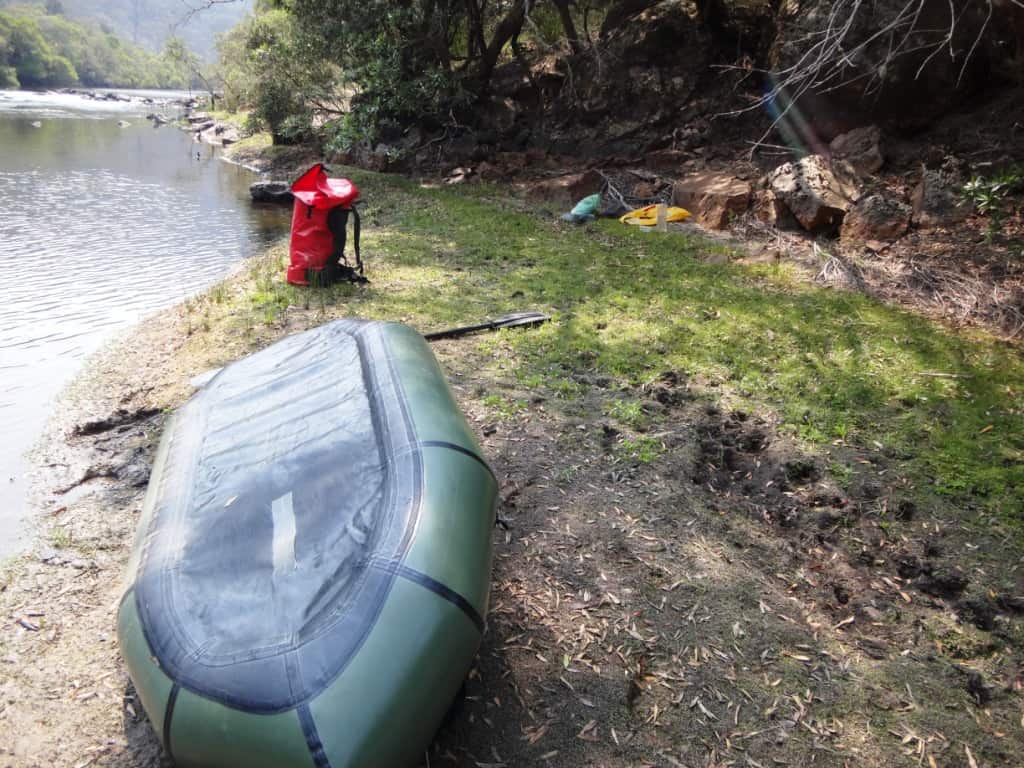

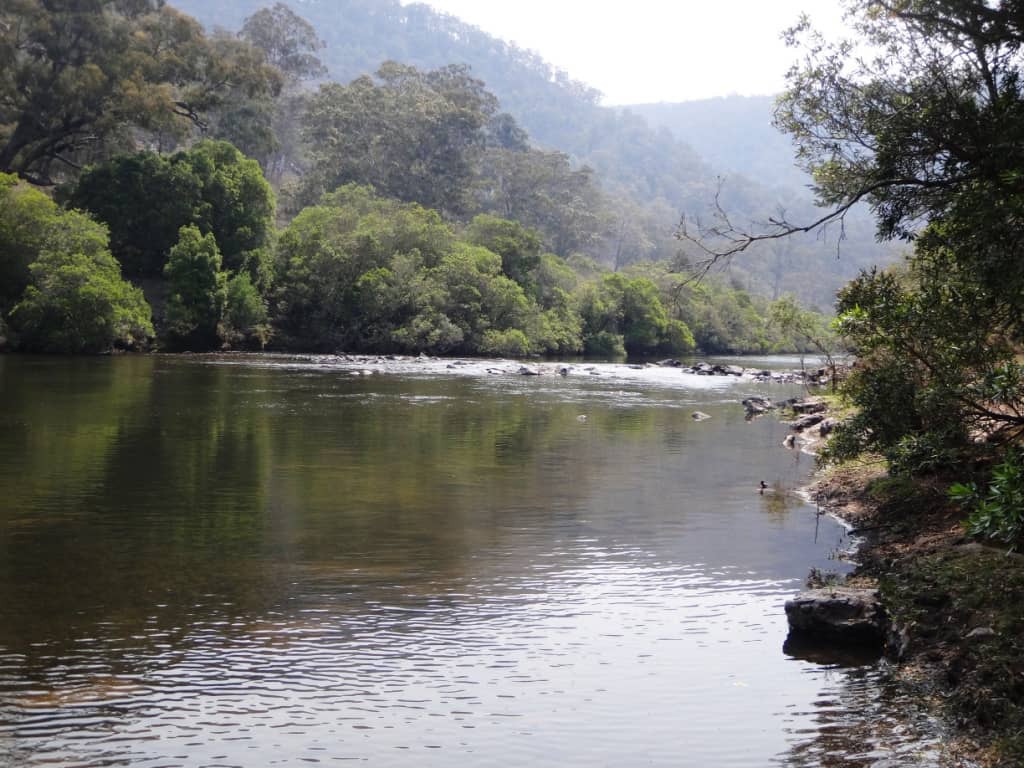
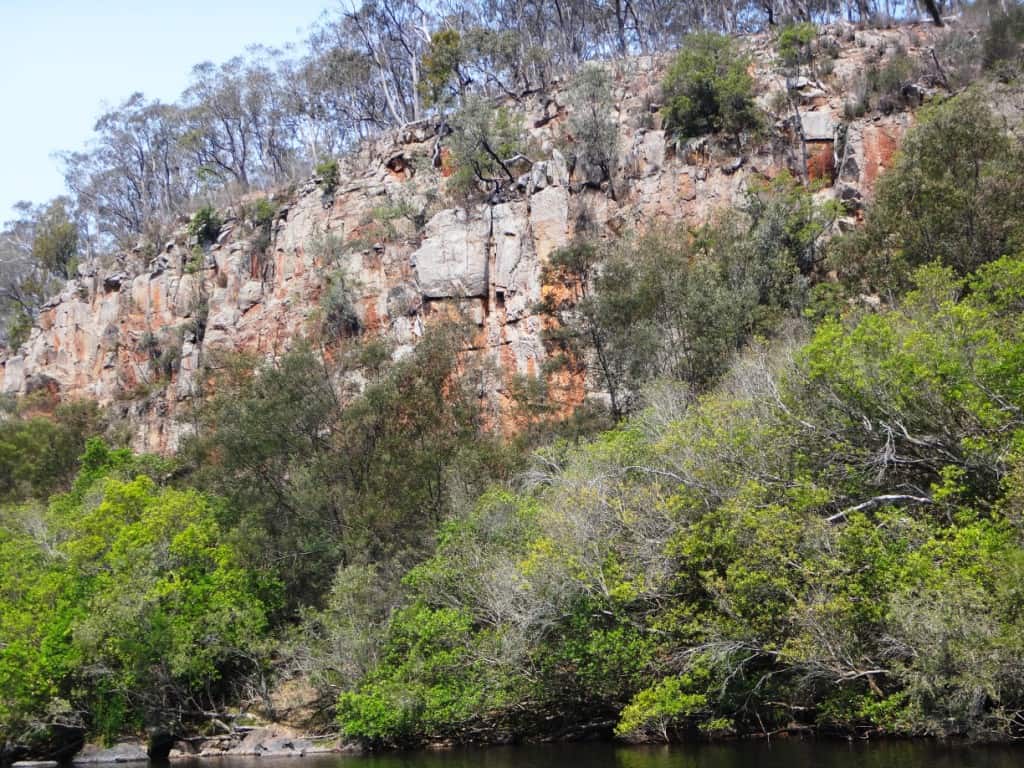
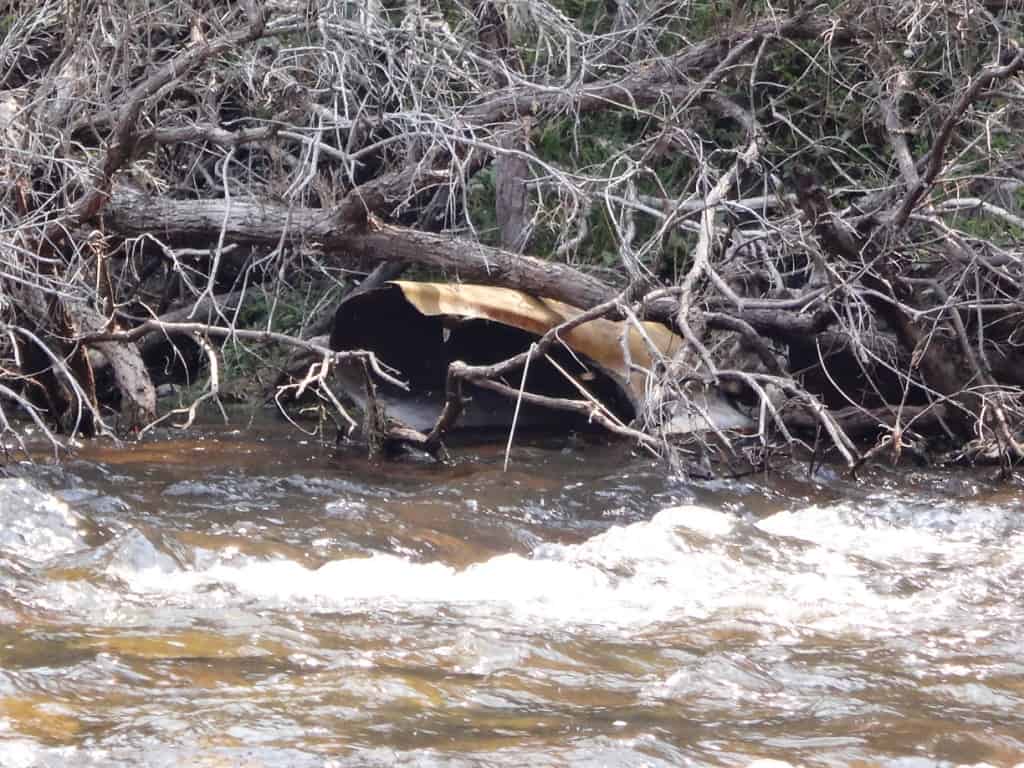
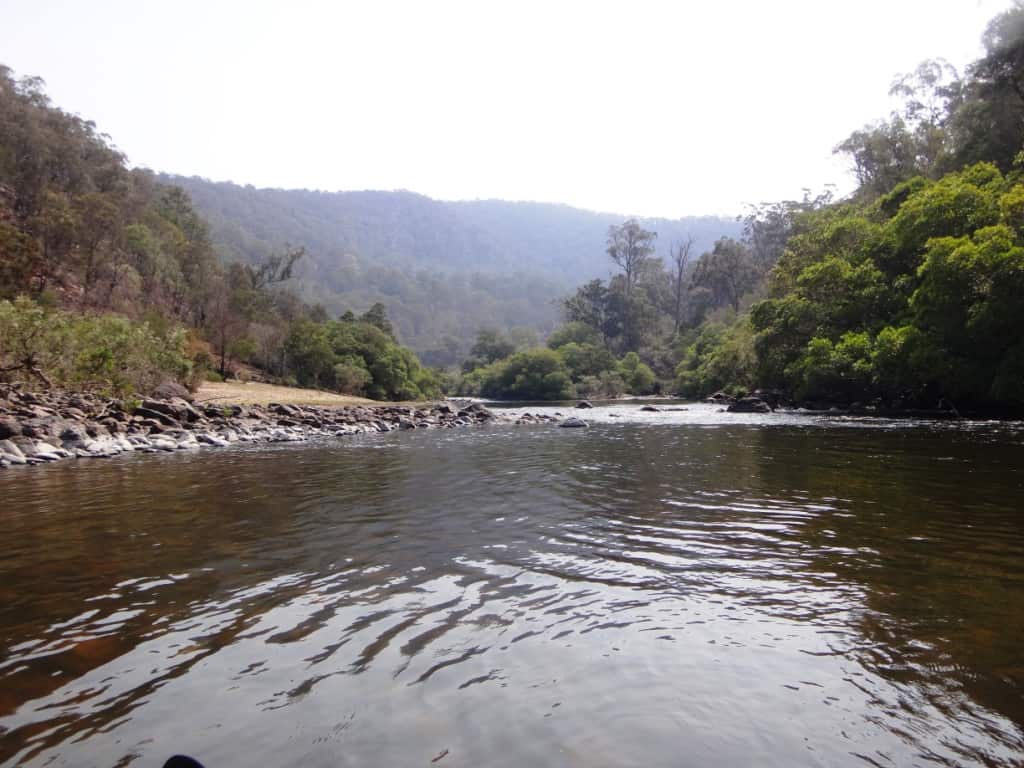
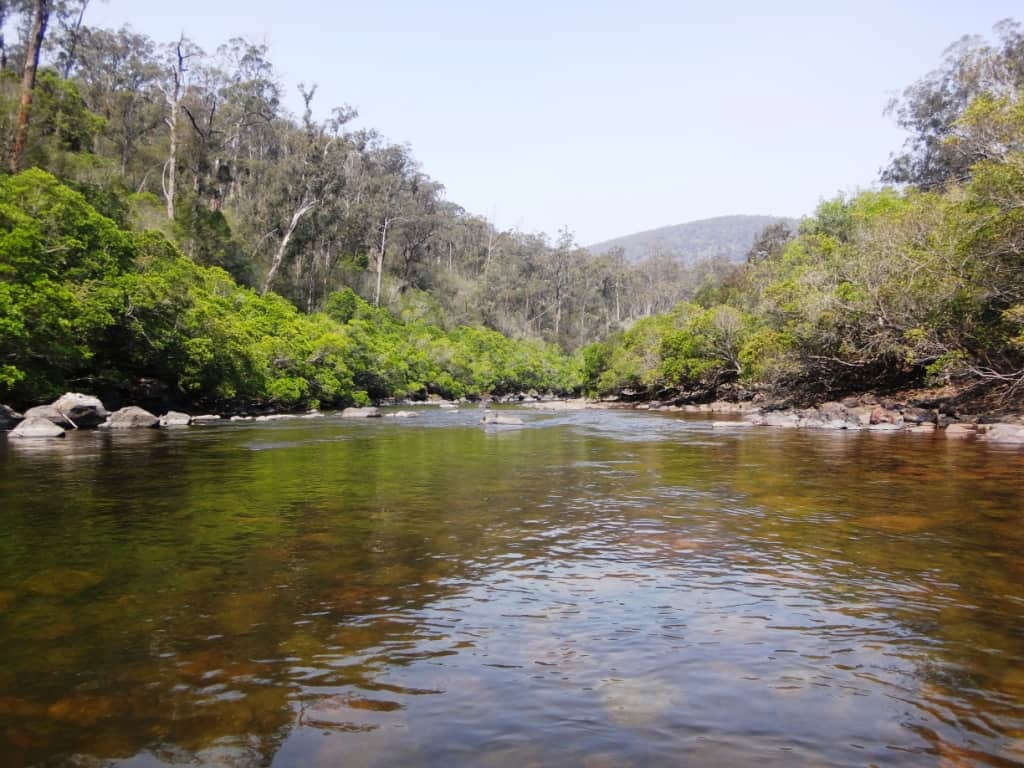
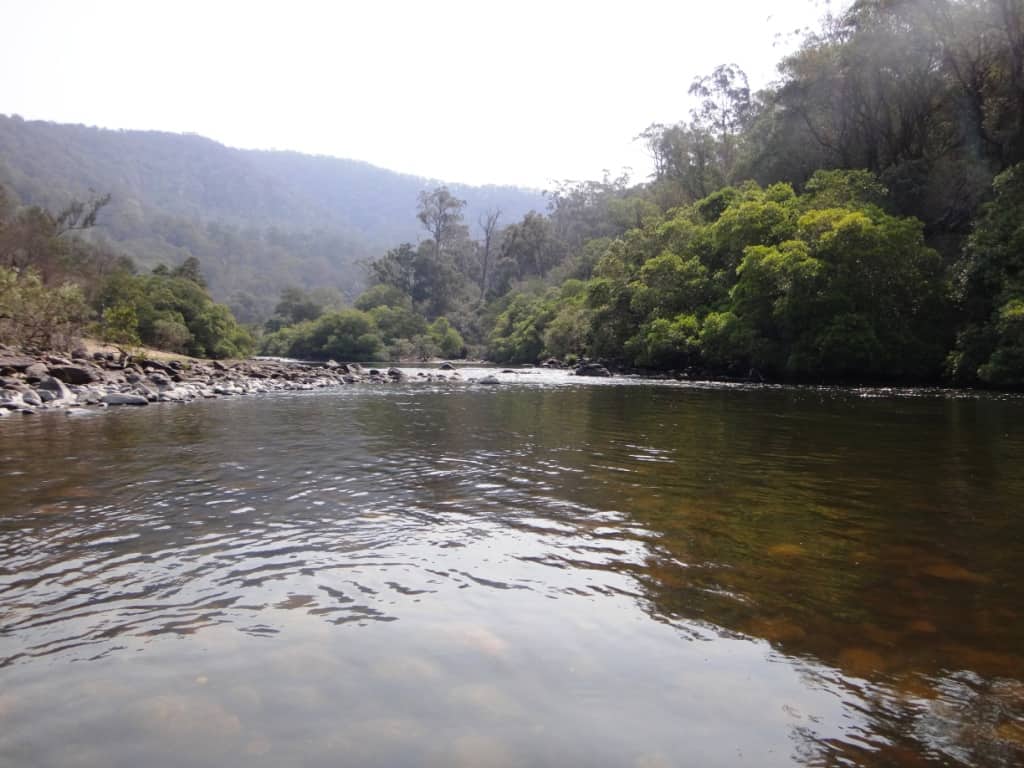

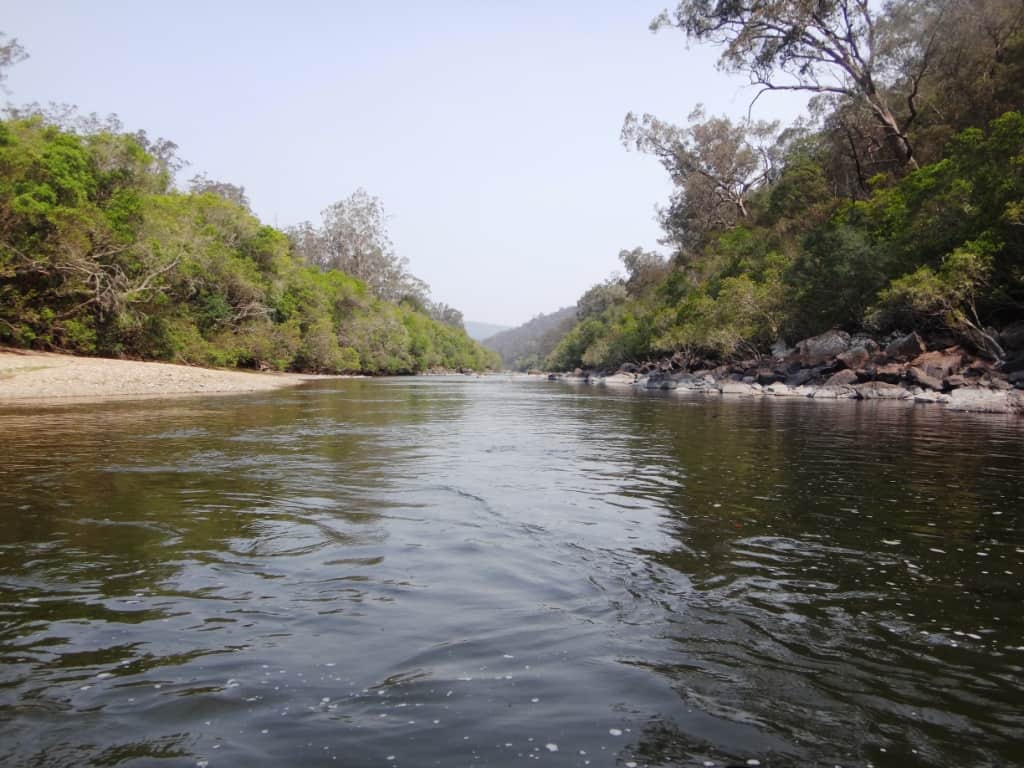
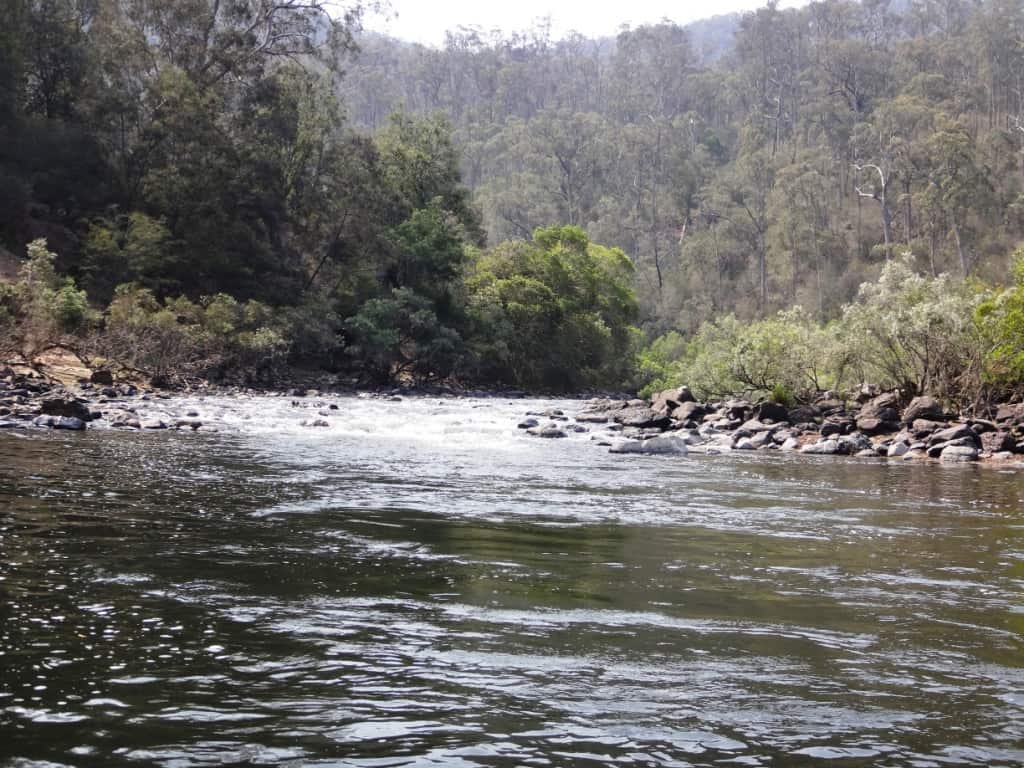
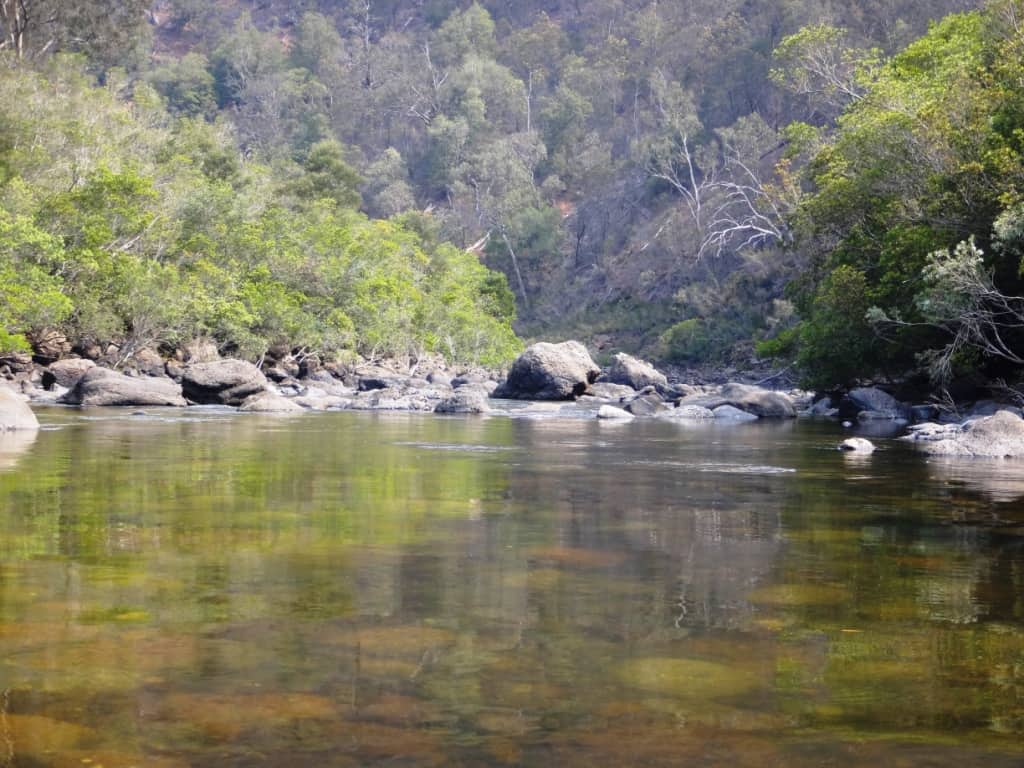
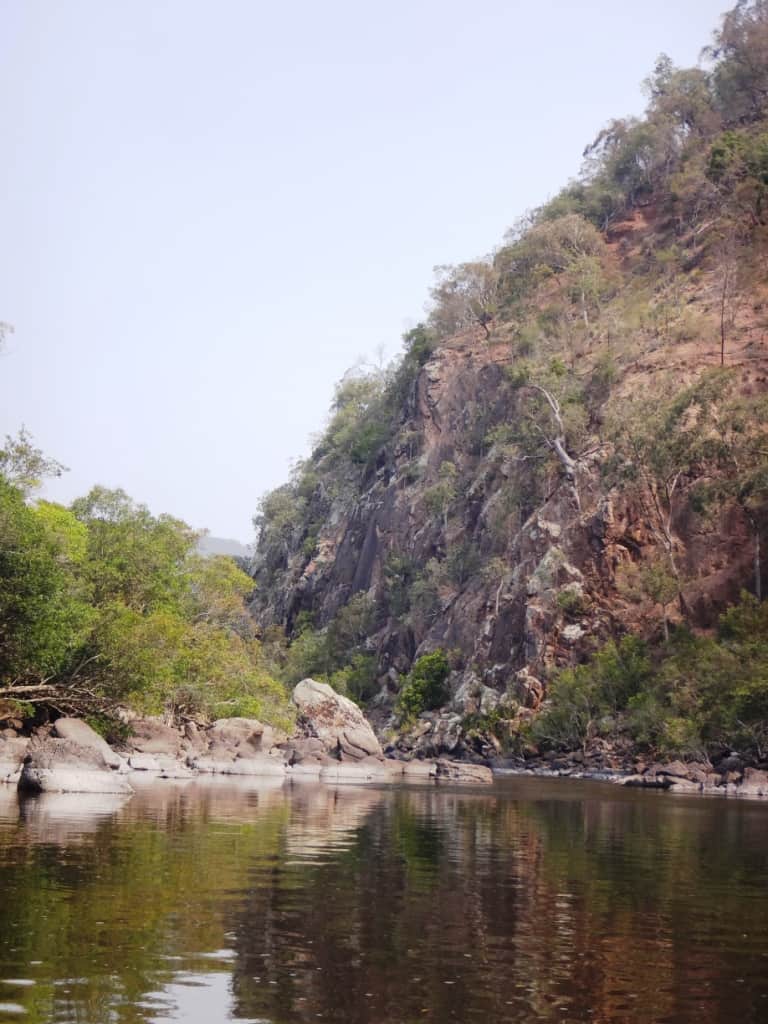
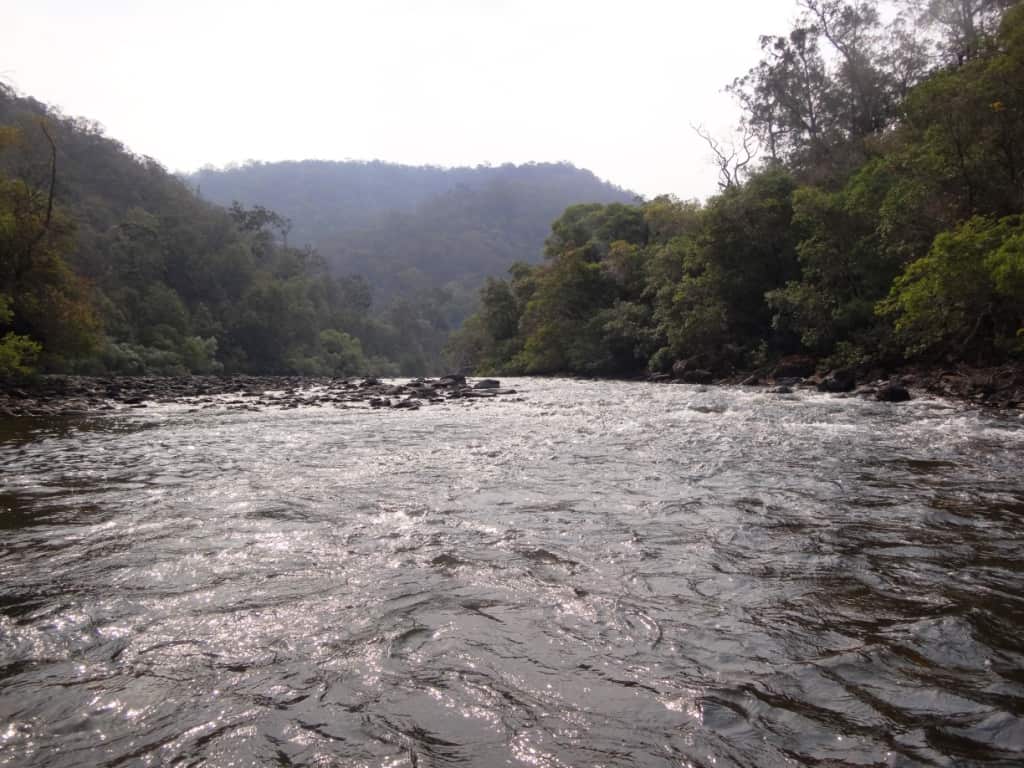
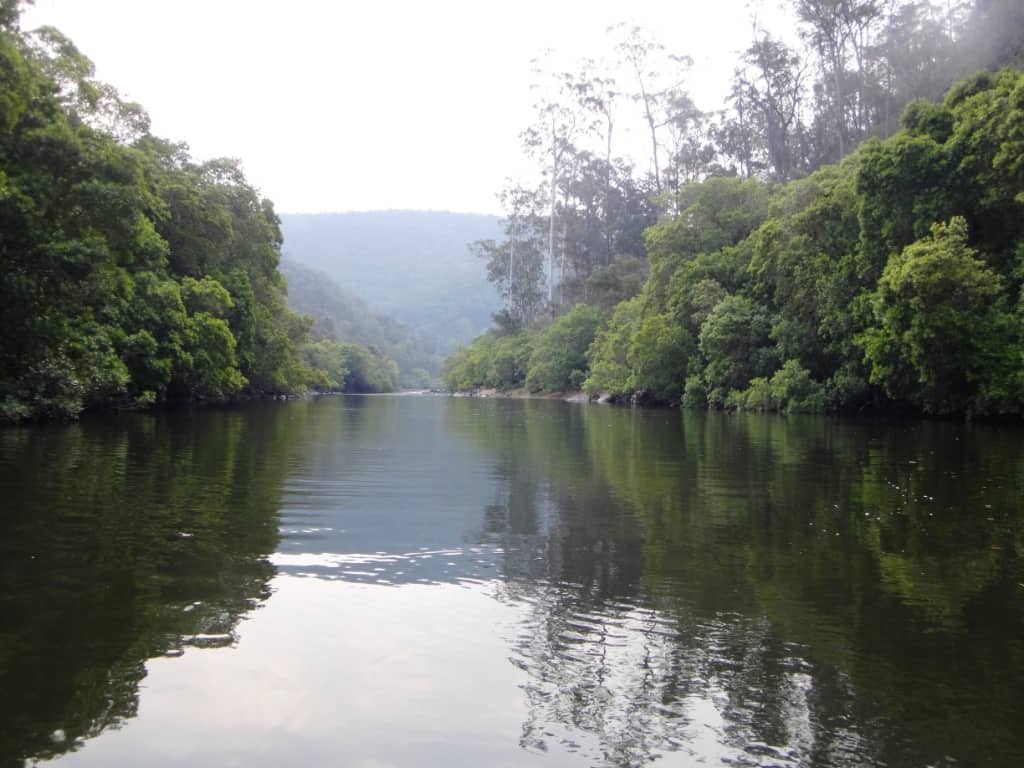

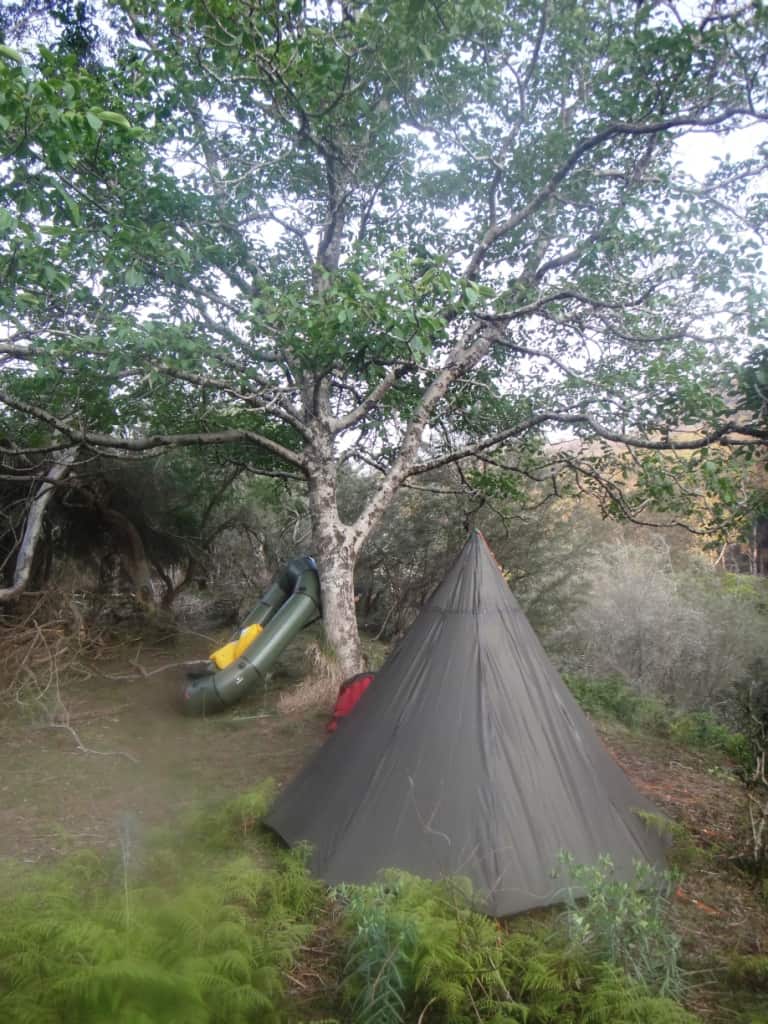

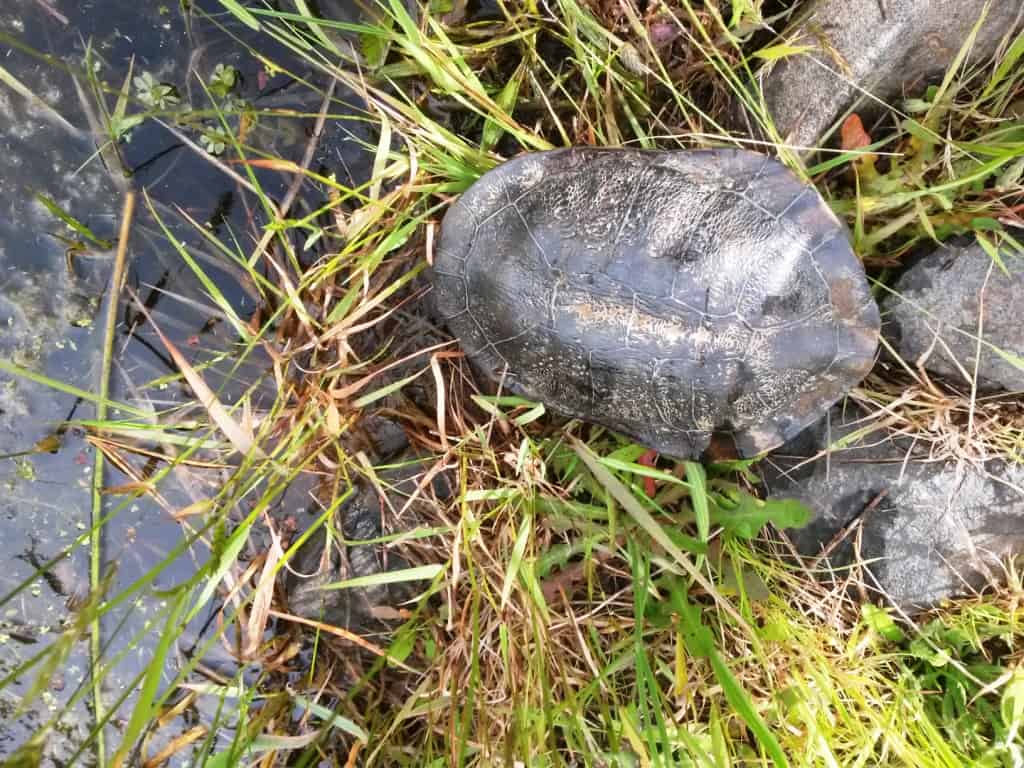
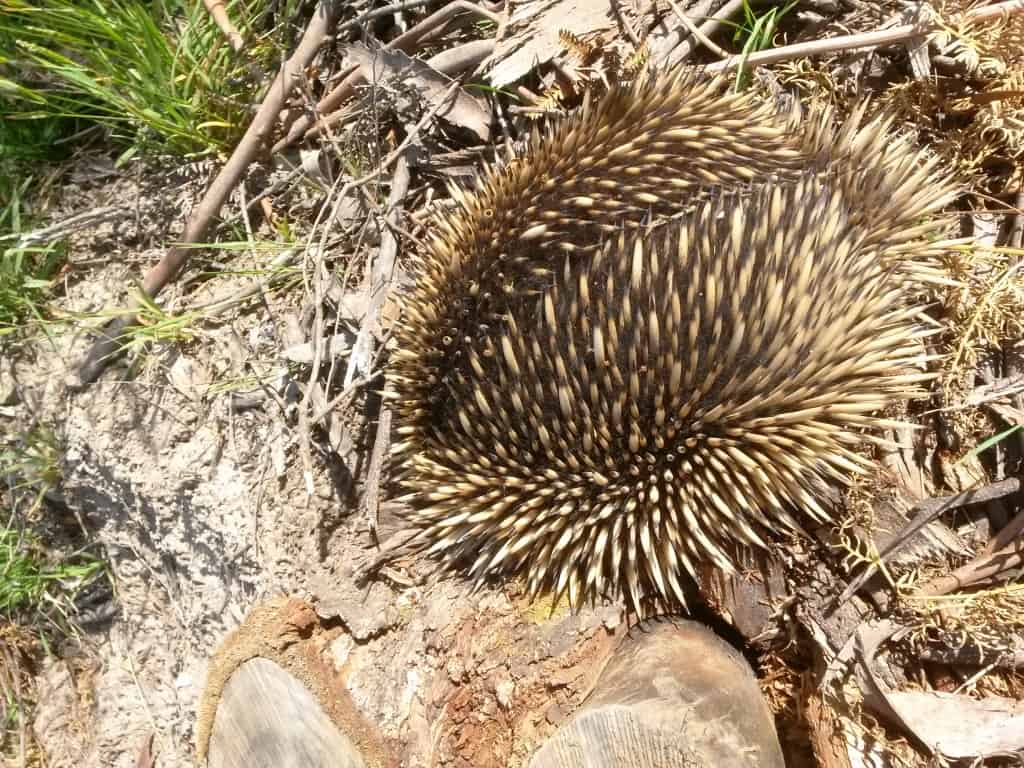
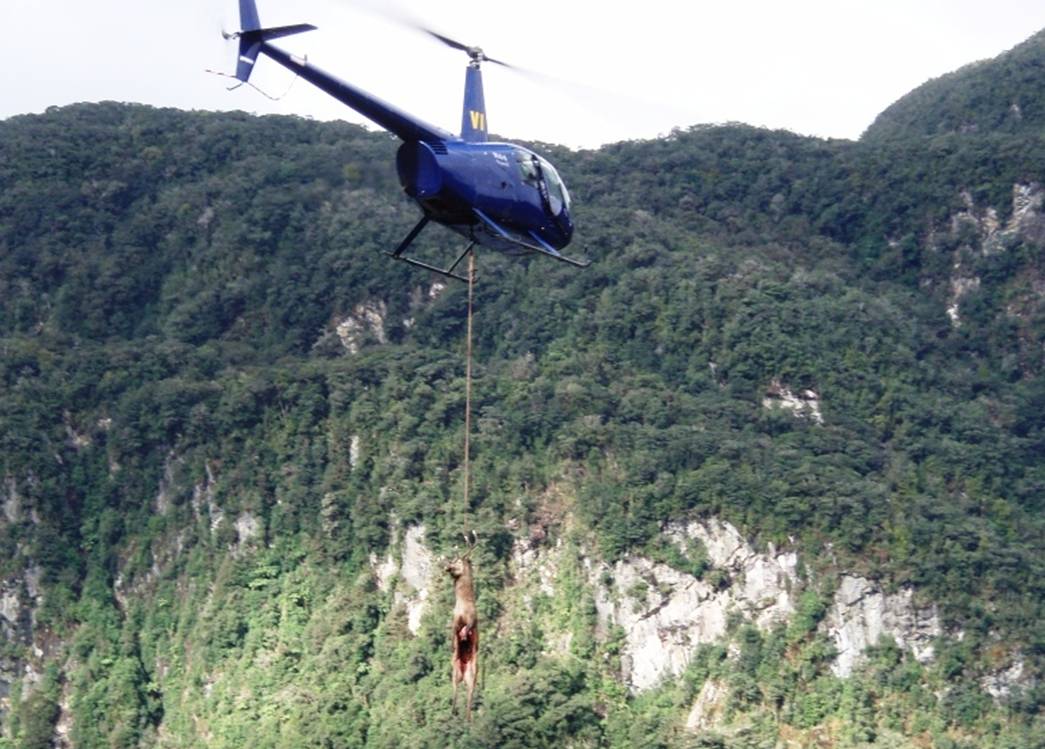
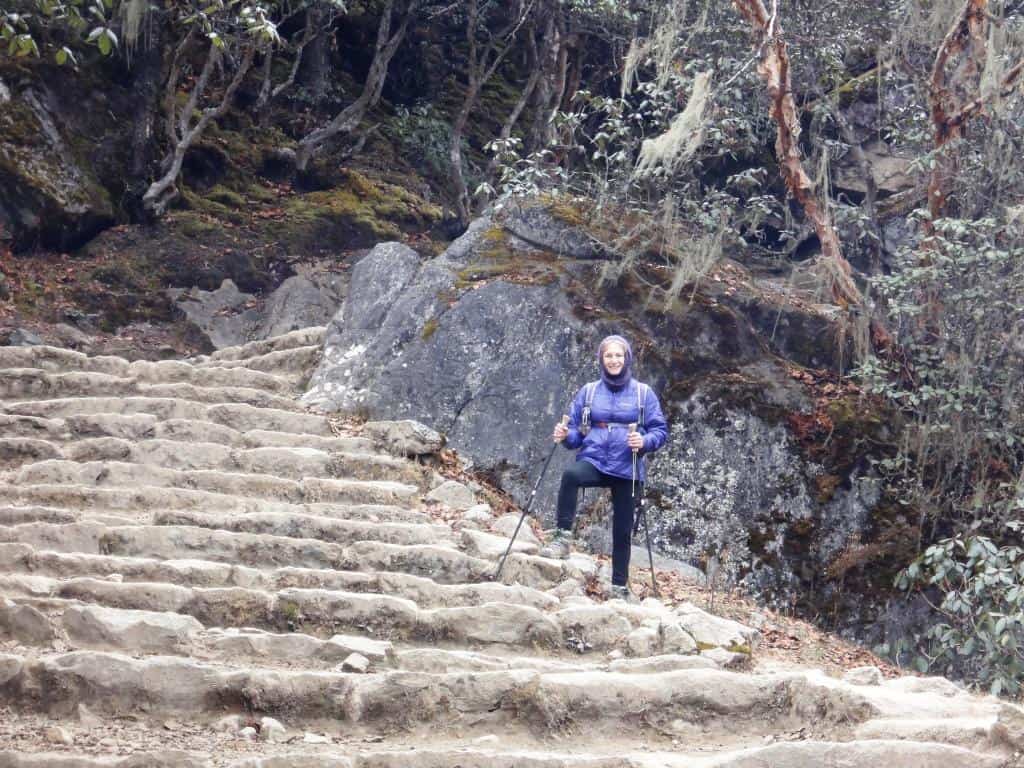
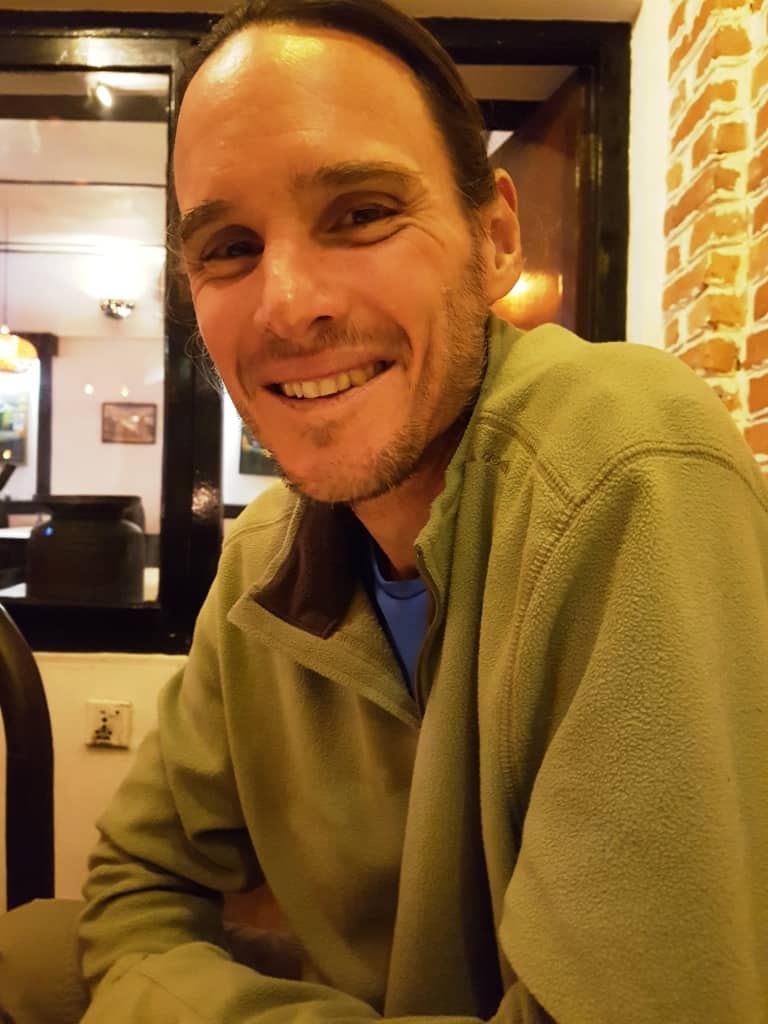 Here we are
enjoying ourselves, none the worse for wear from our trek (or rickshaw ride).
Here we are
enjoying ourselves, none the worse for wear from our trek (or rickshaw ride).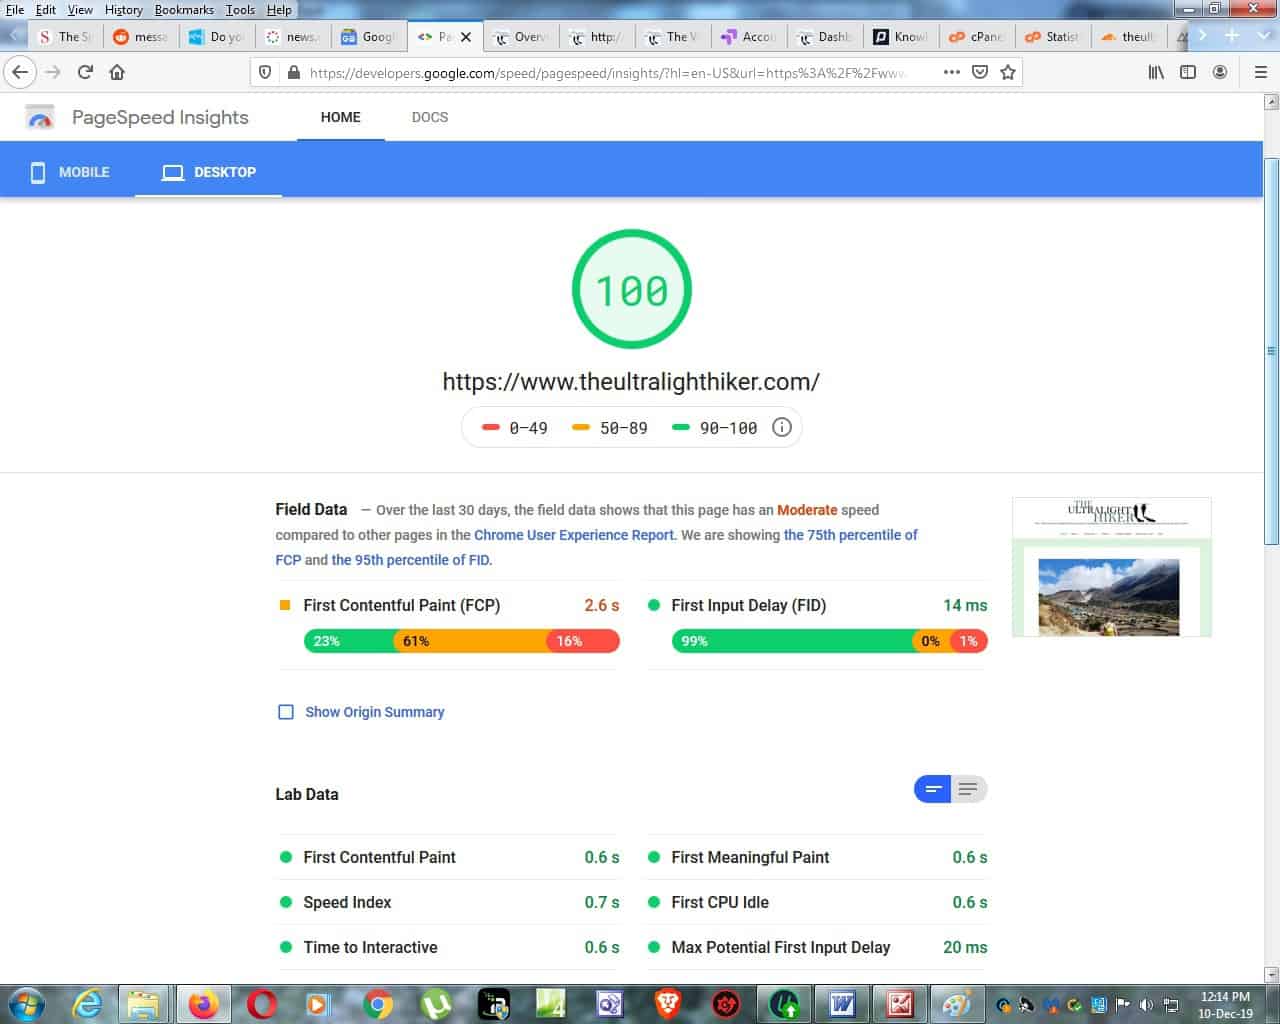


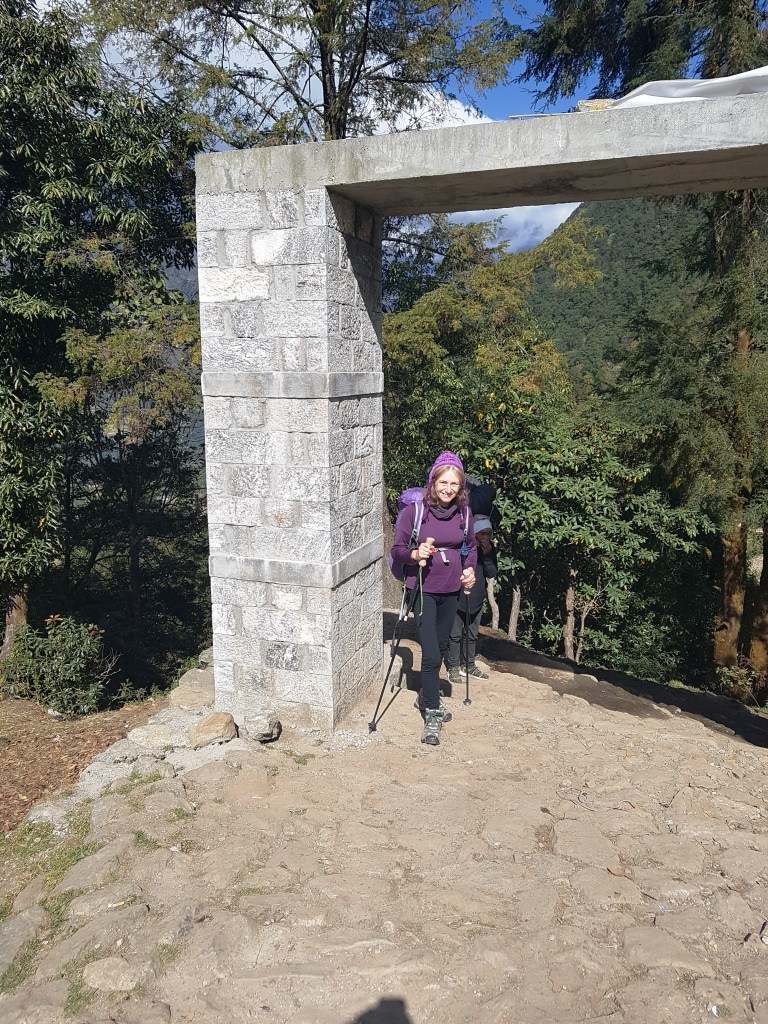

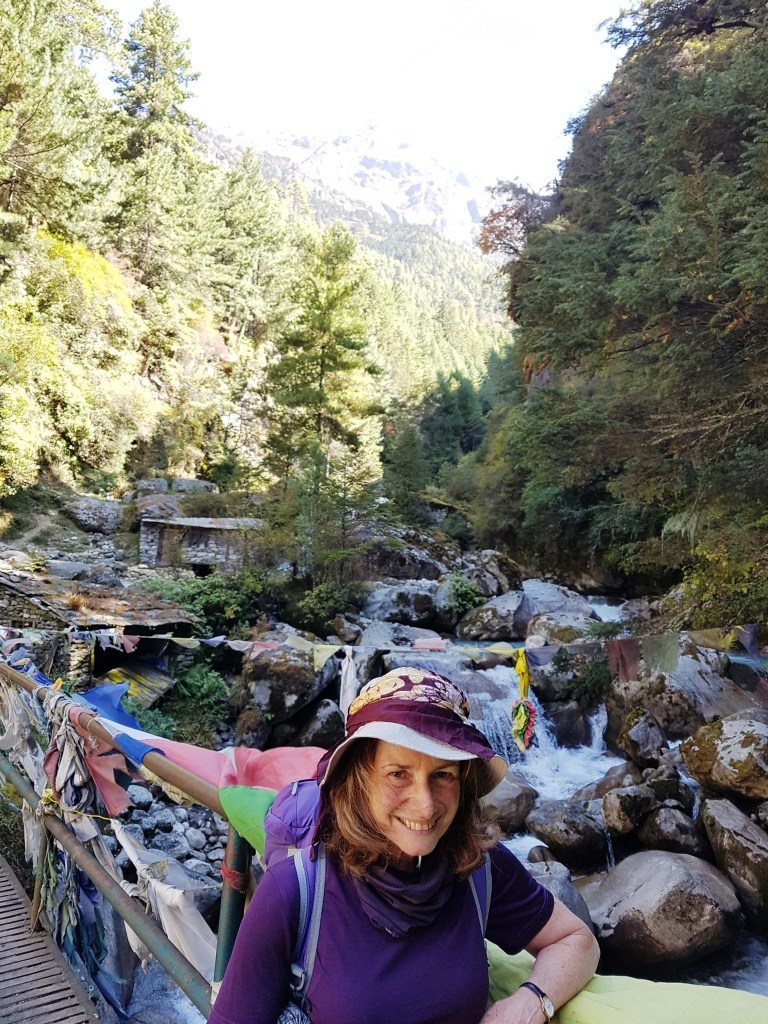
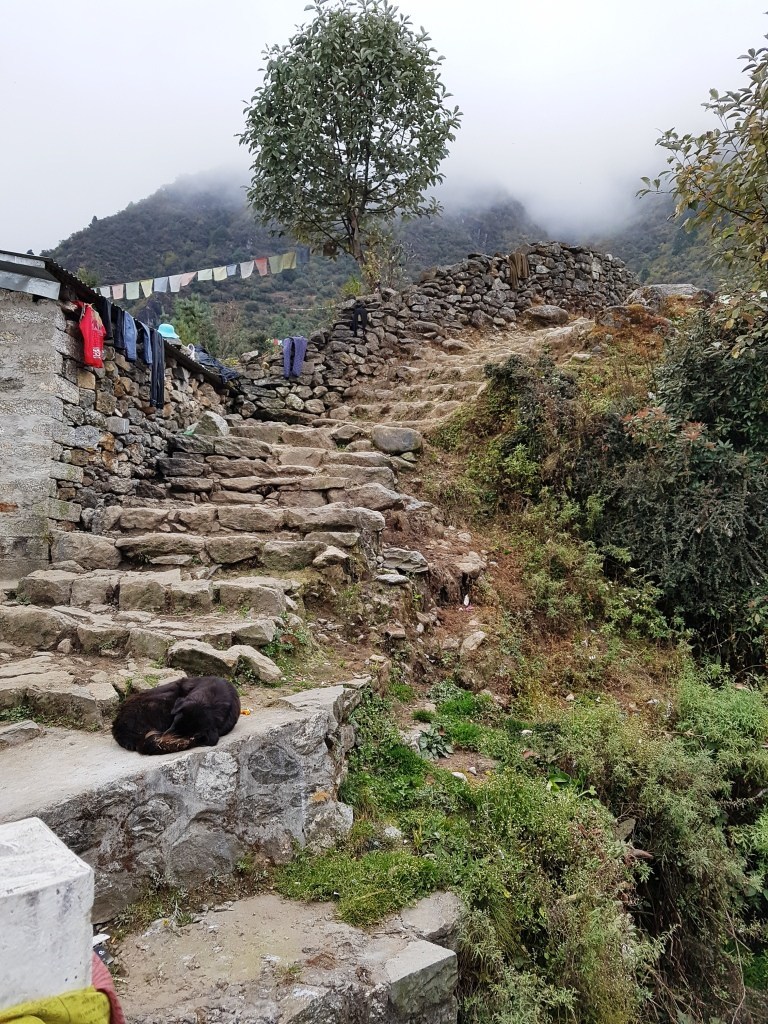
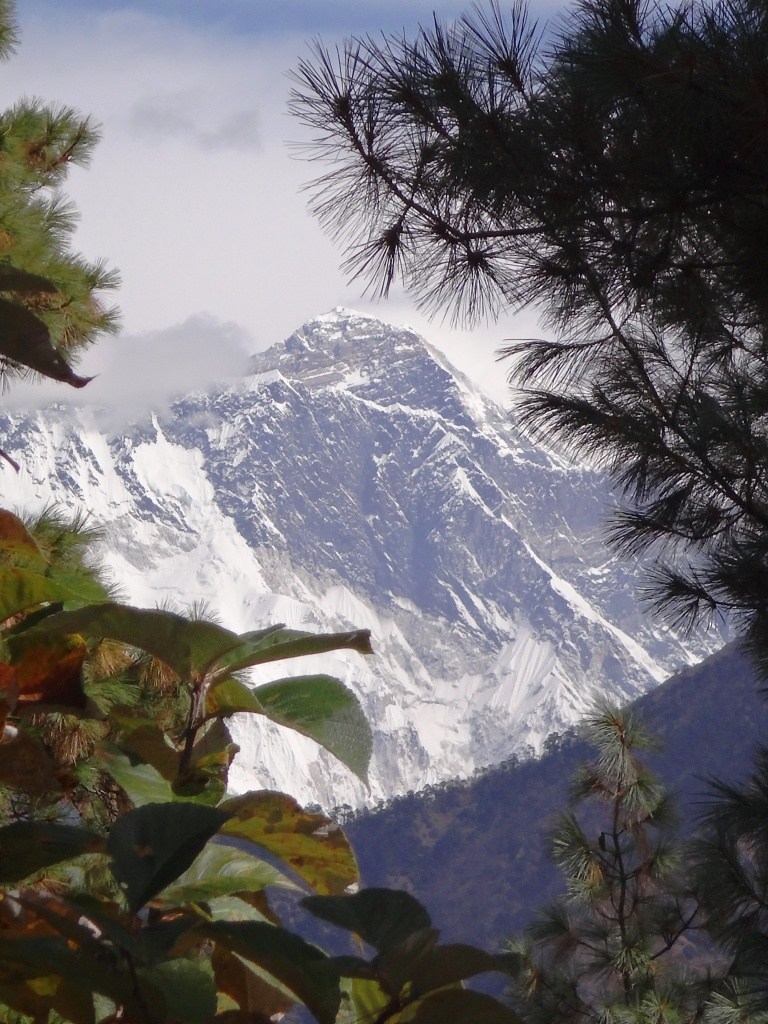
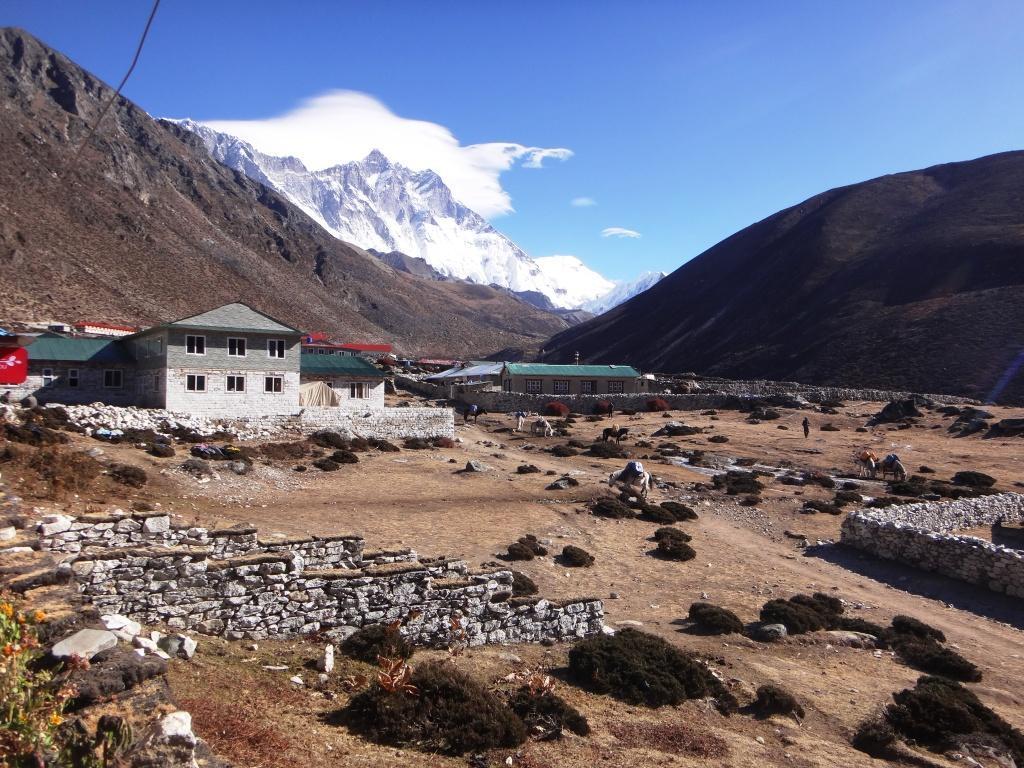


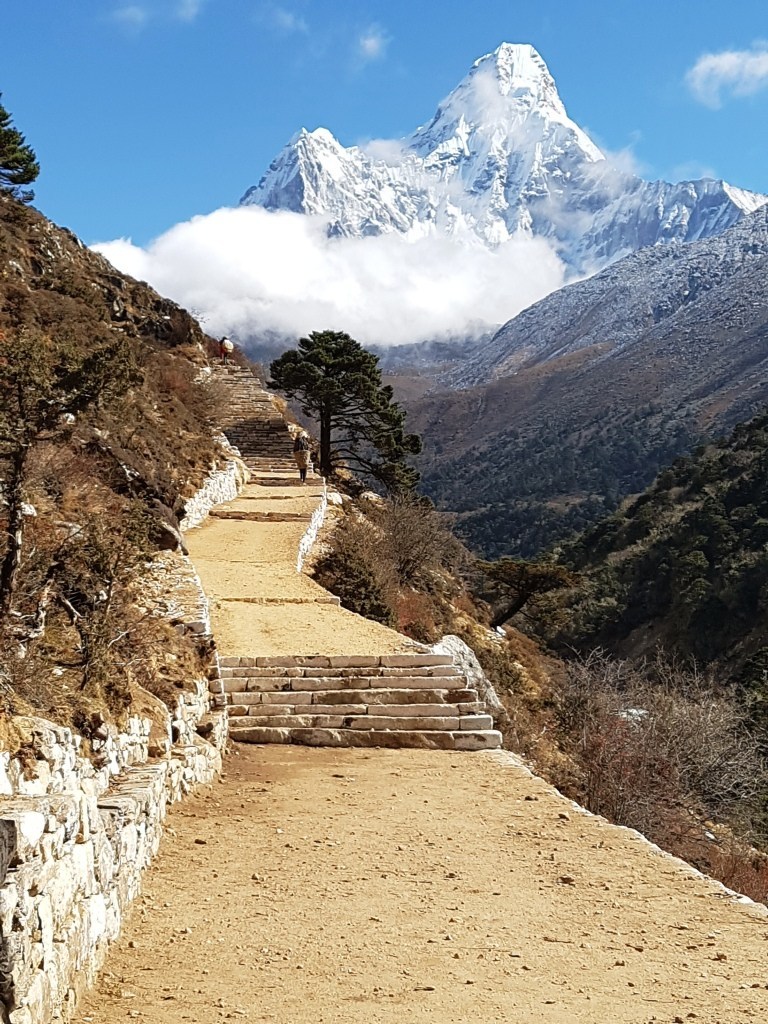

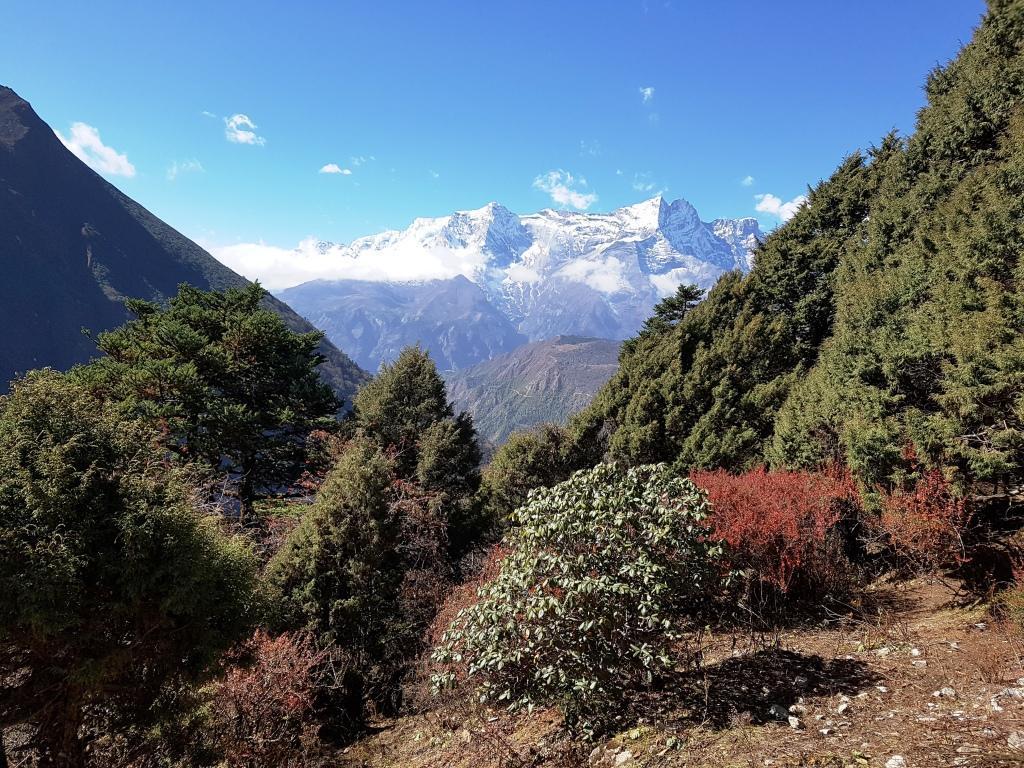
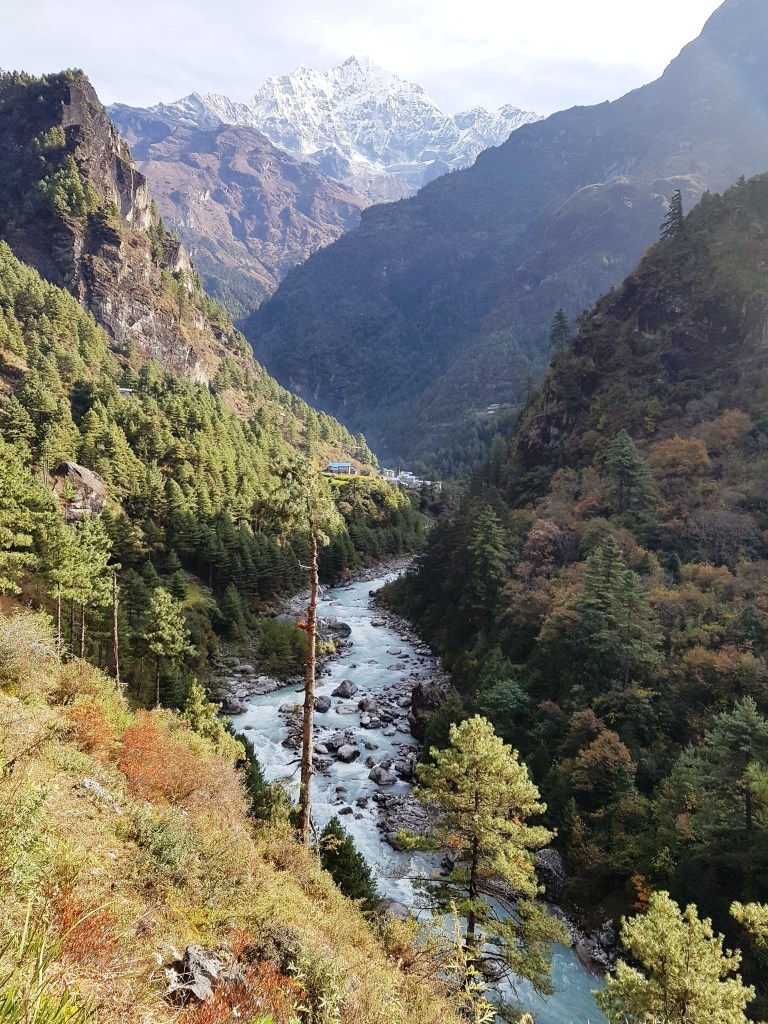


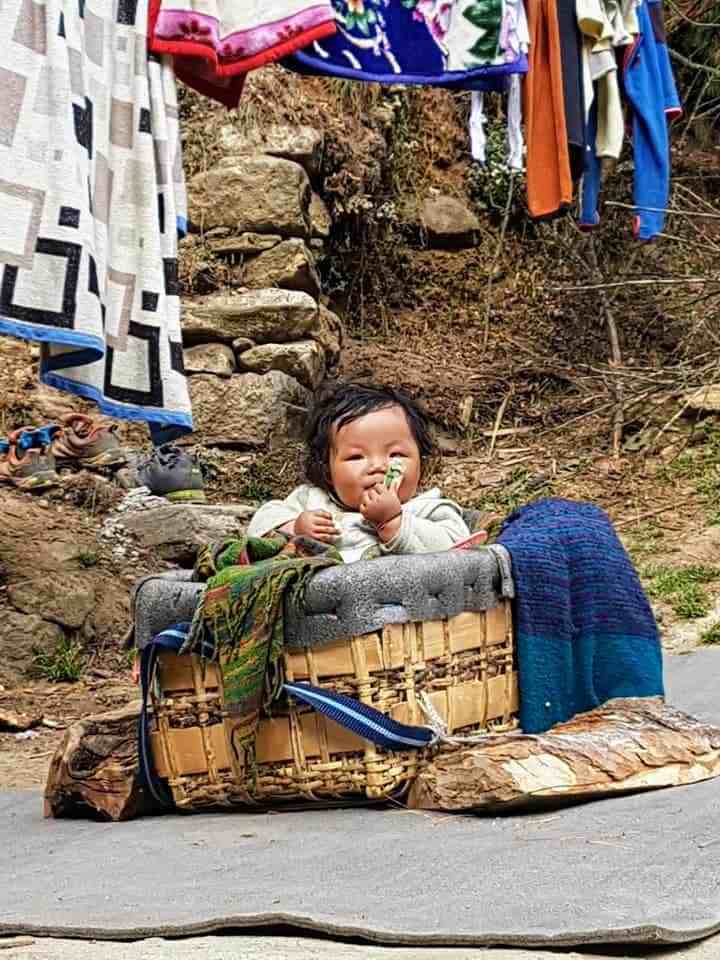


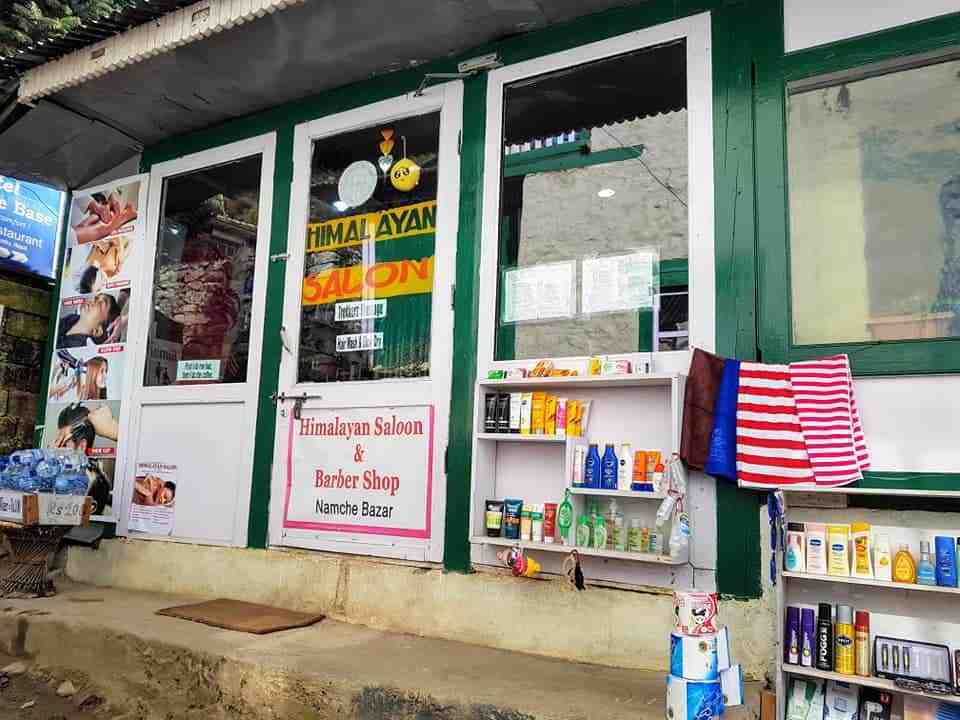


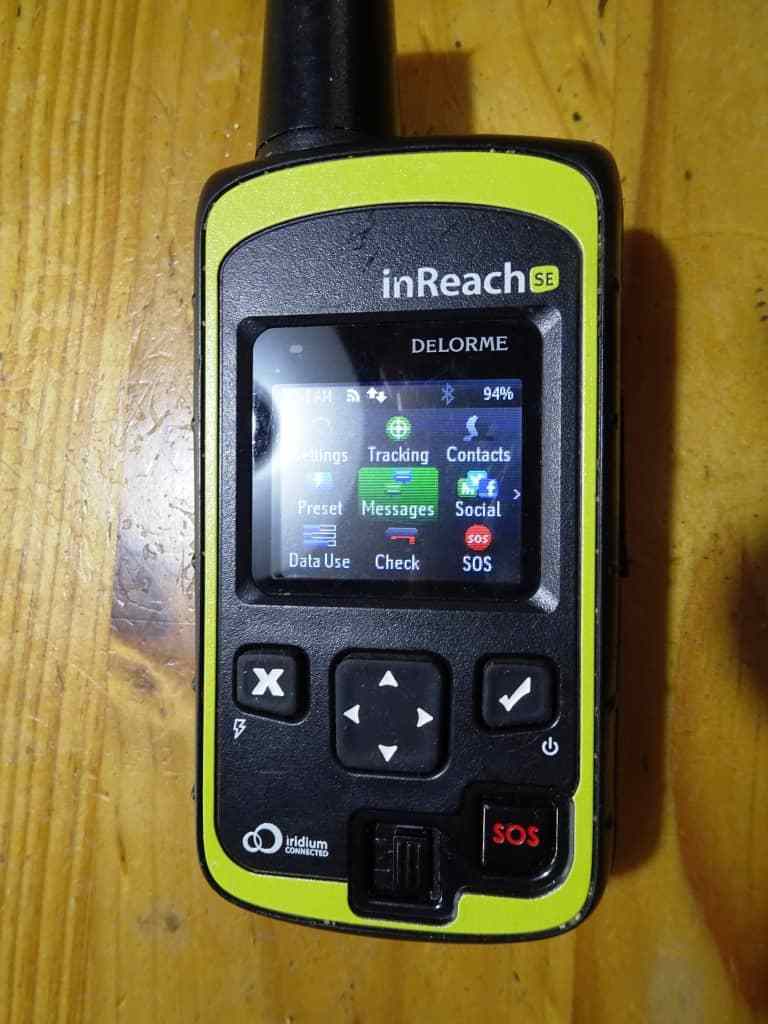
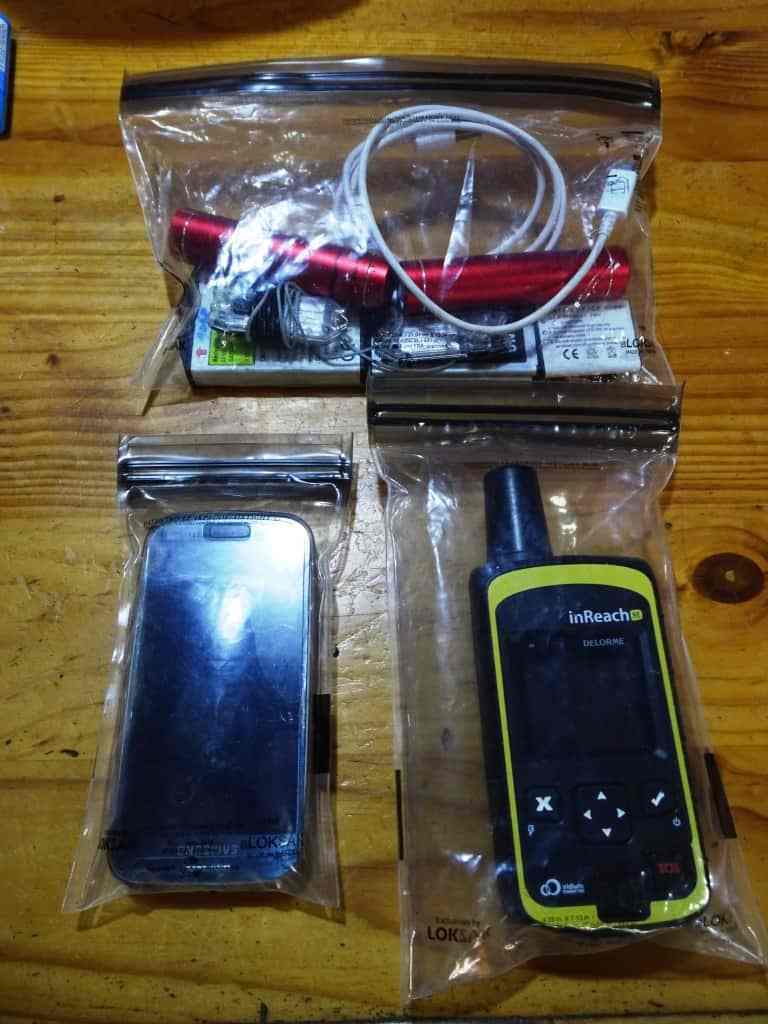

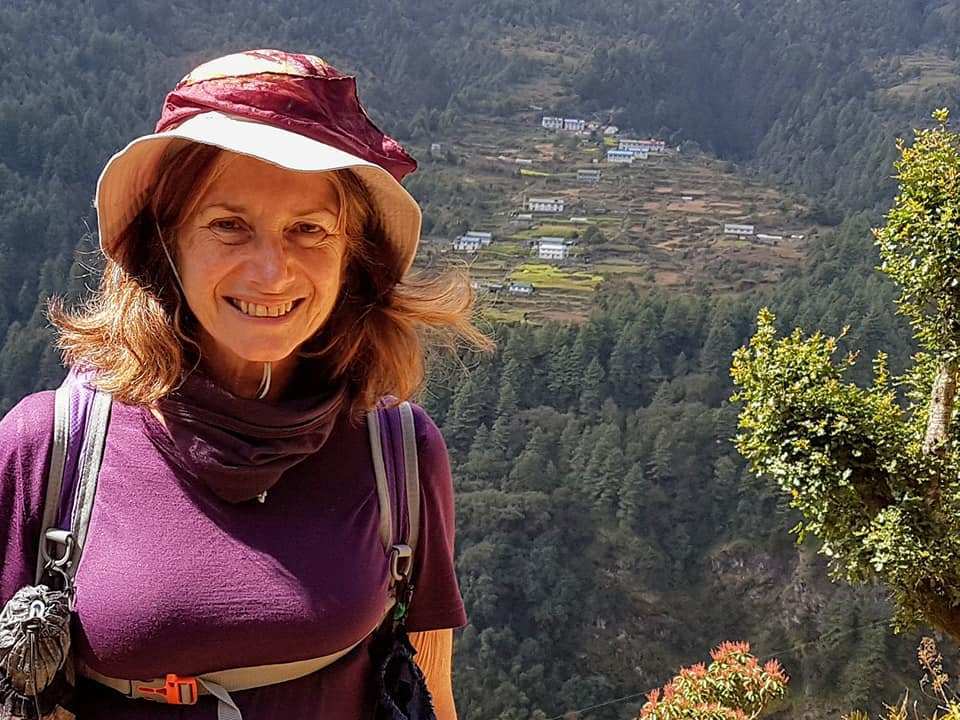 Everest View Namche:


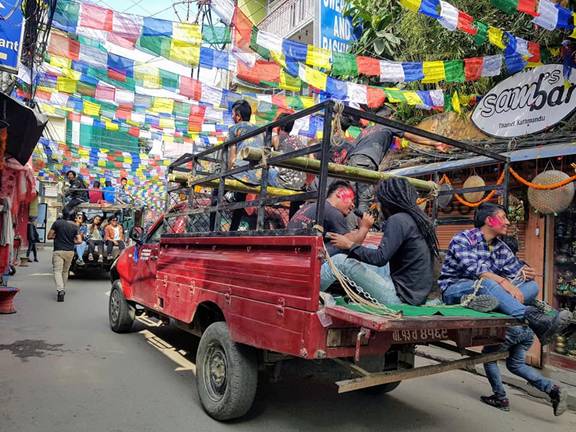
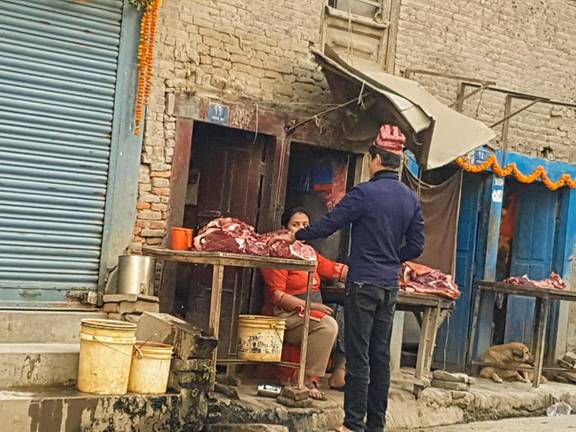
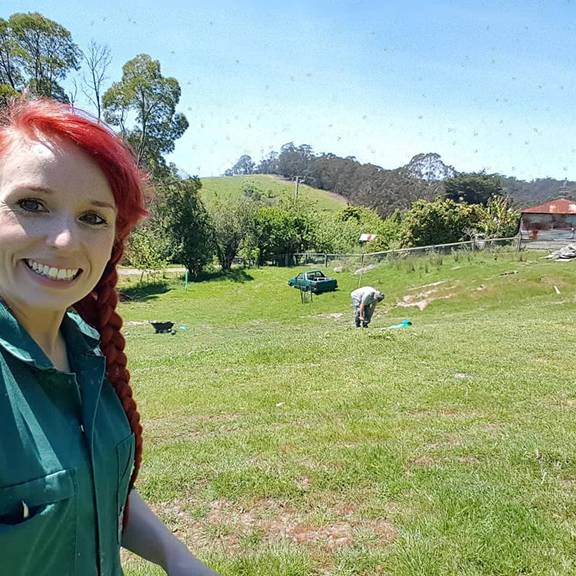
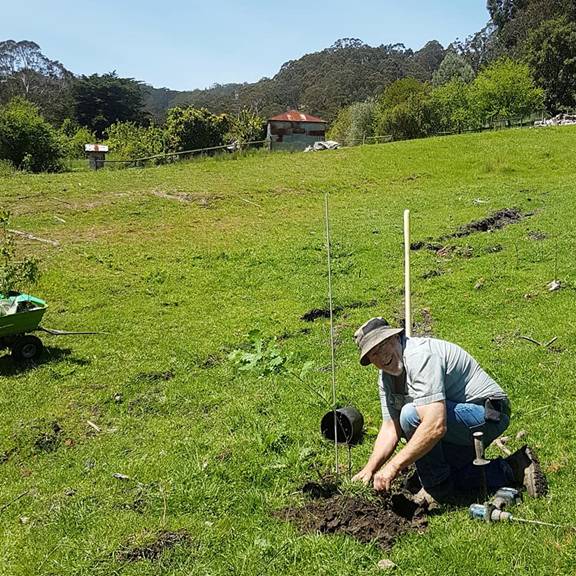
 You
need the Google Maps App from the Play Store installed on your phone and when
you are downloading the map you need to be connected to the internet. . When
you open the Maps App you will see three parallel lines on the top left hand
corner. Click on them. A menu will open. Scroll down to ‘Offline Maps’ and
select that. At the top of the page you will see ‘Select Your Own Map’. Tap on
that. A map of the world will open. (probably it will already be centred on the
area you re in now). You can navigate to any area of the world you want to
download. Google will tell you how much space on your phone the download
will take up. Obviously you need to have the available storage. Click
‘Download’ to transfer the map selected to your phone. It will stay on your phone
for a year. You have to refresh or ‘Update’ it before it expires.
You
need the Google Maps App from the Play Store installed on your phone and when
you are downloading the map you need to be connected to the internet. . When
you open the Maps App you will see three parallel lines on the top left hand
corner. Click on them. A menu will open. Scroll down to ‘Offline Maps’ and
select that. At the top of the page you will see ‘Select Your Own Map’. Tap on
that. A map of the world will open. (probably it will already be centred on the
area you re in now). You can navigate to any area of the world you want to
download. Google will tell you how much space on your phone the download
will take up. Obviously you need to have the available storage. Click
‘Download’ to transfer the map selected to your phone. It will stay on your phone
for a year. You have to refresh or ‘Update’ it before it expires.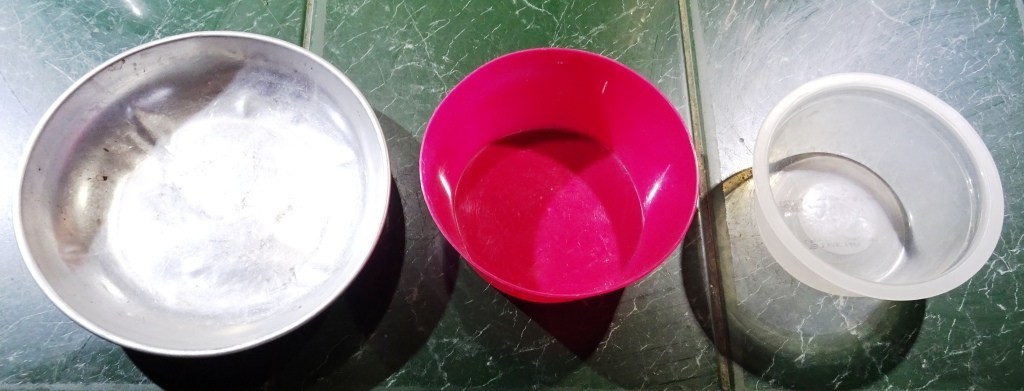


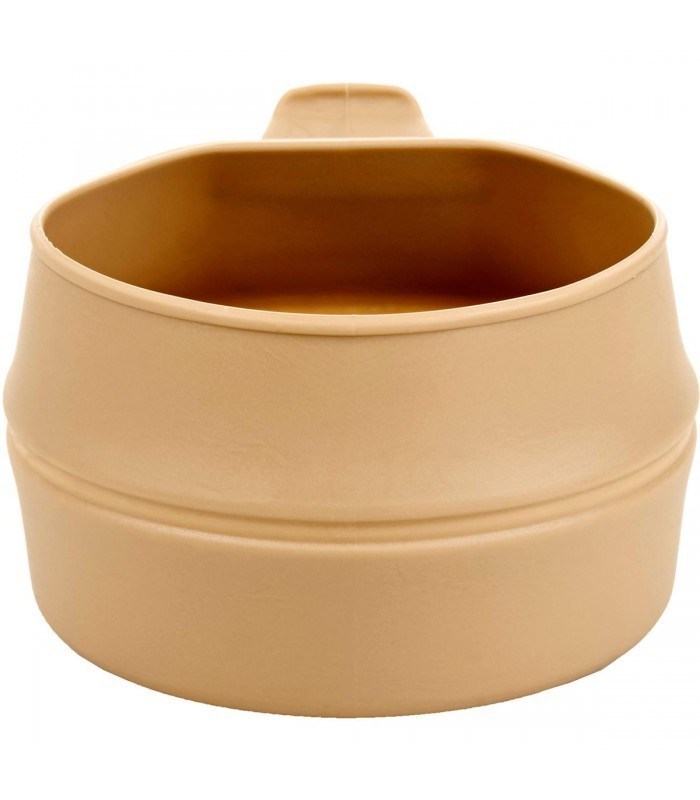
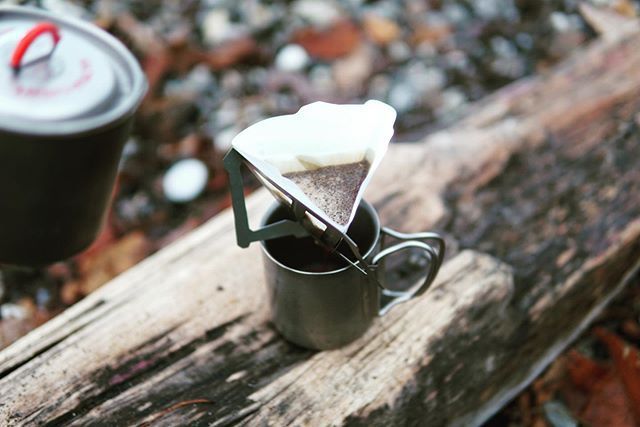

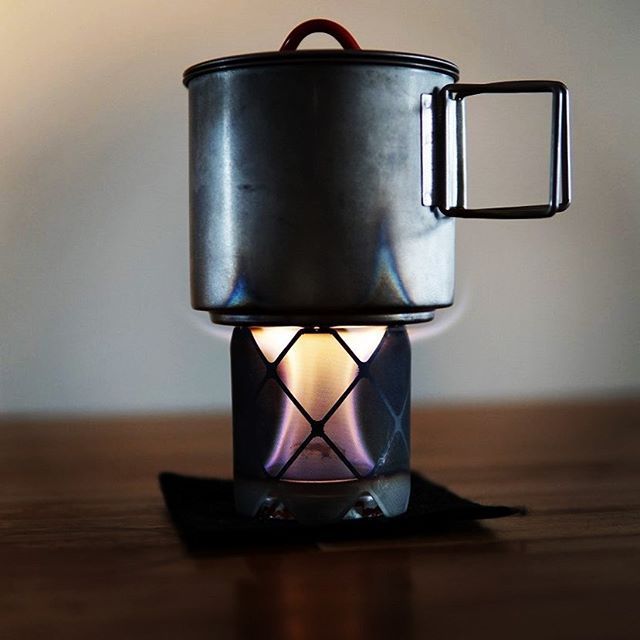

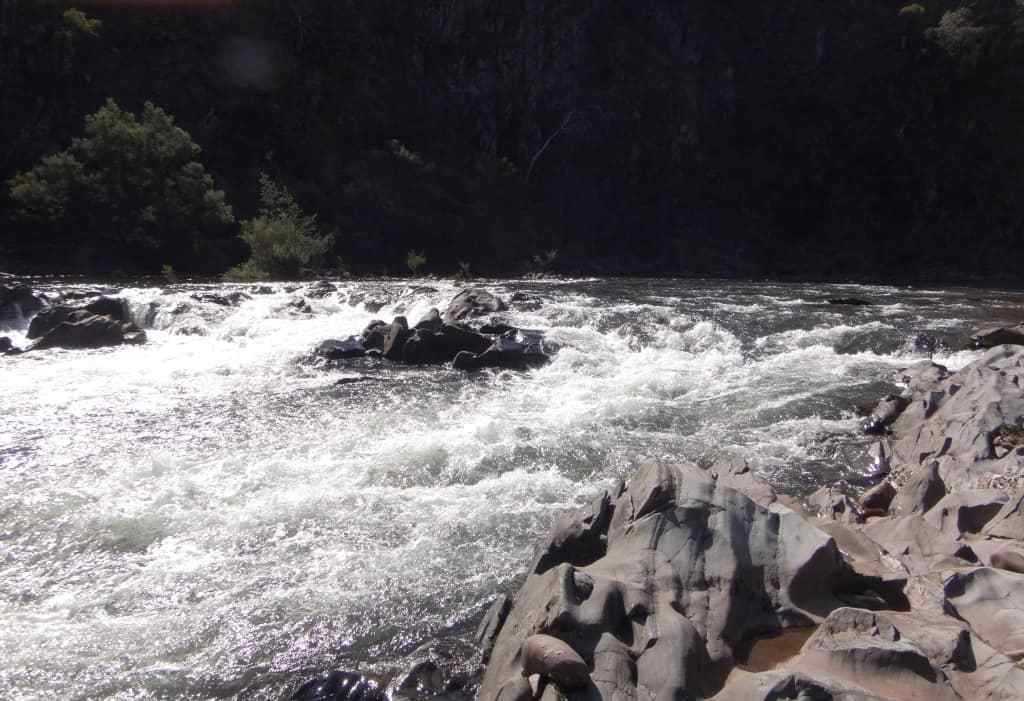


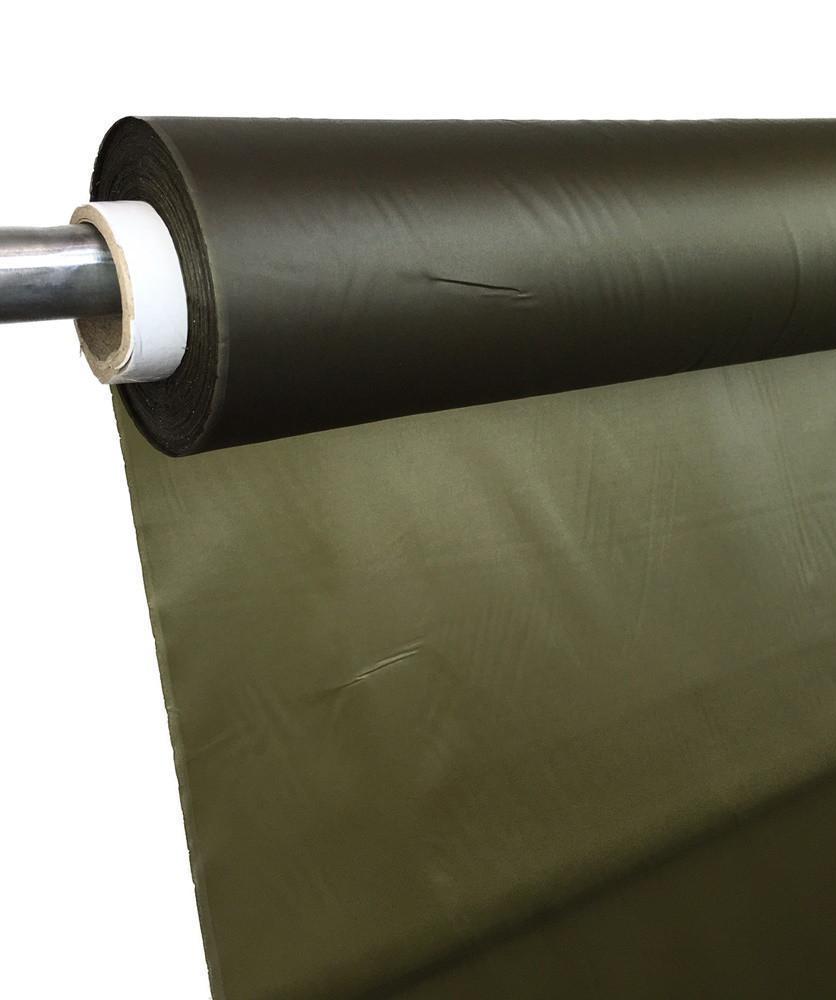
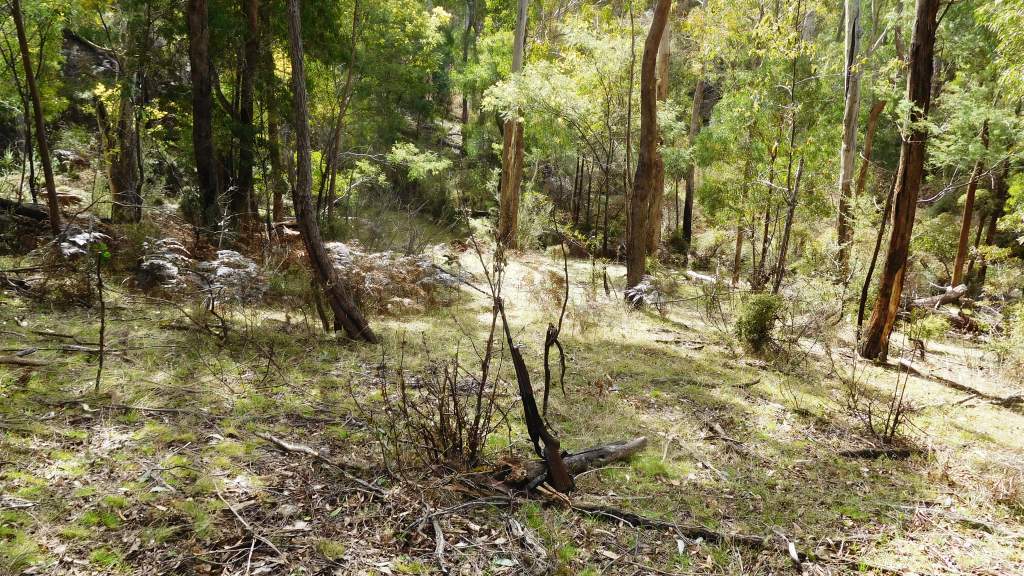
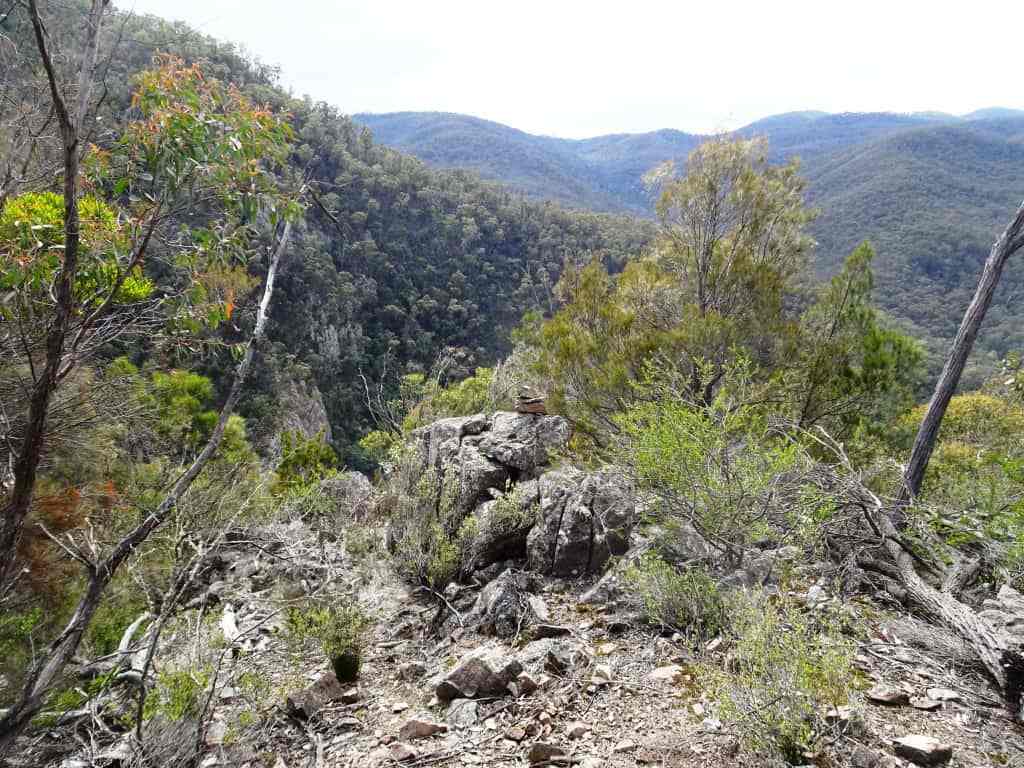

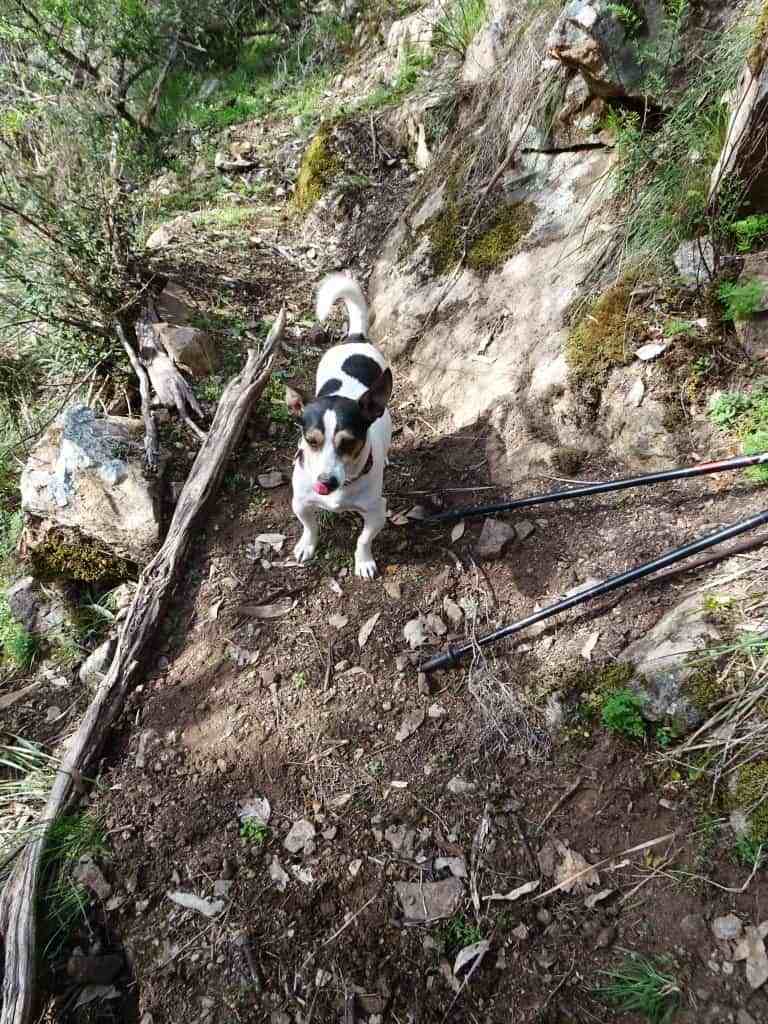
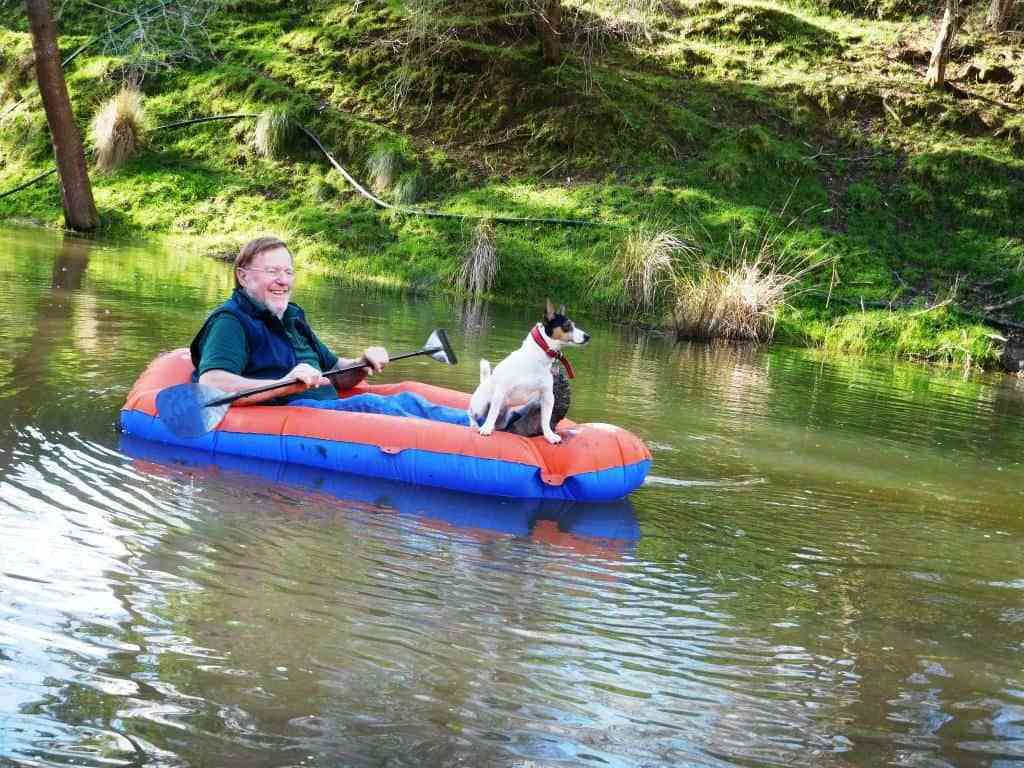


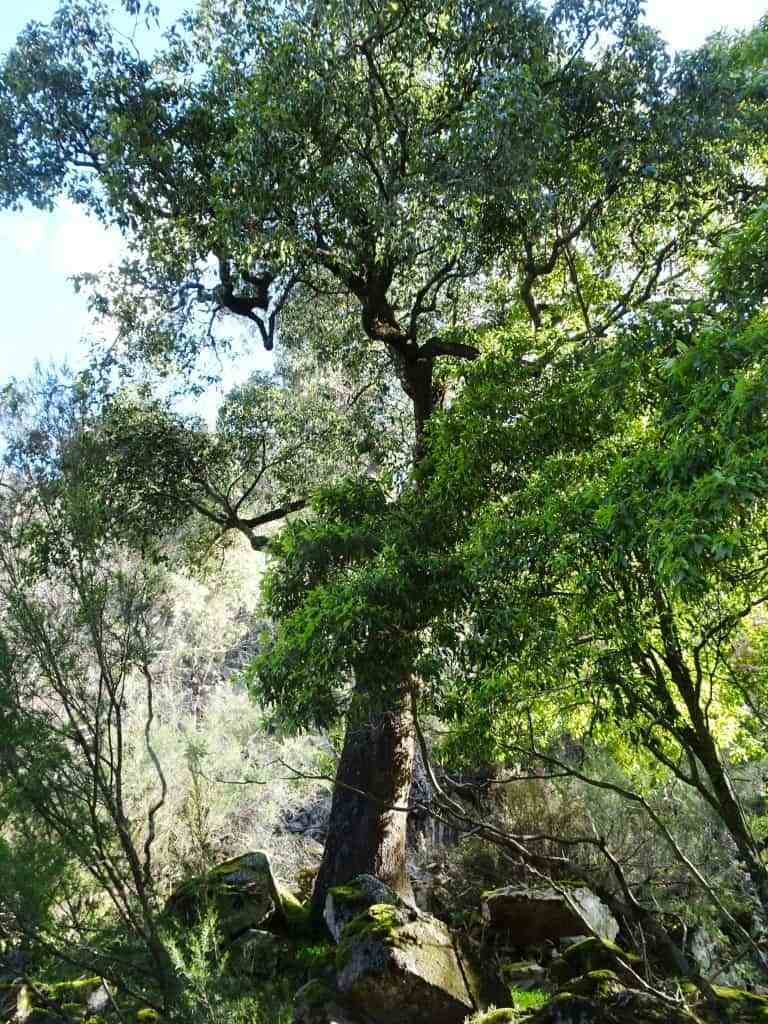


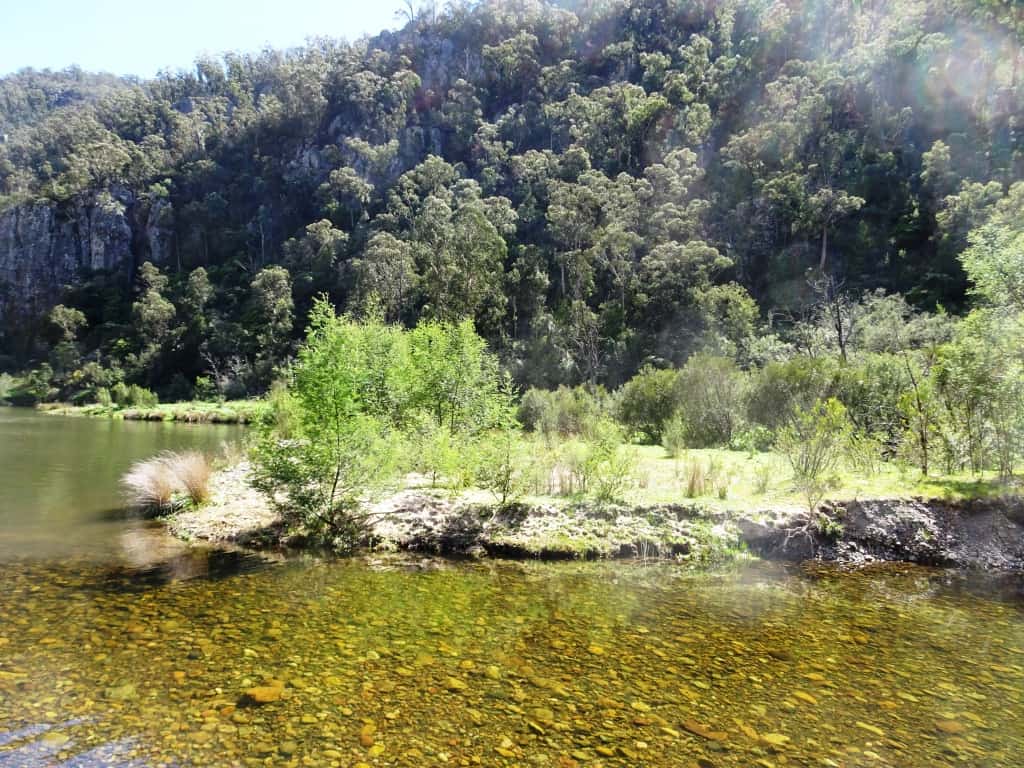


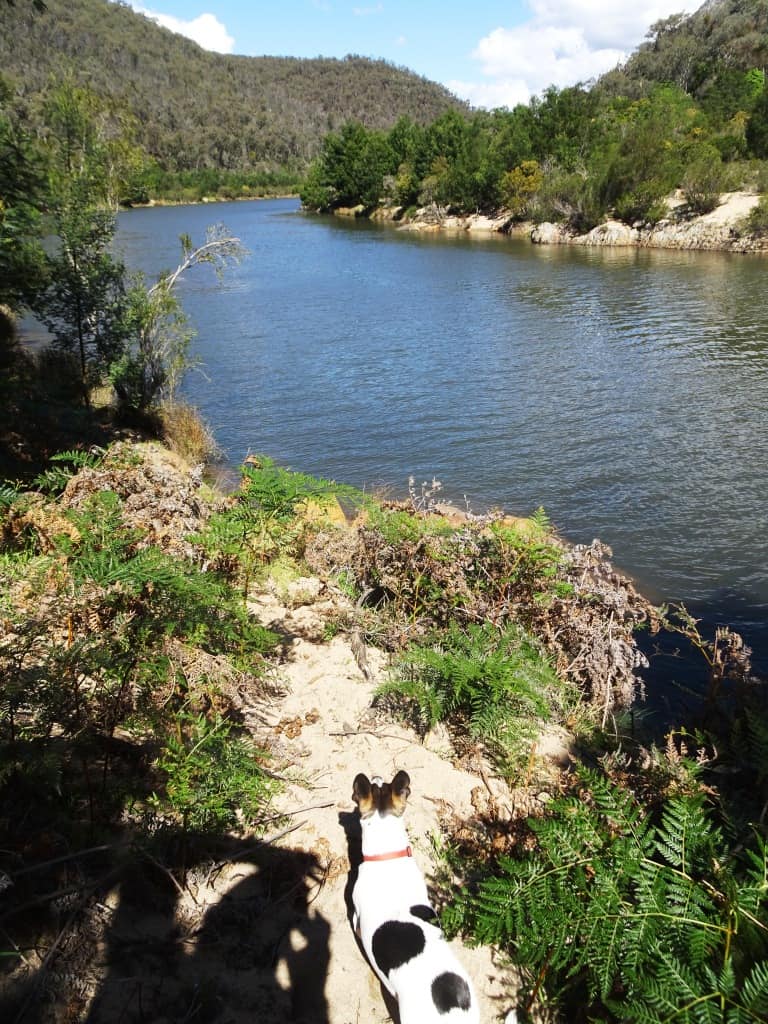
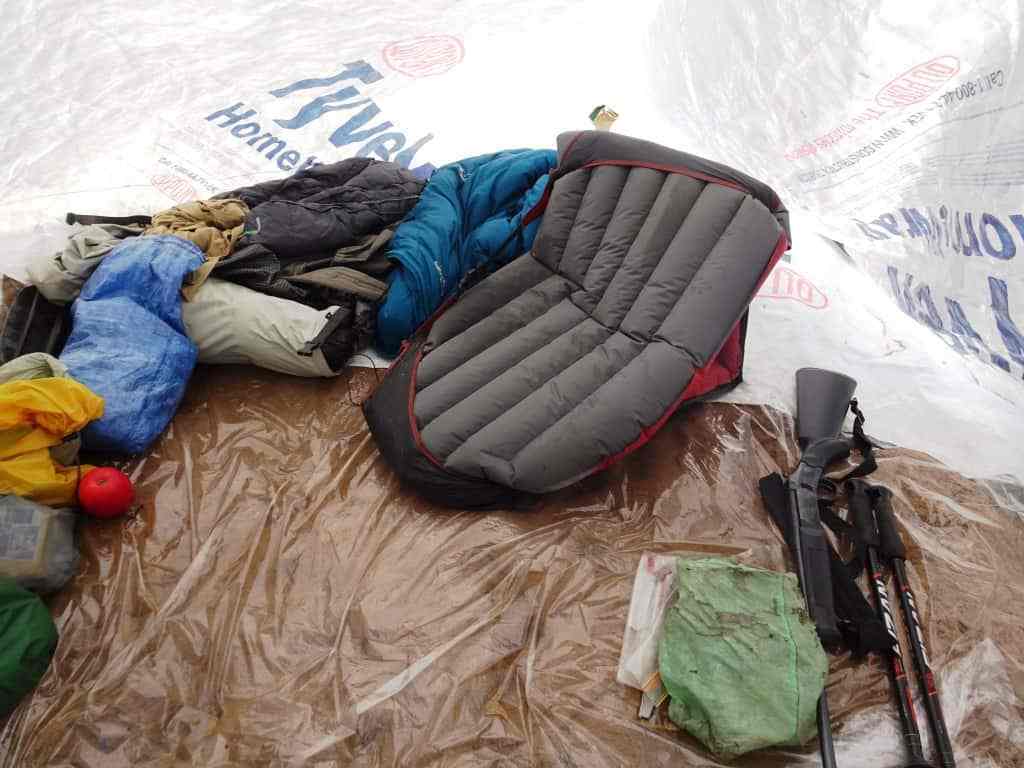


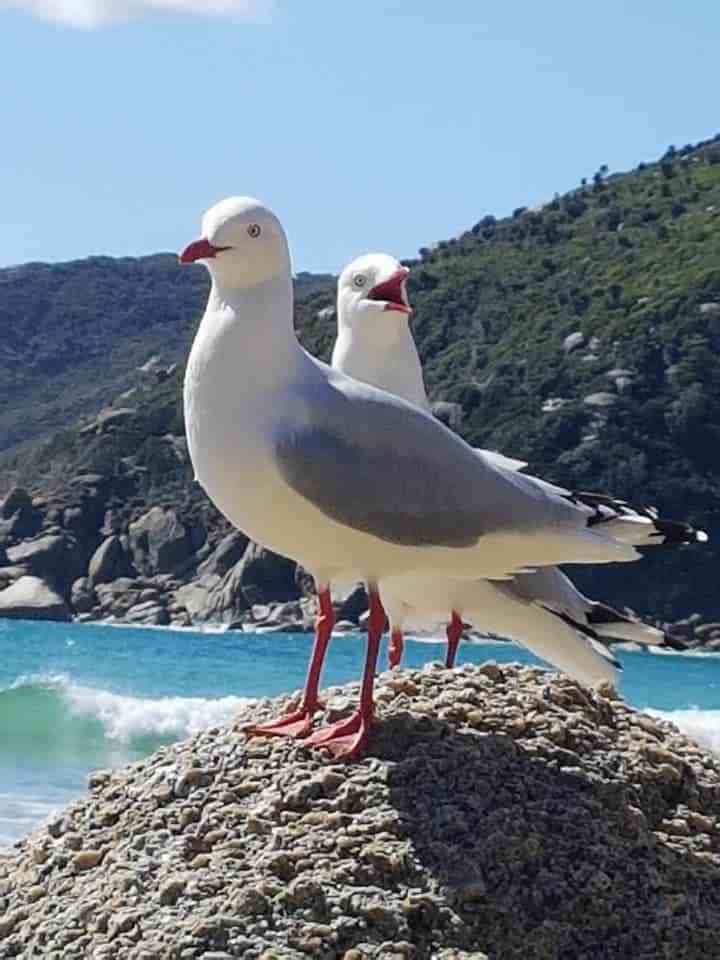


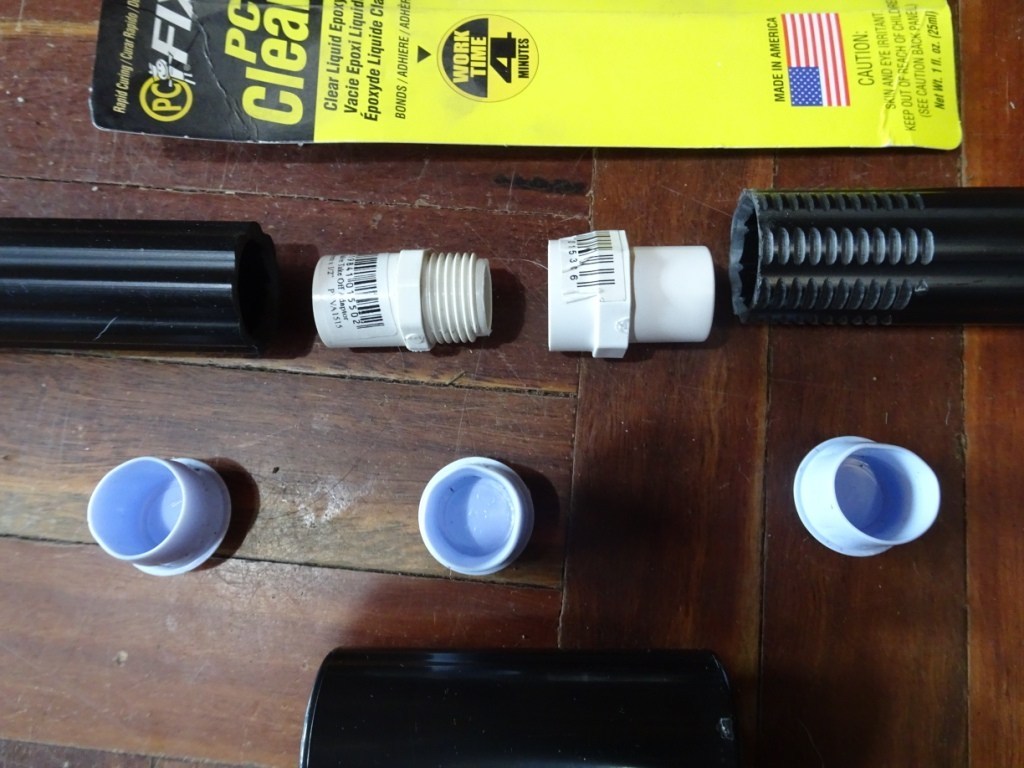
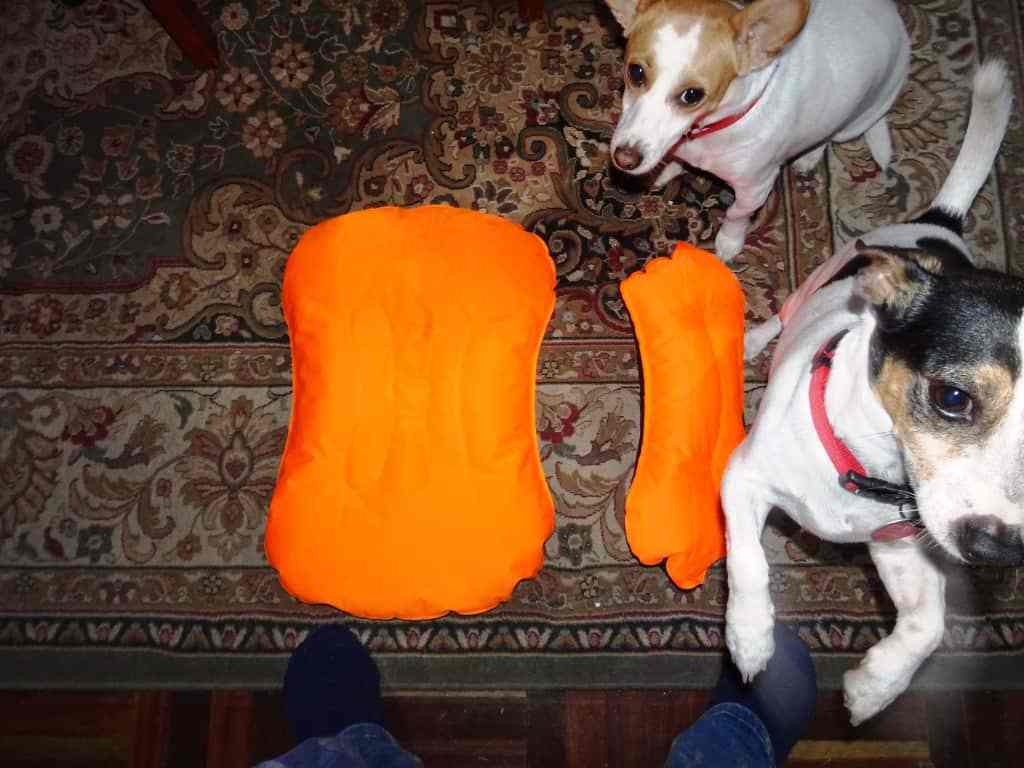
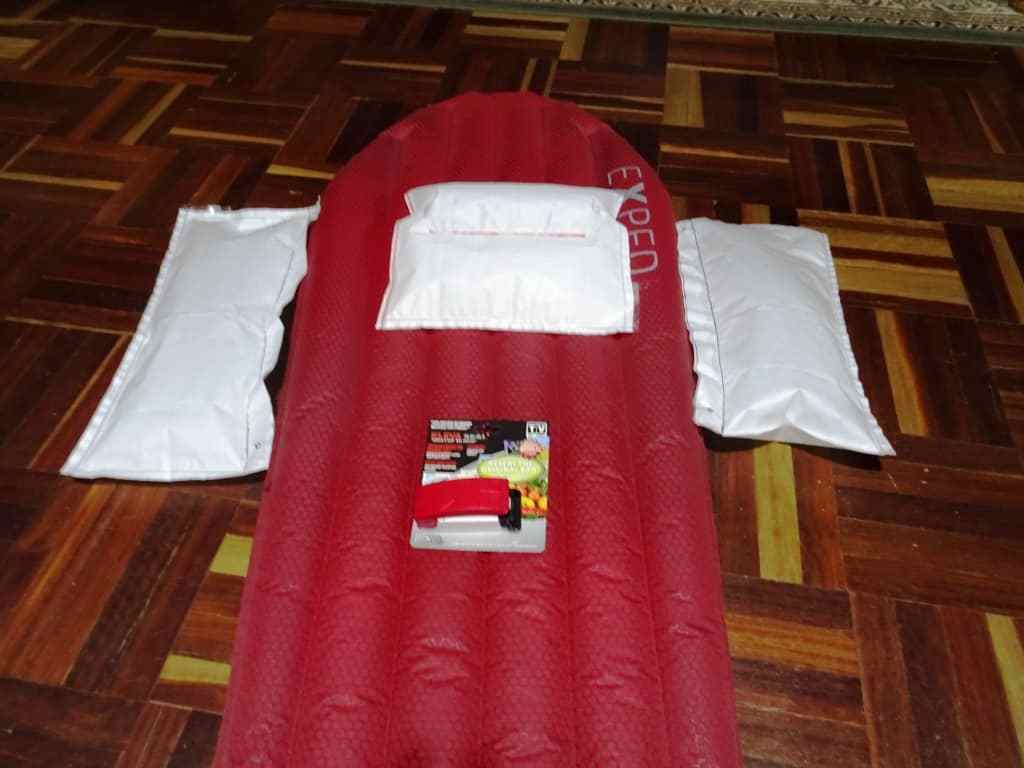
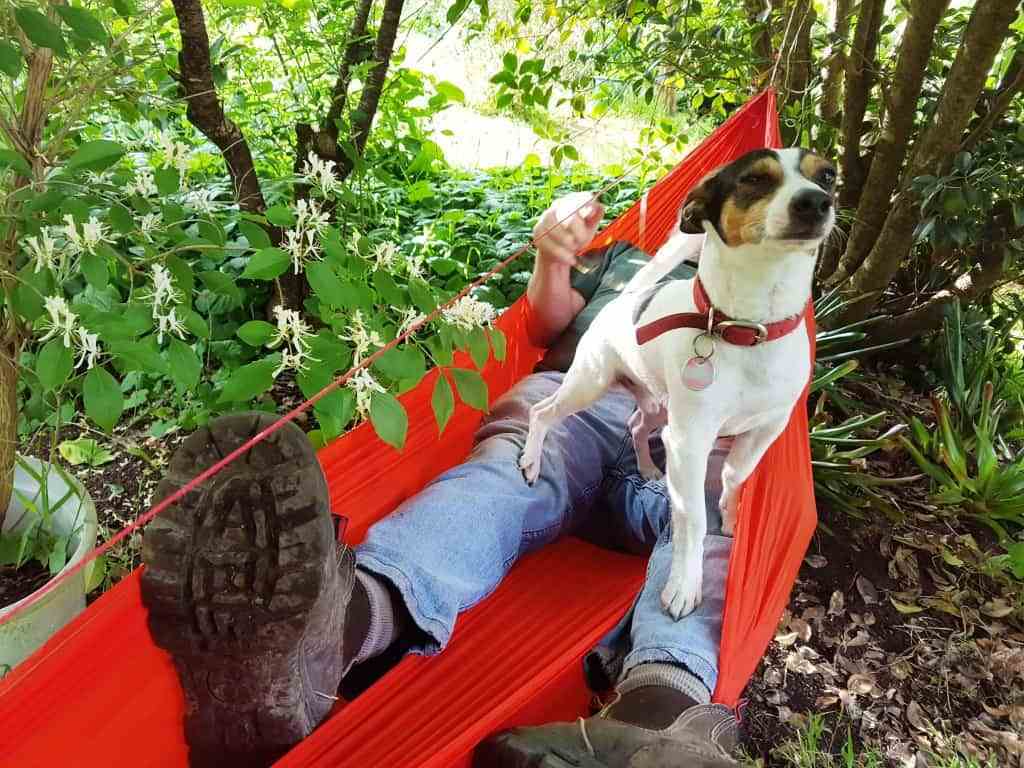
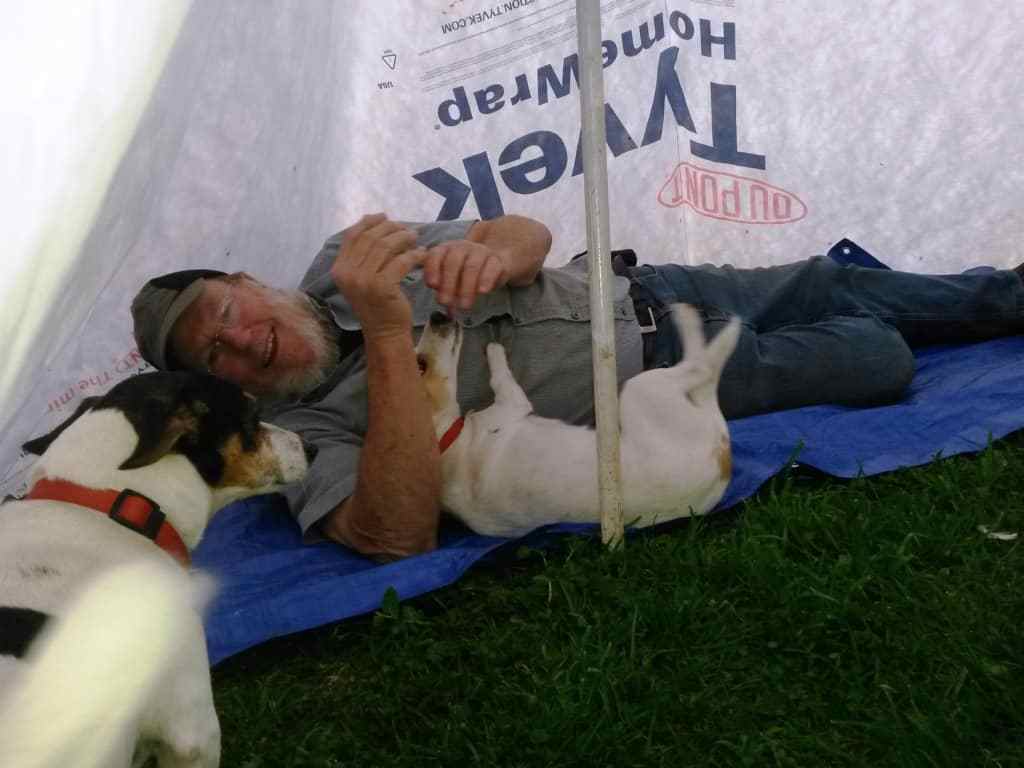
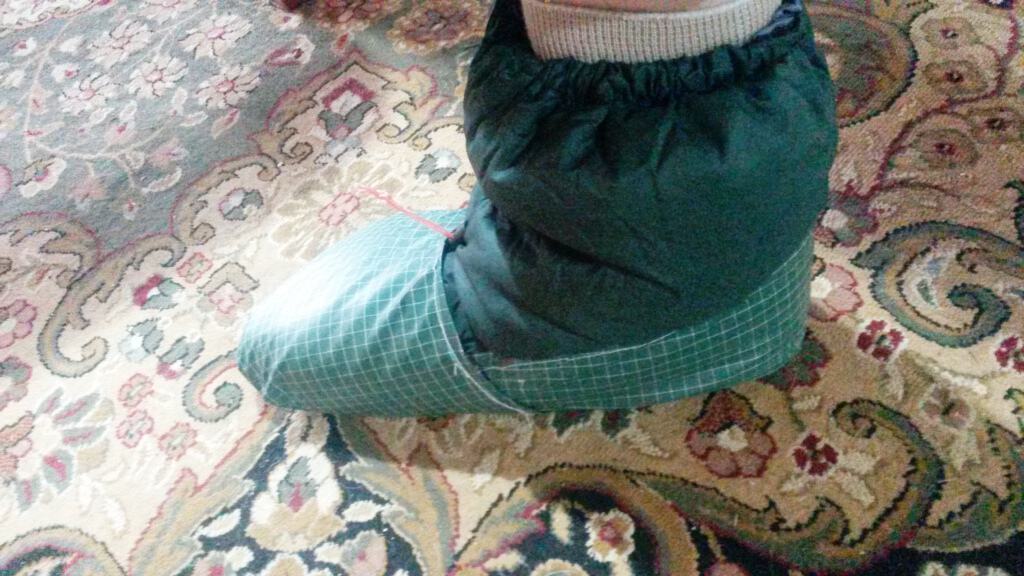
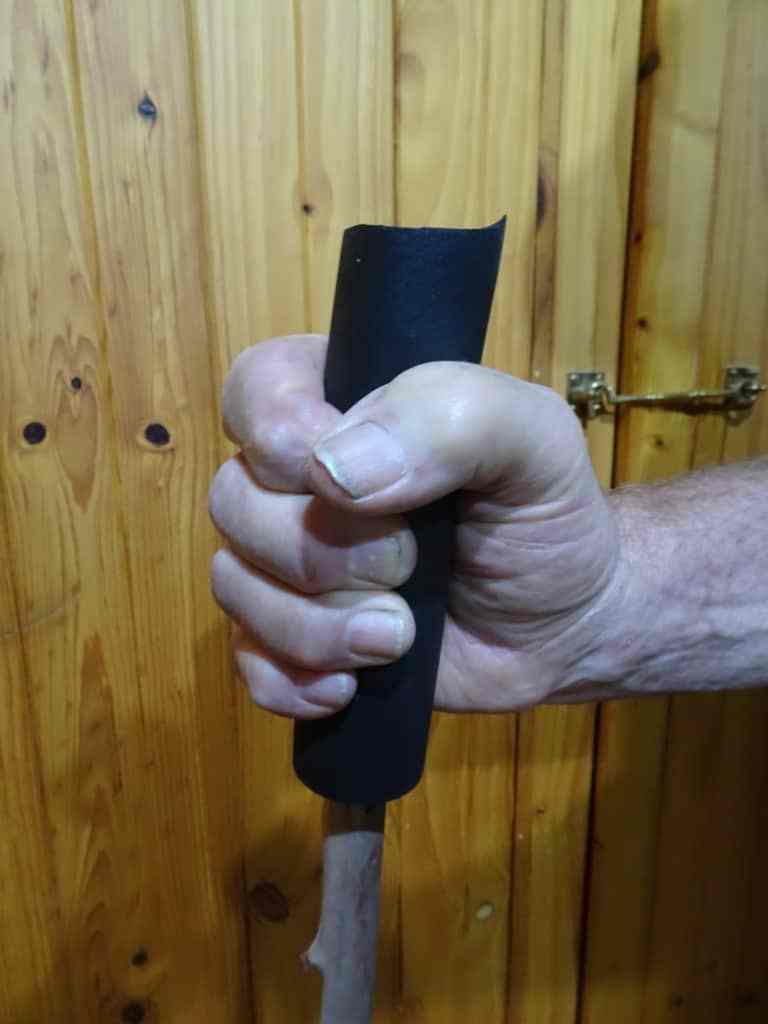
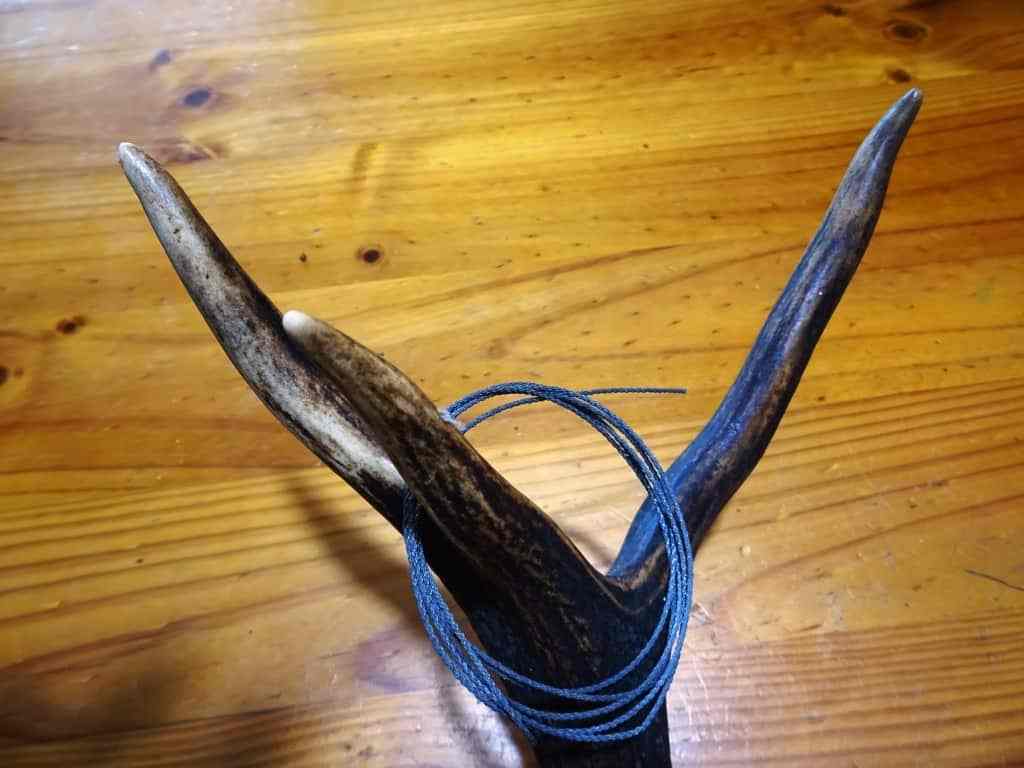
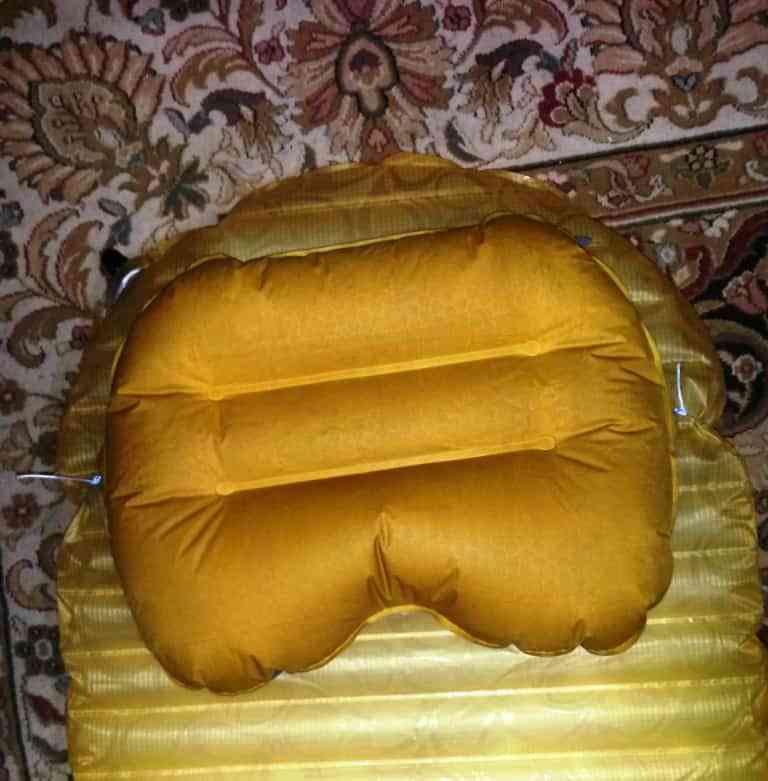
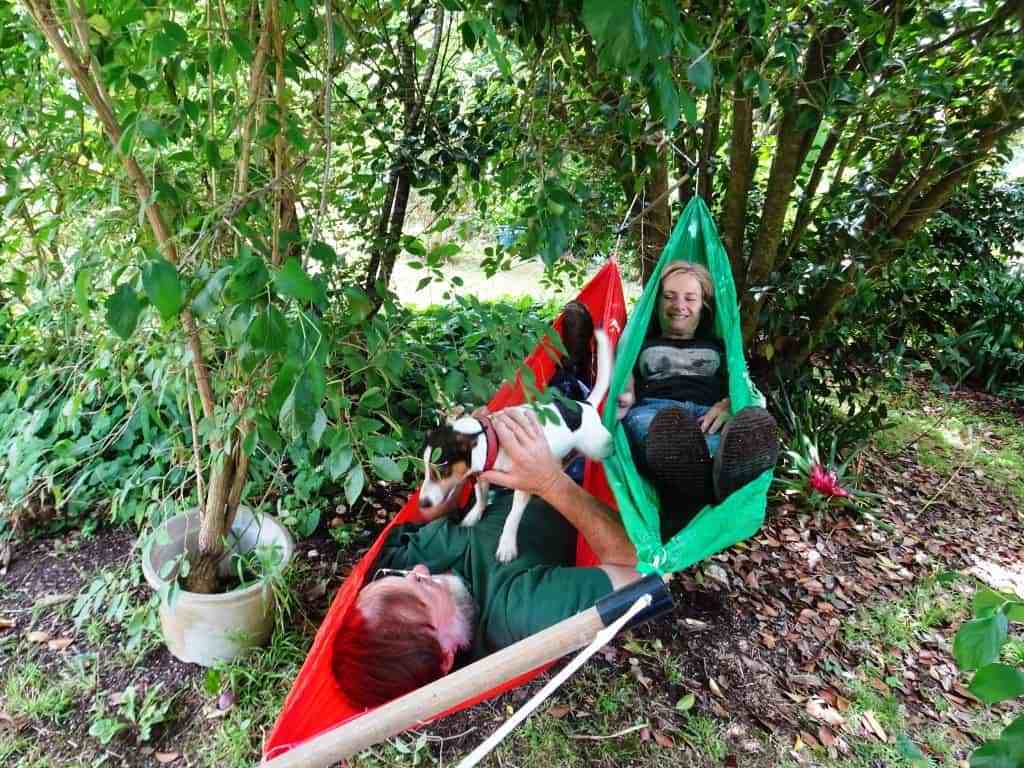


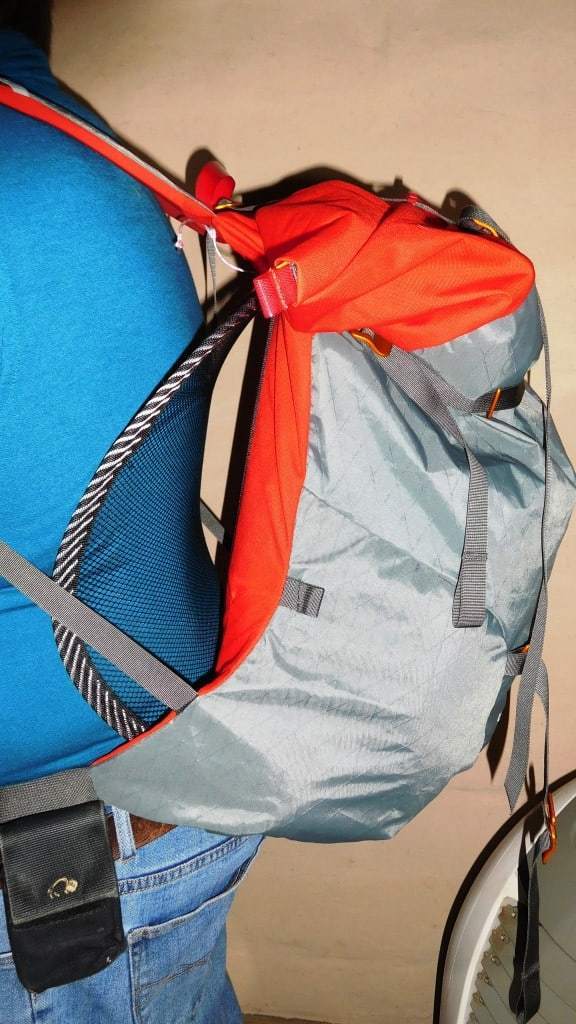
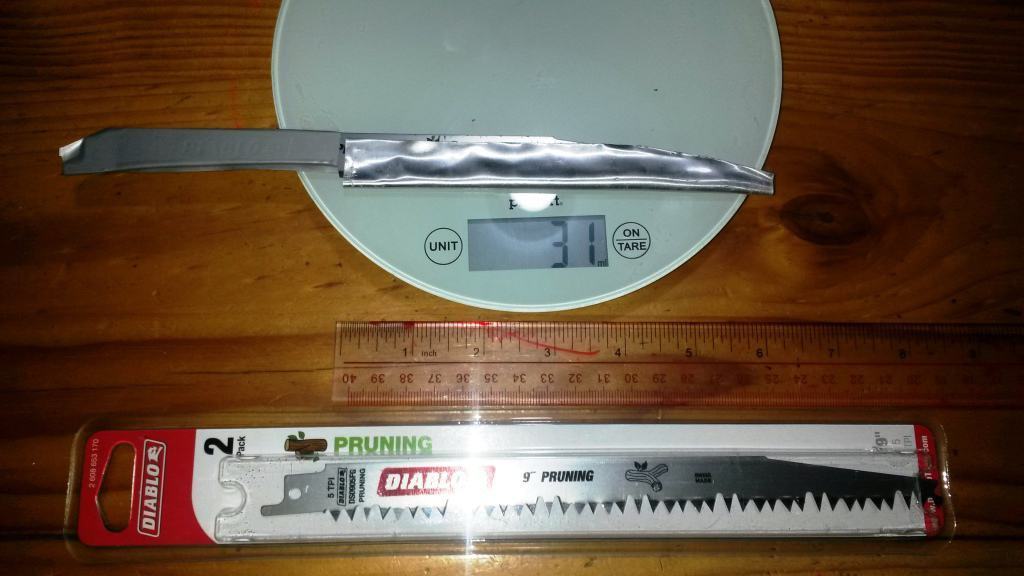

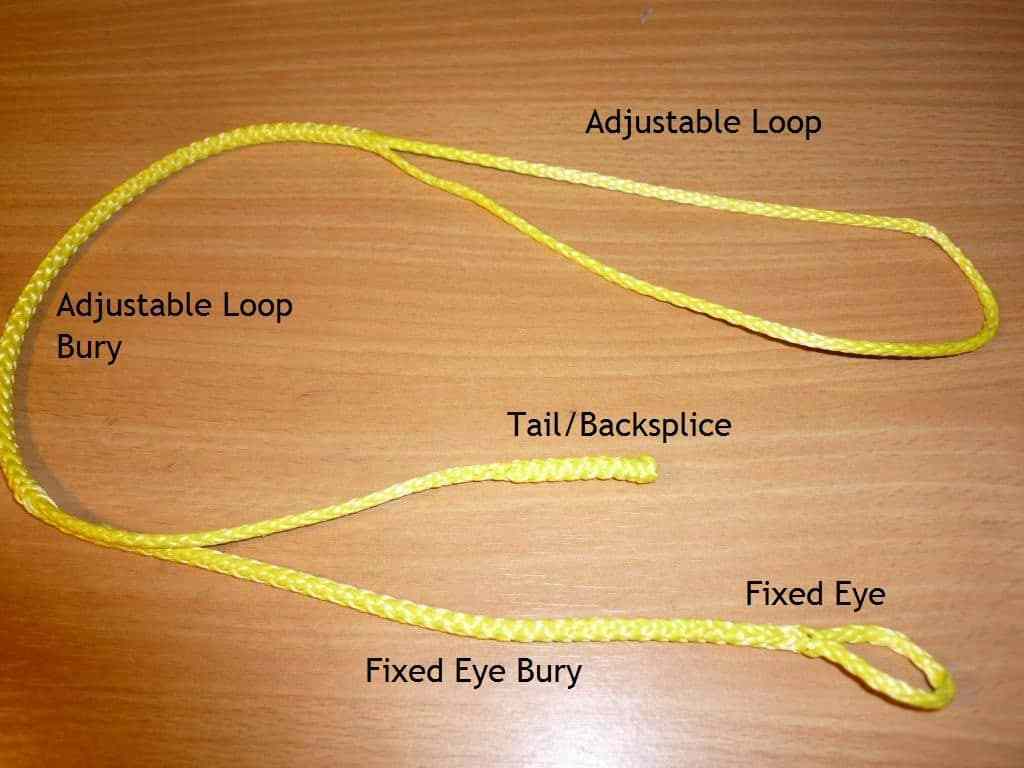
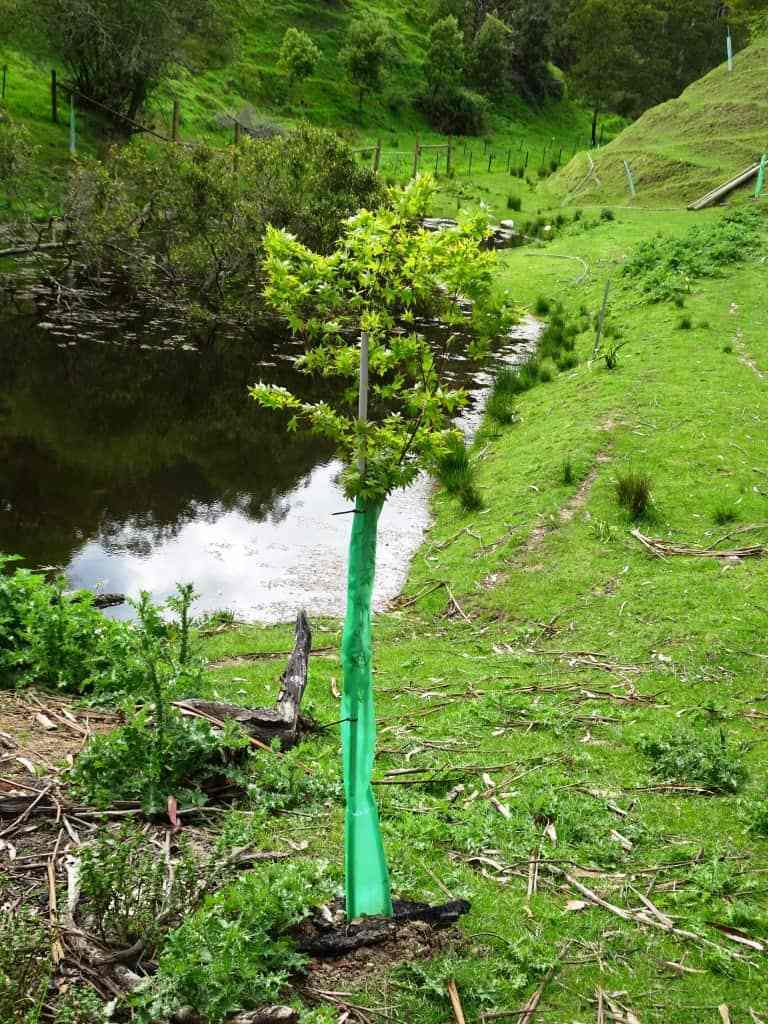
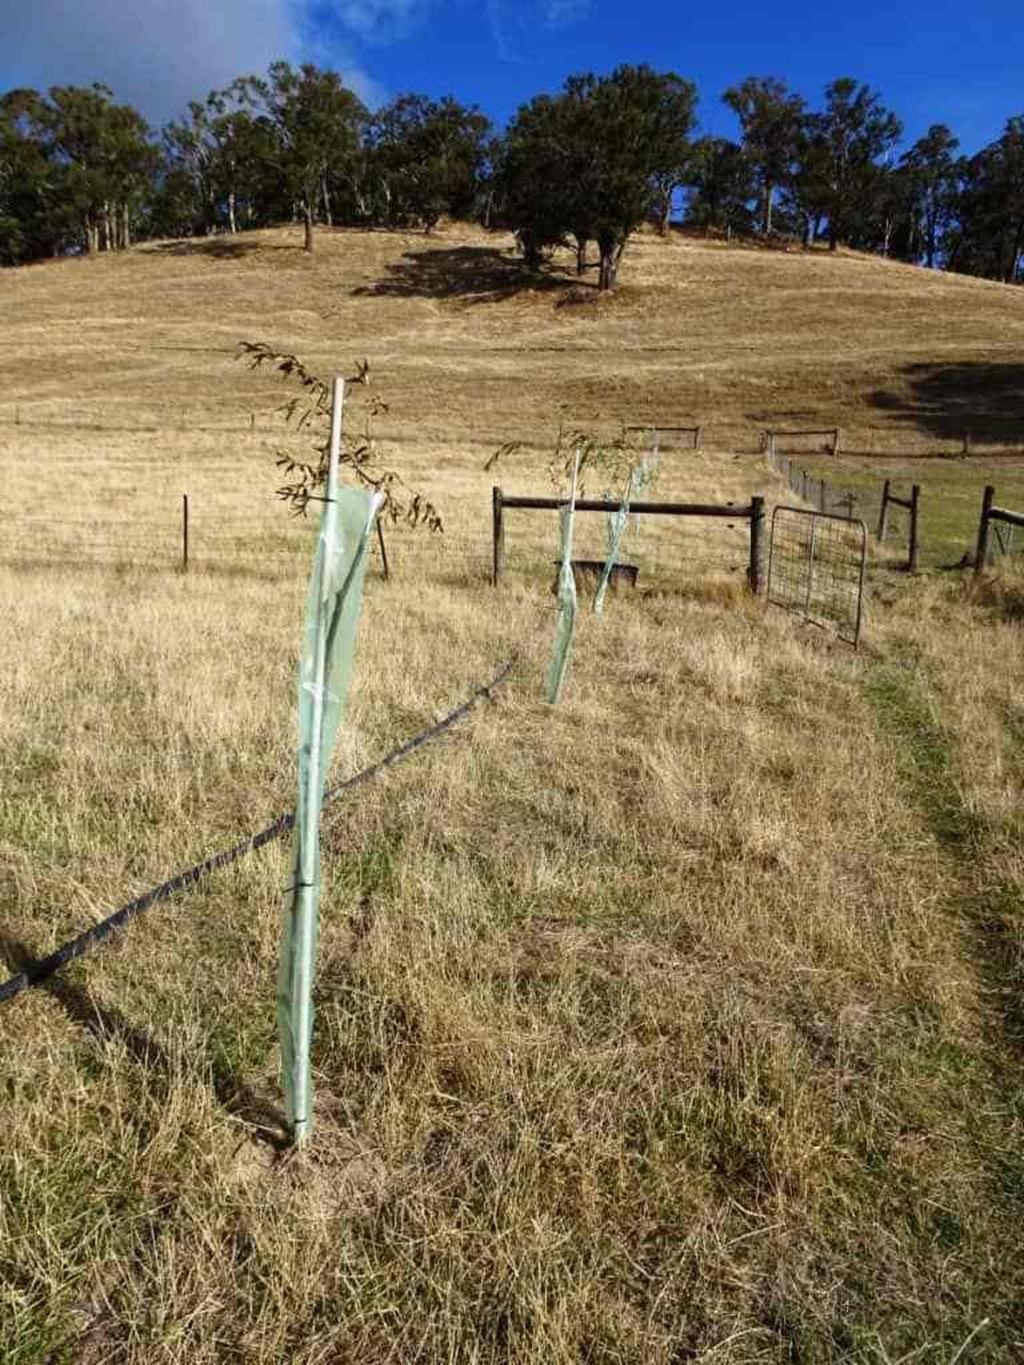
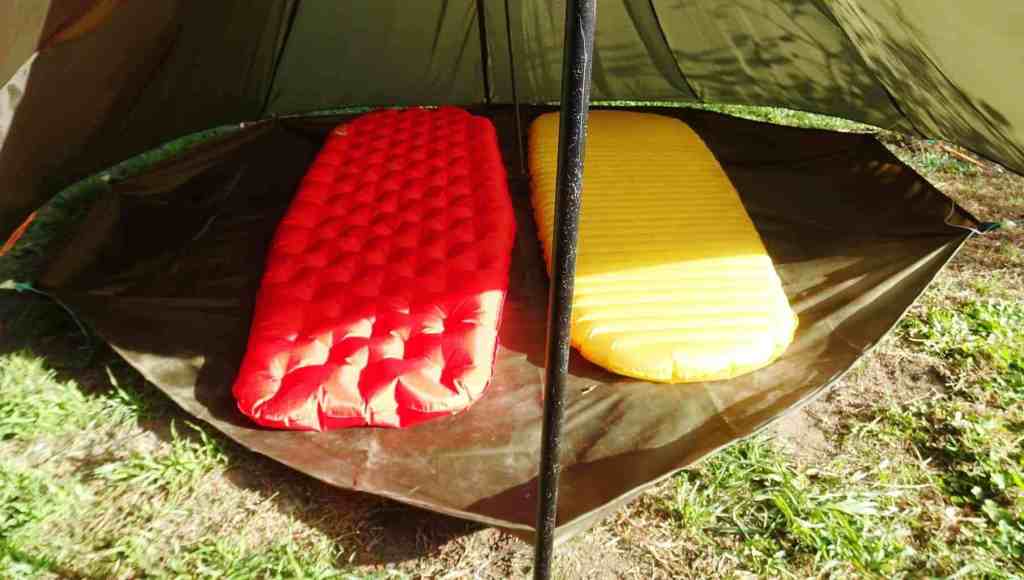
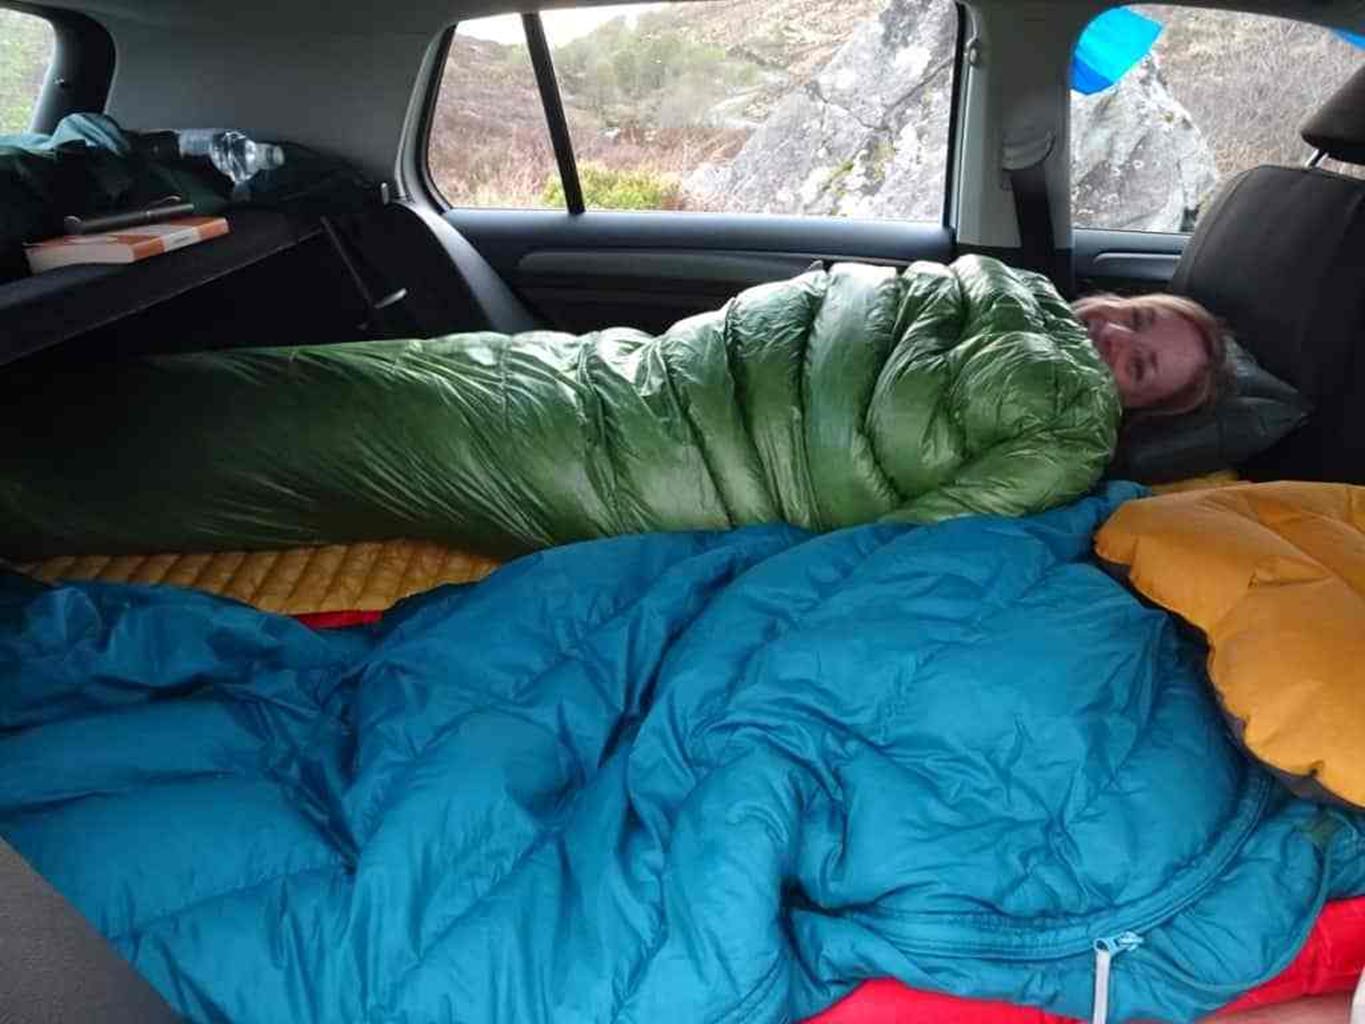


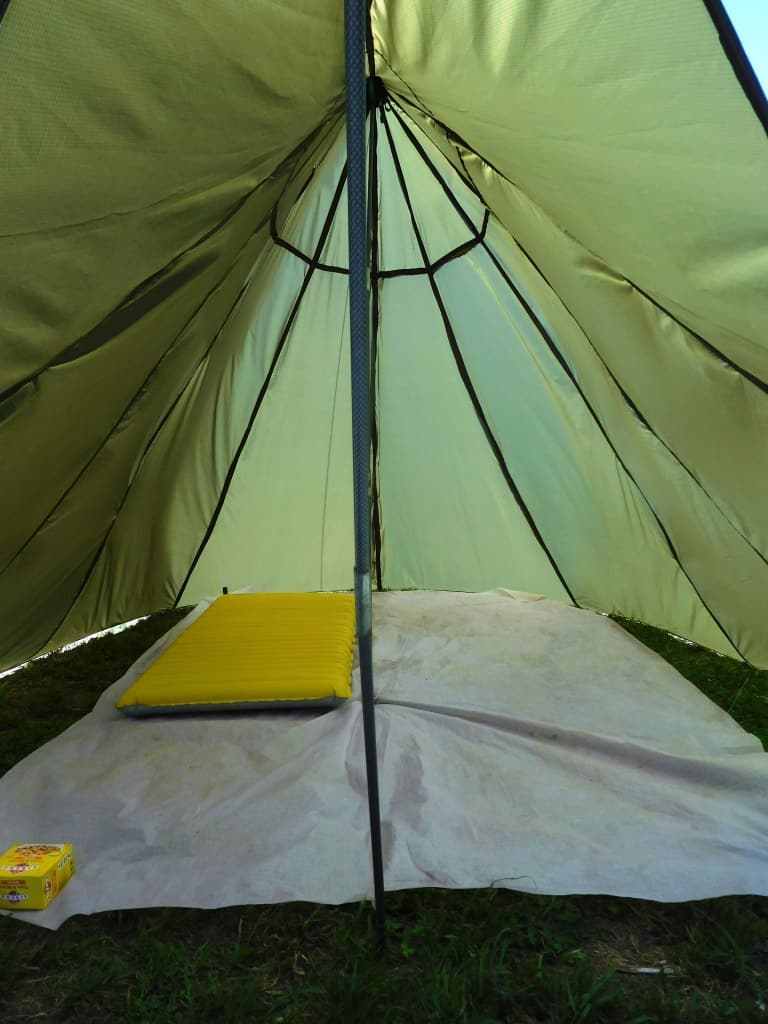


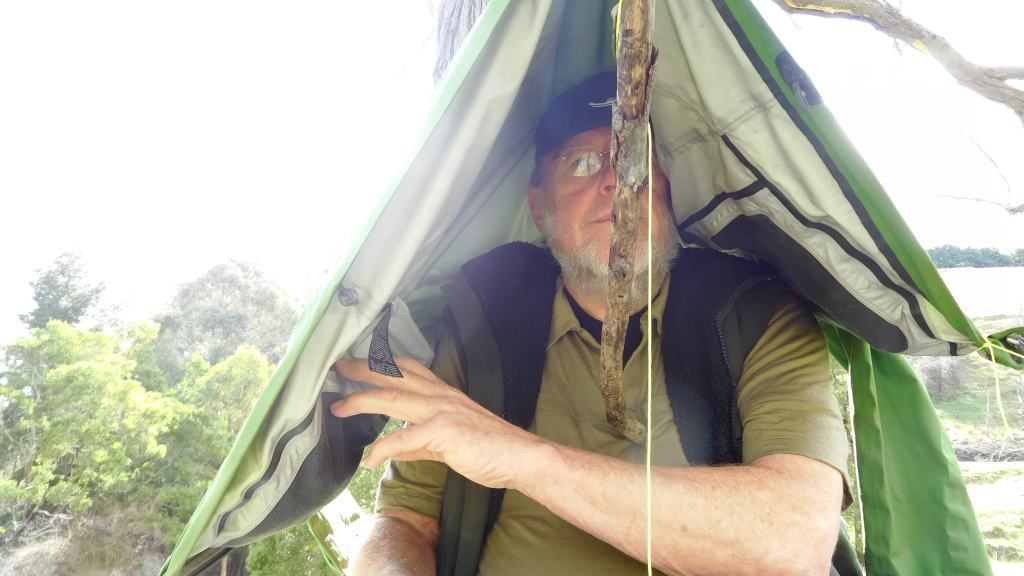
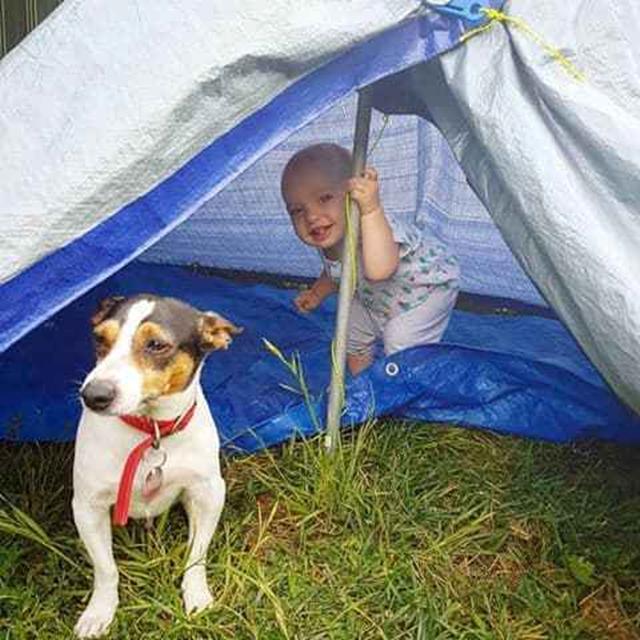
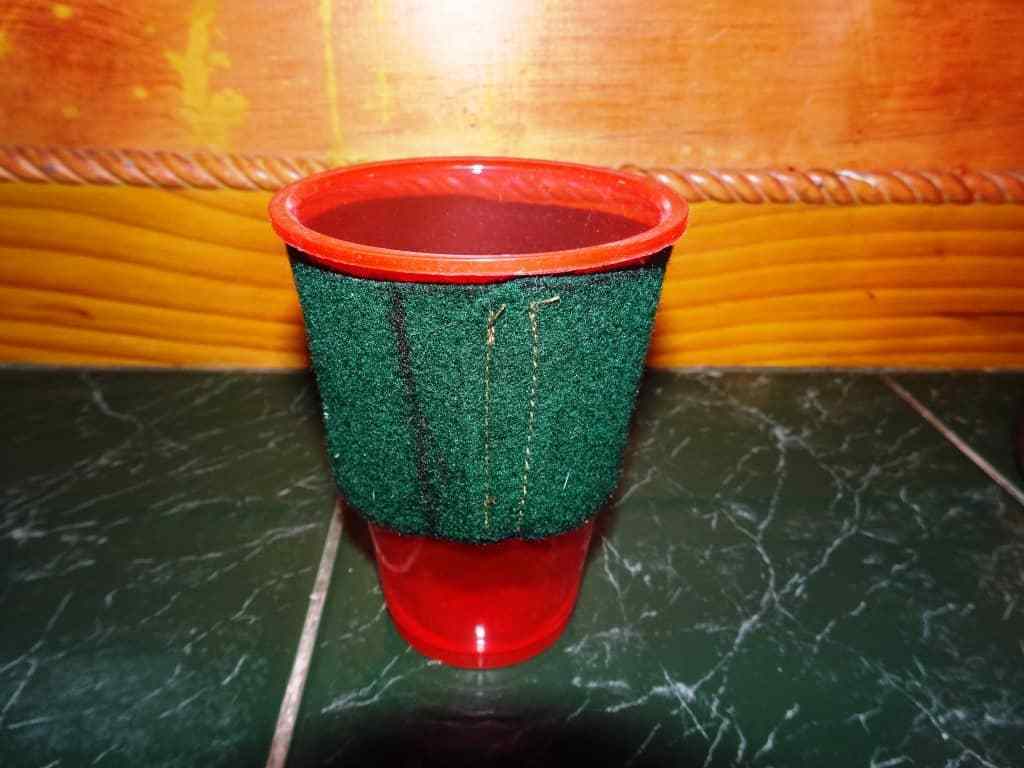
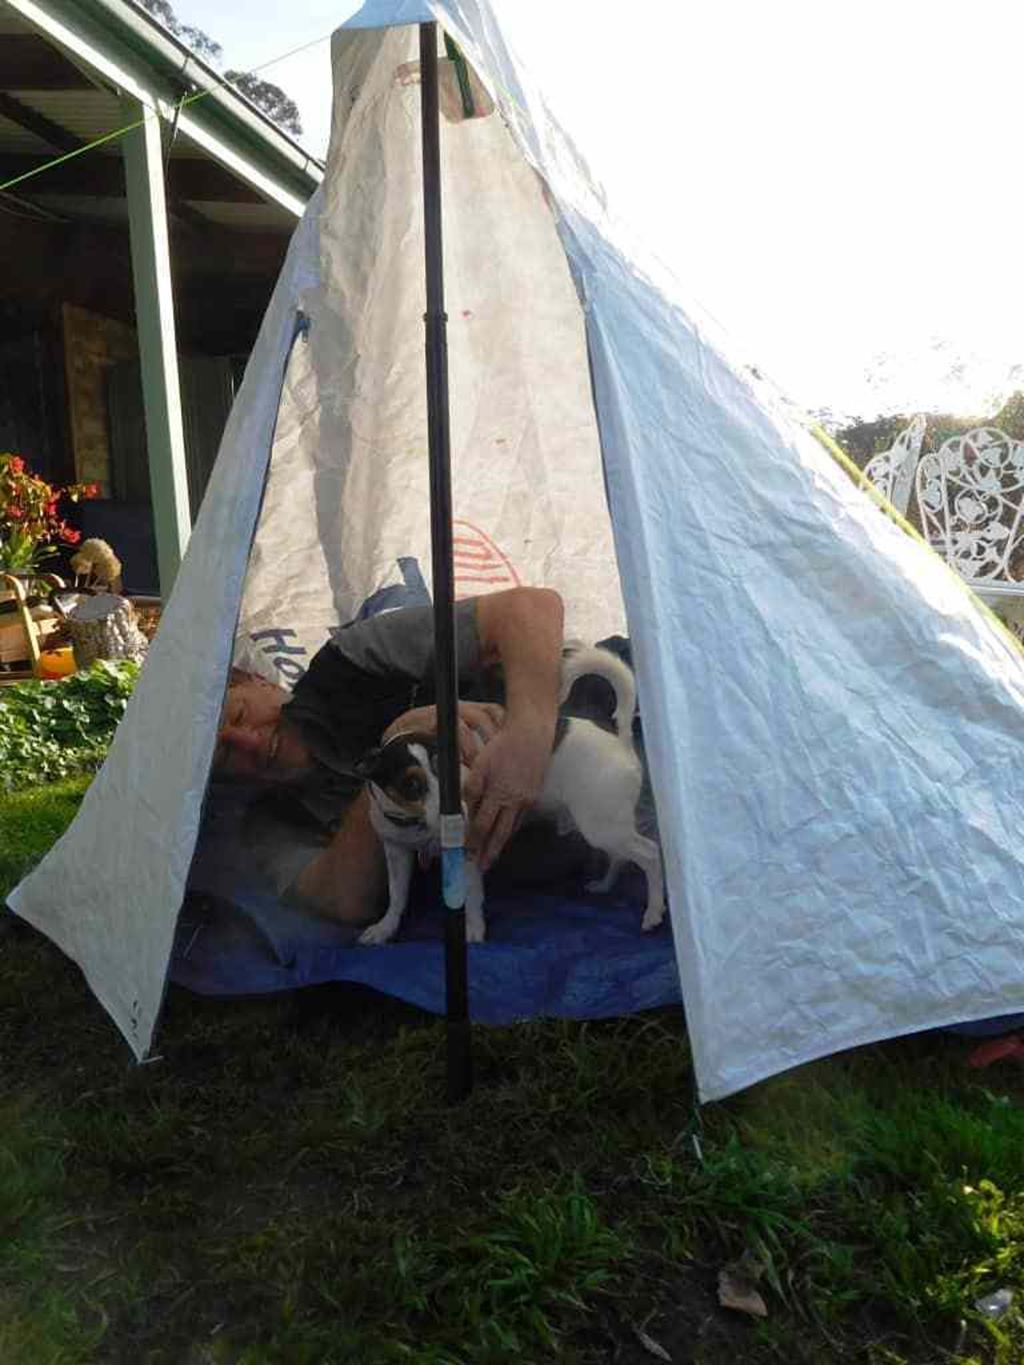


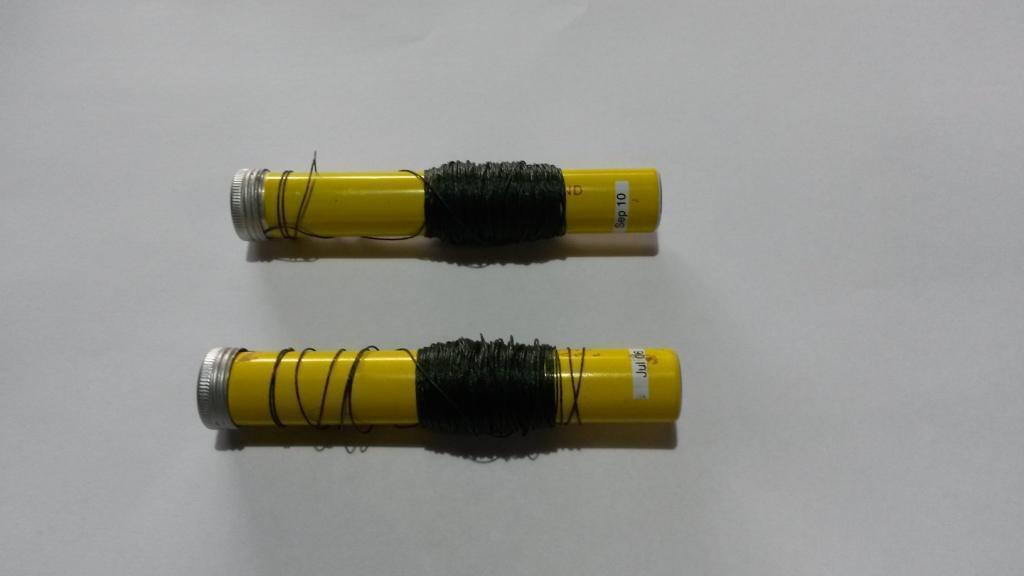
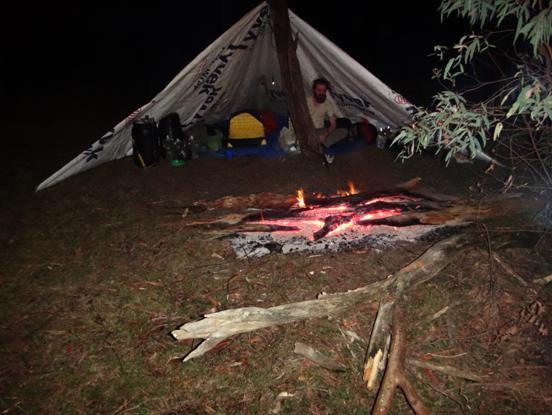
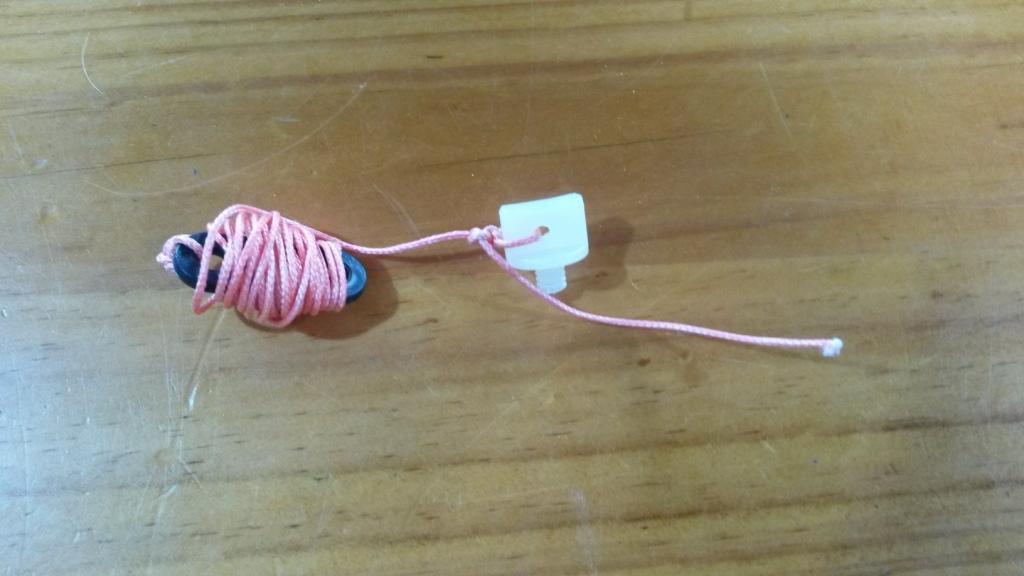
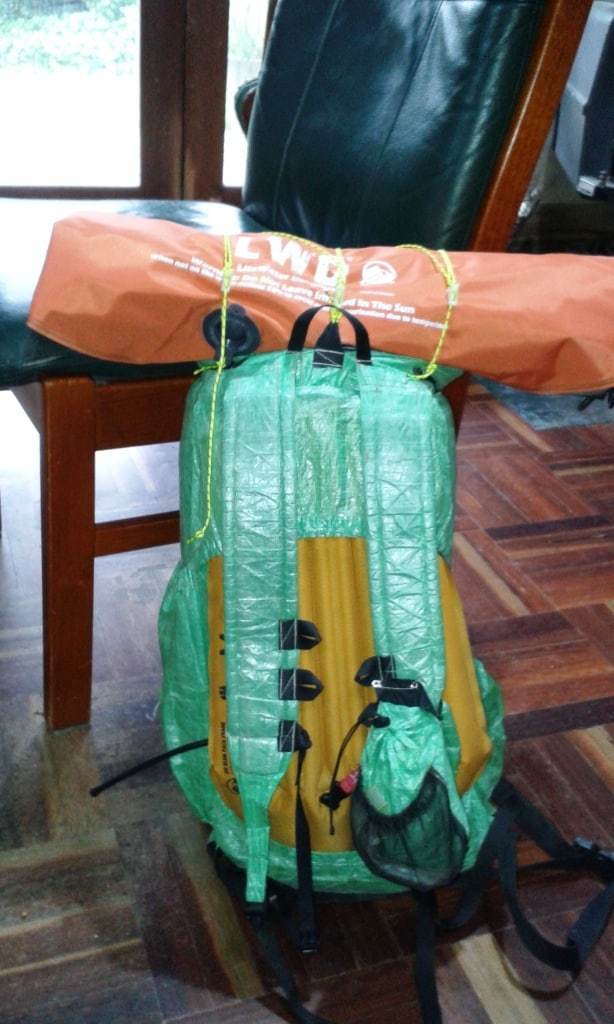
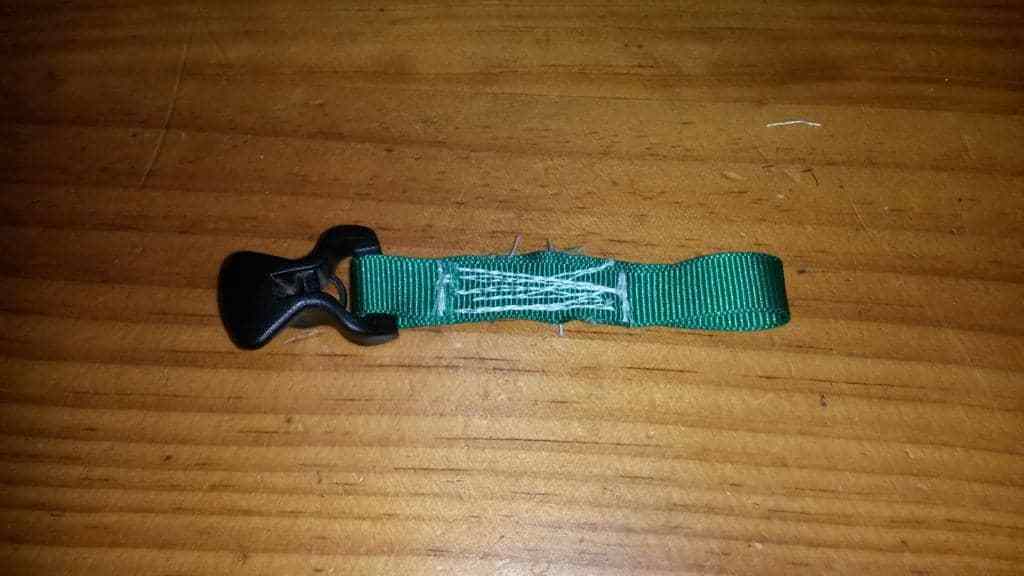


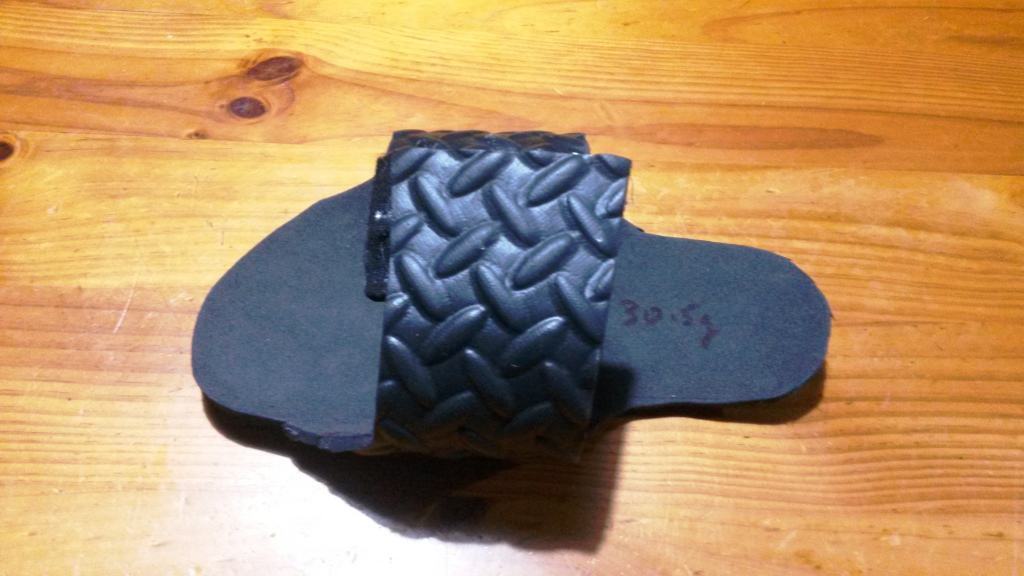
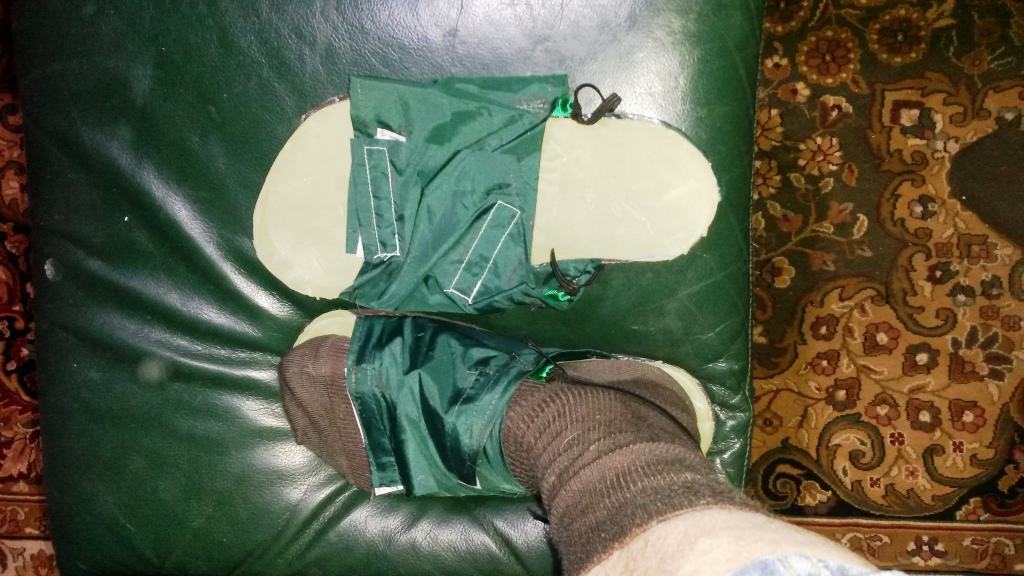
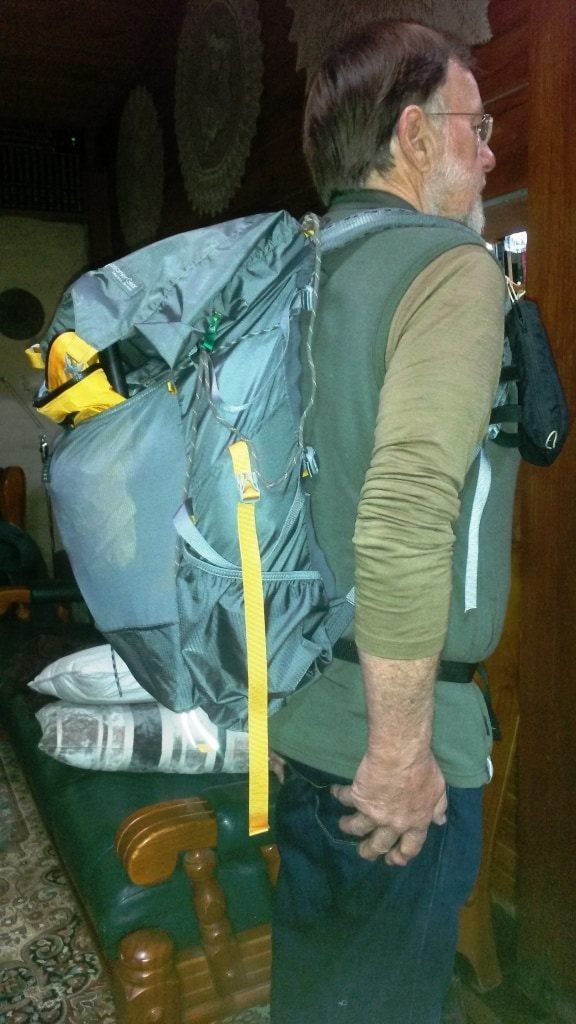
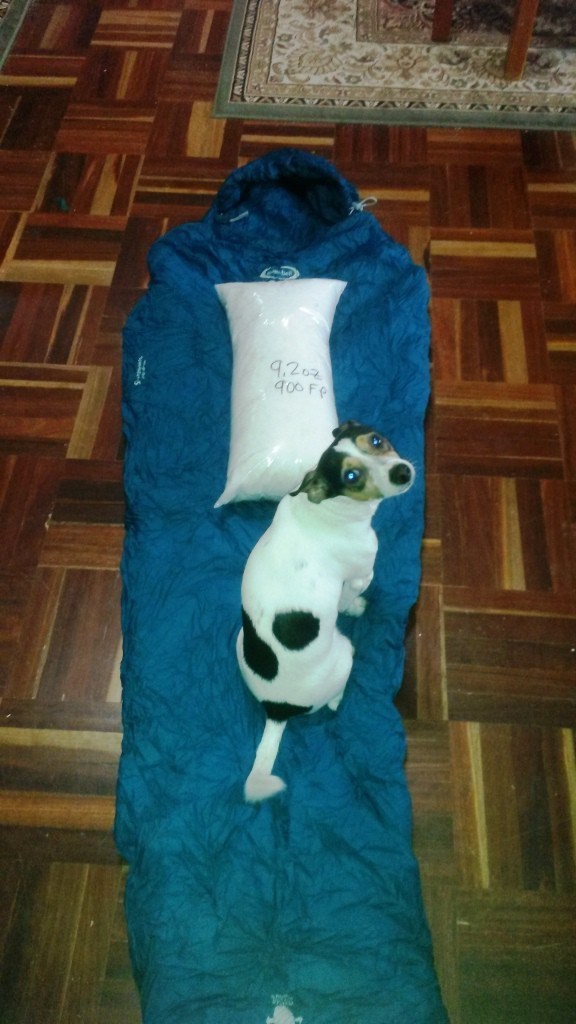
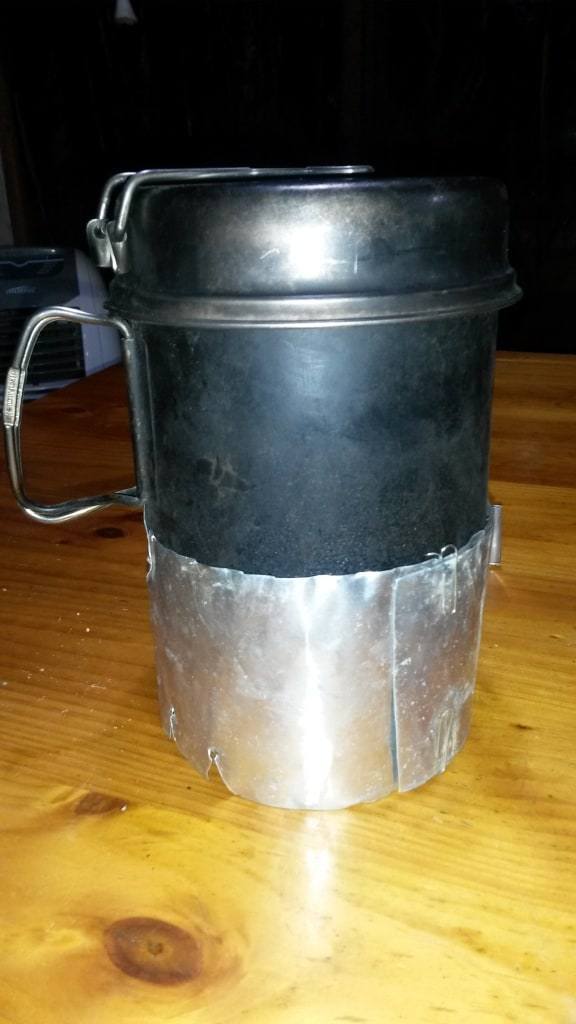
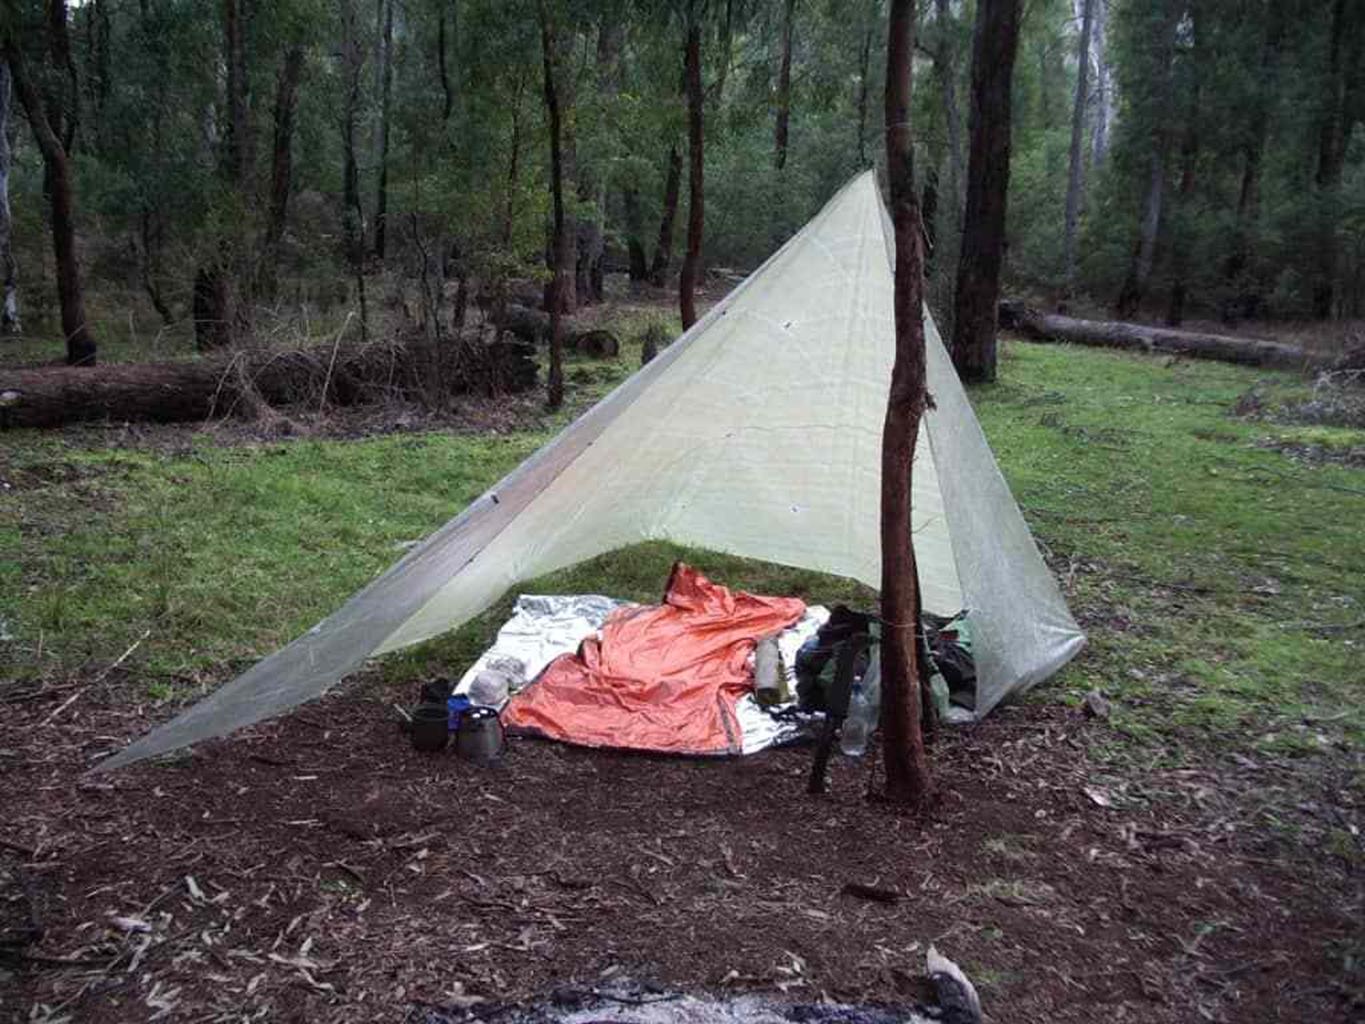

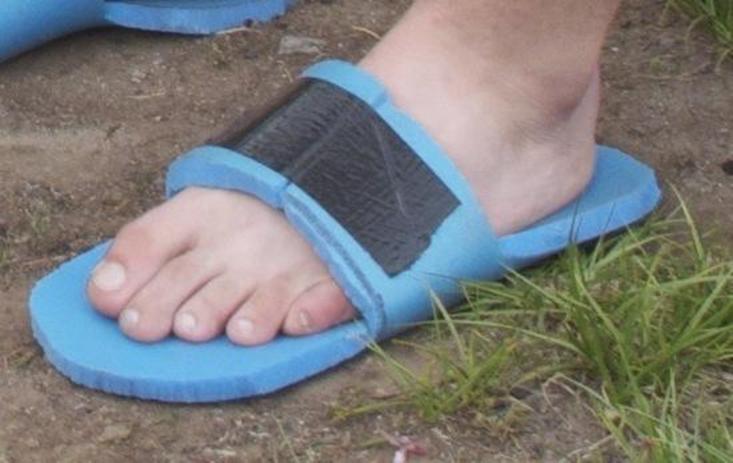

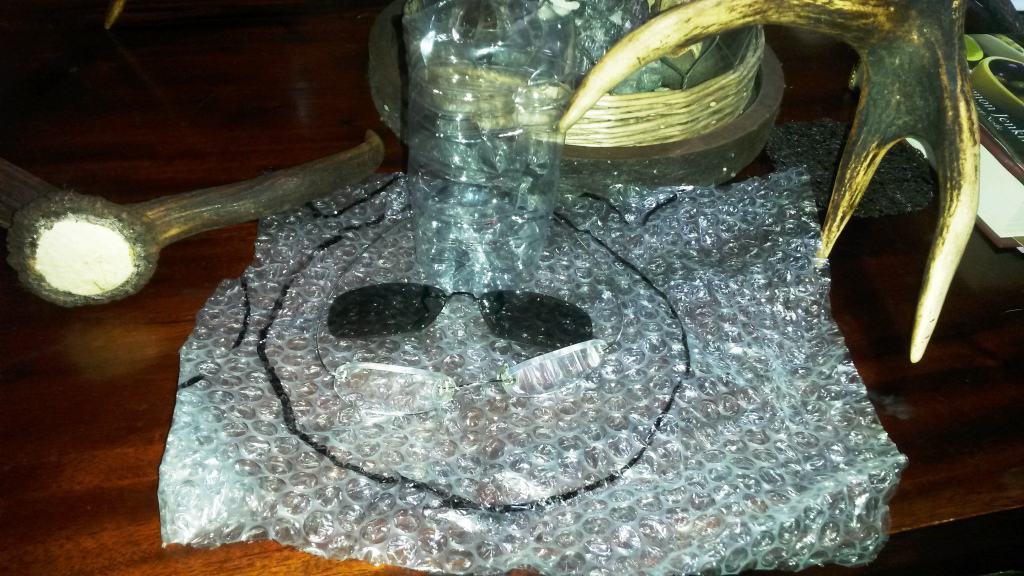
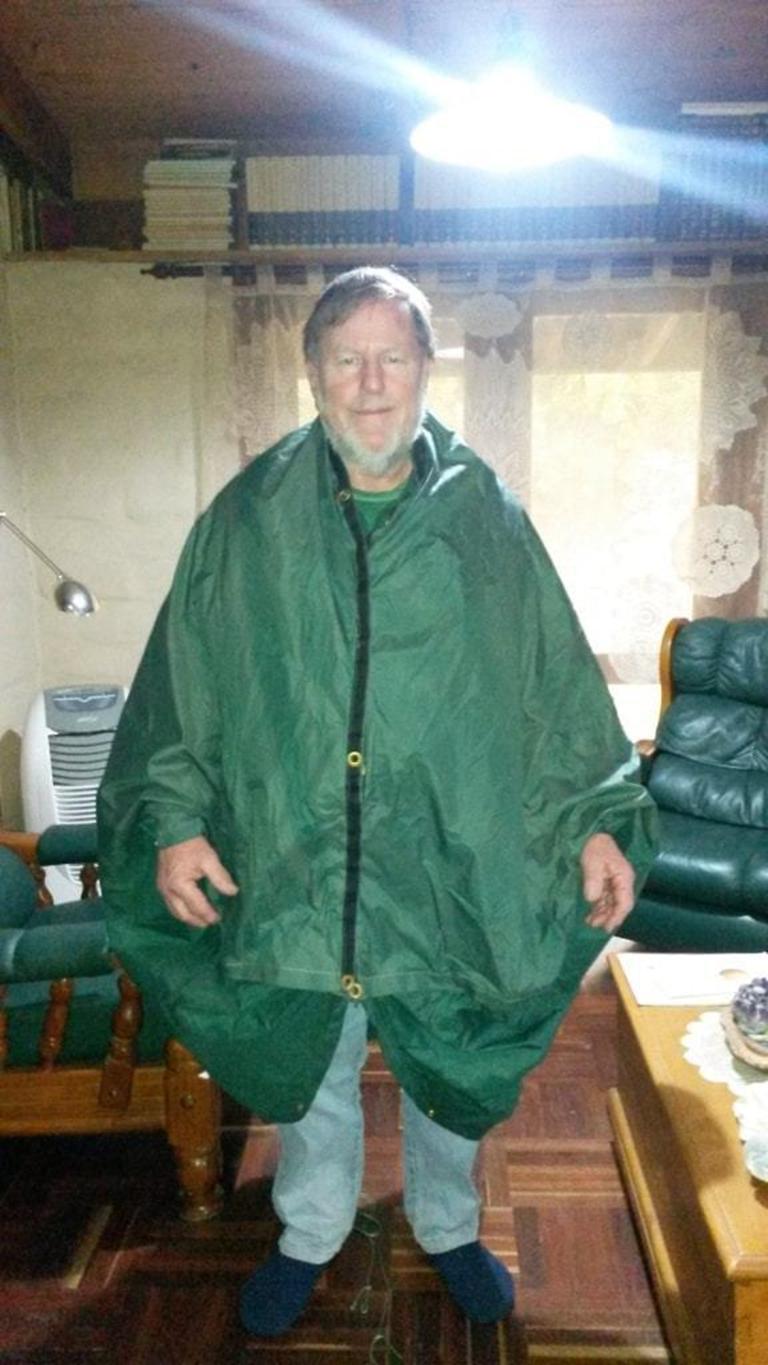
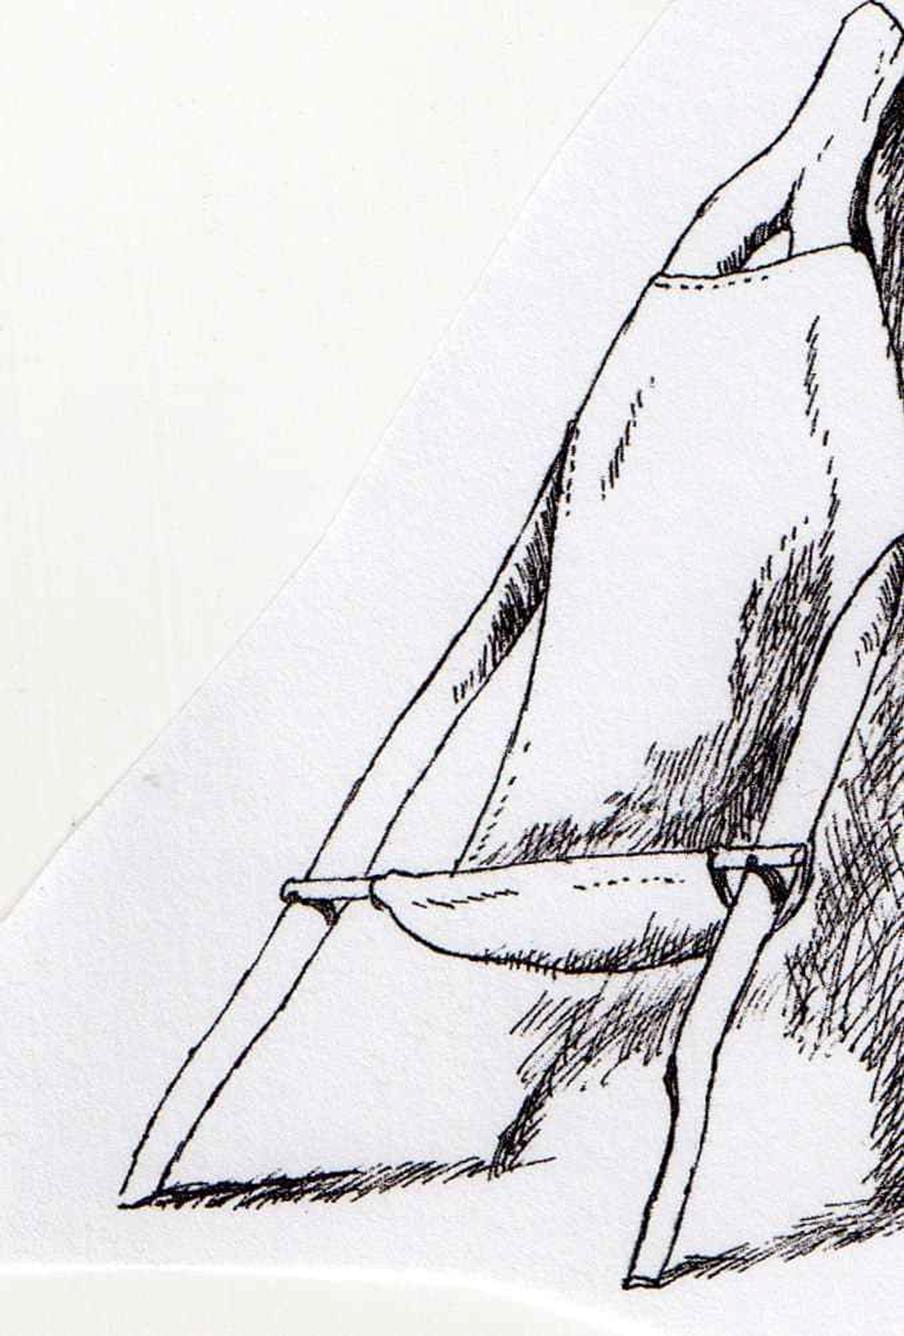


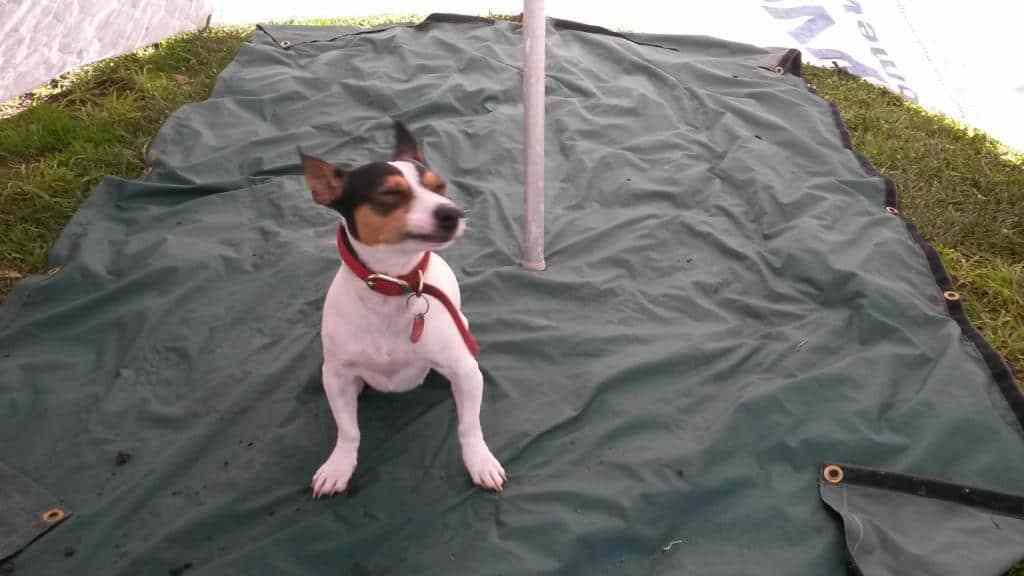
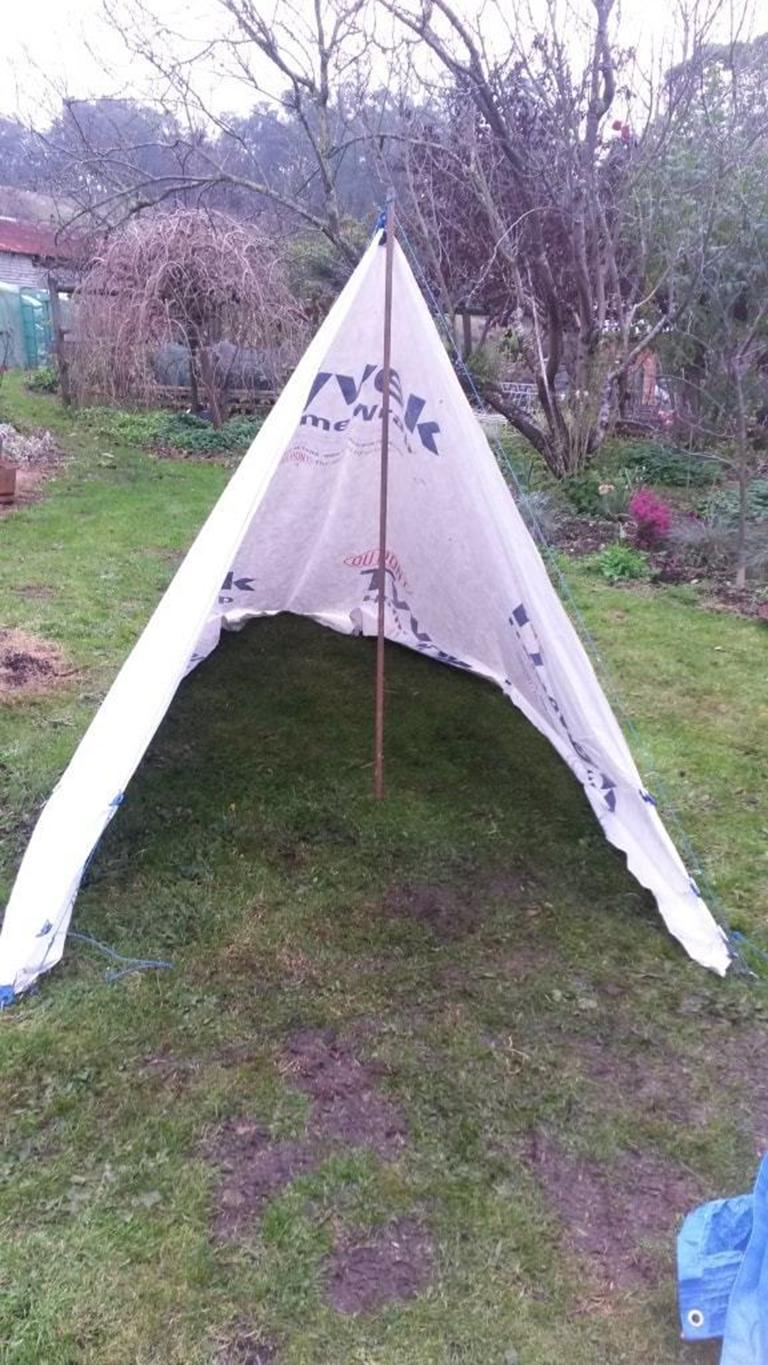
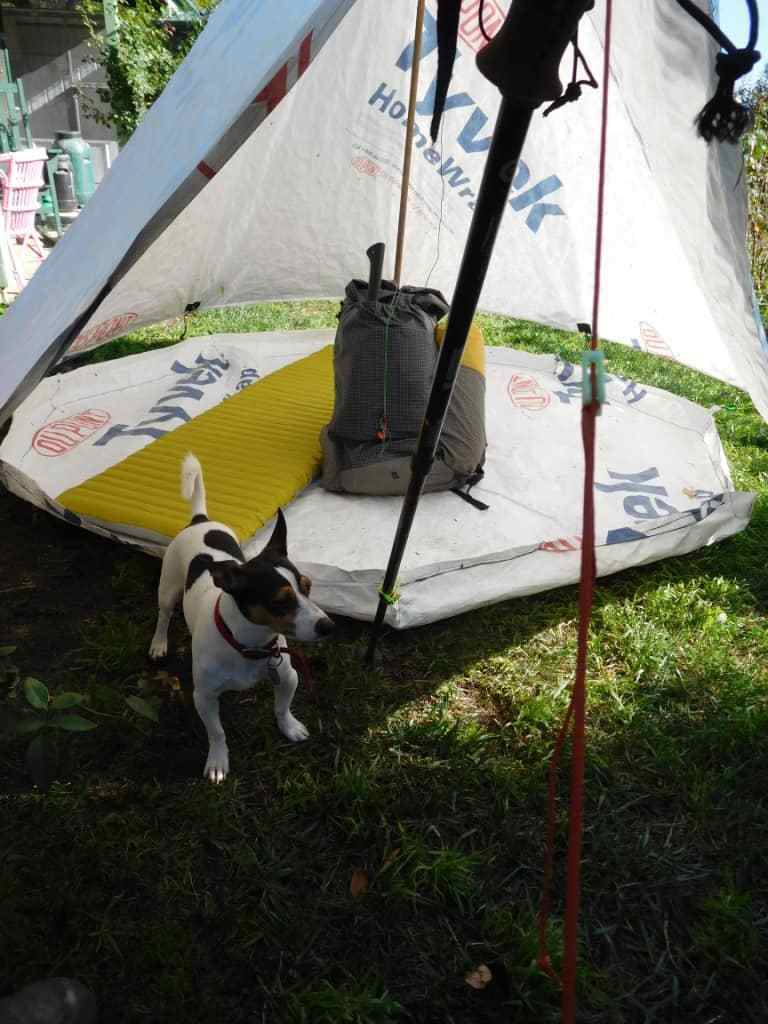
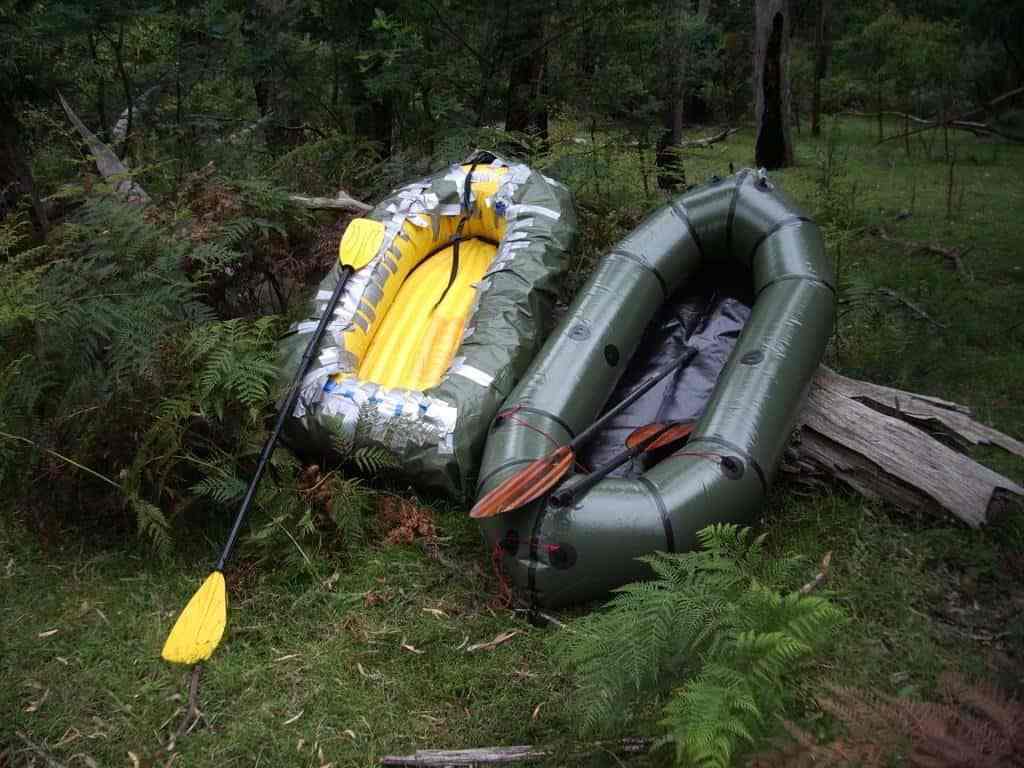

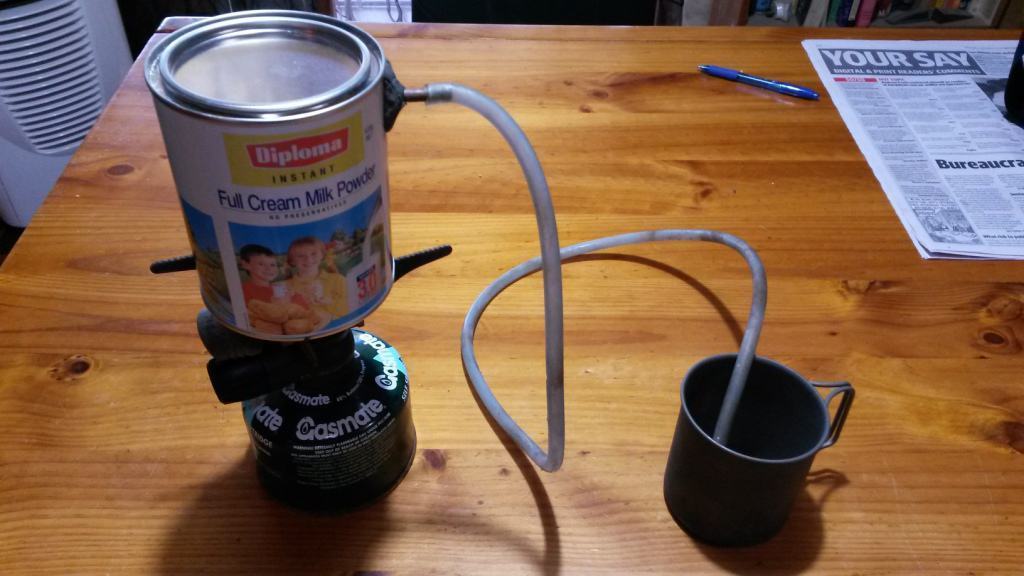
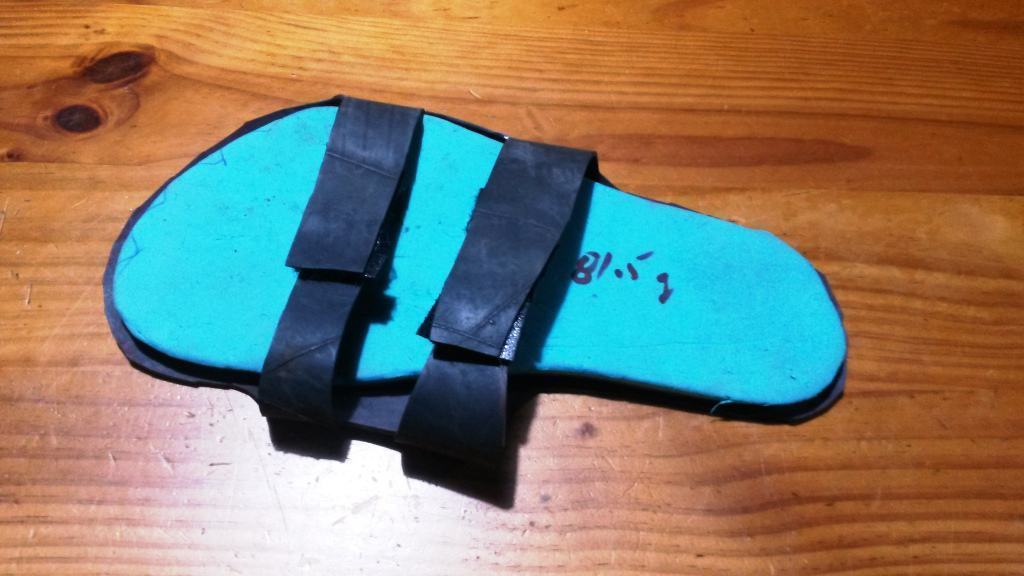
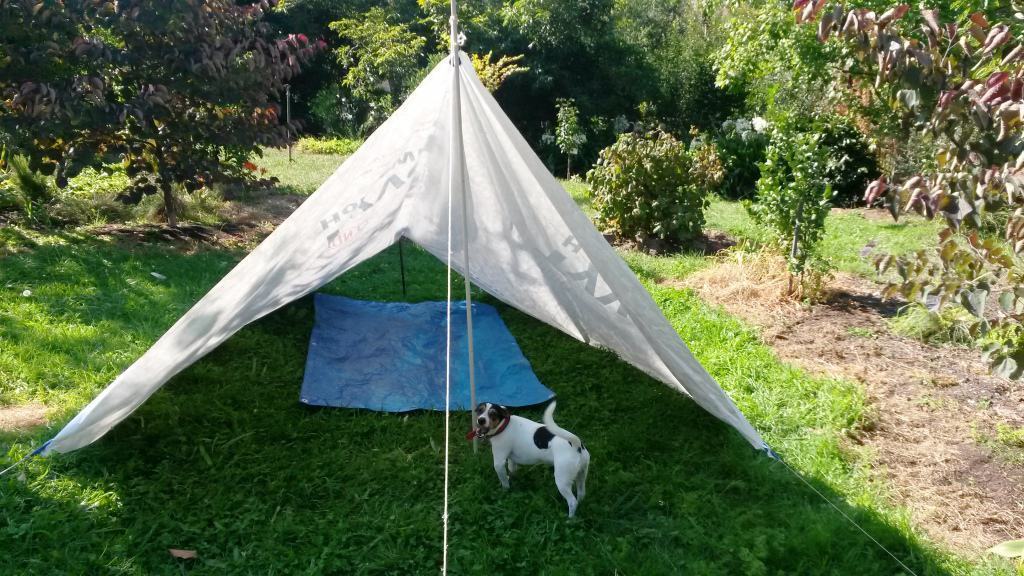
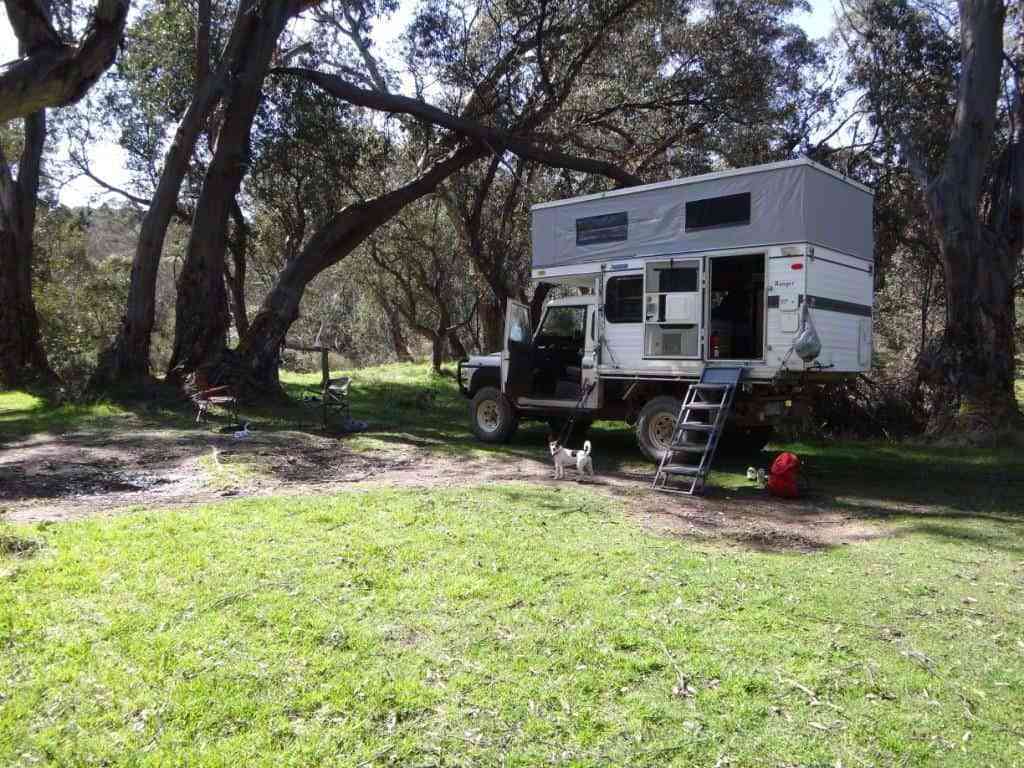

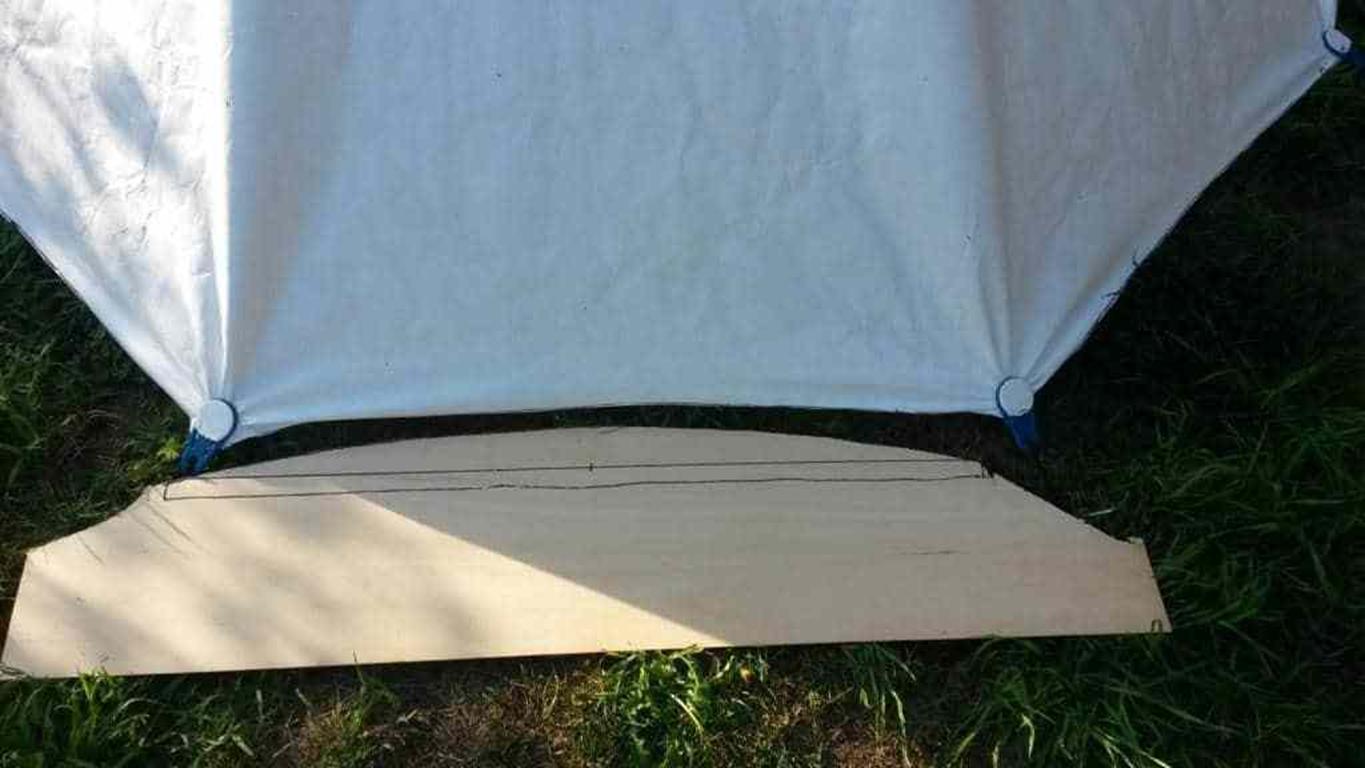
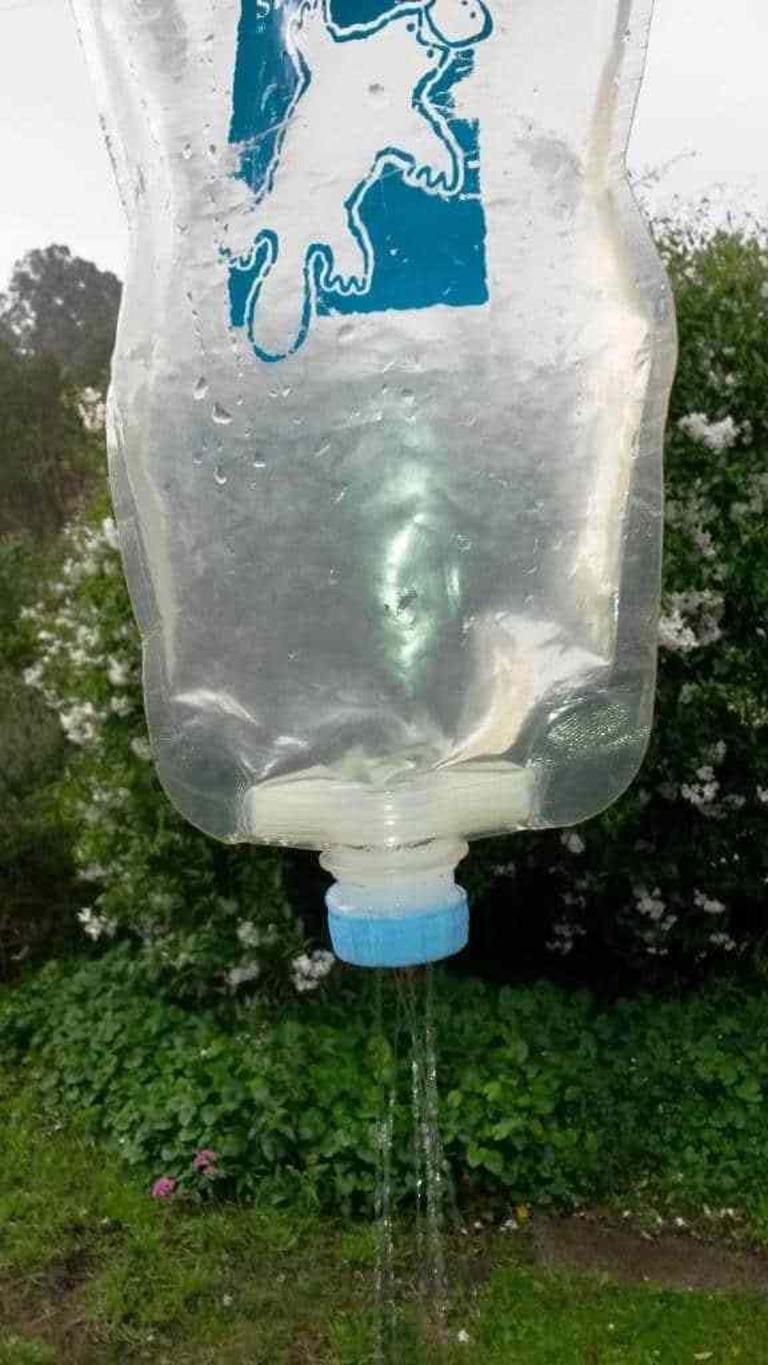
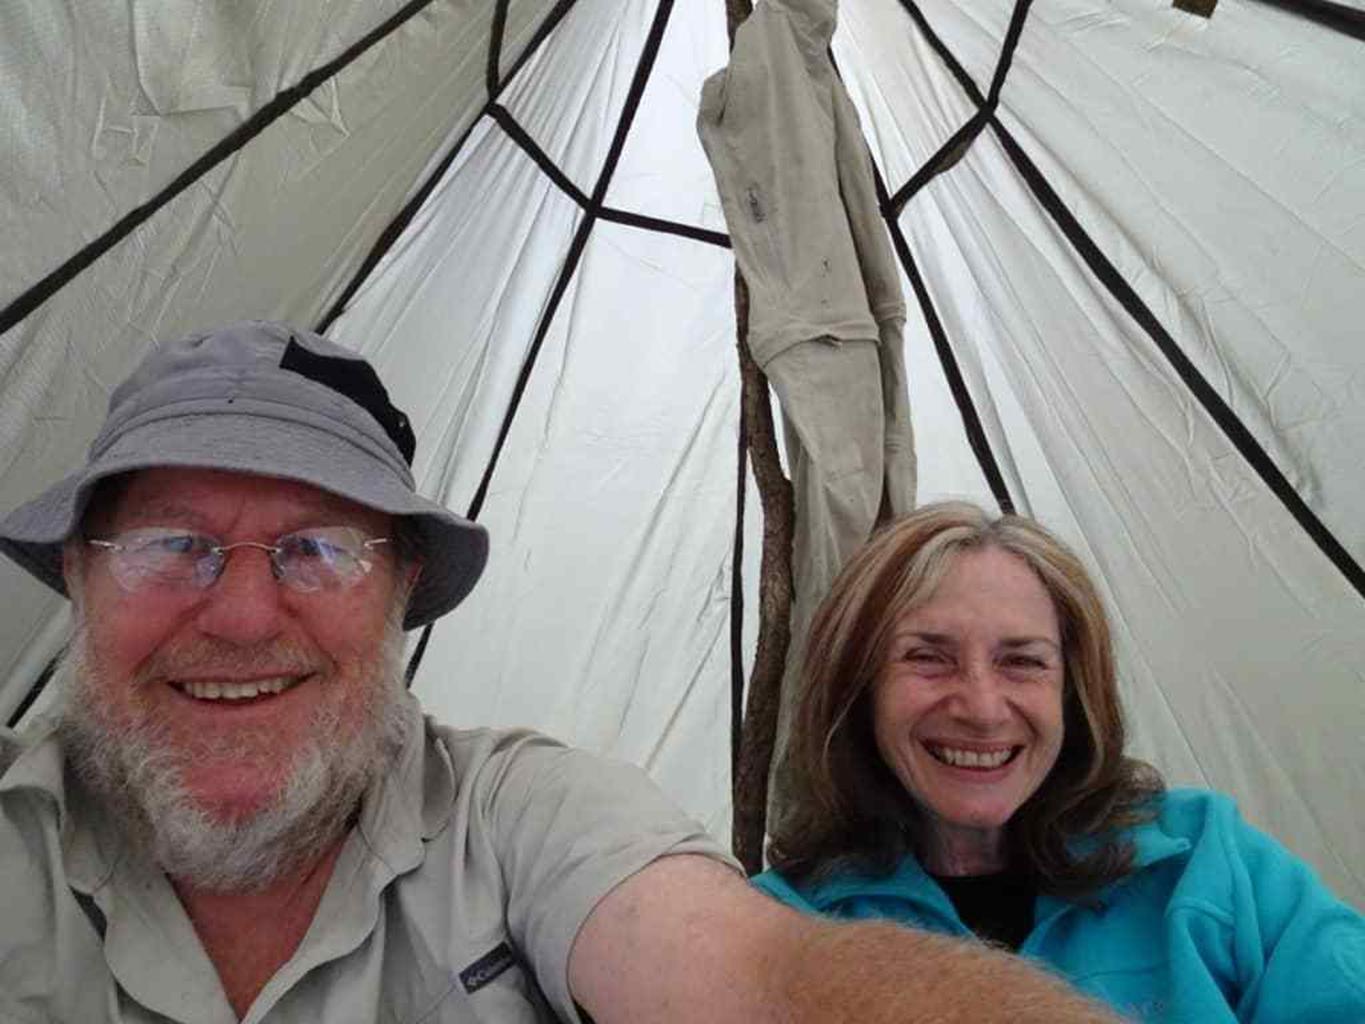
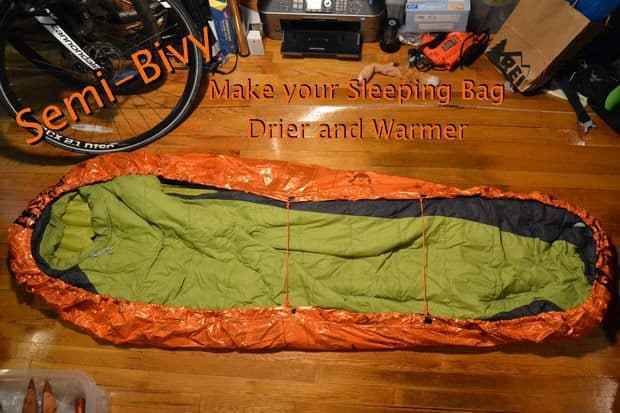
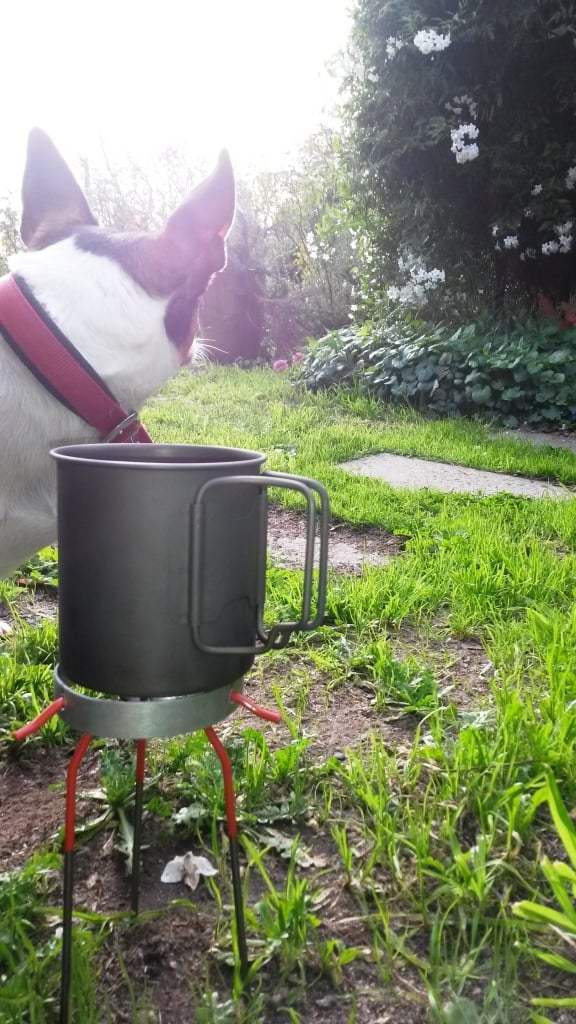
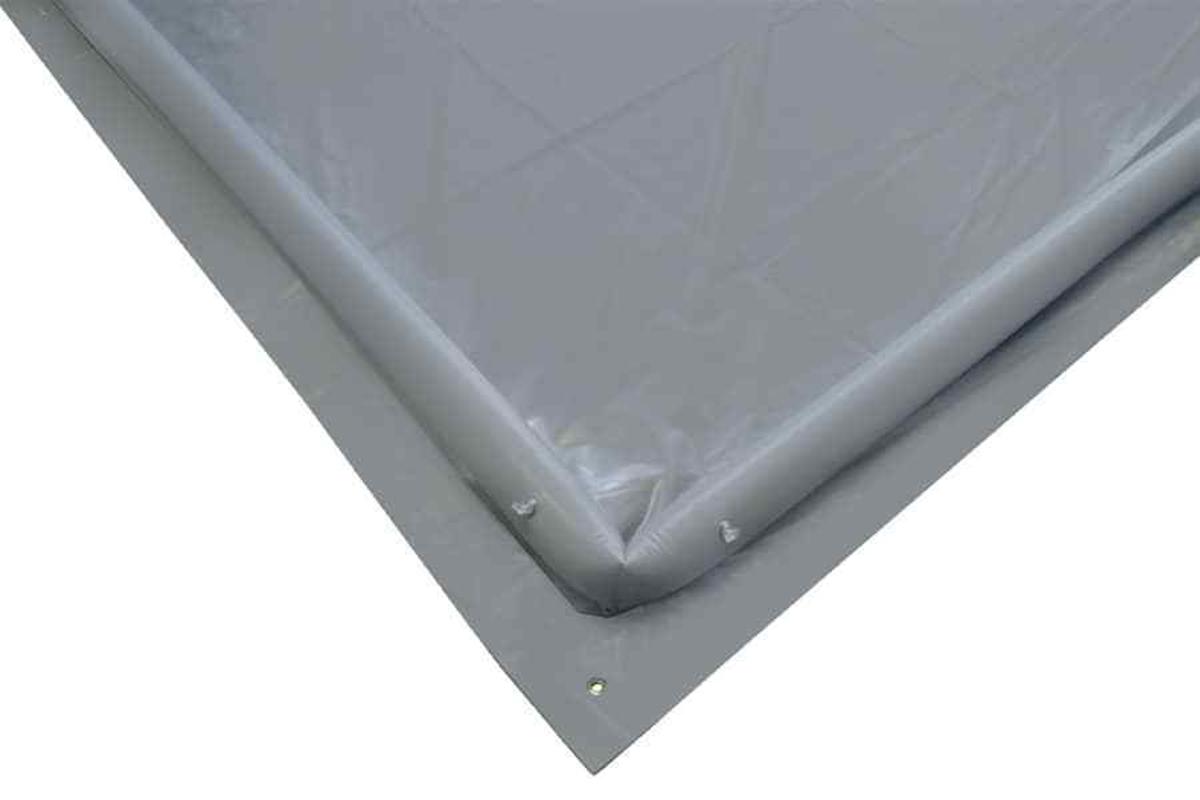

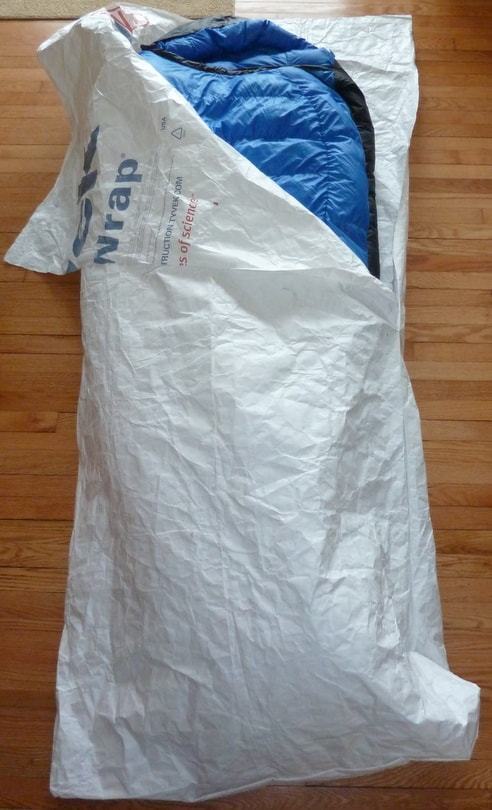
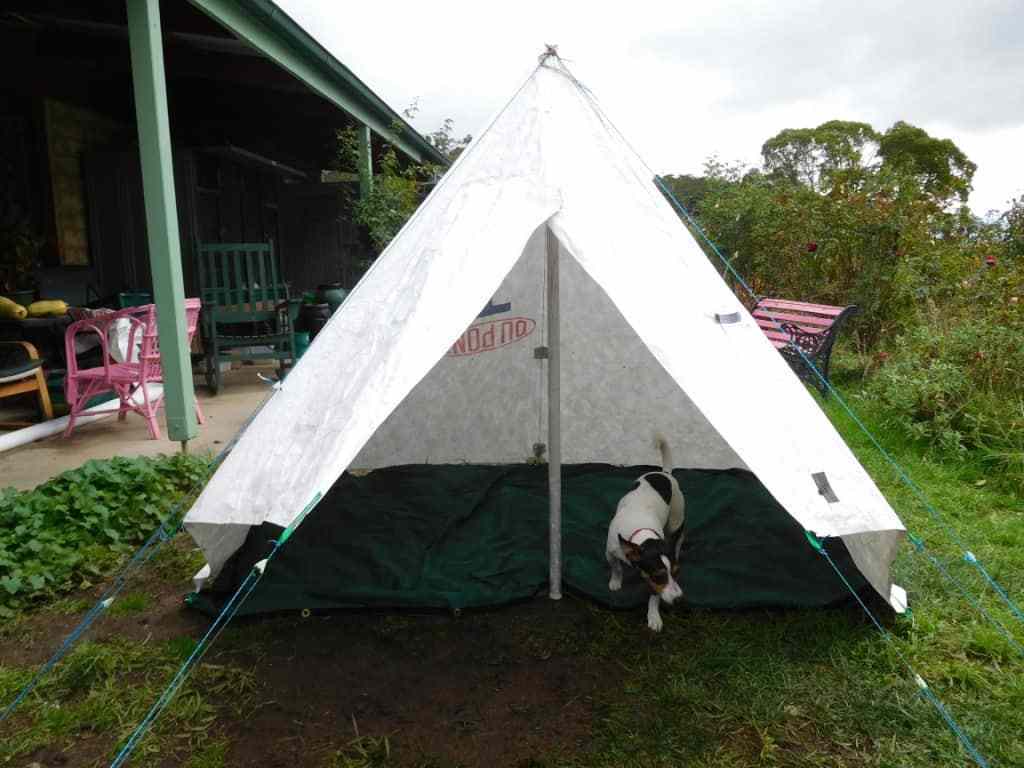
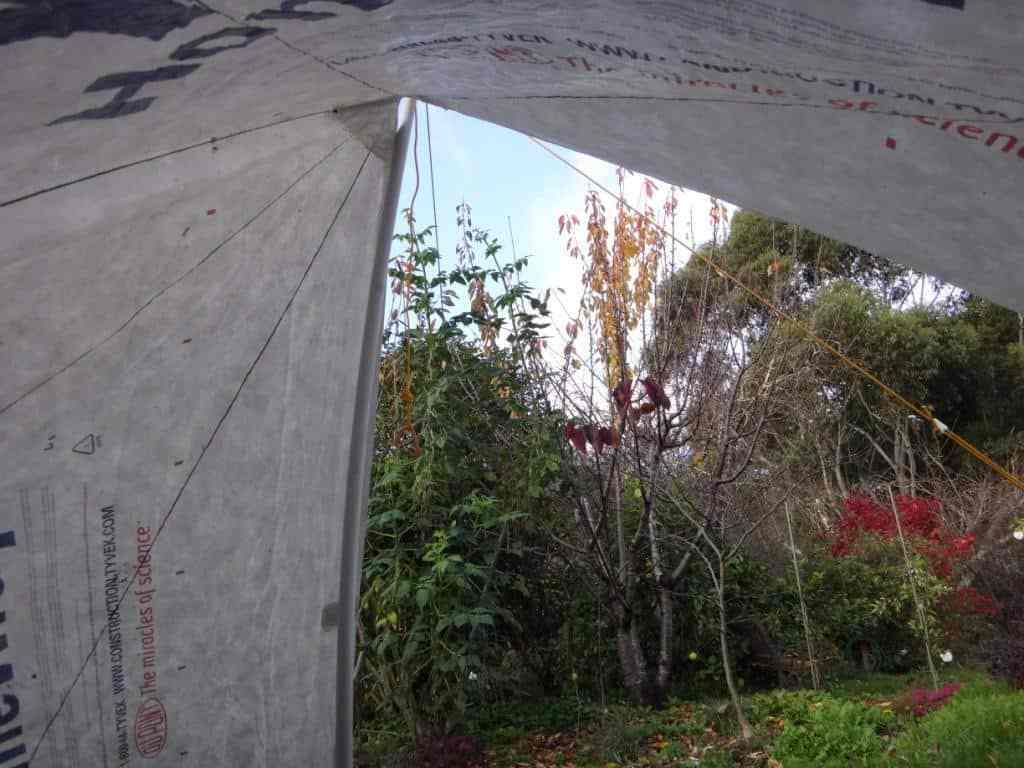

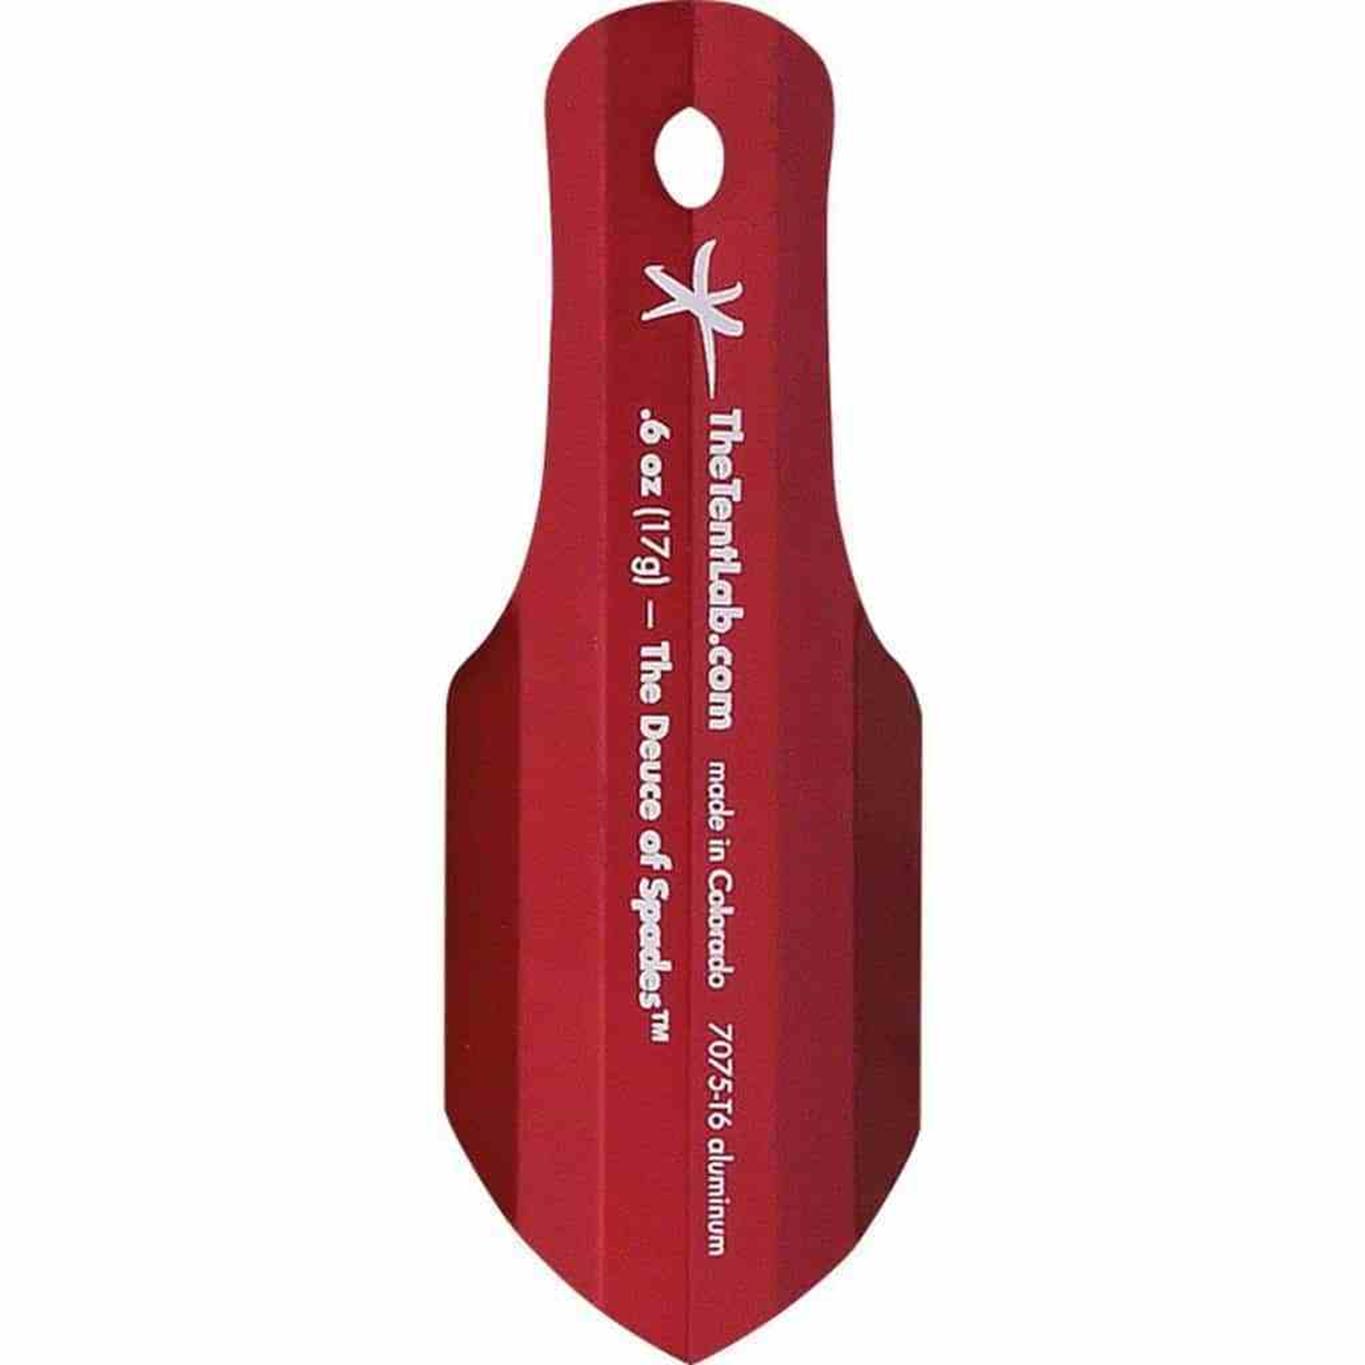
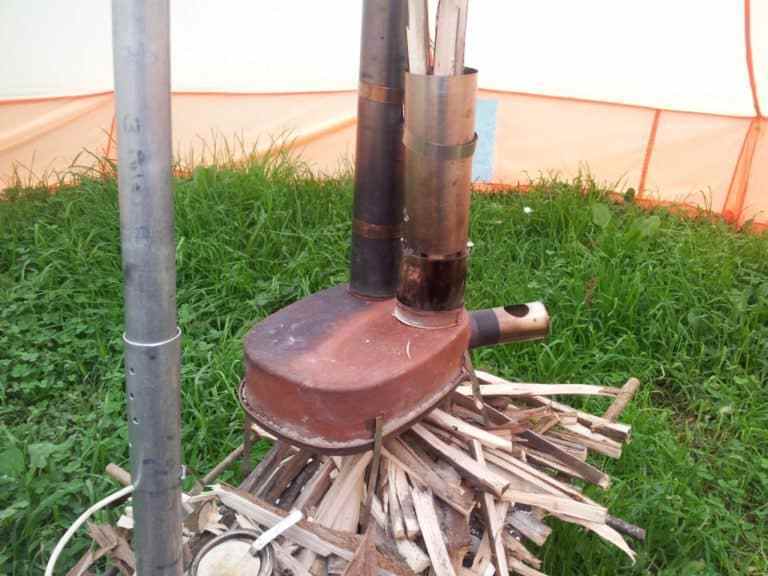
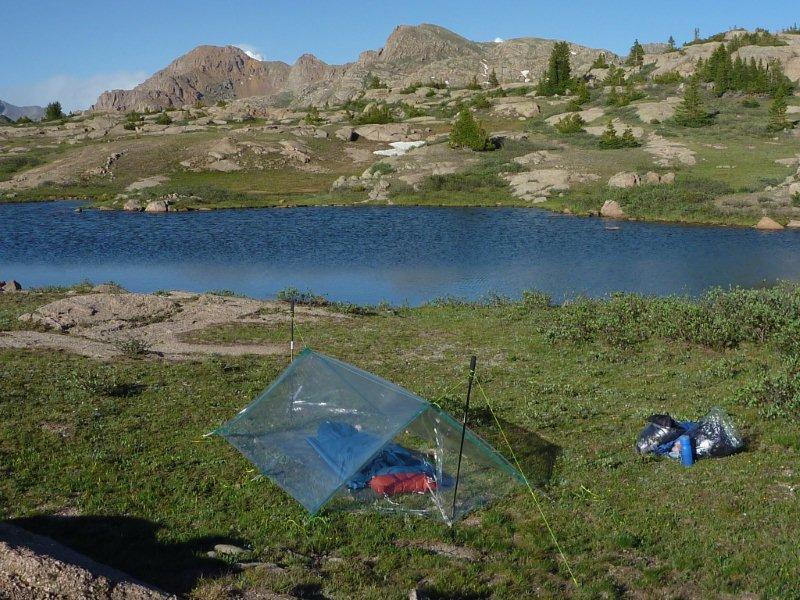


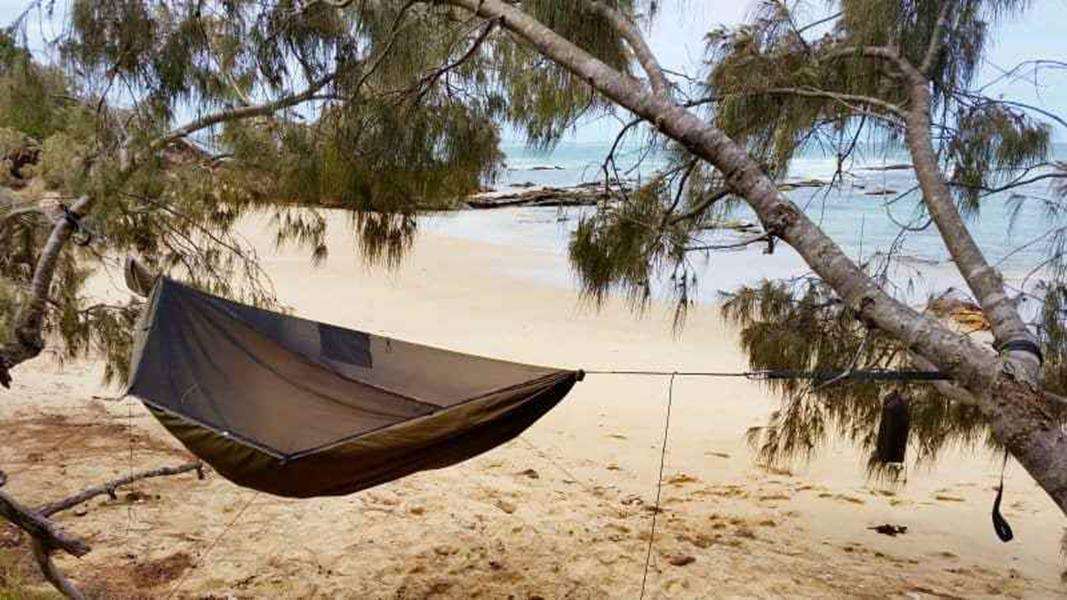


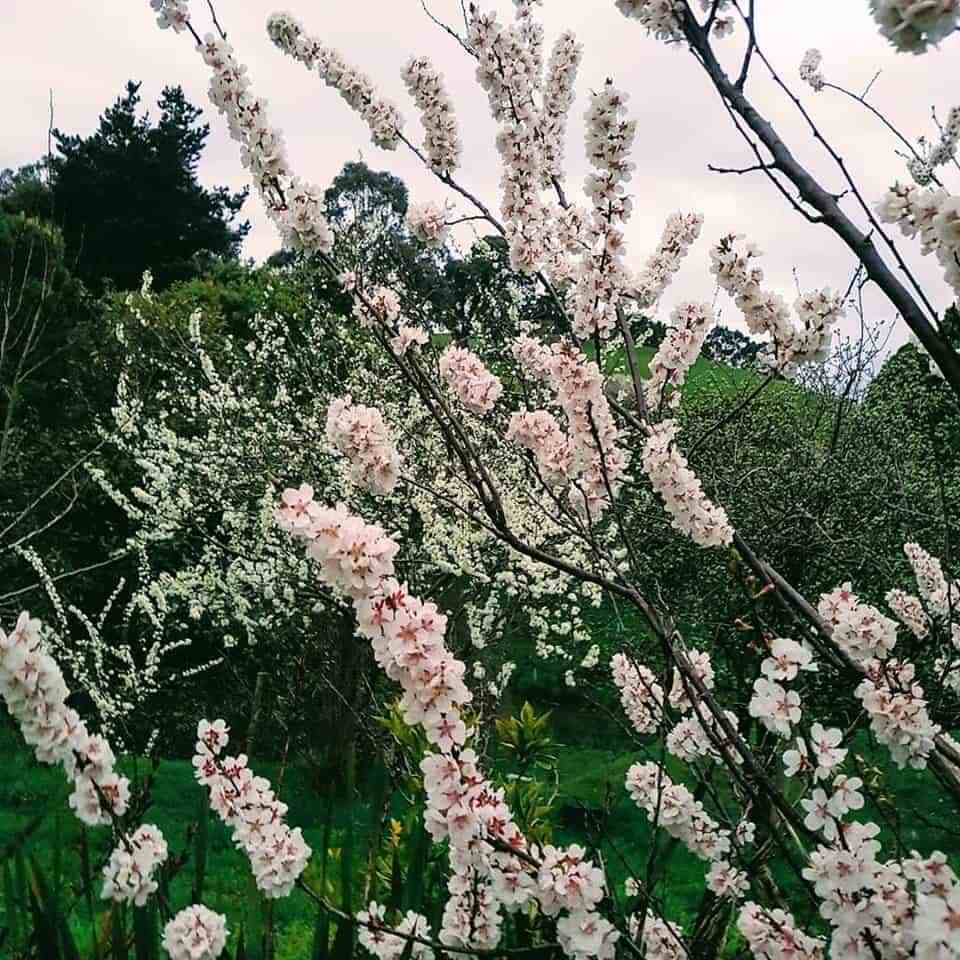

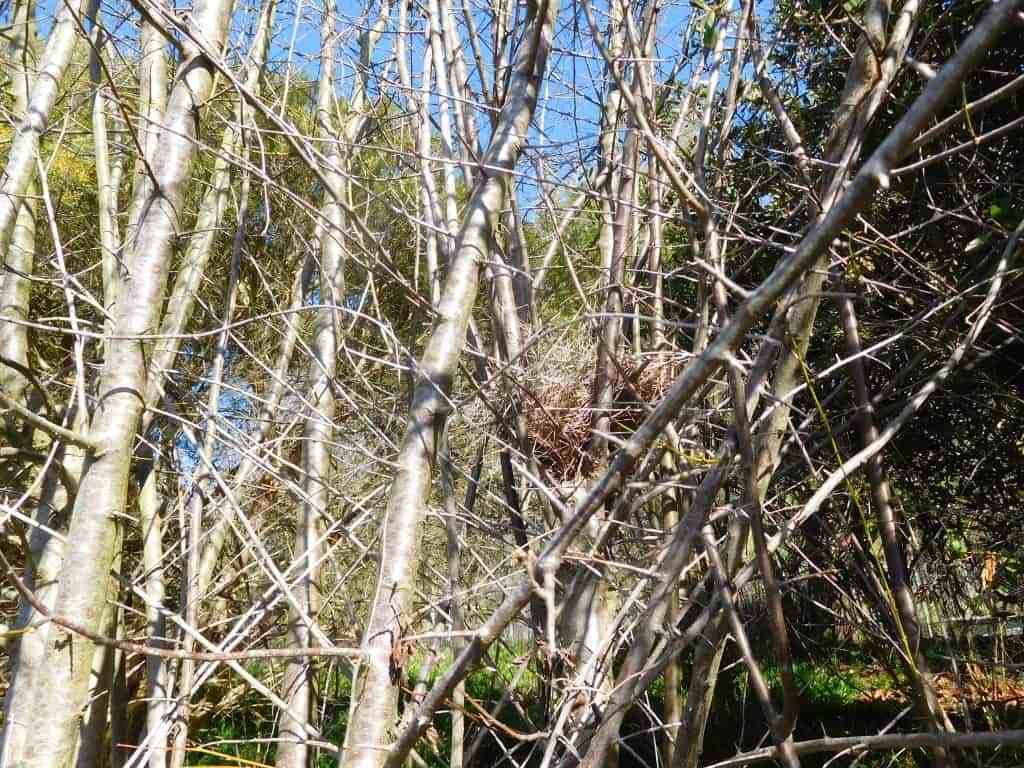

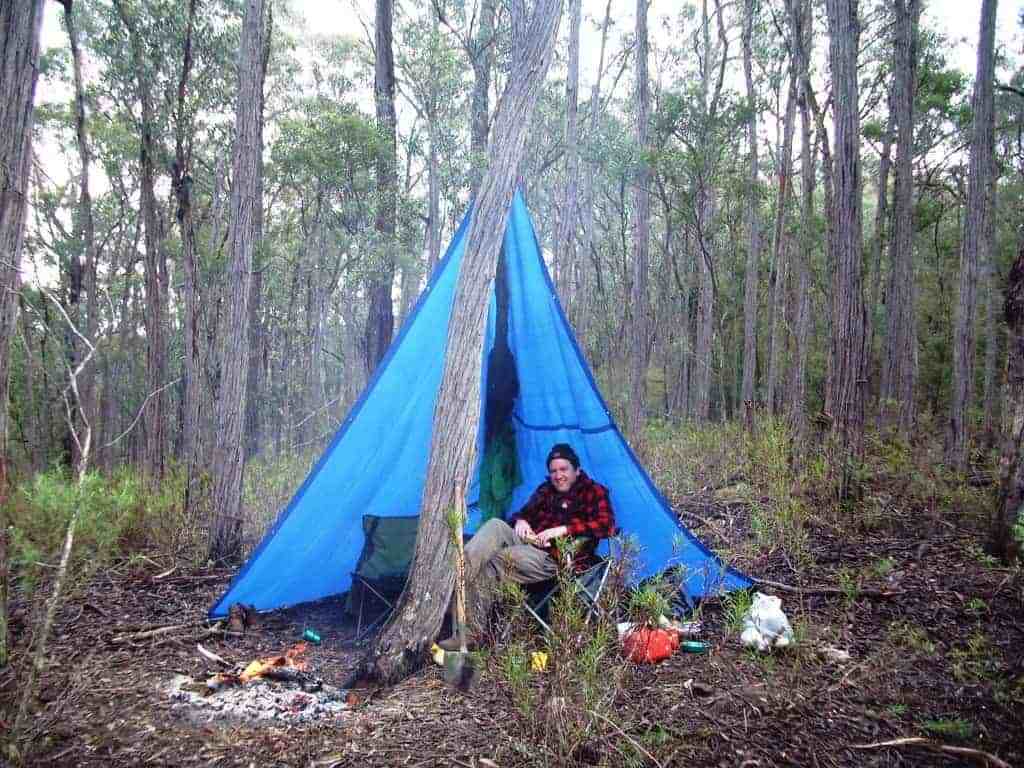


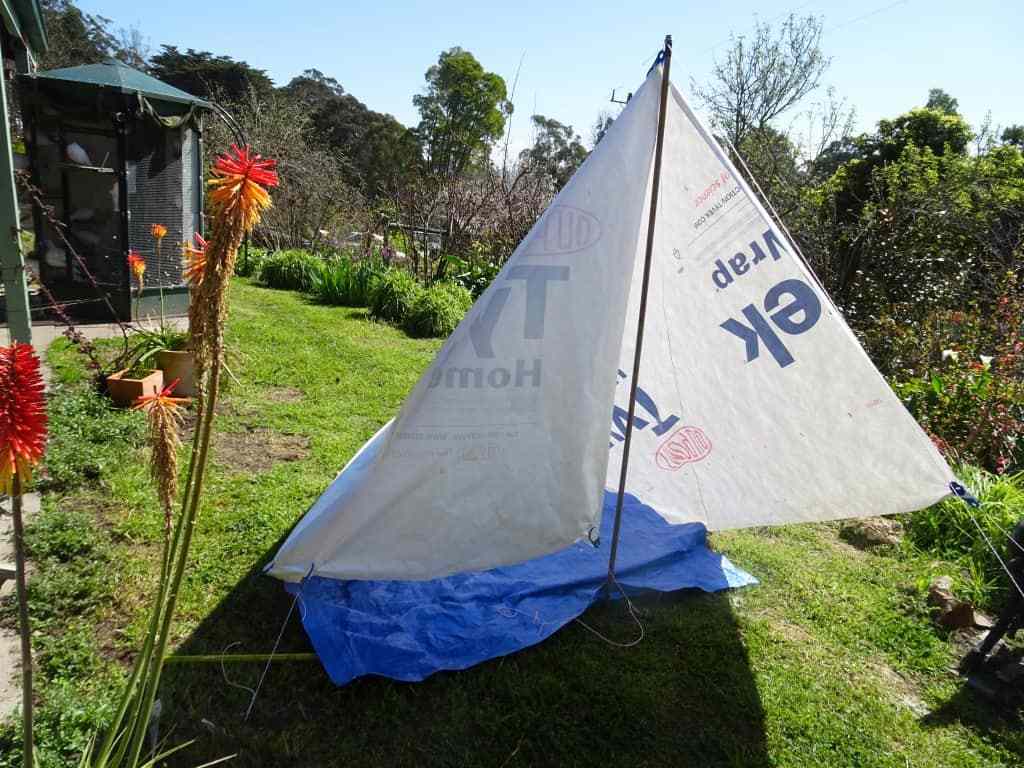


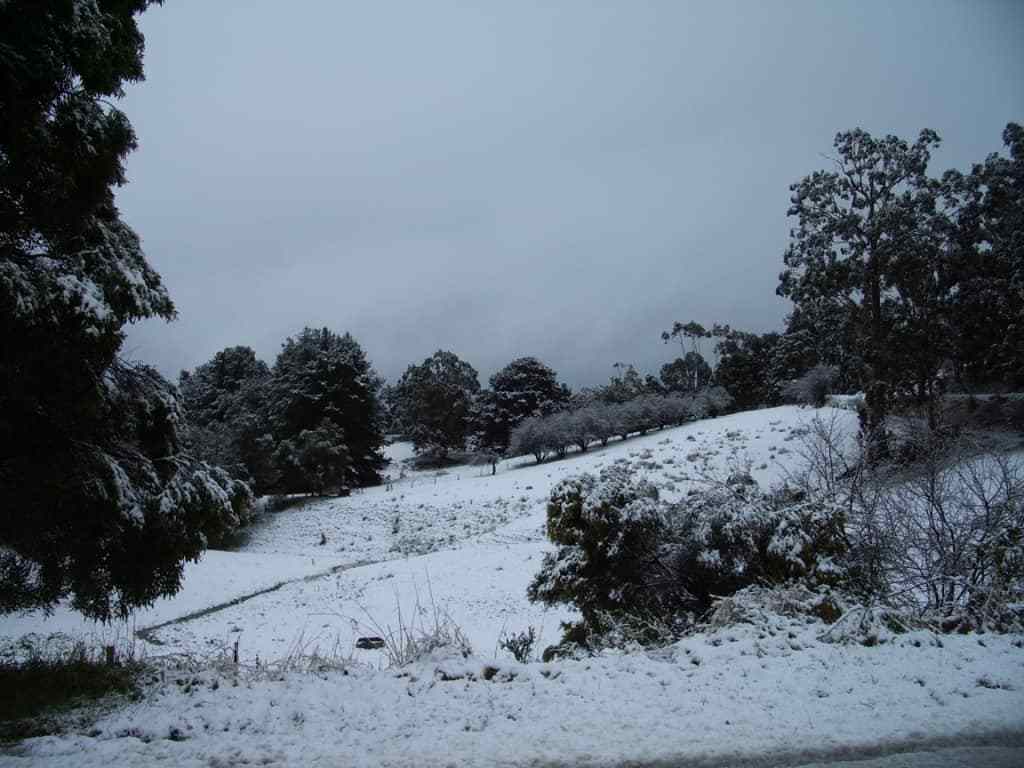


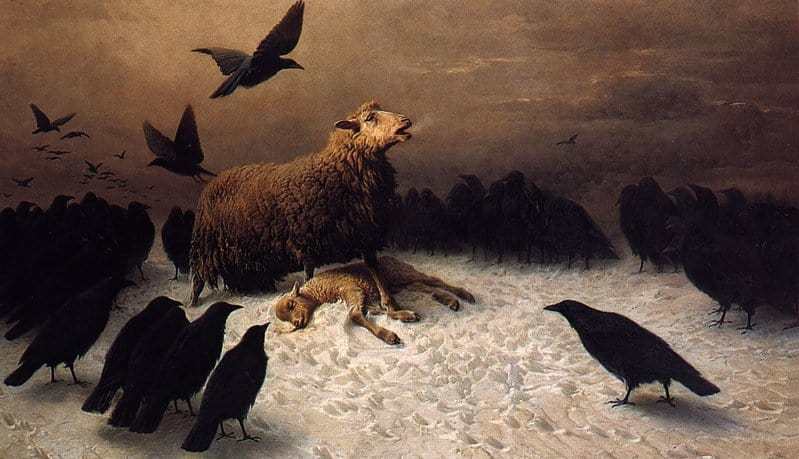
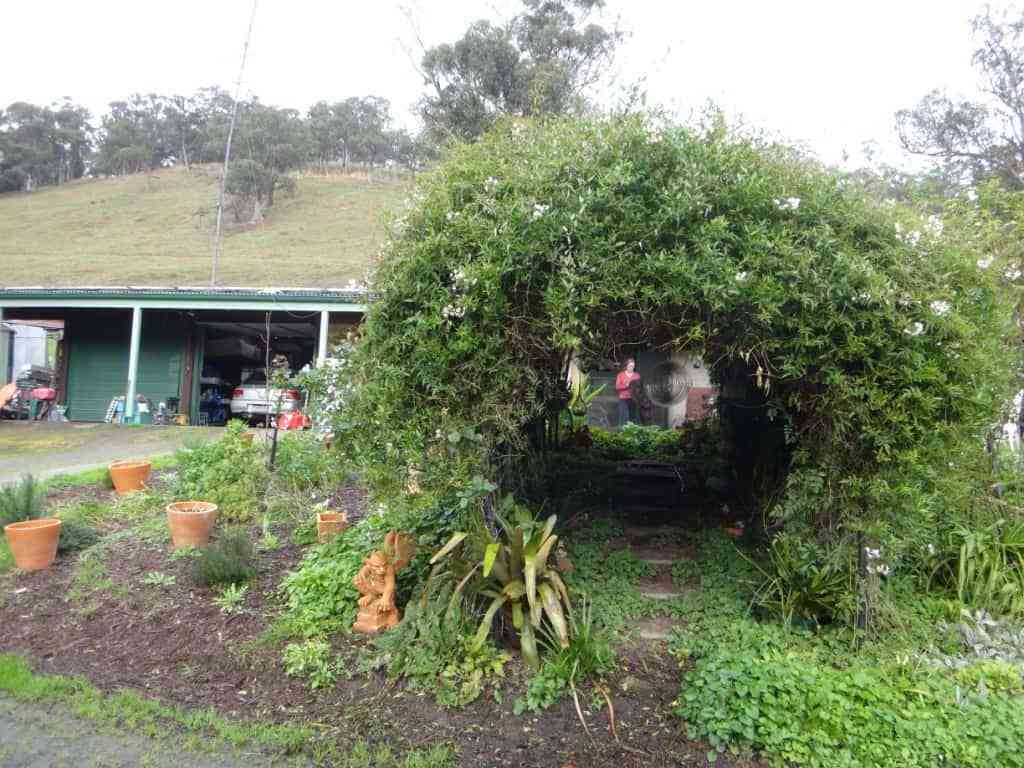


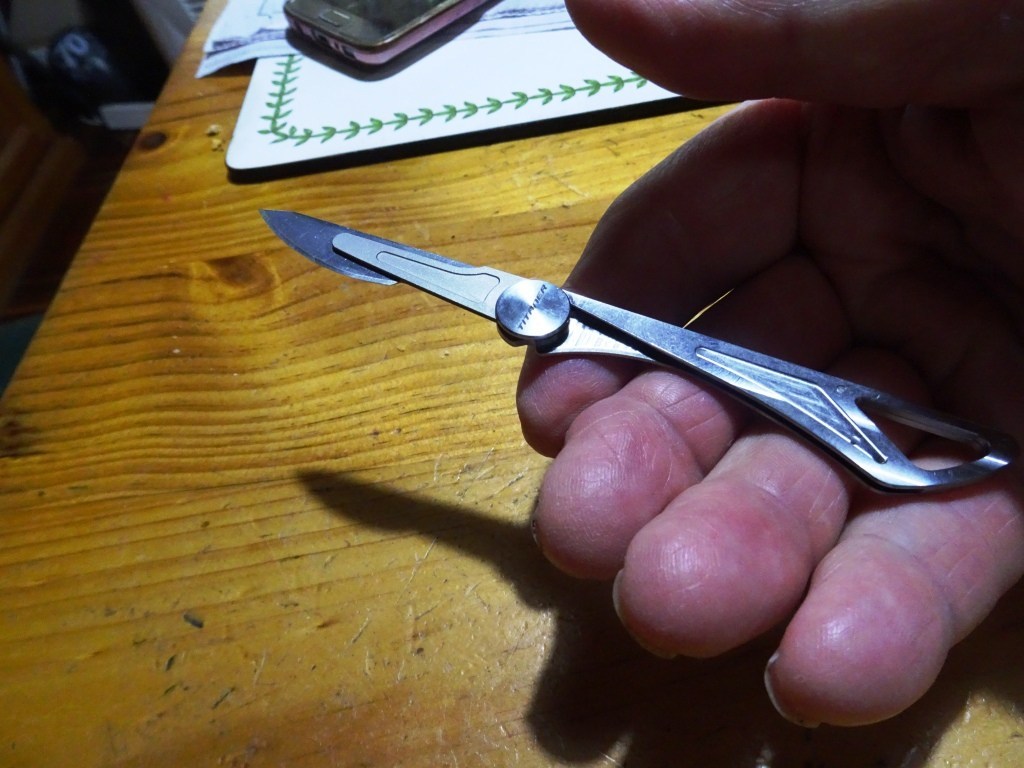
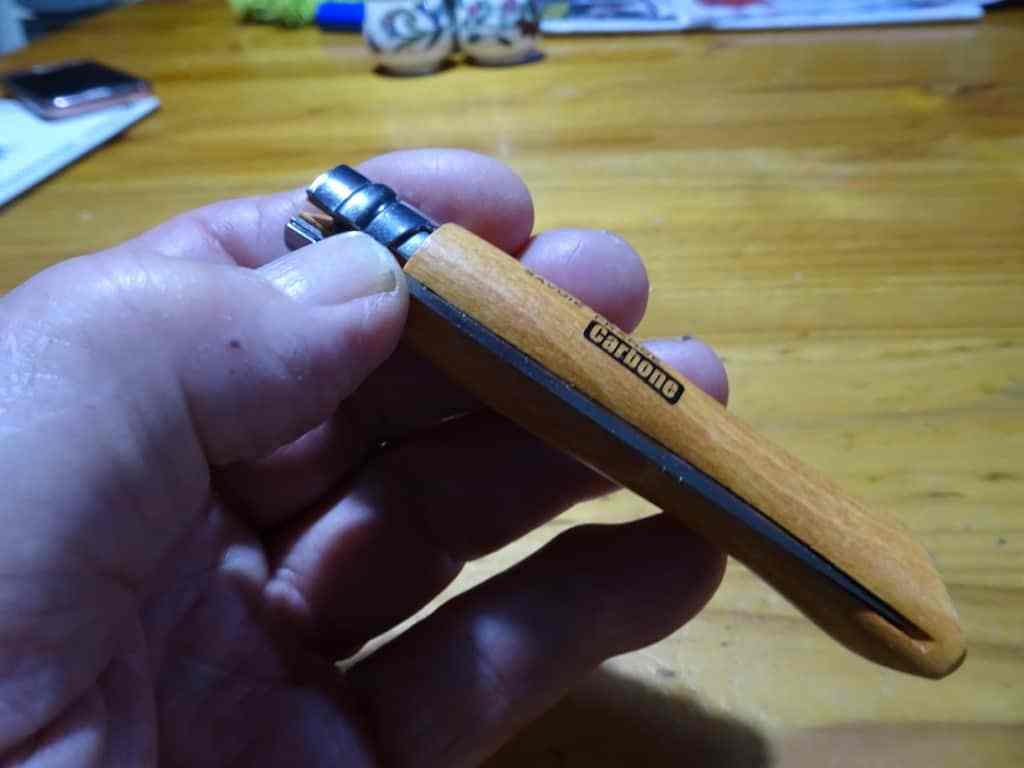


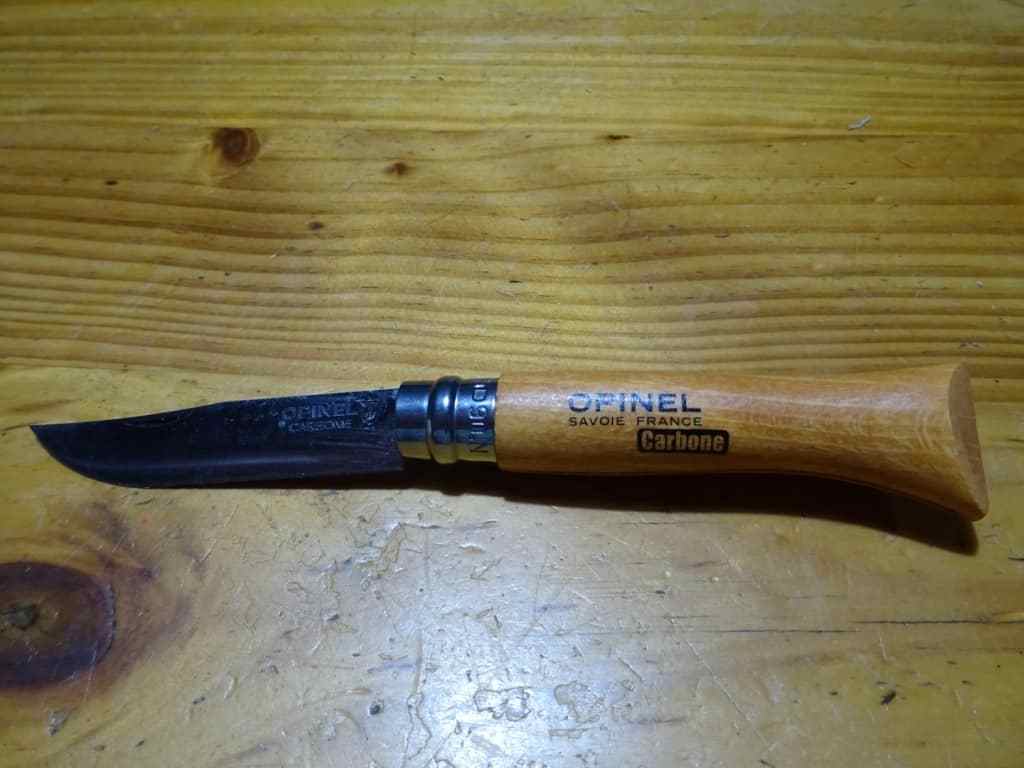

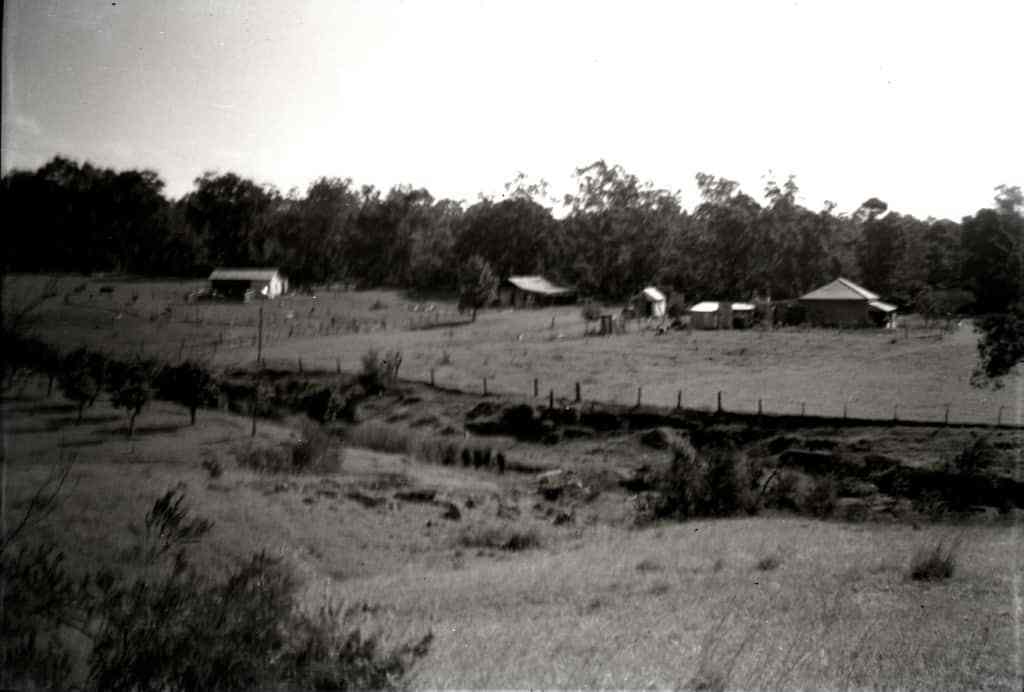 ‘The
Chase’ Paterson – our farm amid the forest. Most of the forest is still there.
Our property was off Keppie’s Lane. The Keppies were our neighbours. Some of
them still live roundabout. The house would have stood at the end of the lane
which comes off it (behind ‘Glenlossie’) on the Google satellite map.
‘The
Chase’ Paterson – our farm amid the forest. Most of the forest is still there.
Our property was off Keppie’s Lane. The Keppies were our neighbours. Some of
them still live roundabout. The house would have stood at the end of the lane
which comes off it (behind ‘Glenlossie’) on the Google satellite map.  The
old house is long gone now – soon even the memories will be gone…how many good
times we had on that old verandah!
The
old house is long gone now – soon even the memories will be gone…how many good
times we had on that old verandah!  The
swimming hole in Tucker’s Creek. My dog, ‘Rover’ centre. He would retrieve a
thrown stone from the bottom of the stream. How I love/d that dog!
The
swimming hole in Tucker’s Creek. My dog, ‘Rover’ centre. He would retrieve a
thrown stone from the bottom of the stream. How I love/d that dog! 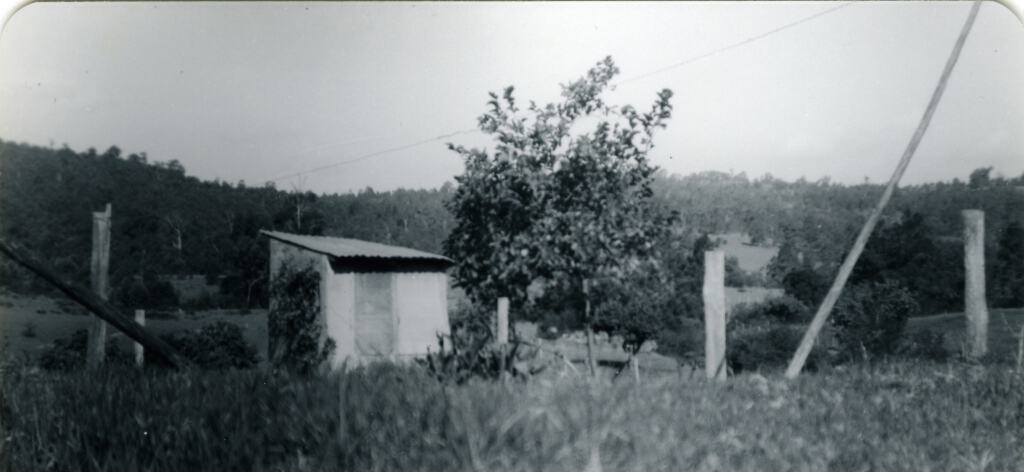 The
lime tree by the outhouse.
The
lime tree by the outhouse.  The
‘new’ dairy circa 1953.
The
‘new’ dairy circa 1953.  Here I
am at about age four-five with my wonderful pup, ‘Rover’. My uncle Leo gave him
to me. You never forget your first dog – or cease to regret their passing.
Here I
am at about age four-five with my wonderful pup, ‘Rover’. My uncle Leo gave him
to me. You never forget your first dog – or cease to regret their passing.  Feeding
the poddies was another child ‘slavery’ exercise. I loved the way they would
suck on your fingers in the bucket – to get them started.
Feeding
the poddies was another child ‘slavery’ exercise. I loved the way they would
suck on your fingers in the bucket – to get them started. 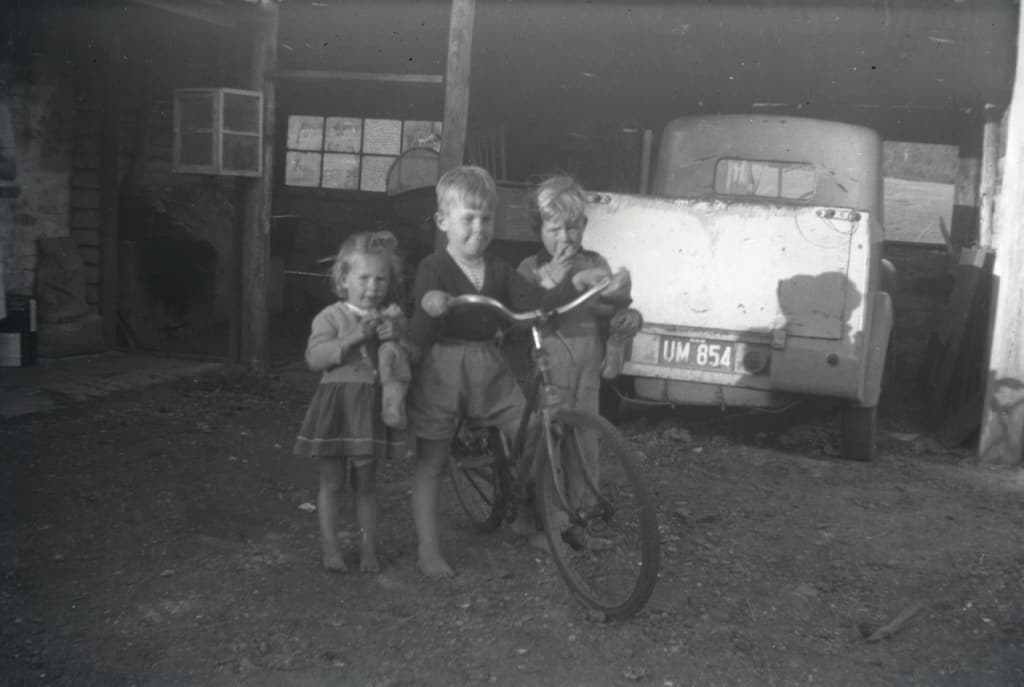 The
back of our old house which just segued into a shed, as you see. Note the
‘ground’ floor. That was me on the bike (sans shoes). The meat safe (our frig)
is hanging from the upright. The car + motorbike and sidecar were our only
transport. You were allowed two adults (or one adult and two children) on the
motorbike plus one adult and one child in the sidecar – believe it or not. All
us children rode in the back of that ute when we went anywhere eg to dances in
Martins Creek on Saturday nights.
The
back of our old house which just segued into a shed, as you see. Note the
‘ground’ floor. That was me on the bike (sans shoes). The meat safe (our frig)
is hanging from the upright. The car + motorbike and sidecar were our only
transport. You were allowed two adults (or one adult and two children) on the
motorbike plus one adult and one child in the sidecar – believe it or not. All
us children rode in the back of that ute when we went anywhere eg to dances in
Martins Creek on Saturday nights. 
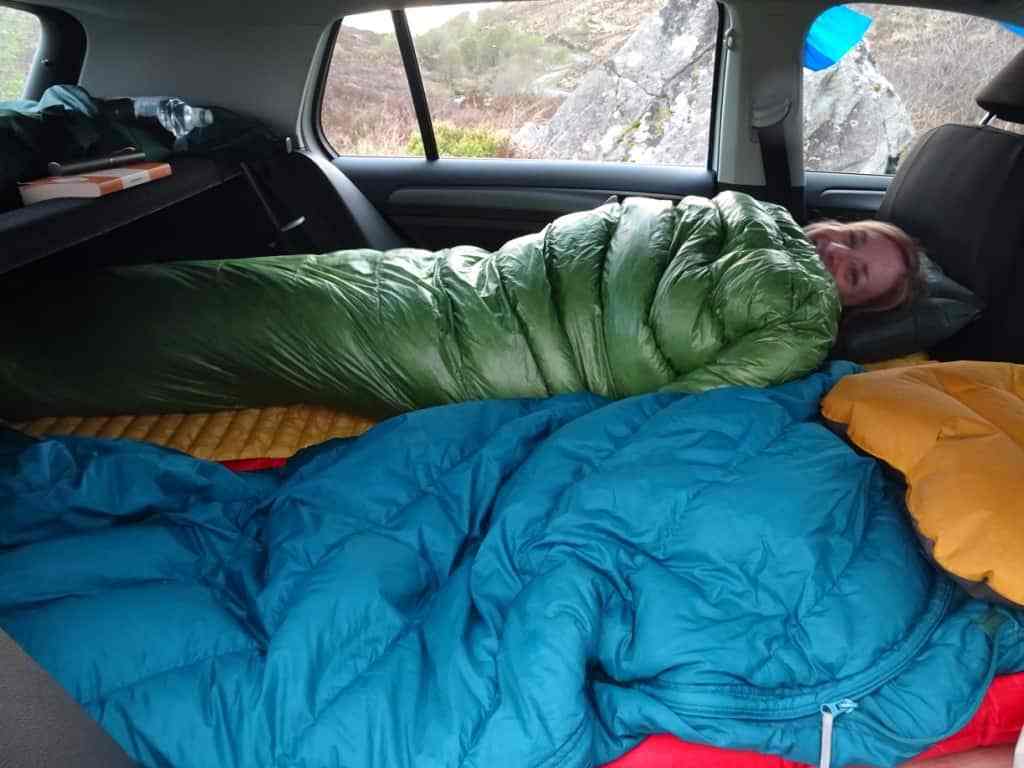
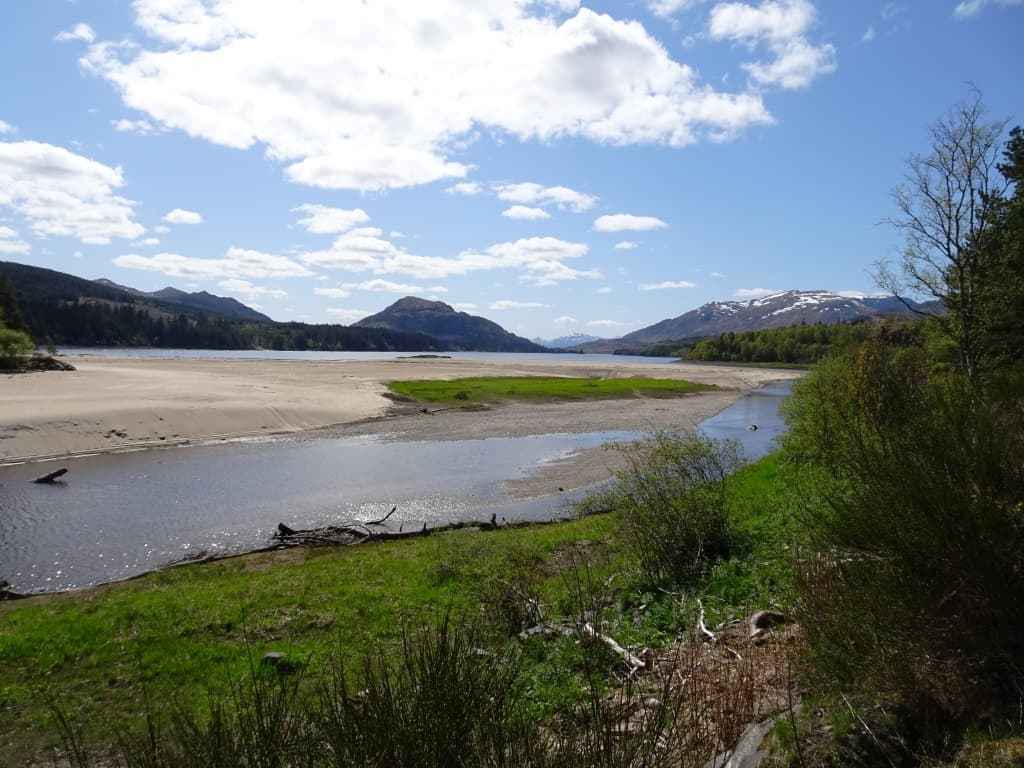
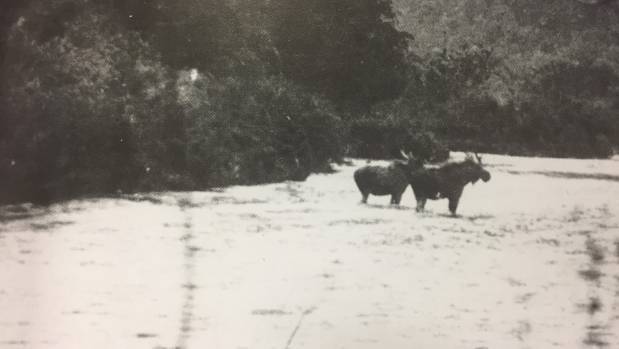
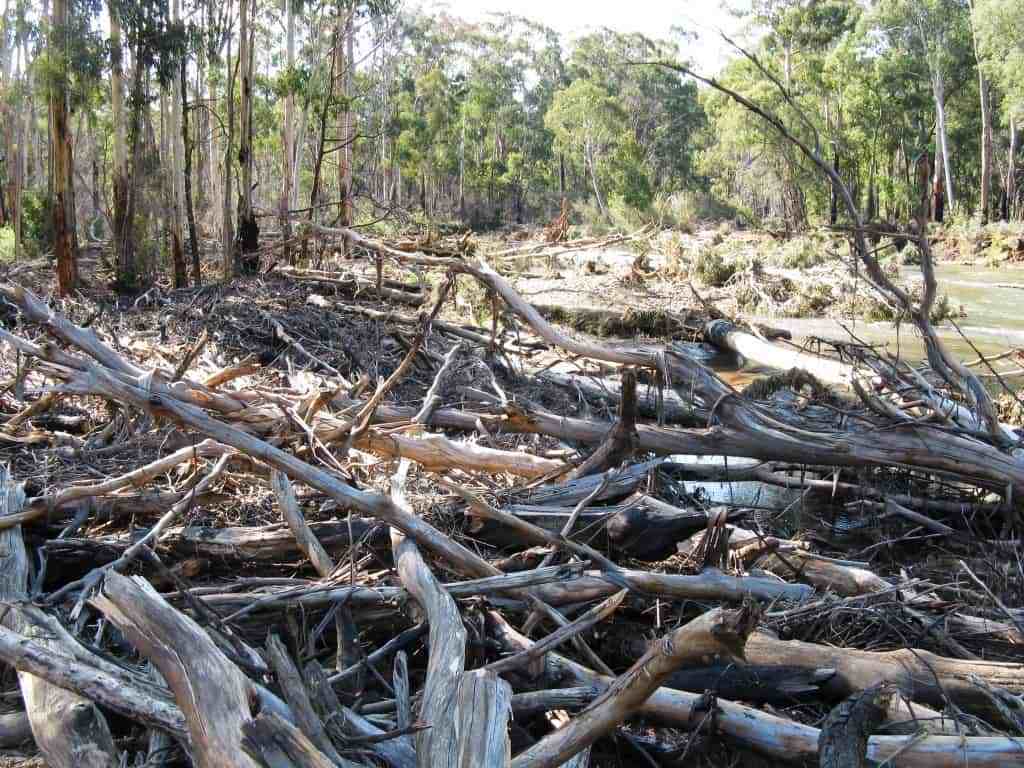
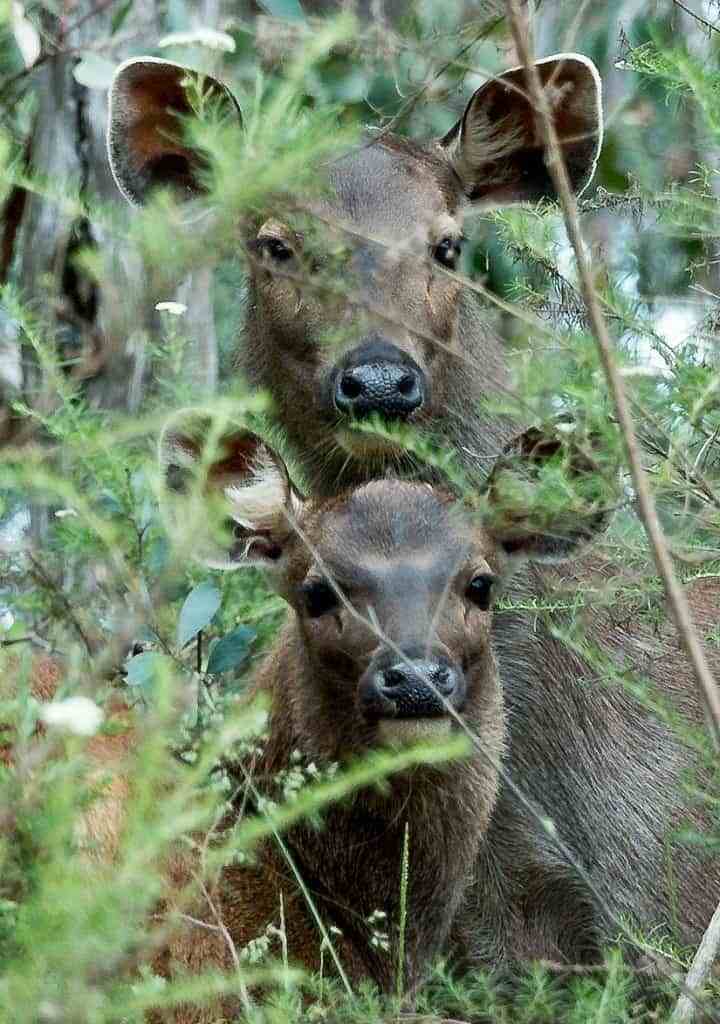

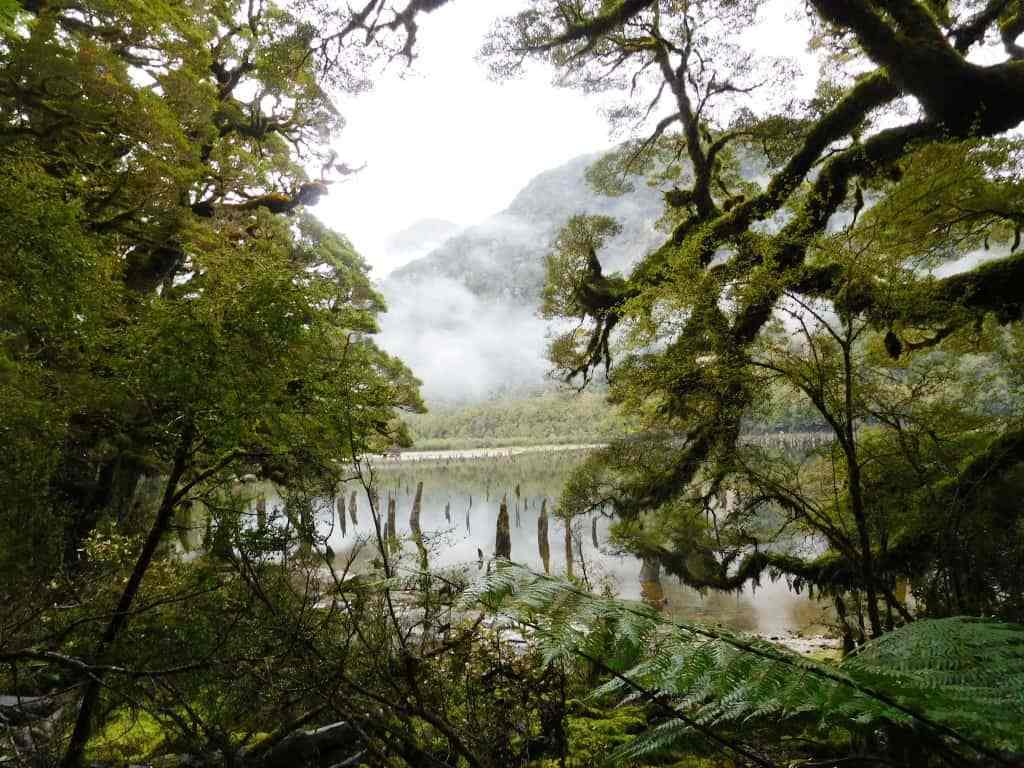
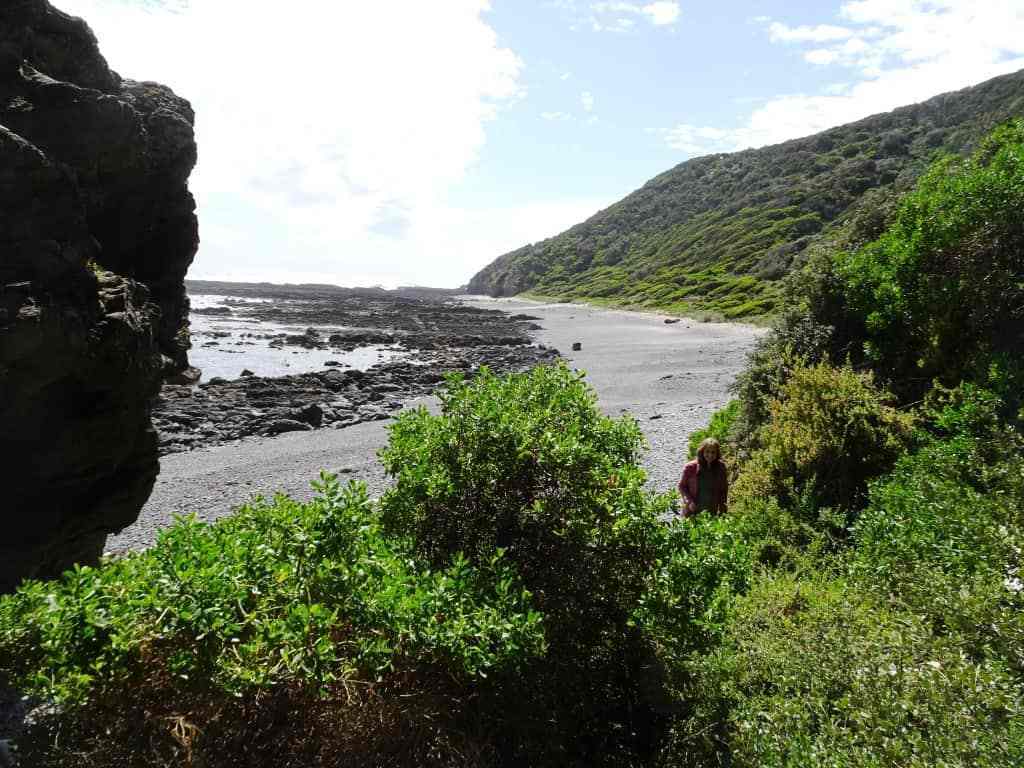
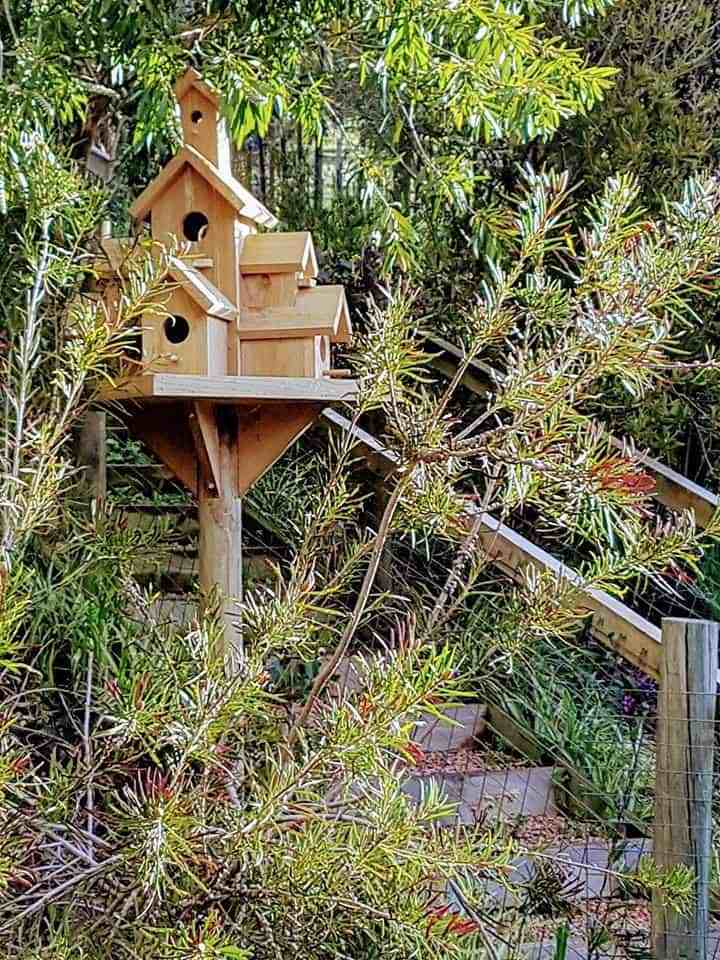

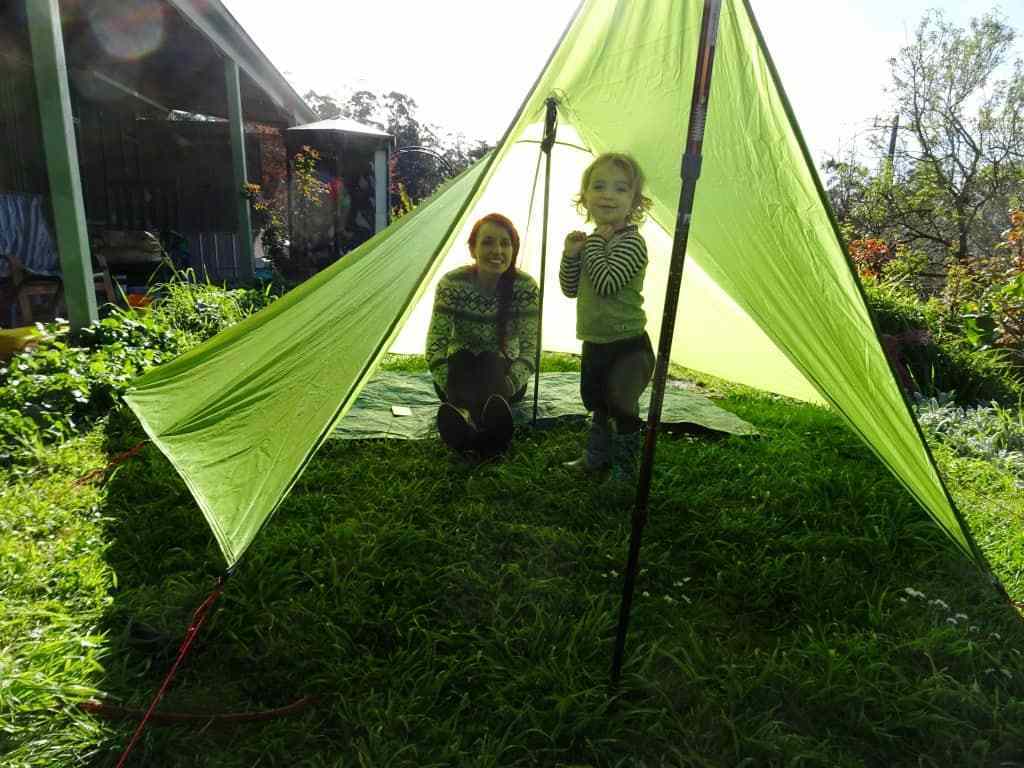
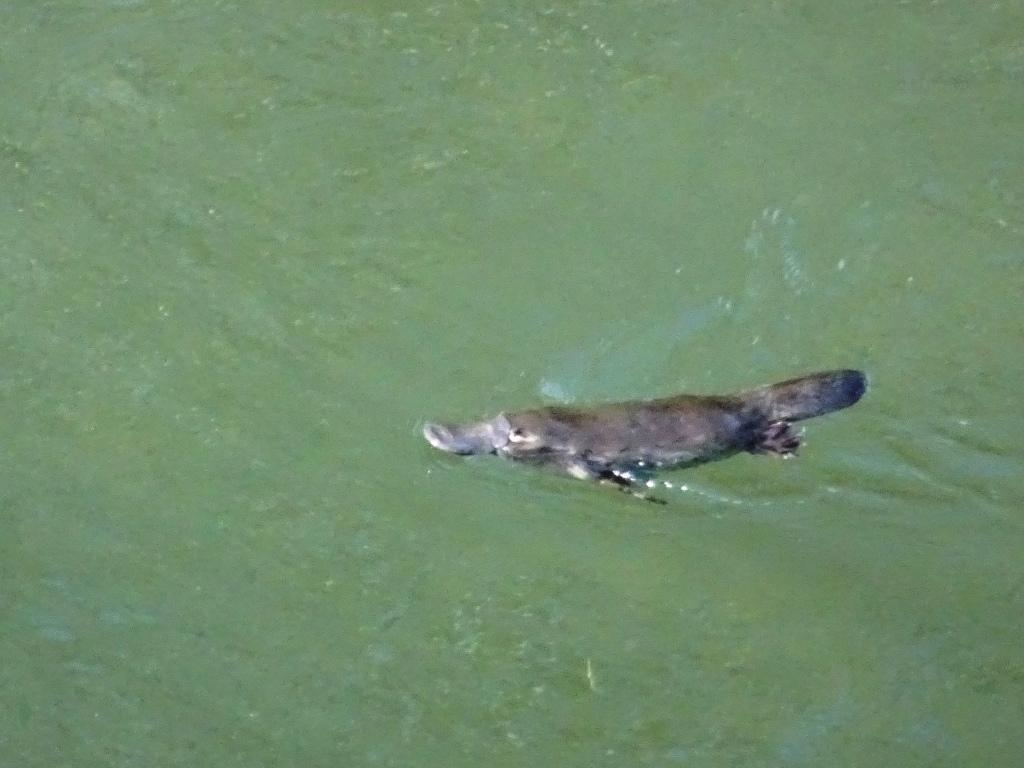
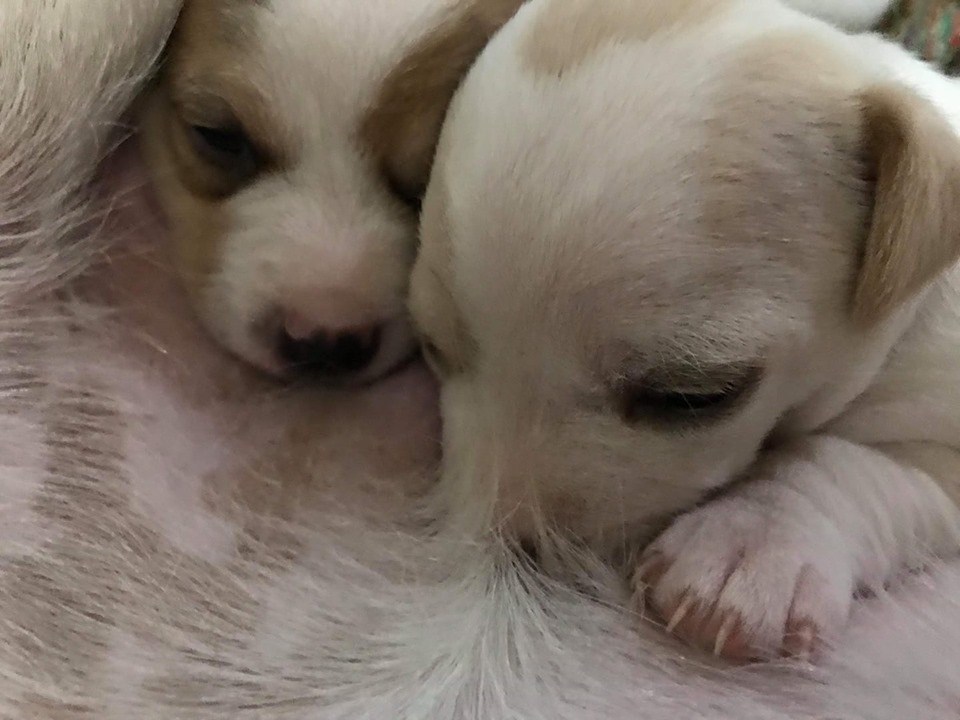

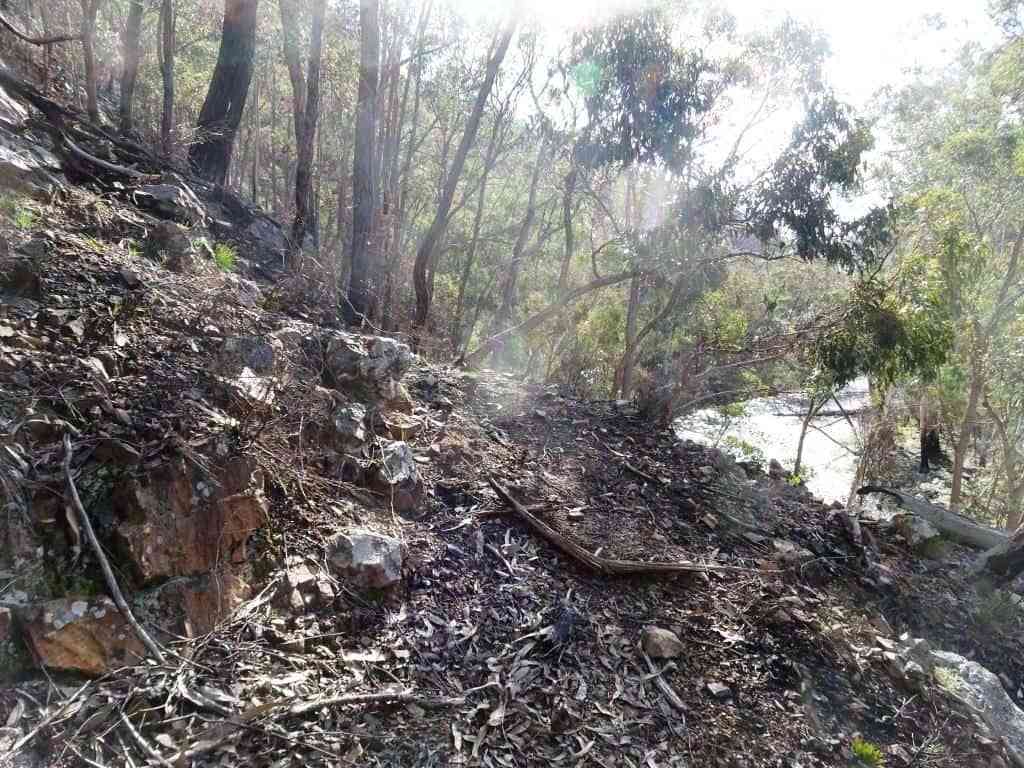


 I
often see one when I am fetching water or washing up at my camp just upstream
of here – or just as likely a deer which is hard to ‘bag’ with just a pot, cup
and spoon. I think I have seen more deer washing up than in any other place! I
should invest in a heavier calibre spoon. The old one has ‘taken’ heaps of deer
though. I just point the spoon and pull the trigger. ‘Bang’ I say, and off the
deer goes.
I
often see one when I am fetching water or washing up at my camp just upstream
of here – or just as likely a deer which is hard to ‘bag’ with just a pot, cup
and spoon. I think I have seen more deer washing up than in any other place! I
should invest in a heavier calibre spoon. The old one has ‘taken’ heaps of deer
though. I just point the spoon and pull the trigger. ‘Bang’ I say, and off the
deer goes.

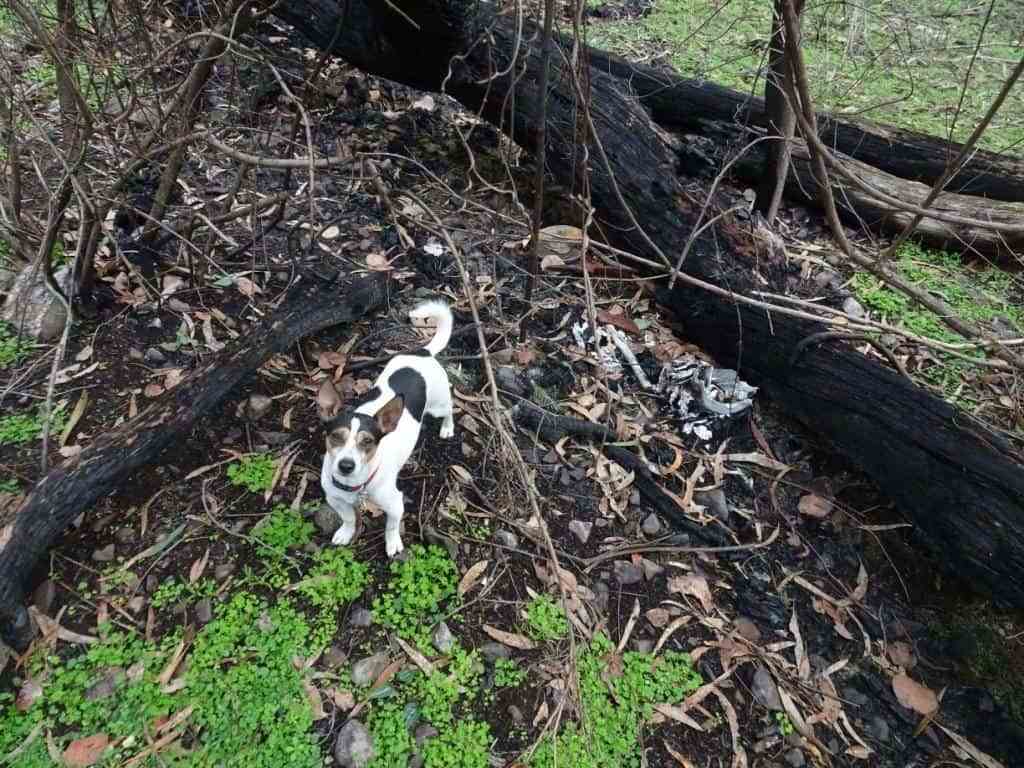
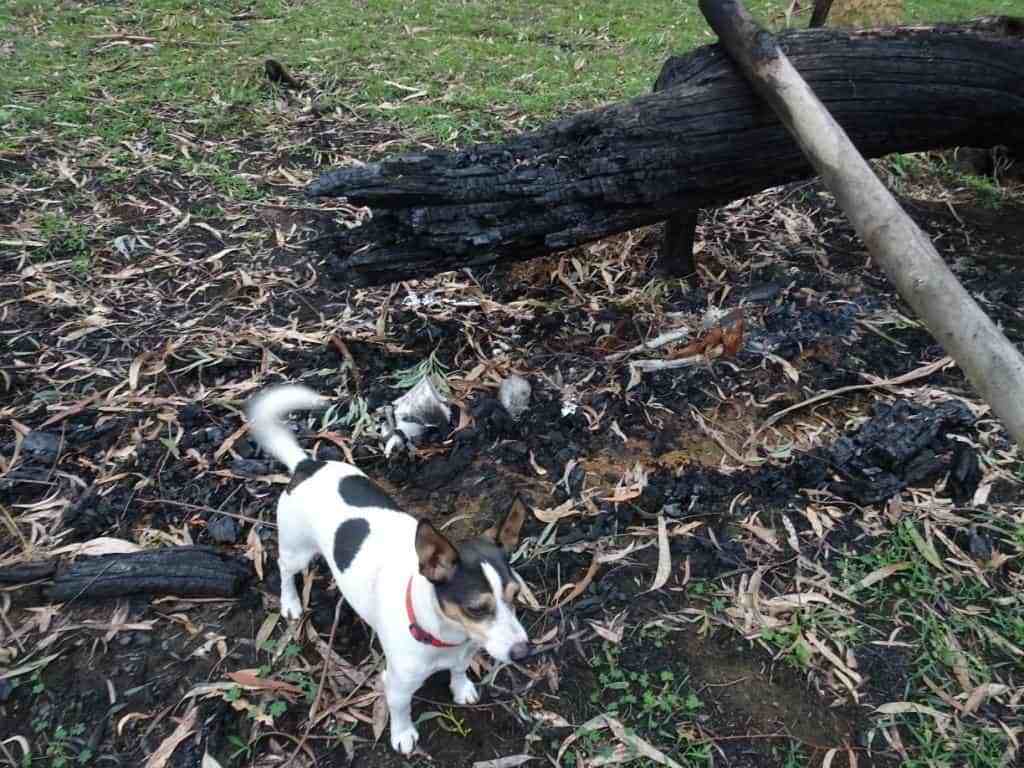
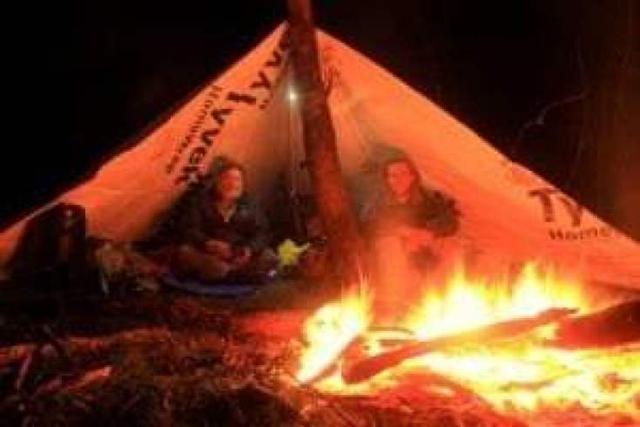

 I am
sitting in is my little sub 200 gram ‘
I am
sitting in is my little sub 200 gram ‘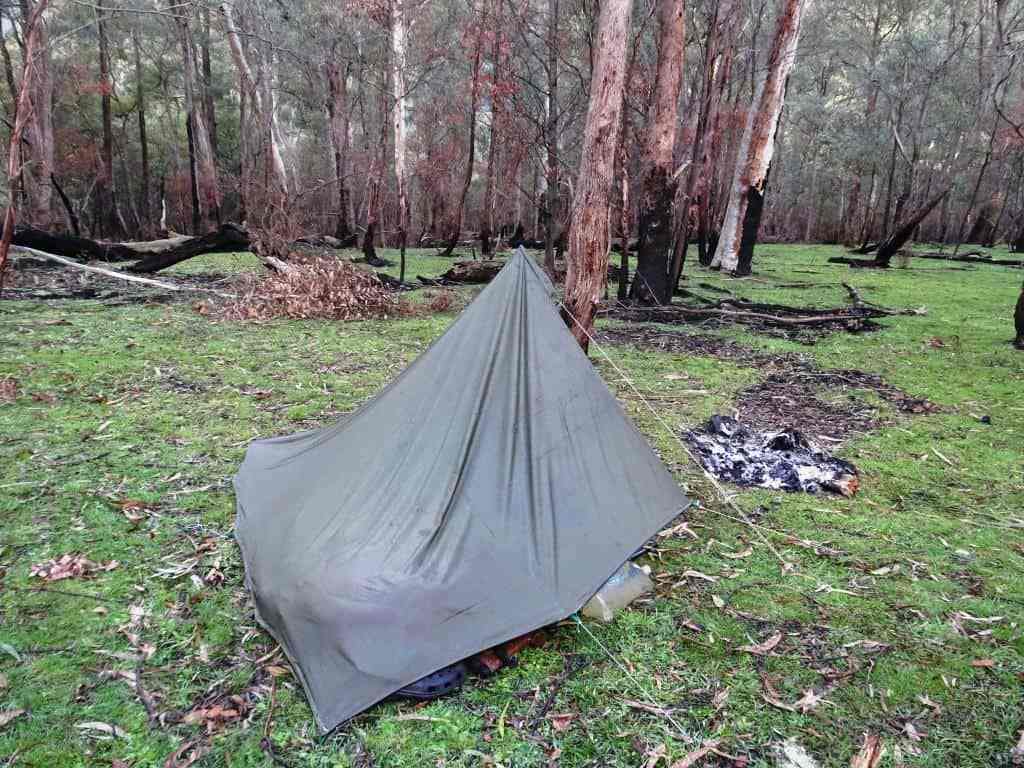


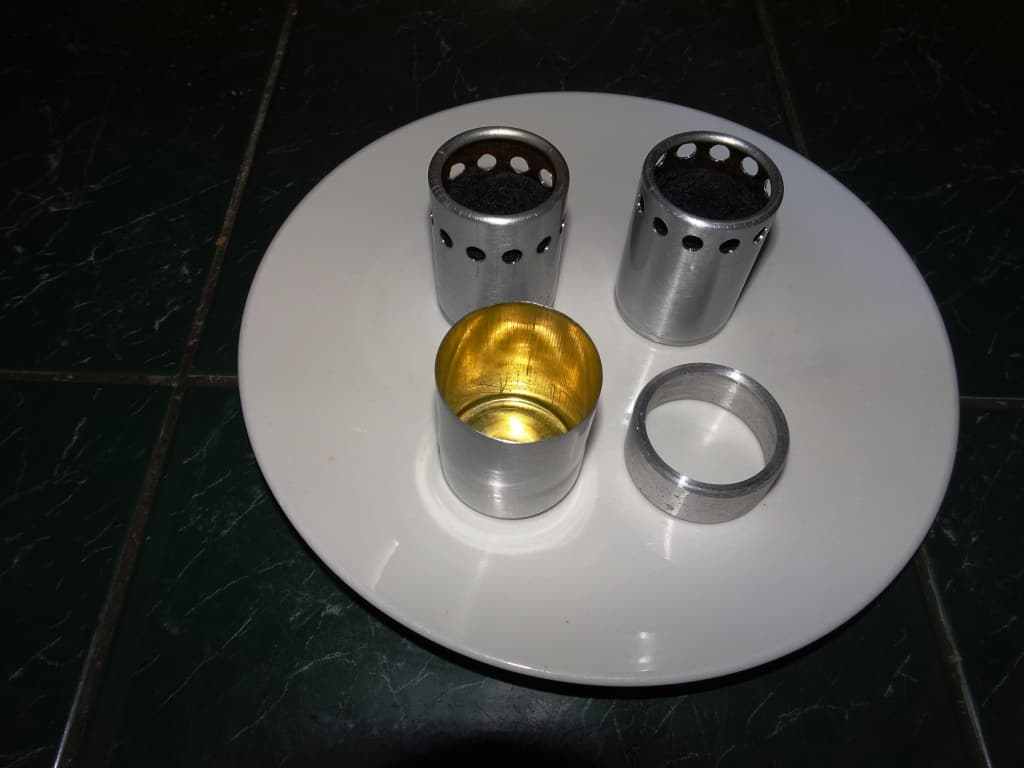


 Other
than that, a tarp, blanket and axe to make a shelter and a fire with. A billy
and a frying pan. Given that these items might be distributed amongst a number
of people (along with the gun and the fishing line) I shouldn’t be surprised if
this did not constitute a more ultralight mode of travel than most people
undertake today, given especially that people might have been ‘up the bush’ for
a month or more at a time on journeys in the past.
Other
than that, a tarp, blanket and axe to make a shelter and a fire with. A billy
and a frying pan. Given that these items might be distributed amongst a number
of people (along with the gun and the fishing line) I shouldn’t be surprised if
this did not constitute a more ultralight mode of travel than most people
undertake today, given especially that people might have been ‘up the bush’ for
a month or more at a time on journeys in the past.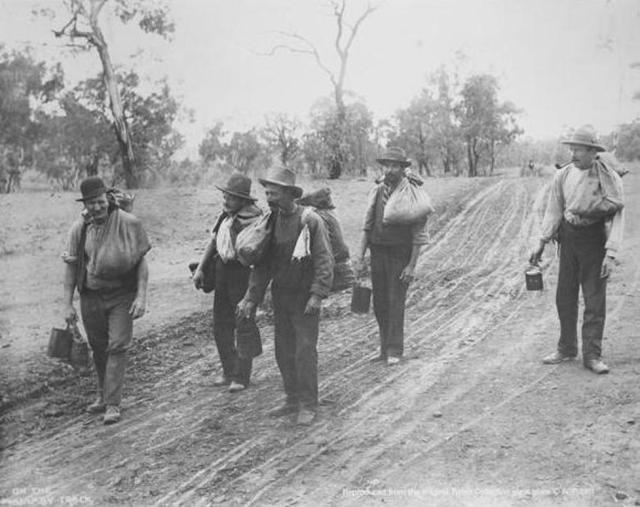


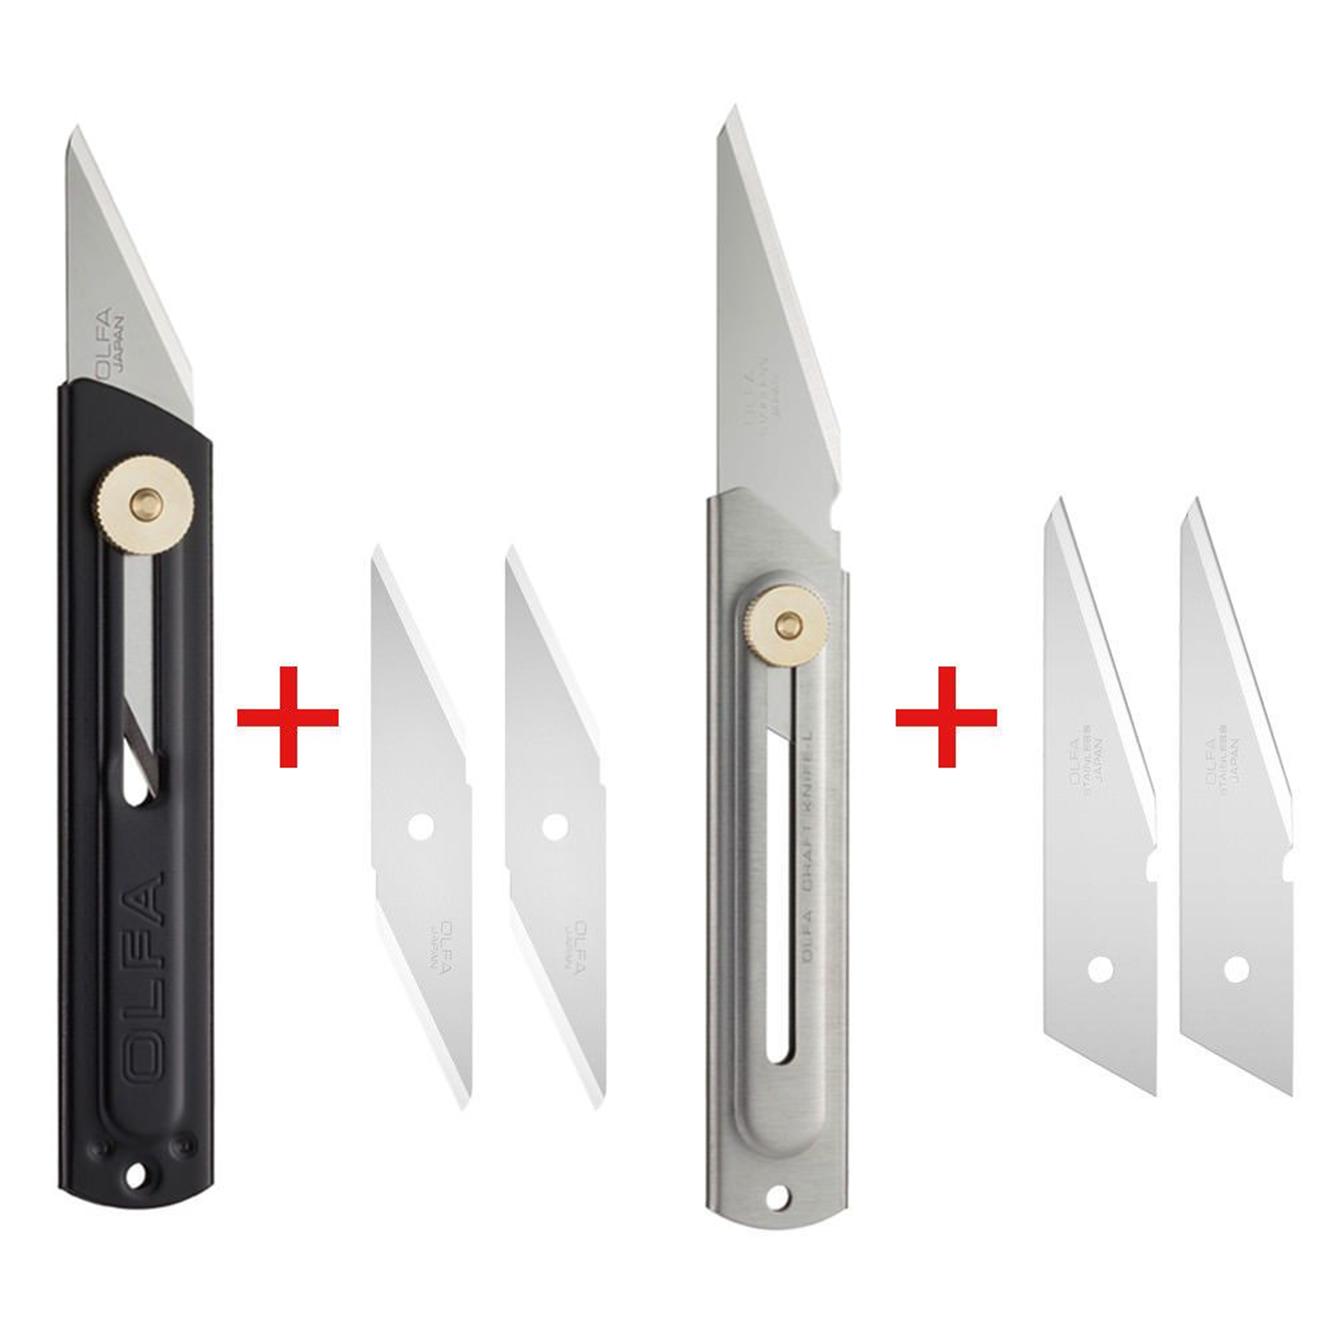
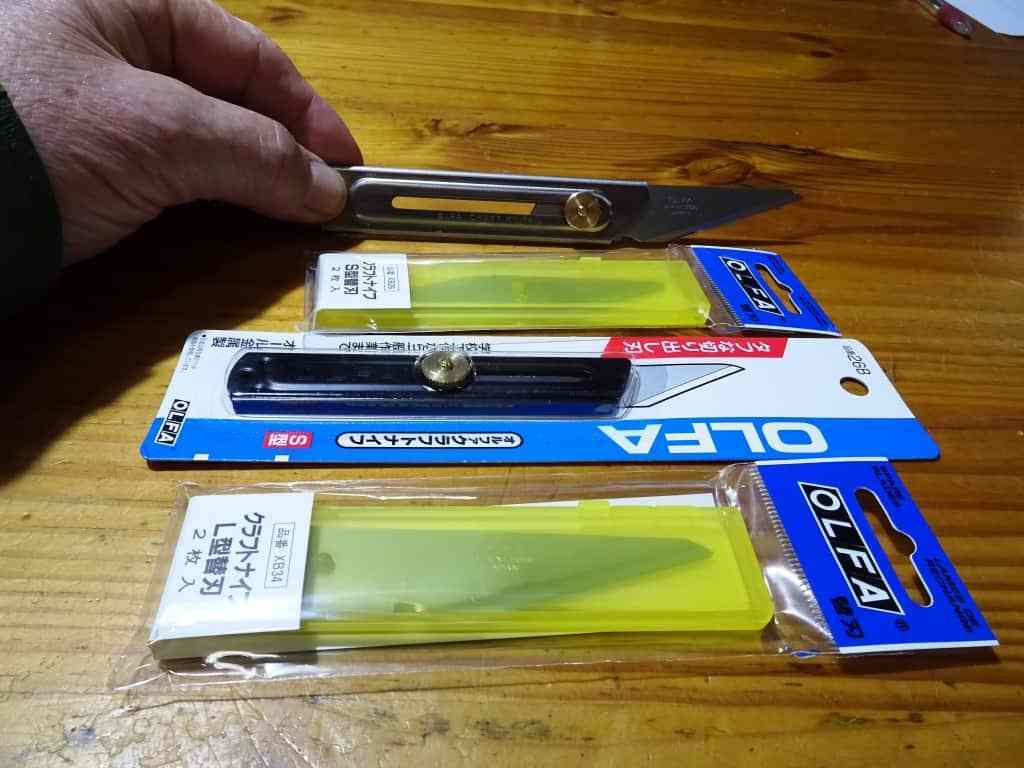


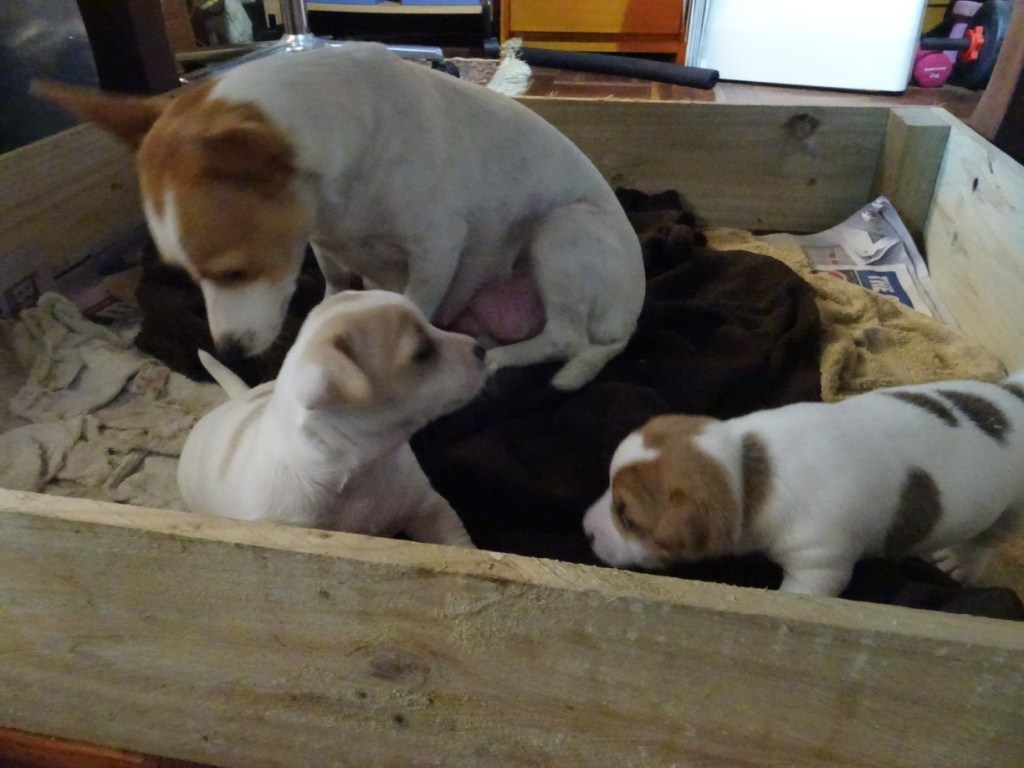


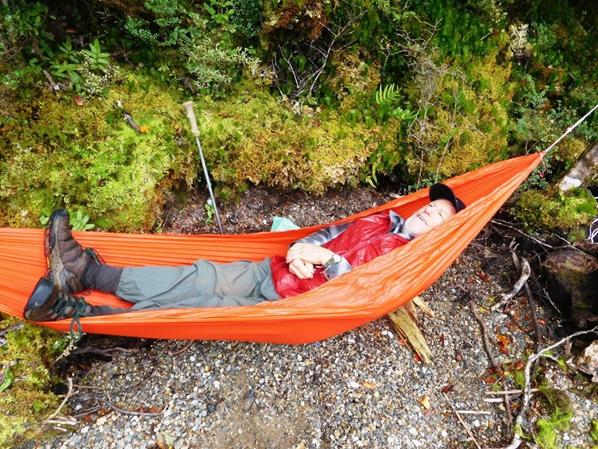

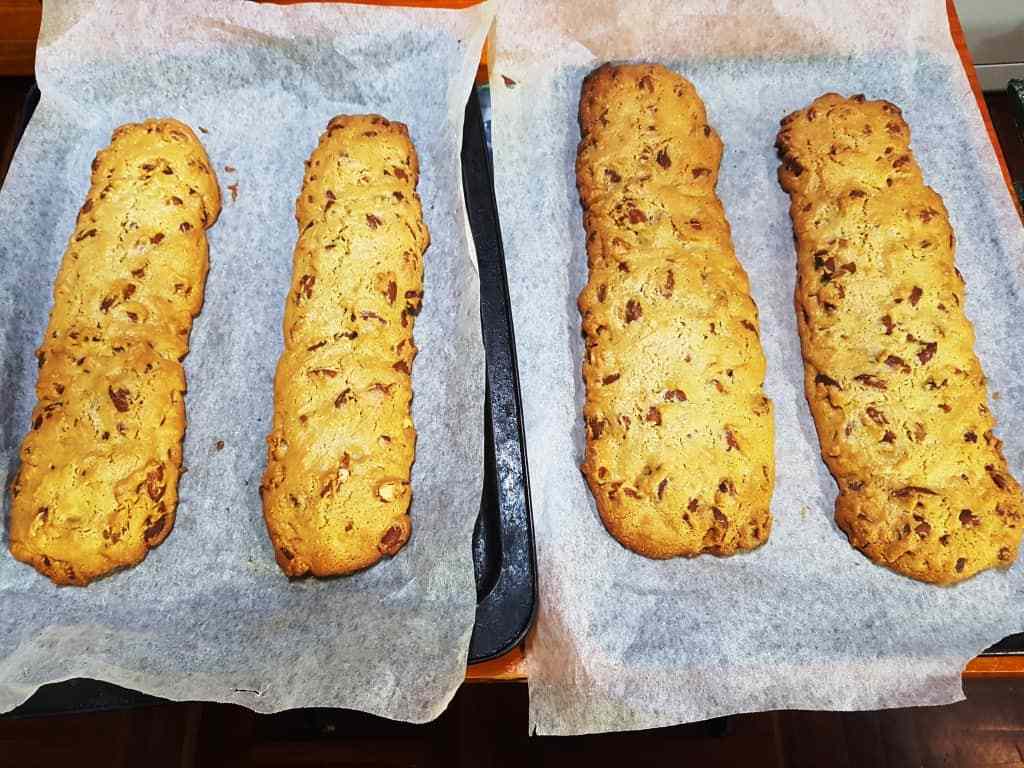 Biscotti
after first baking
Biscotti
after first baking 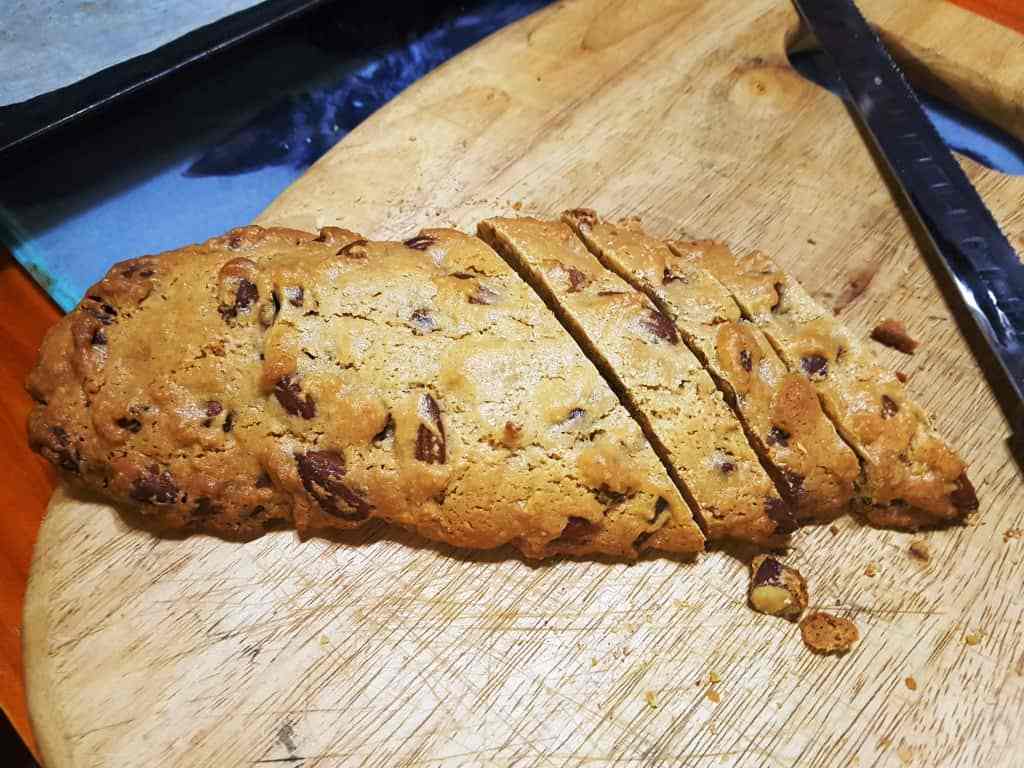 Biscotti
– cutting into biscuits
Biscotti
– cutting into biscuits 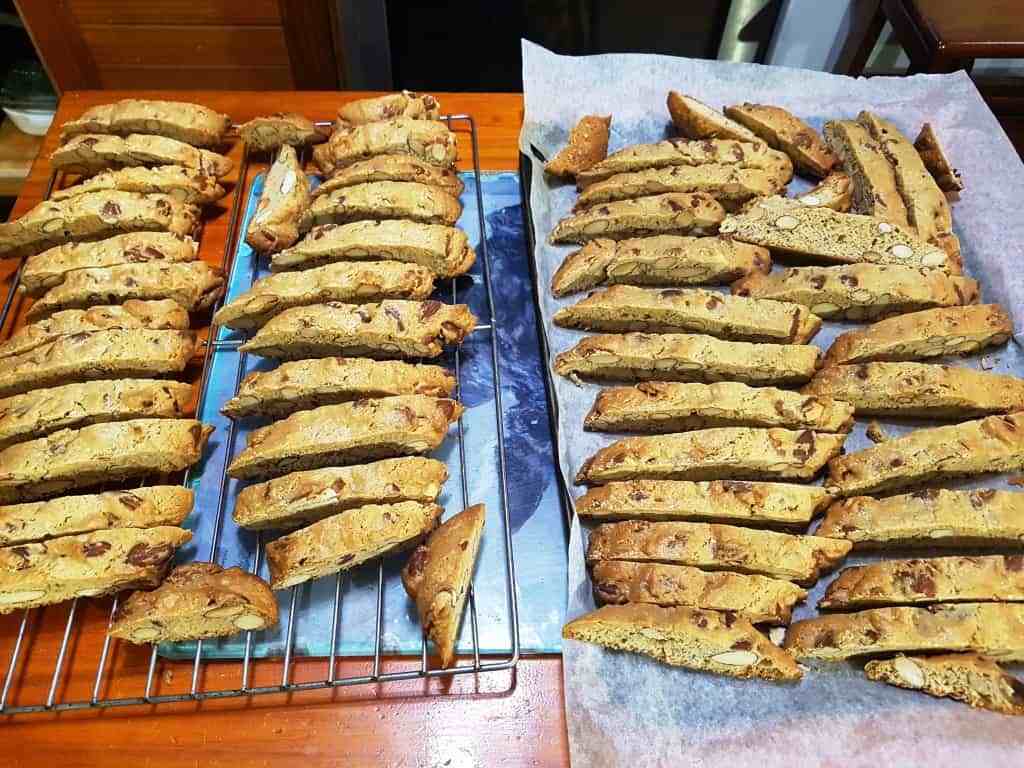 Biscotti
– finished
Biscotti
– finished 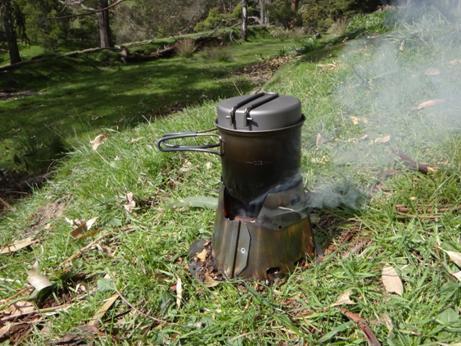
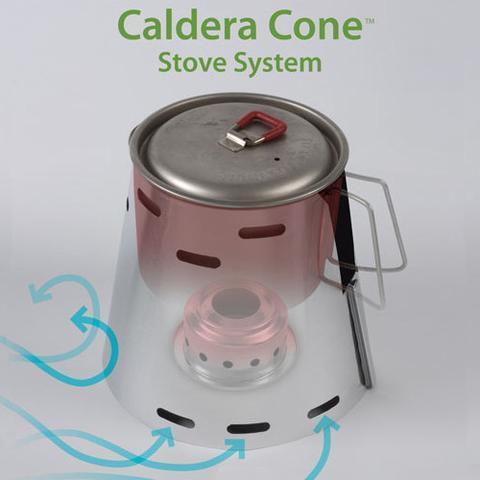


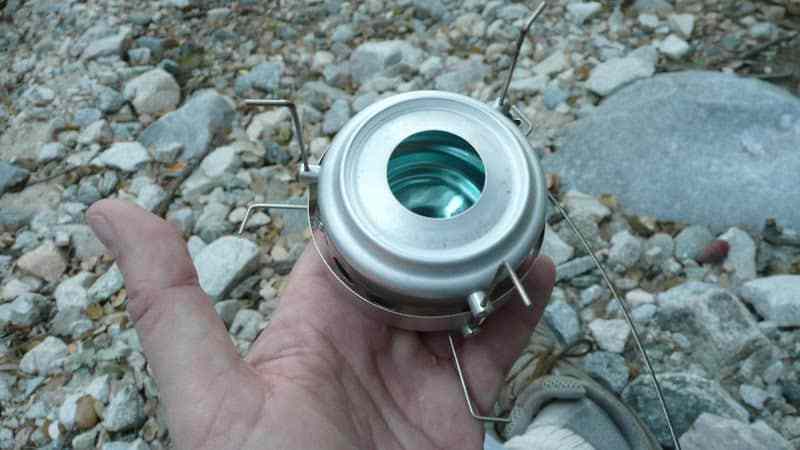
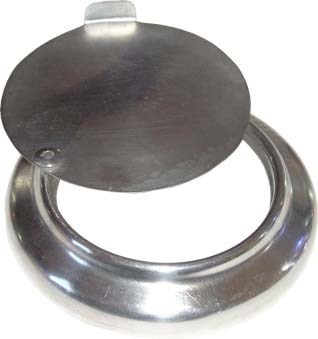
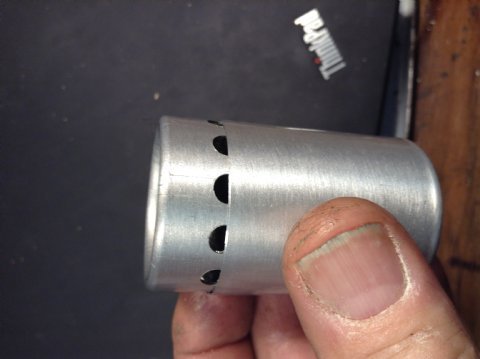
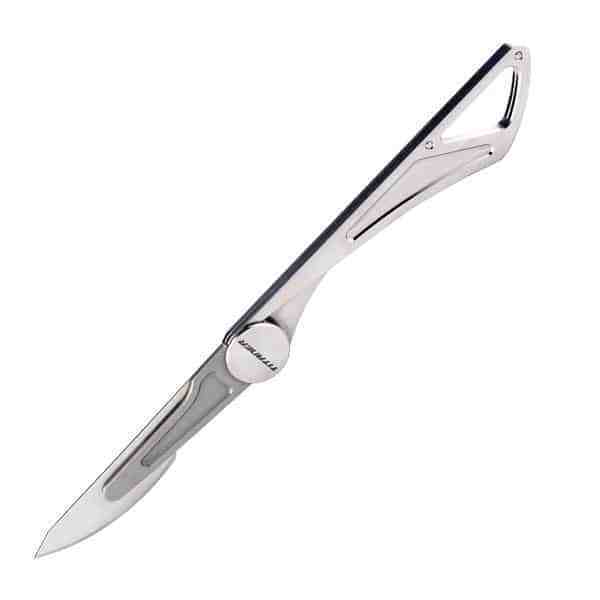
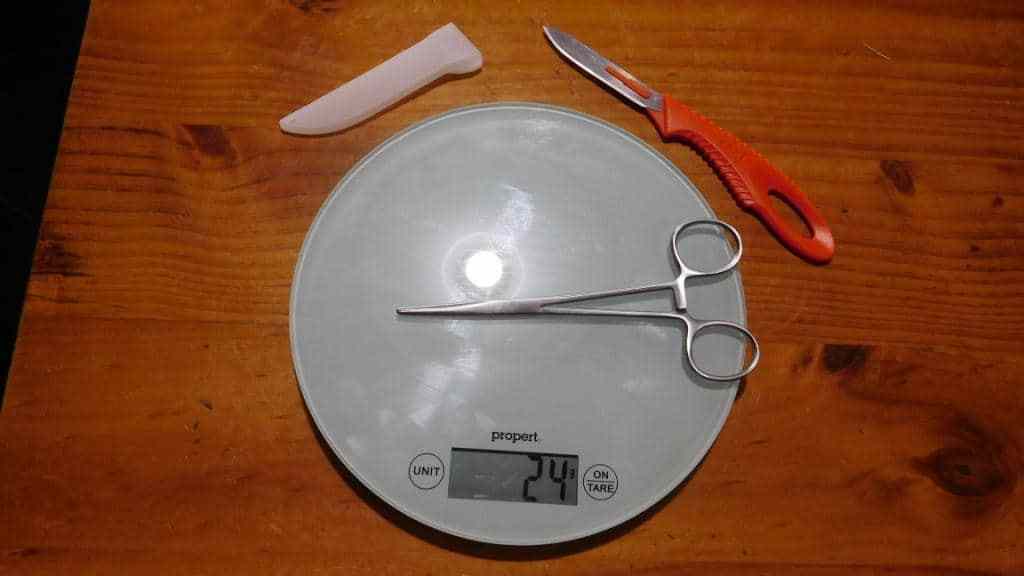 CRKT
knife
CRKT
knife  Gerber
LST 34 grams.
Gerber
LST 34 grams. 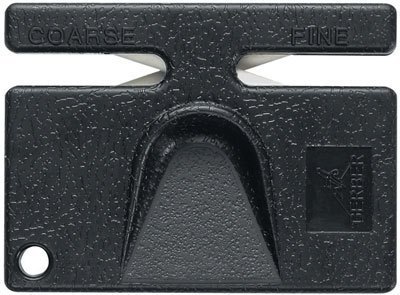

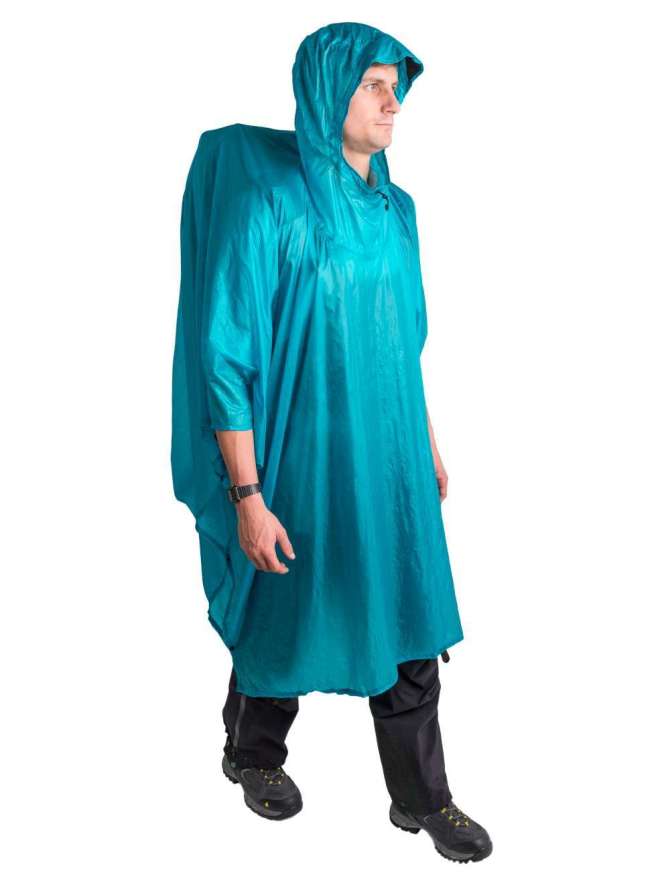
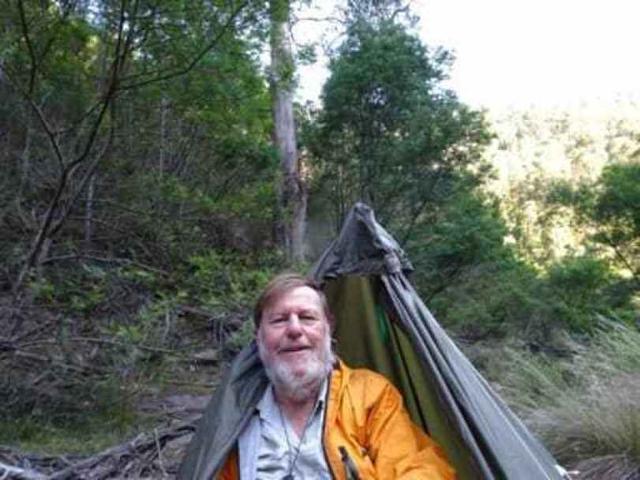
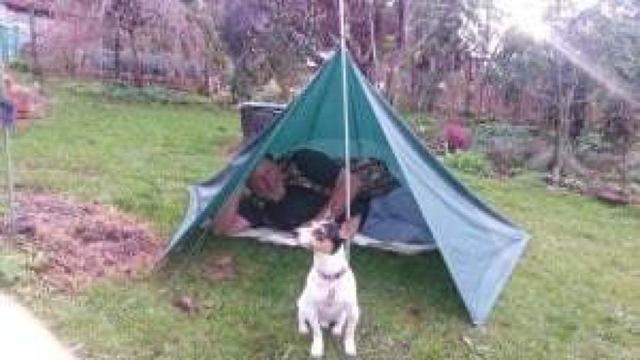


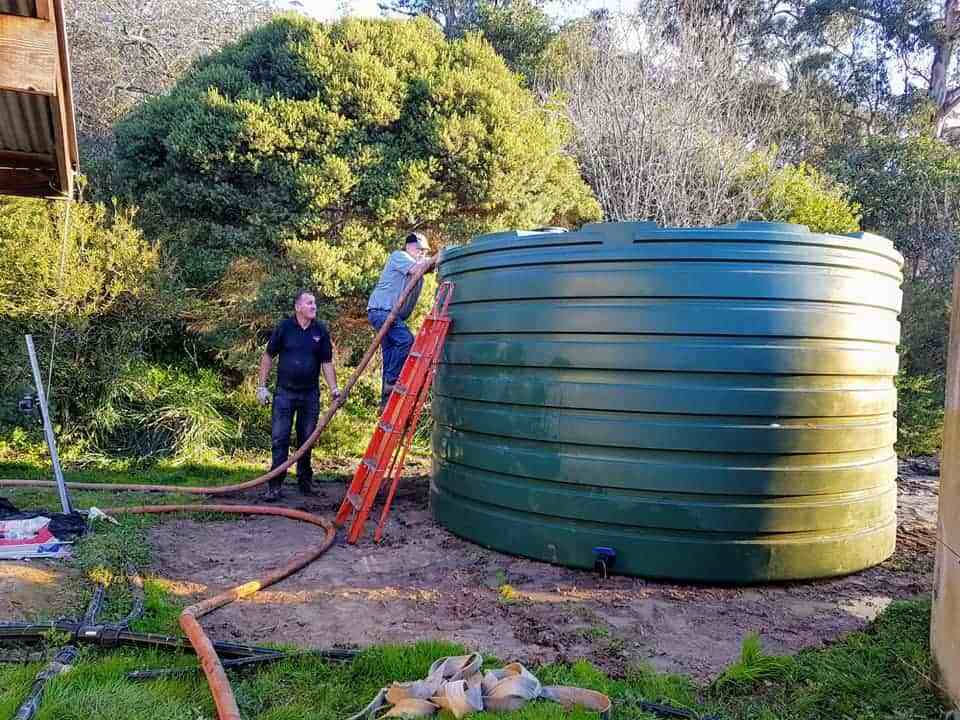


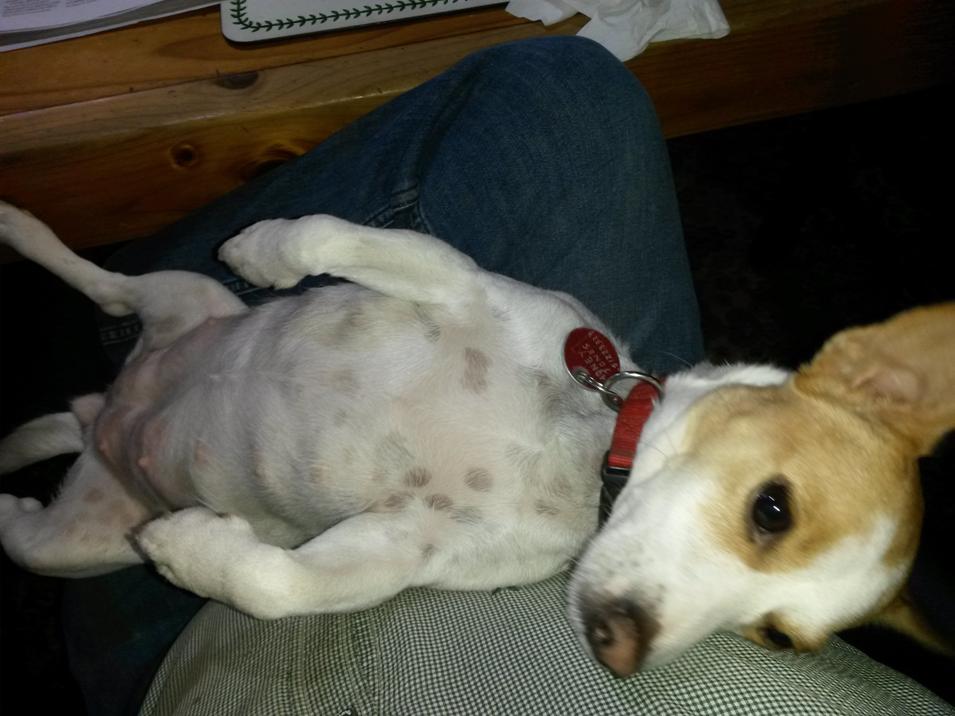

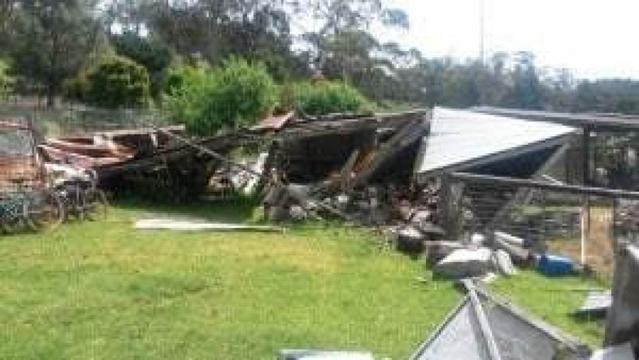

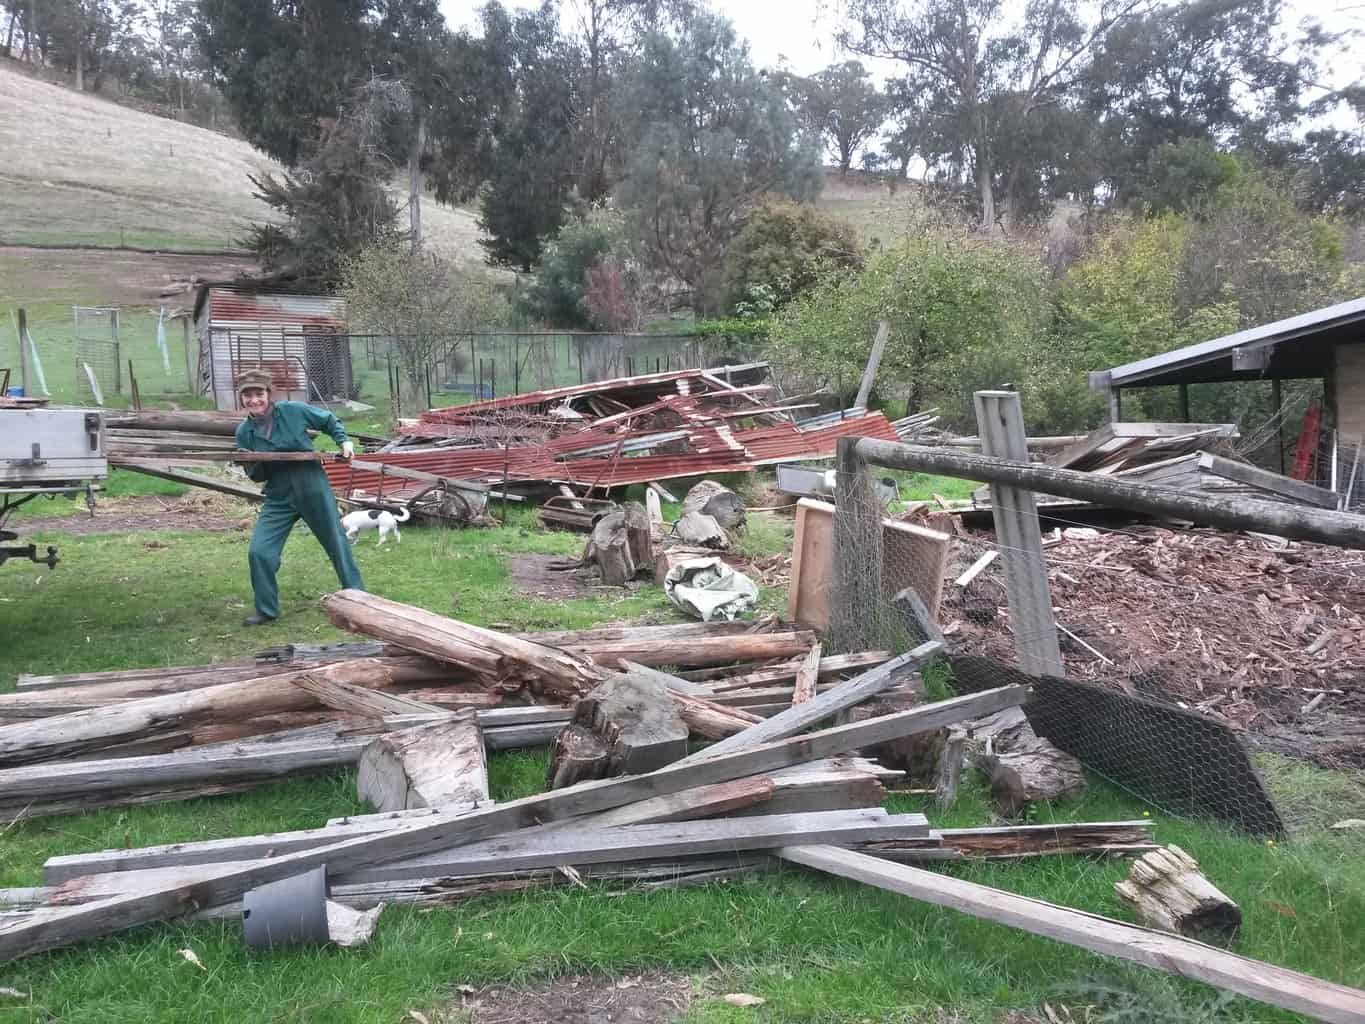


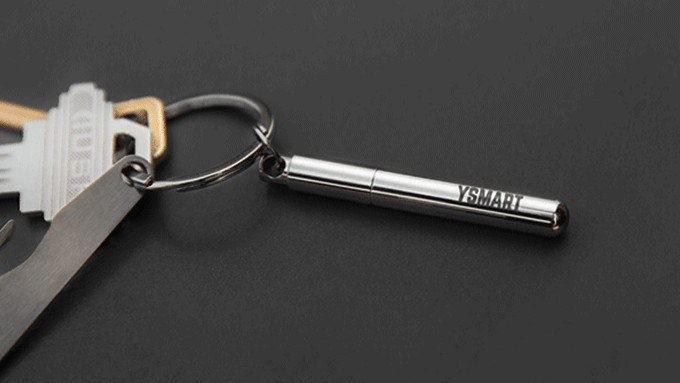
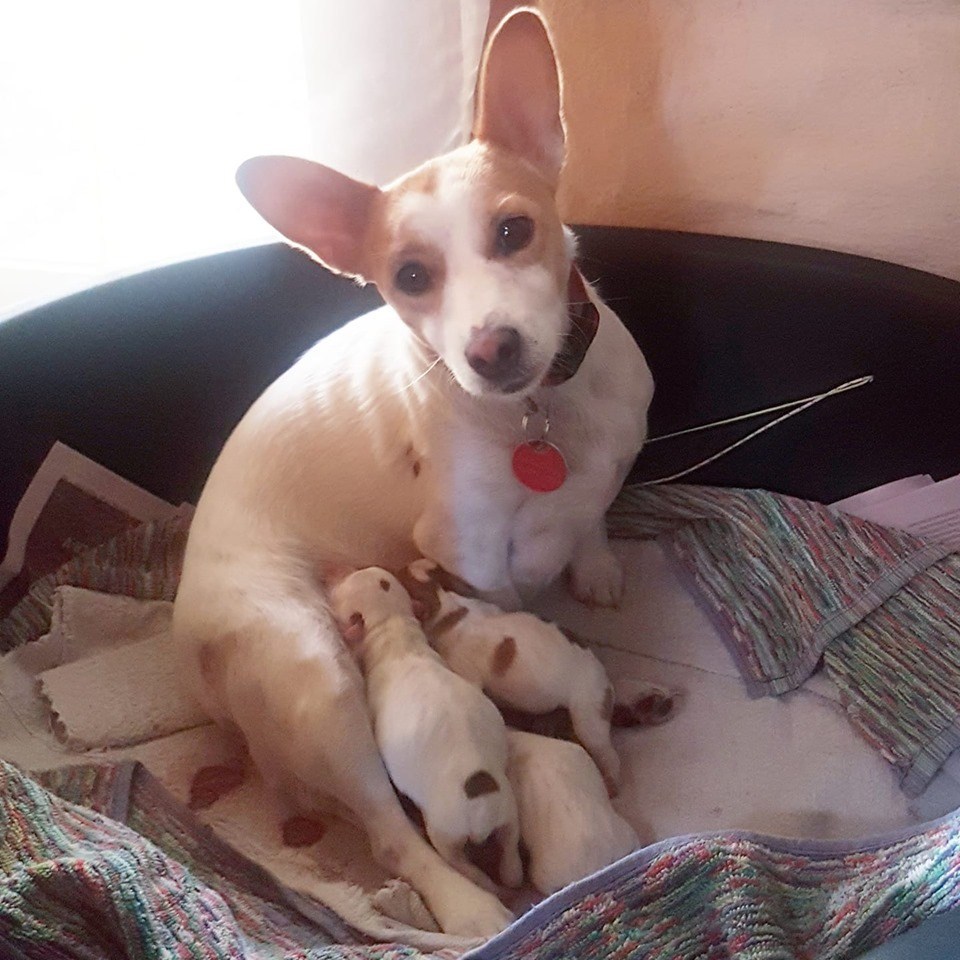


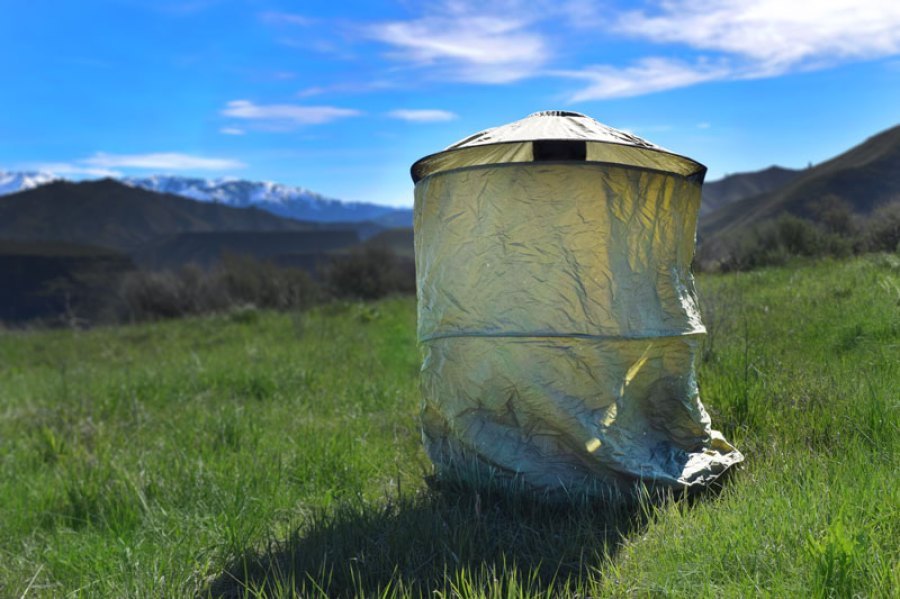
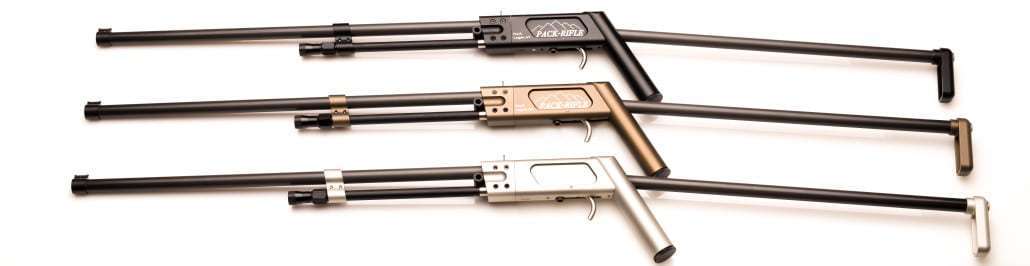
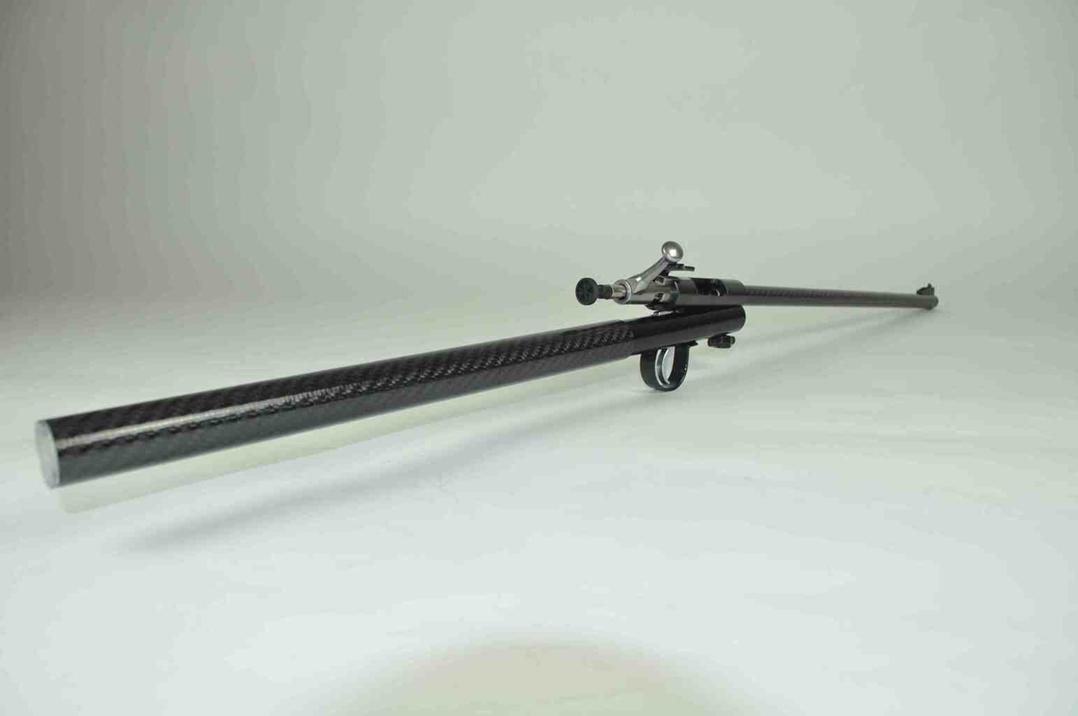
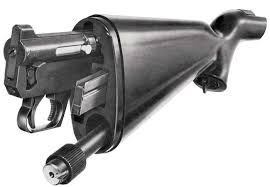

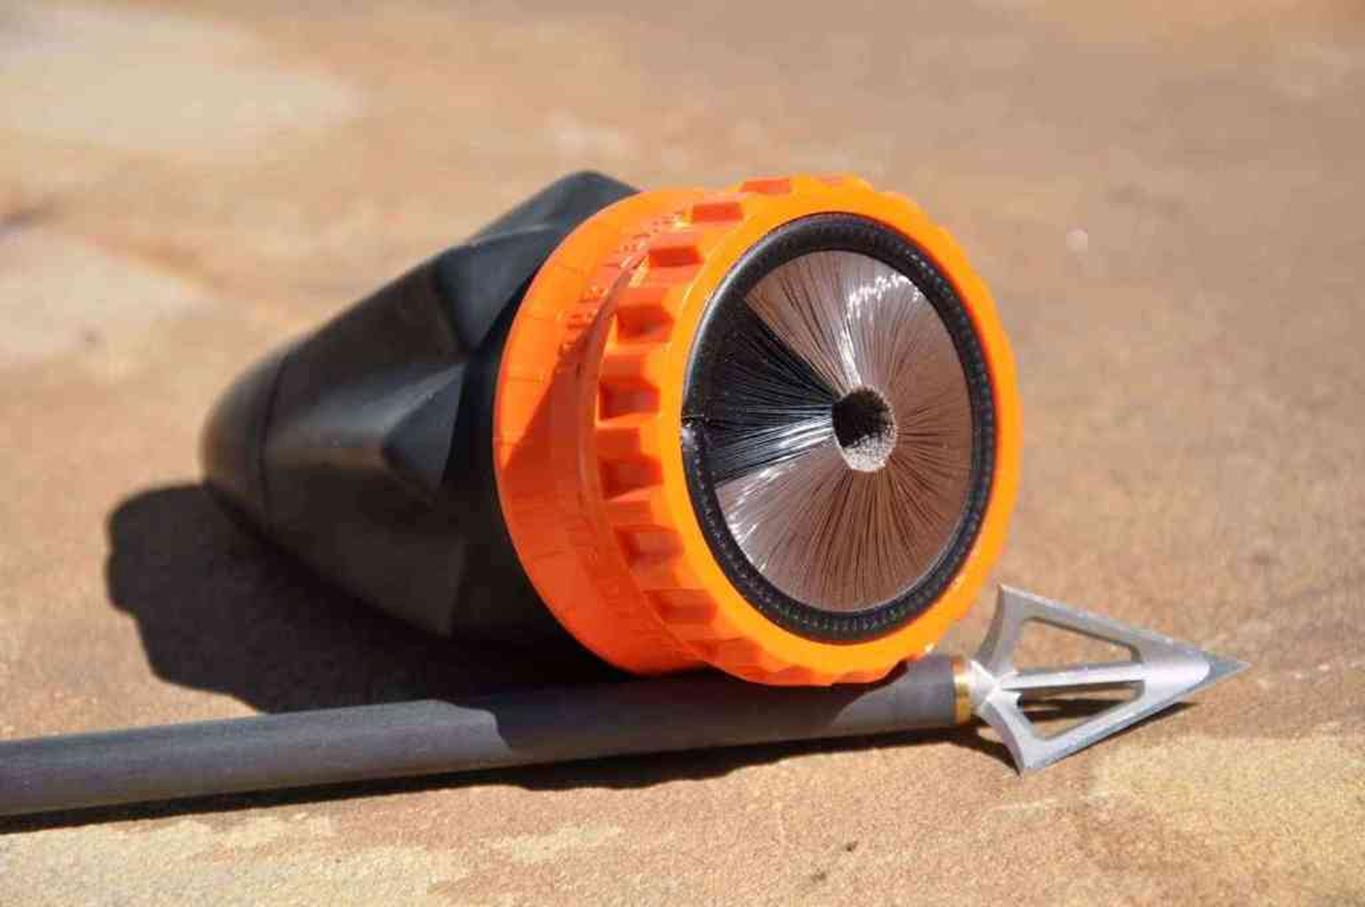
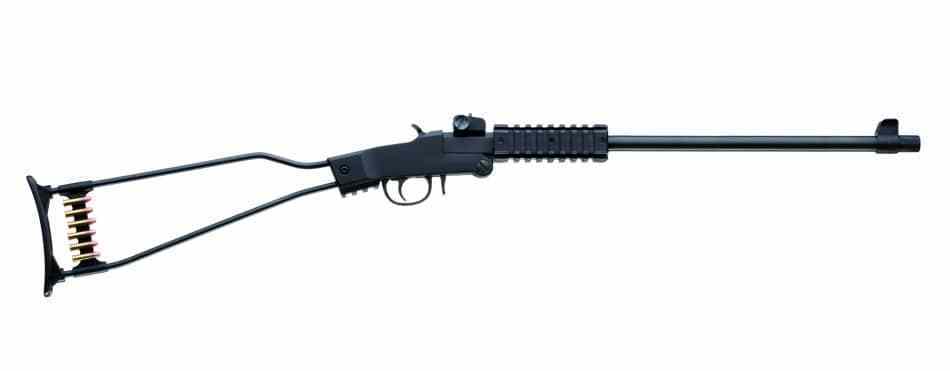
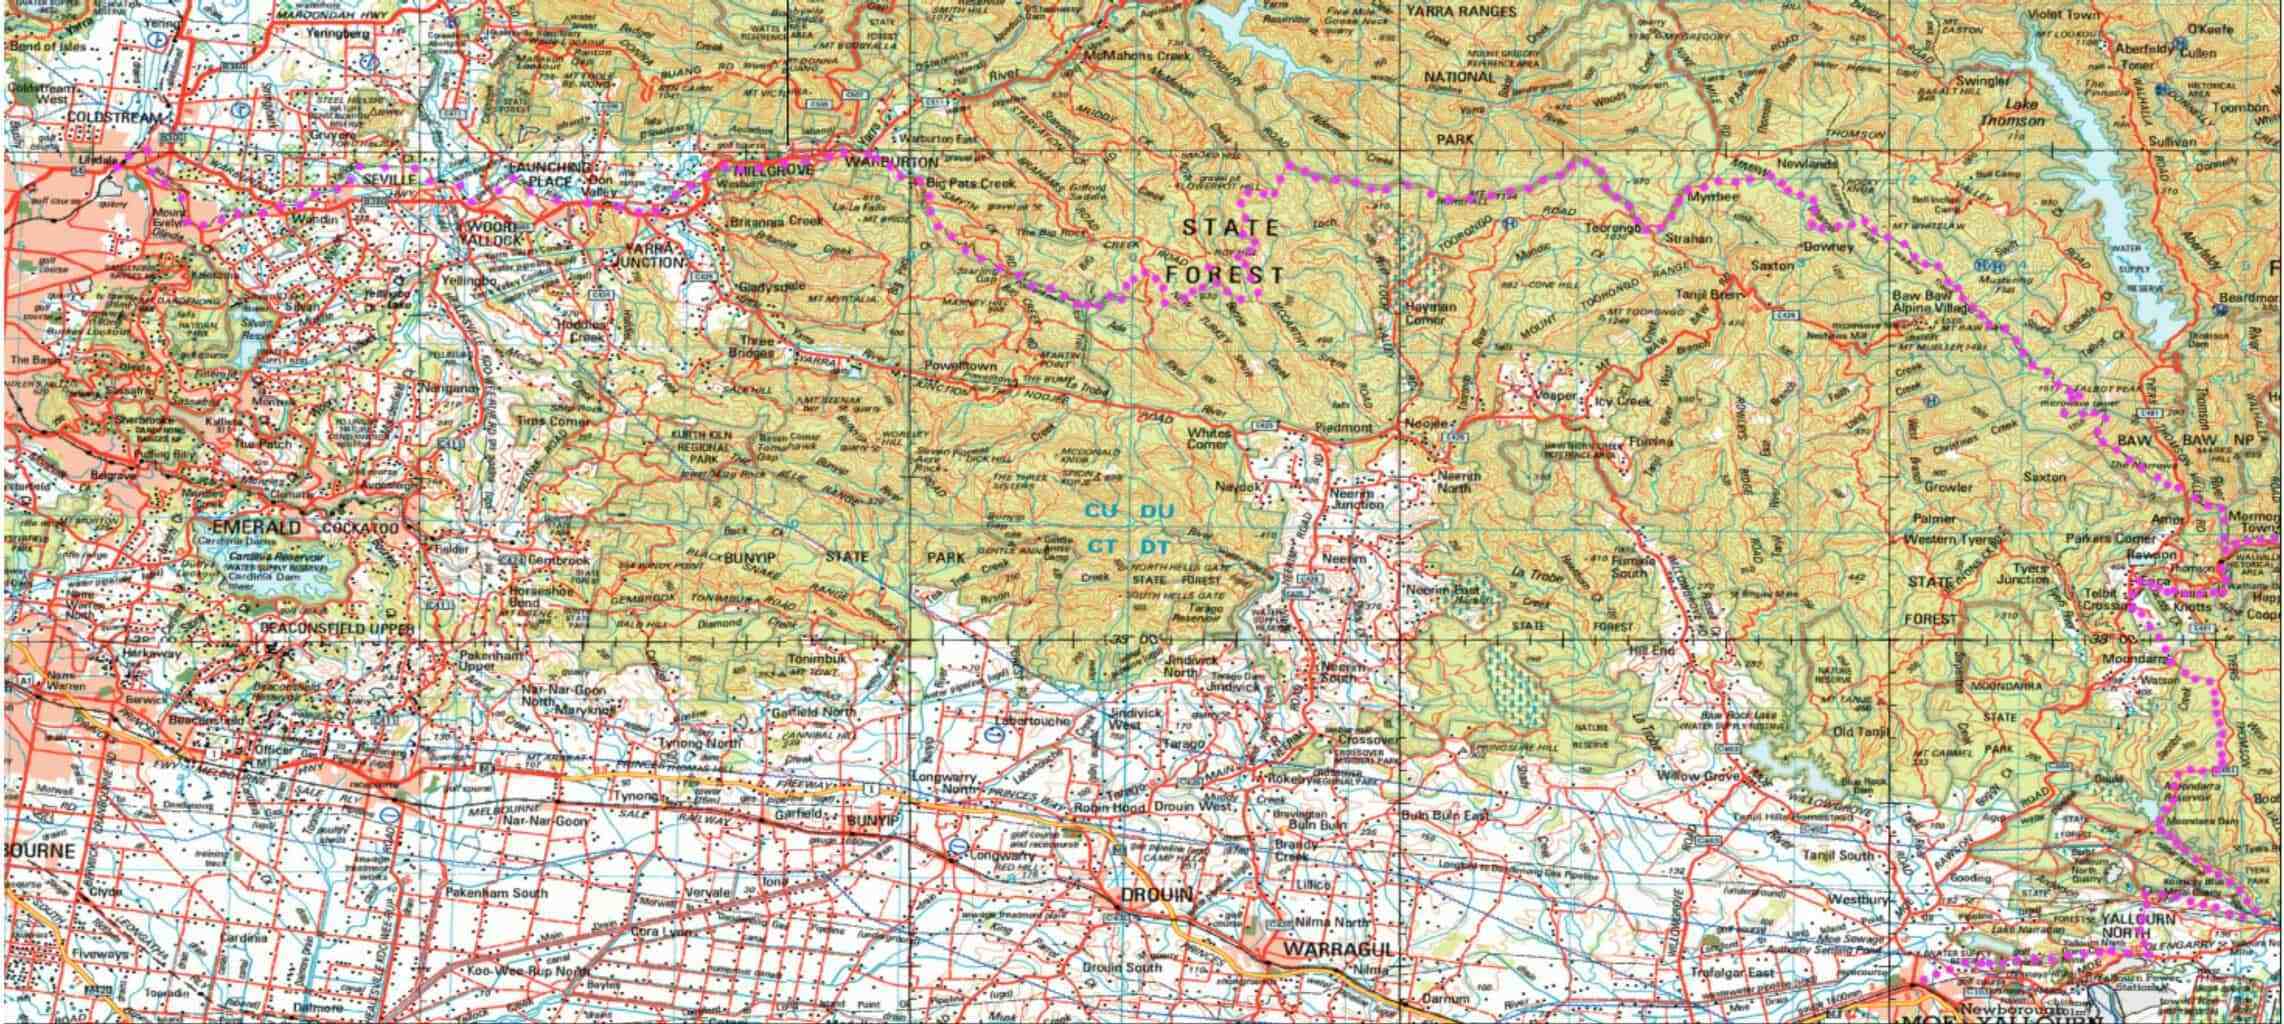

 Heat
sealing iron for modelling
Heat
sealing iron for modelling 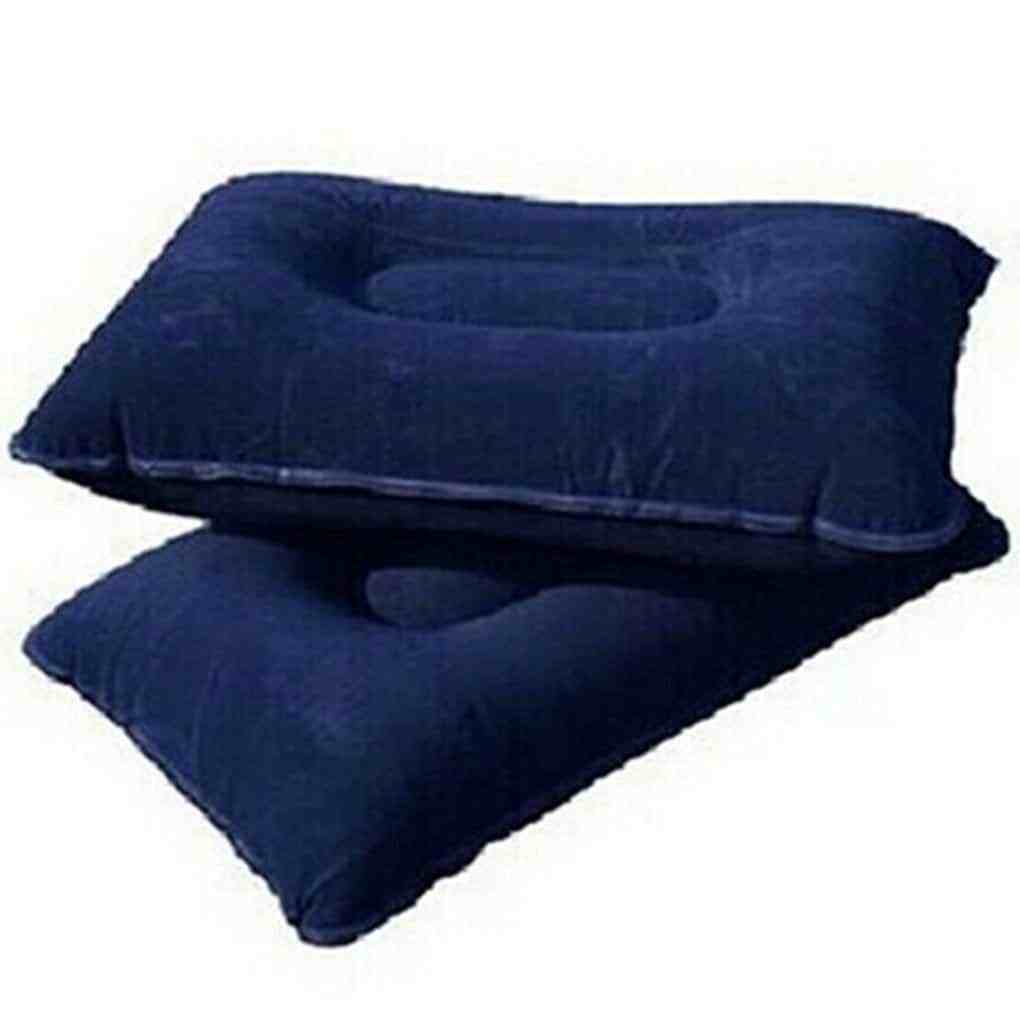

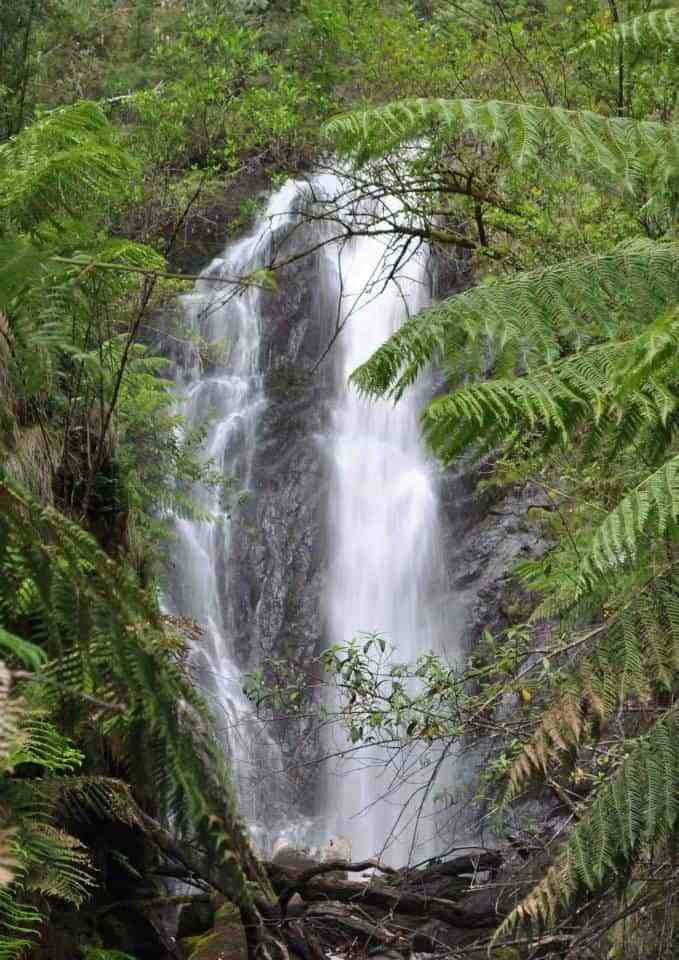
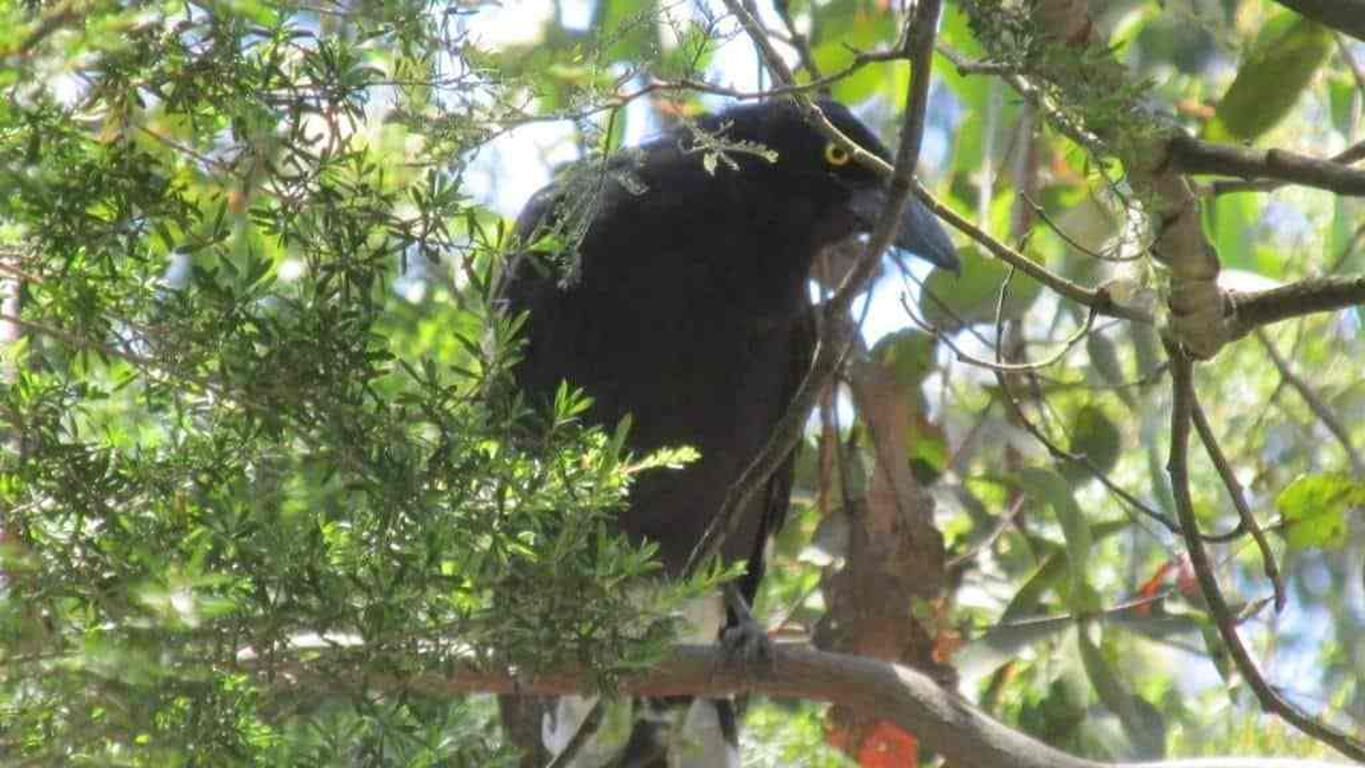
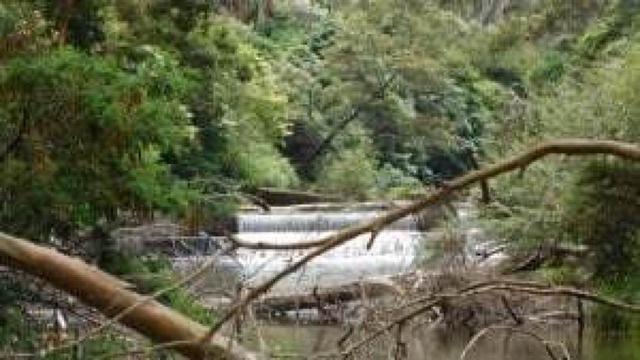
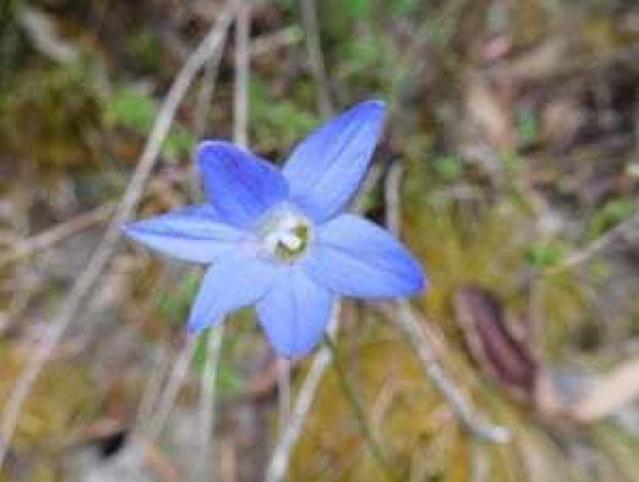
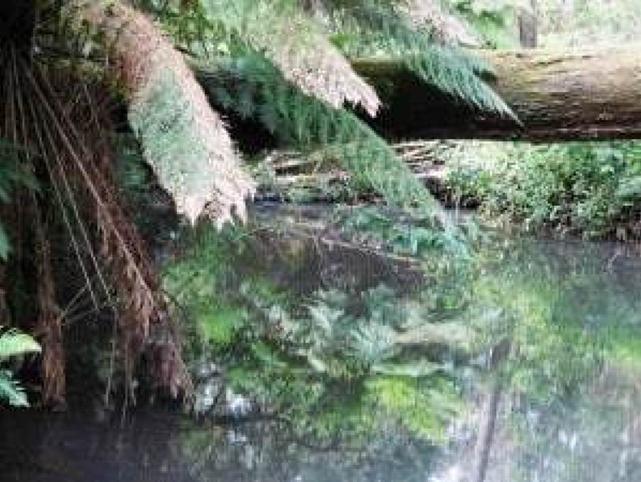
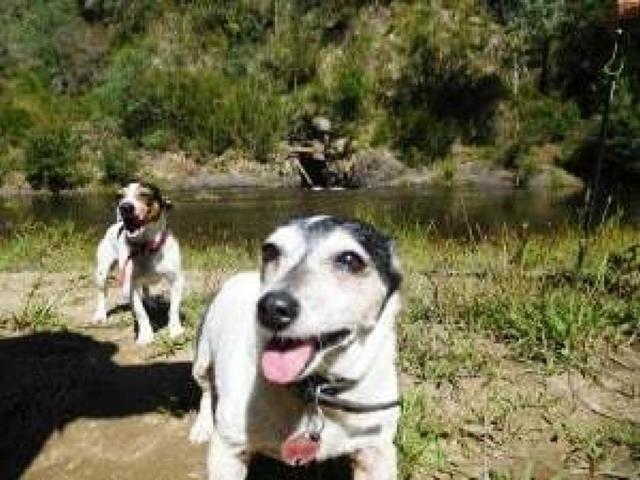
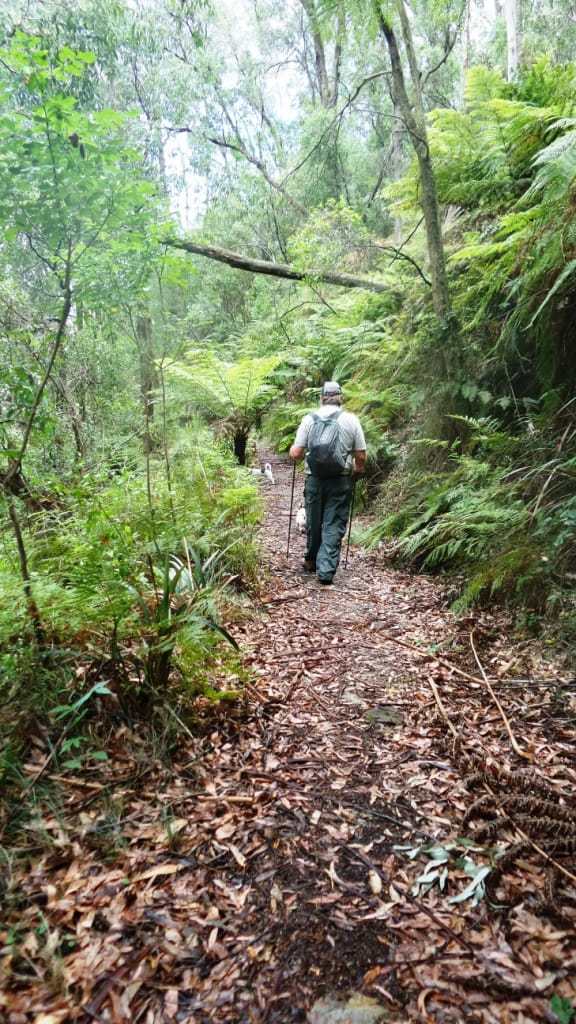
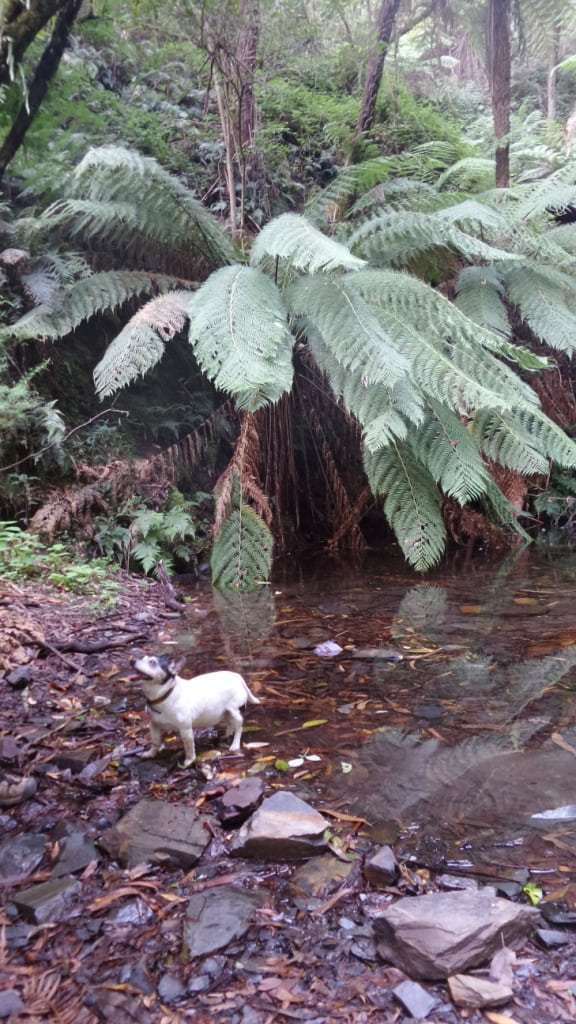

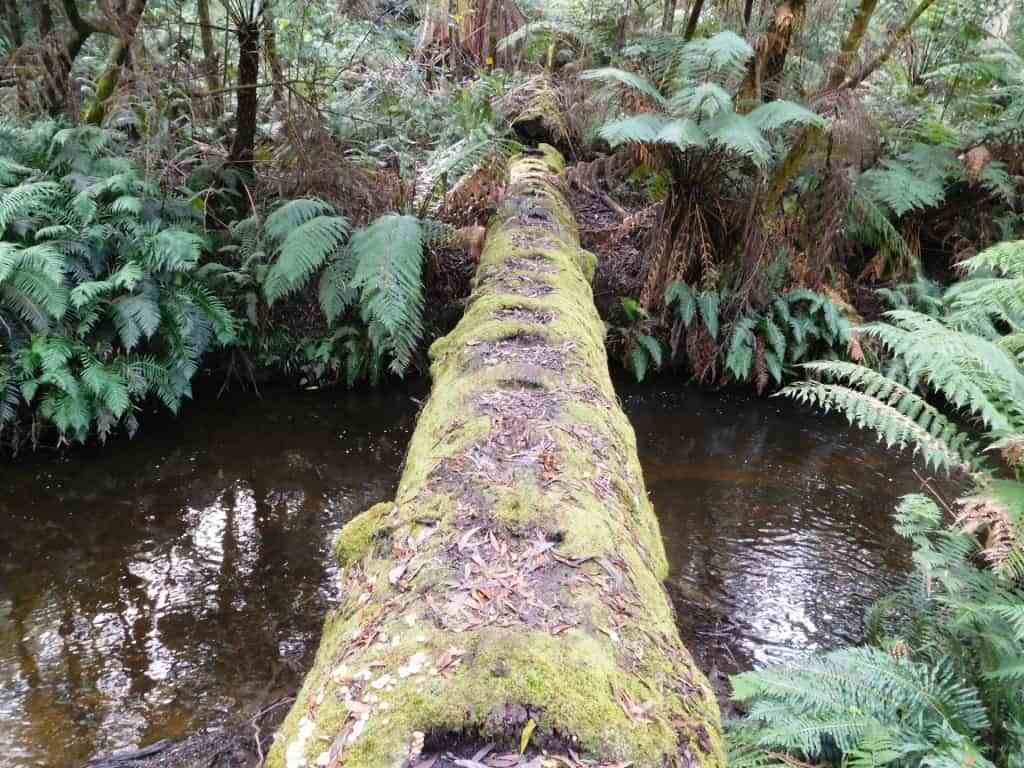
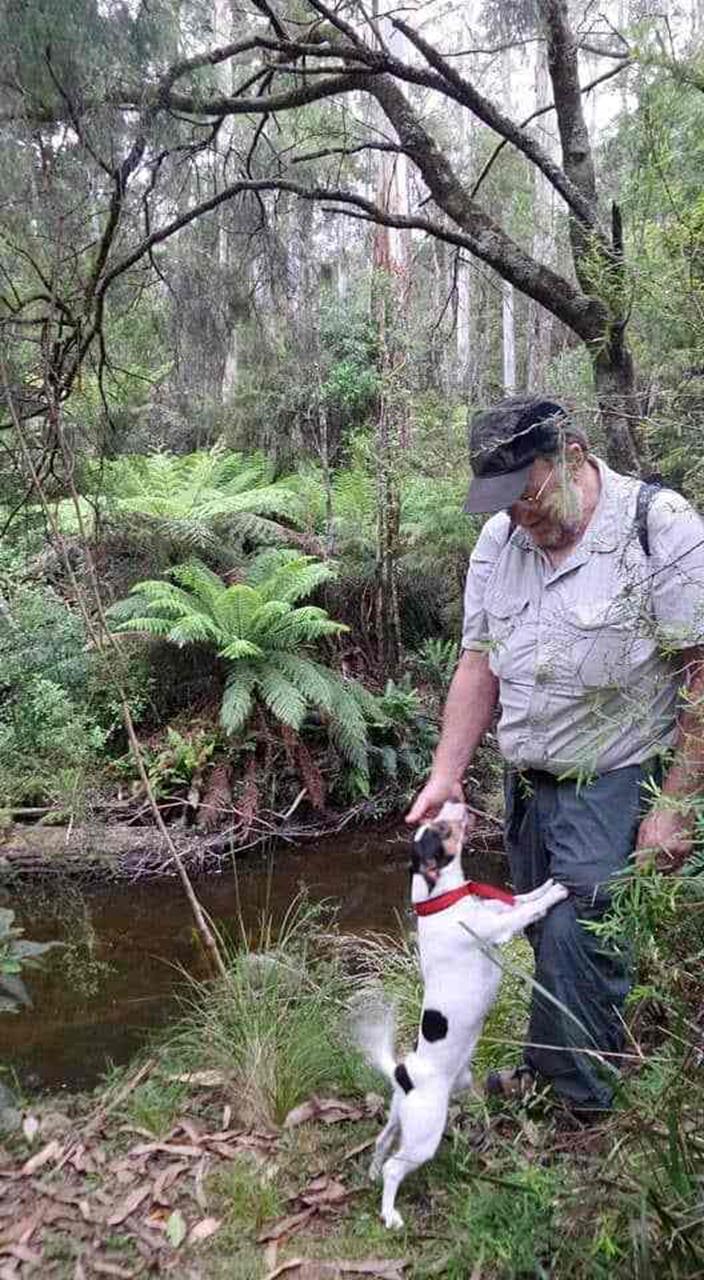
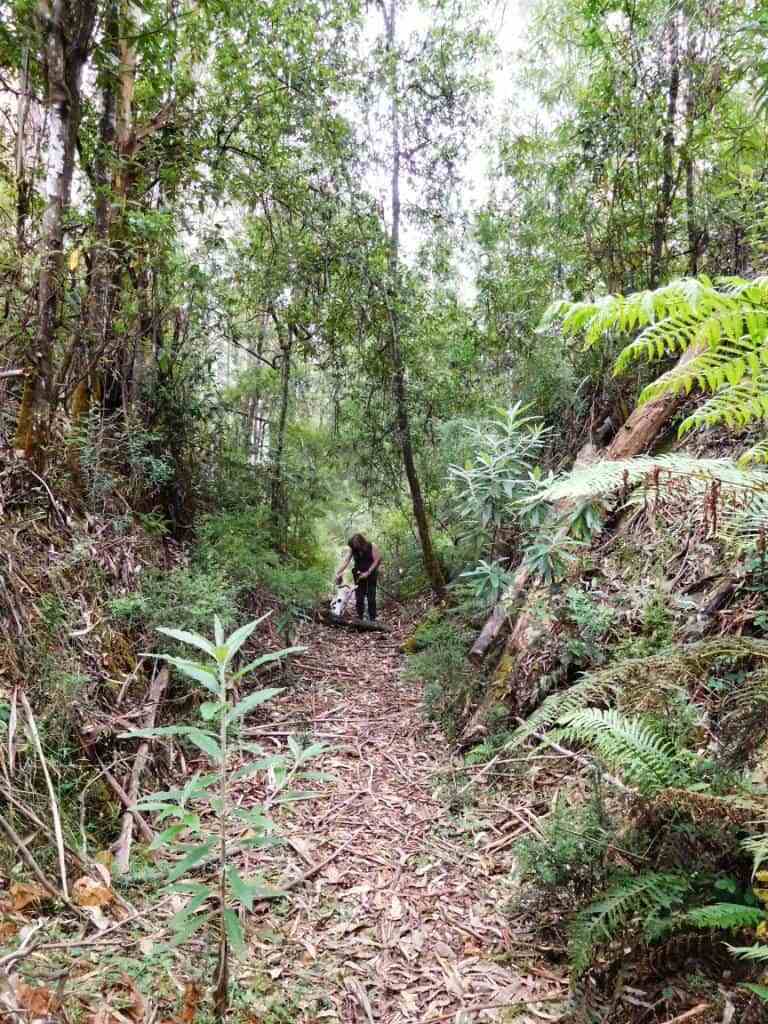
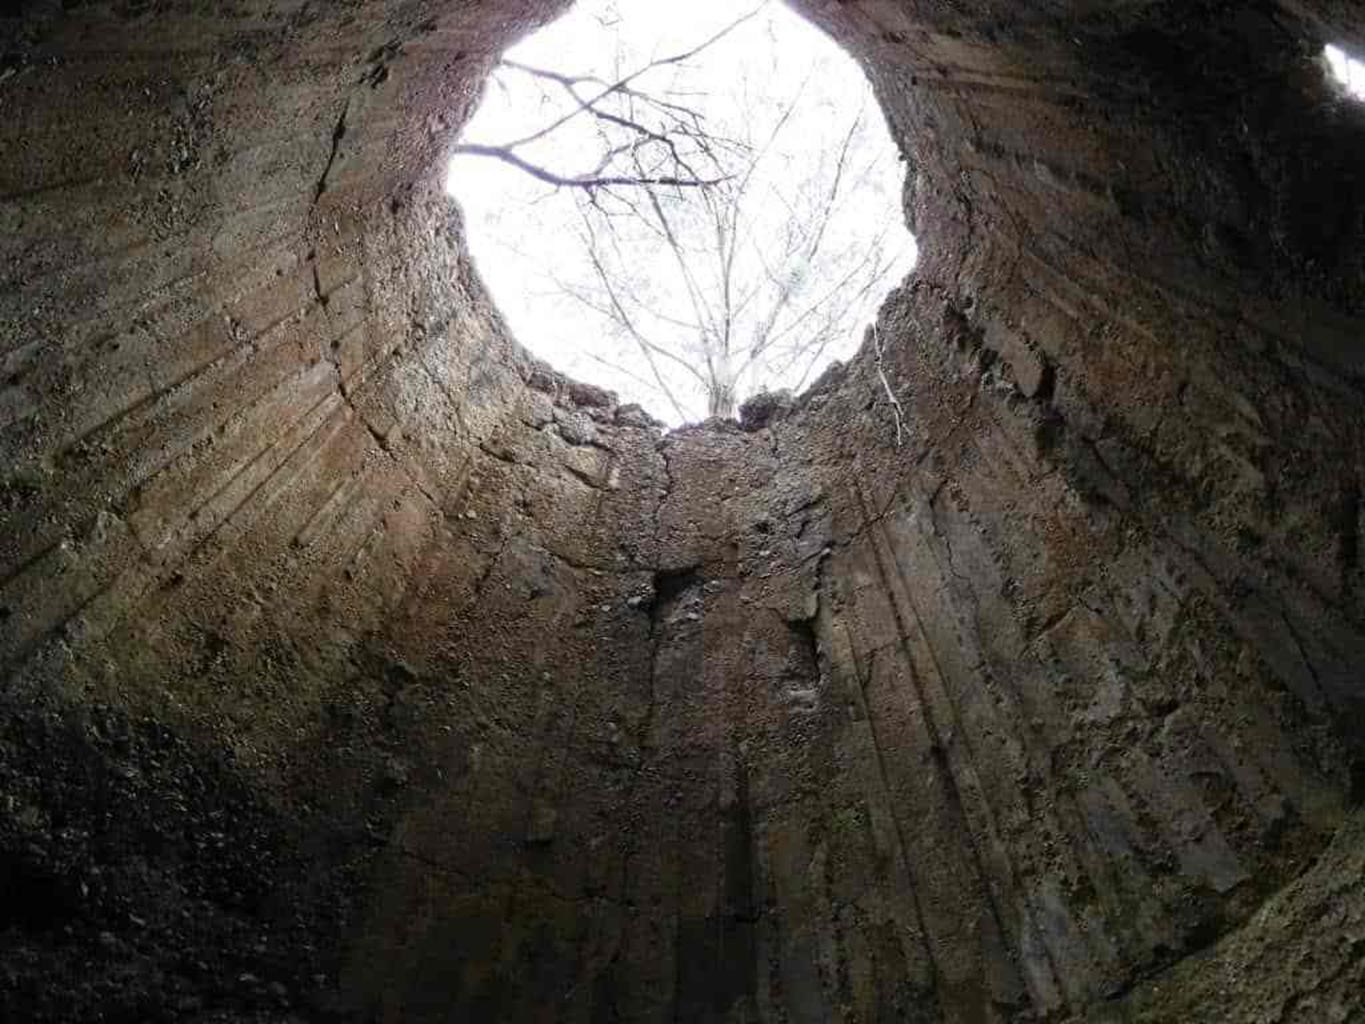
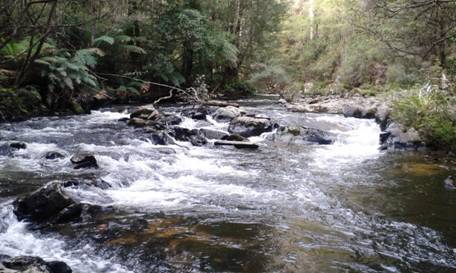
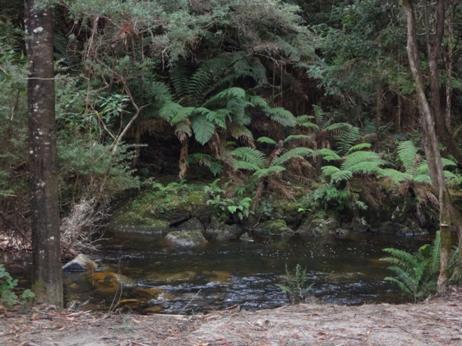
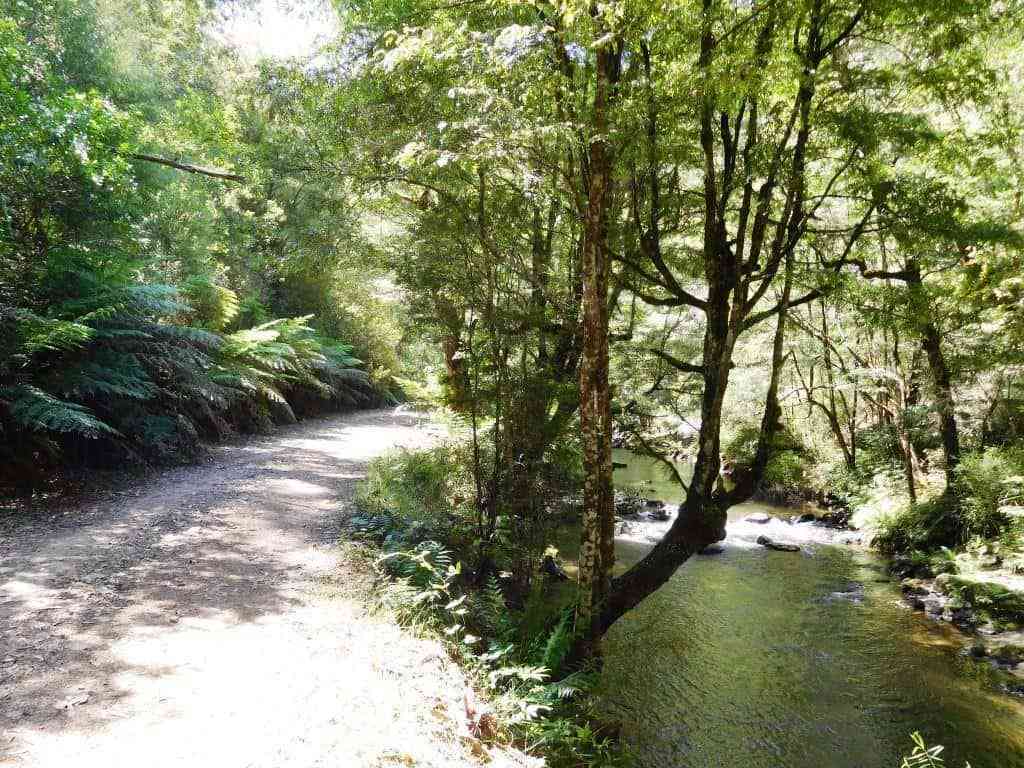


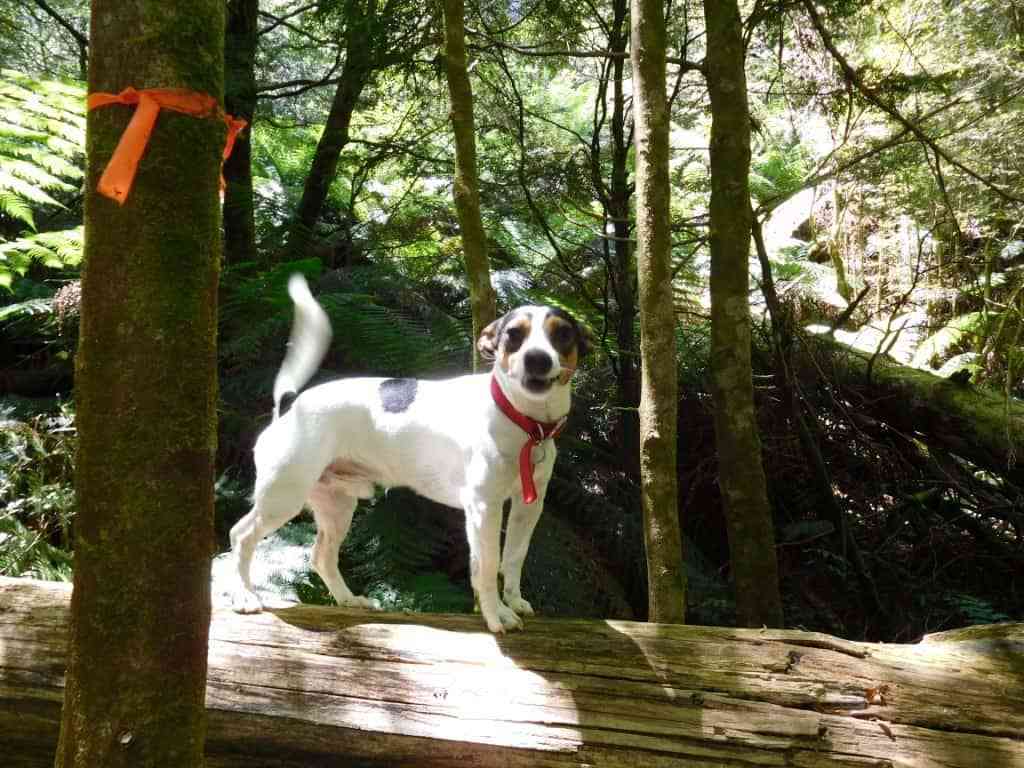
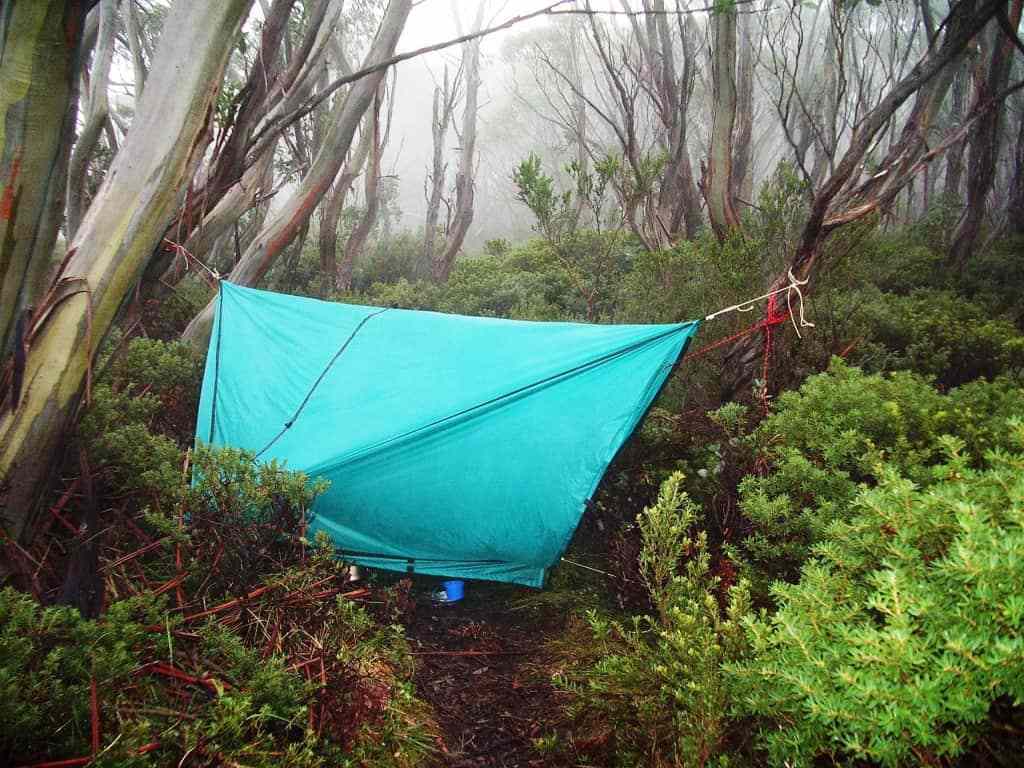

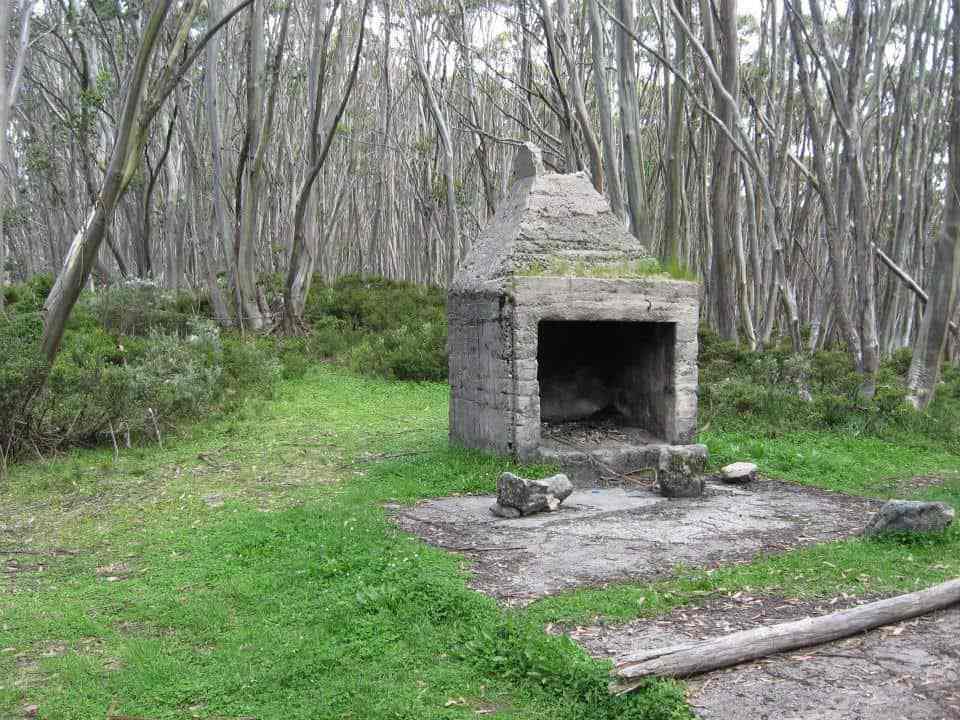
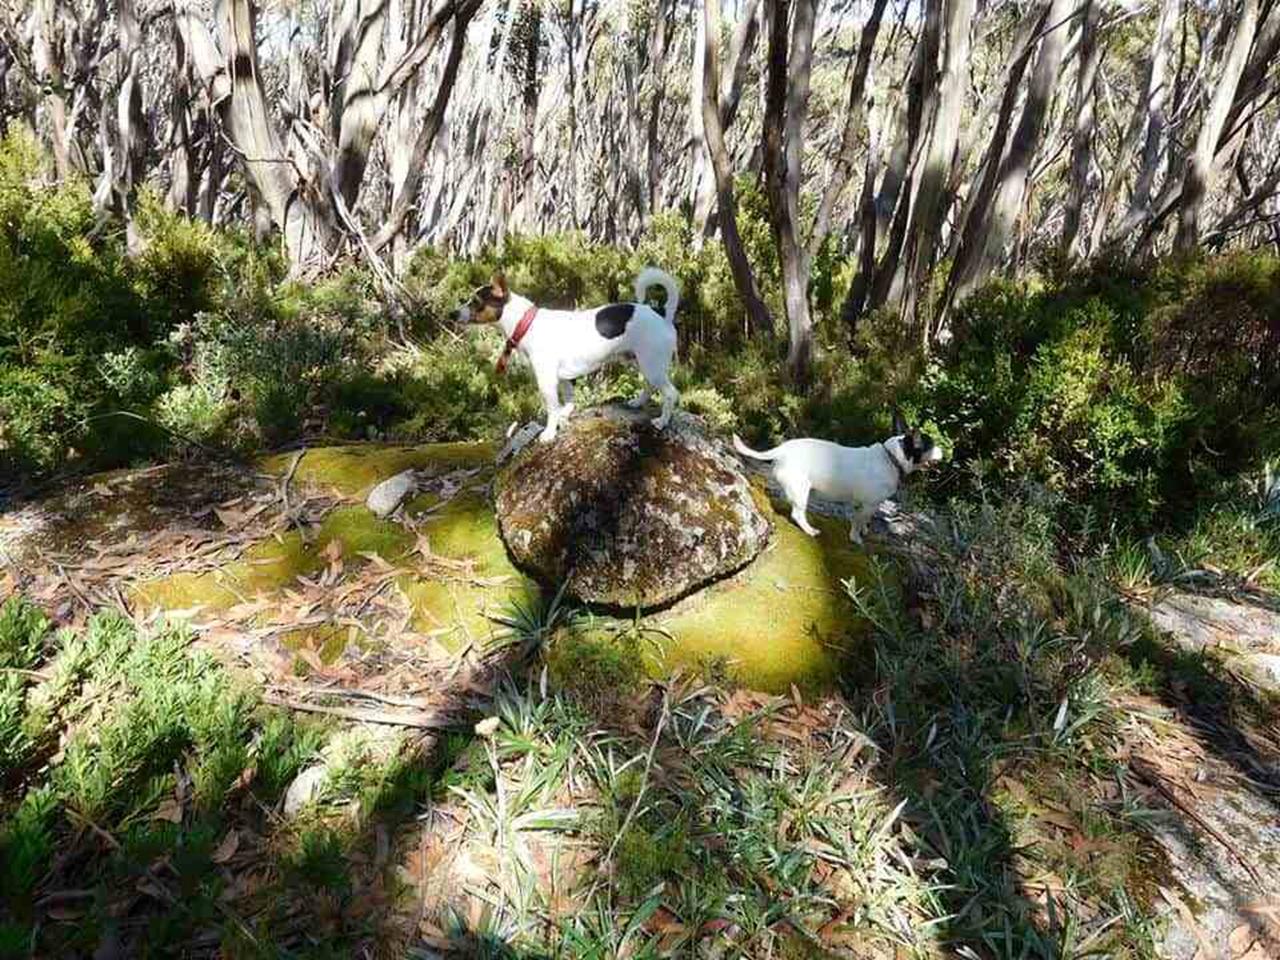
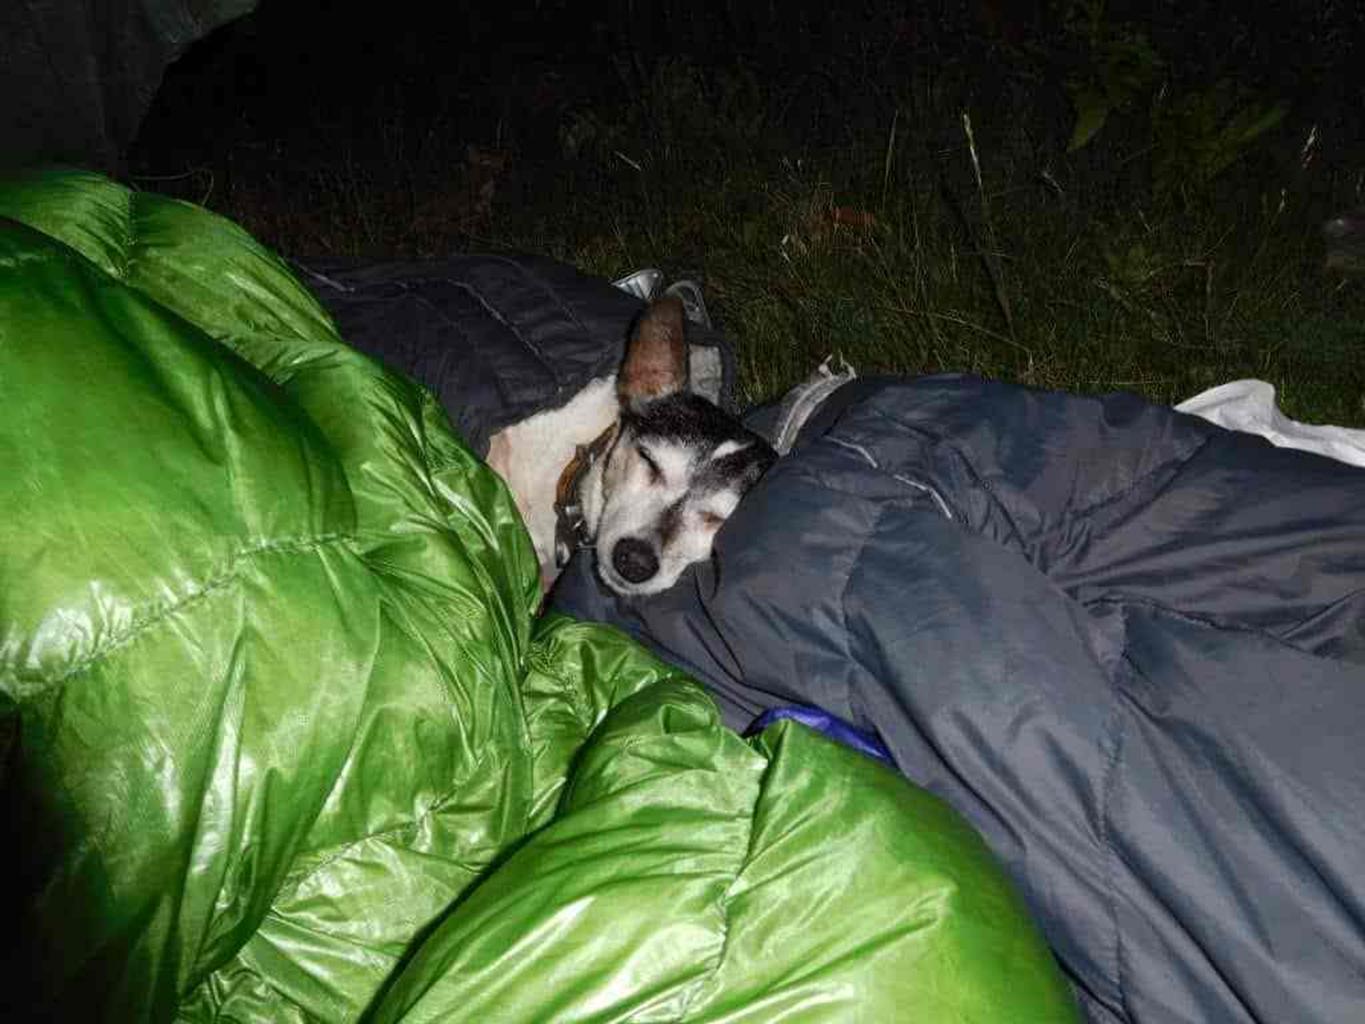
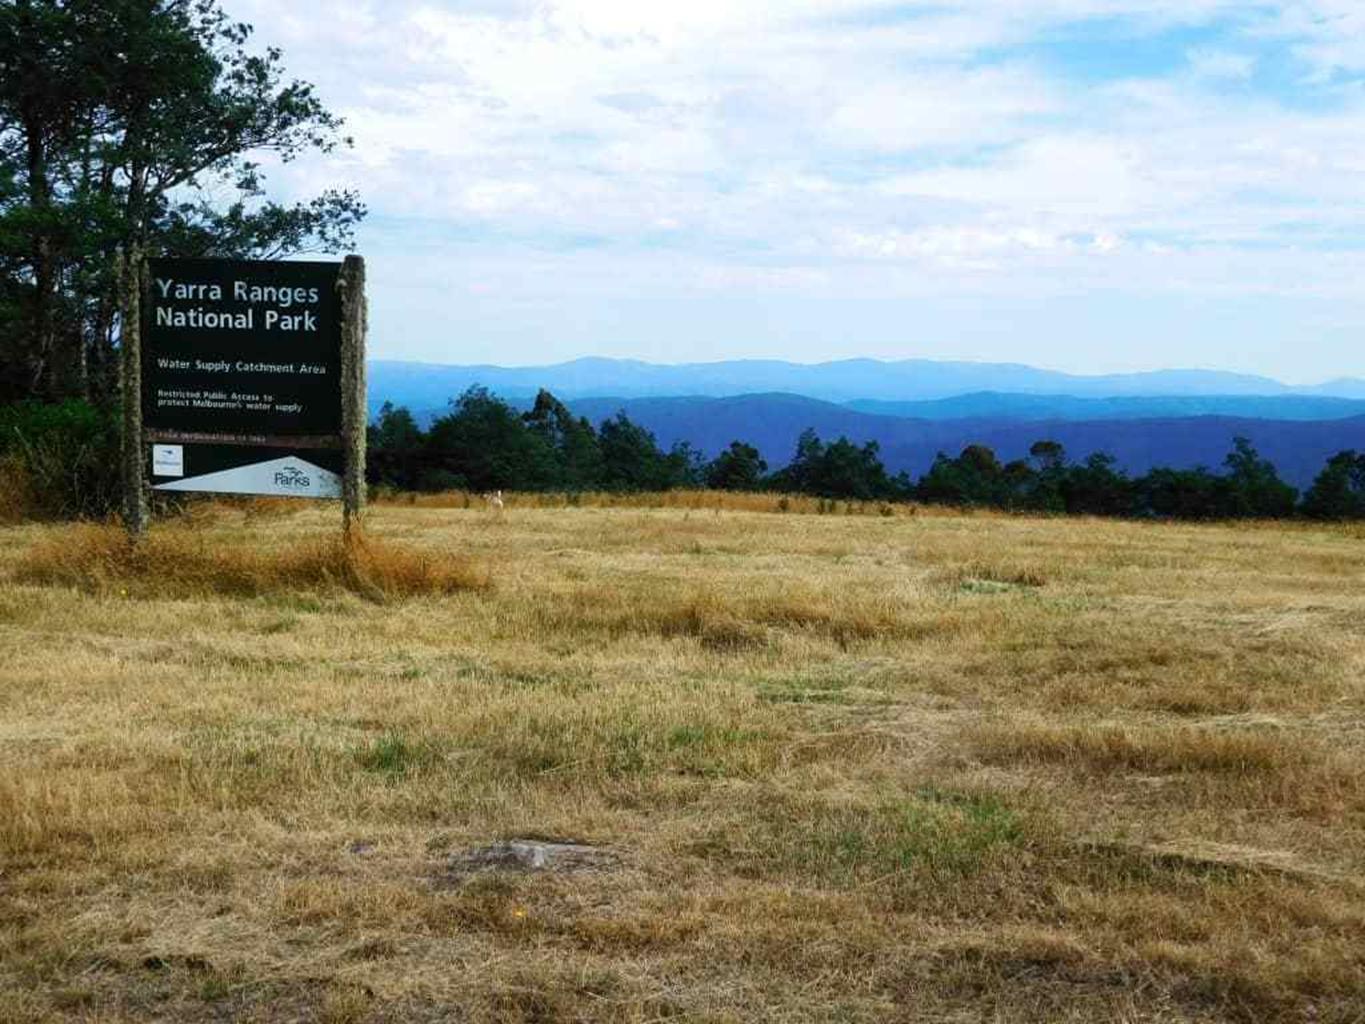
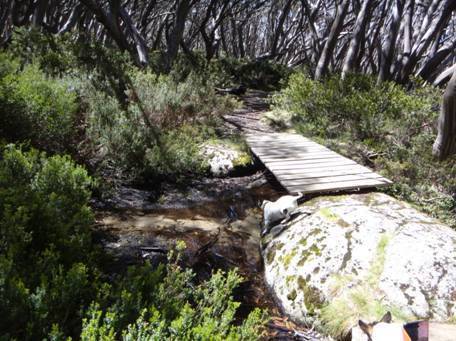

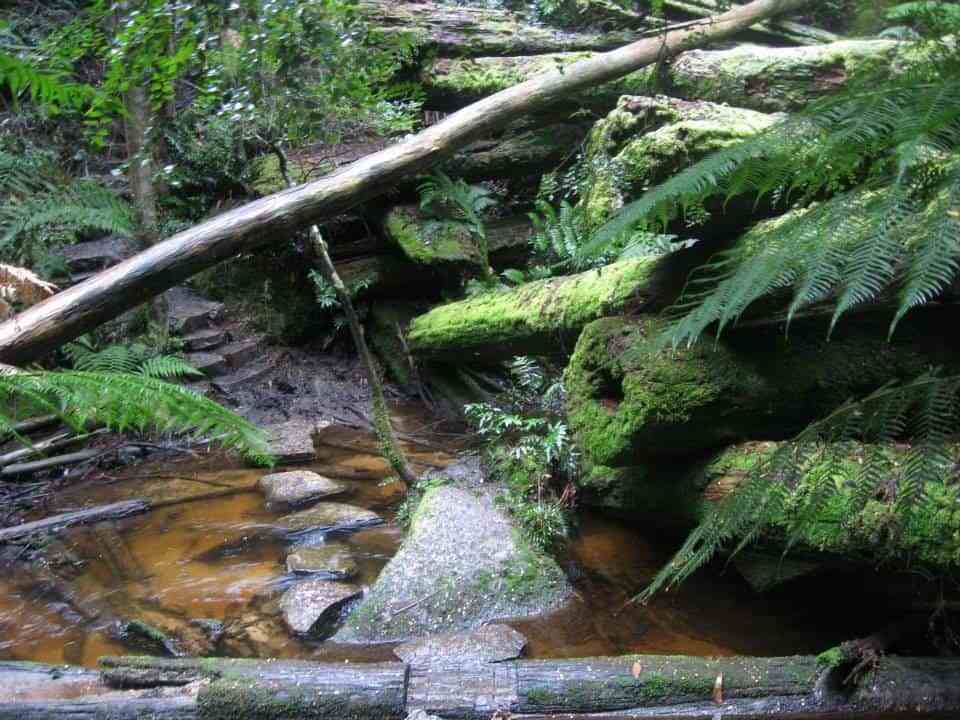
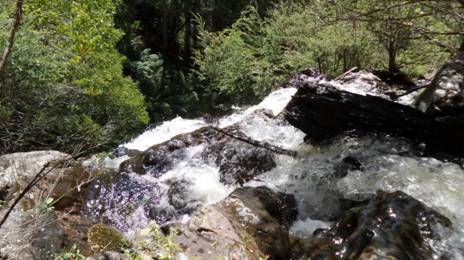
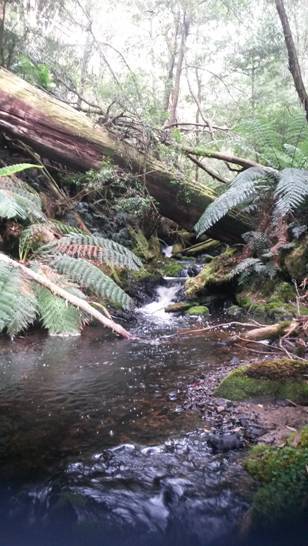
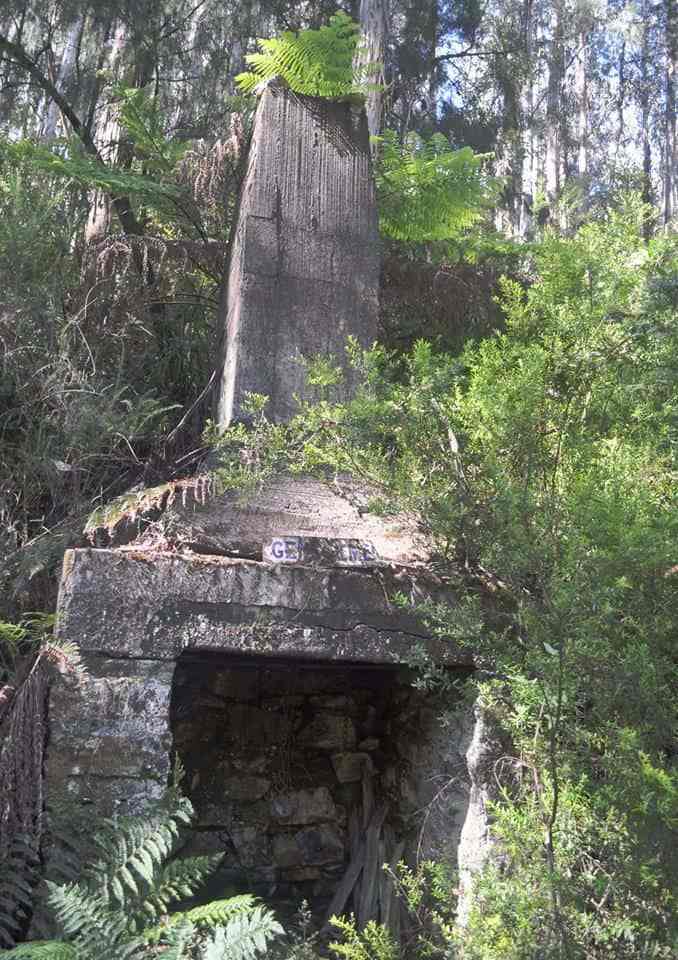
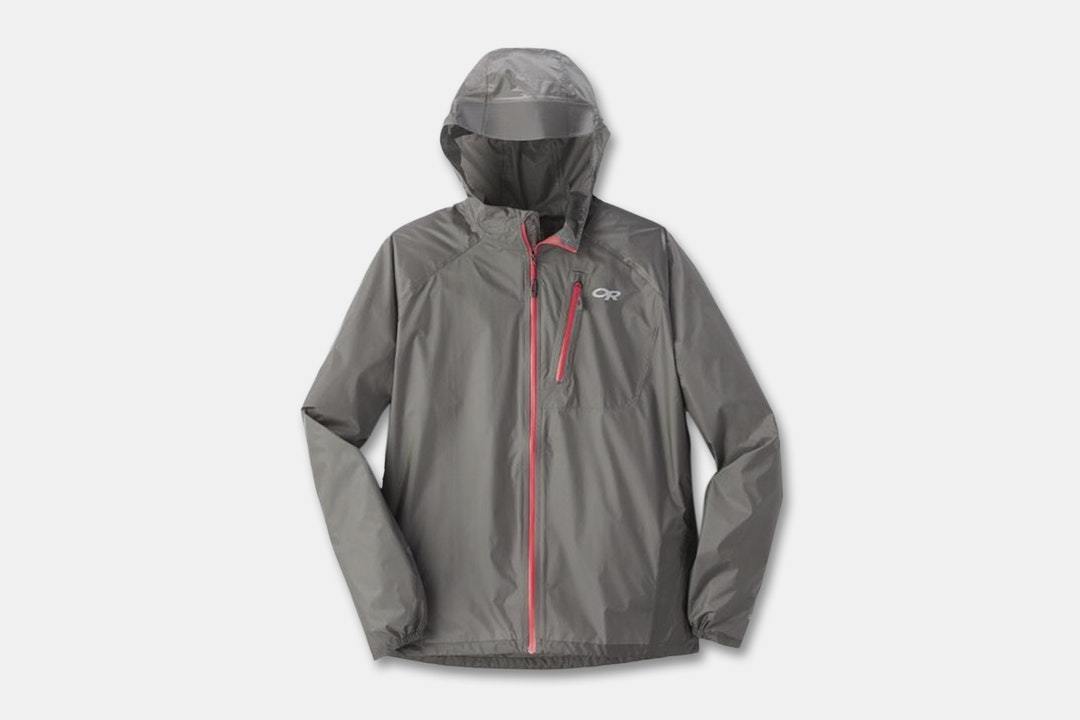


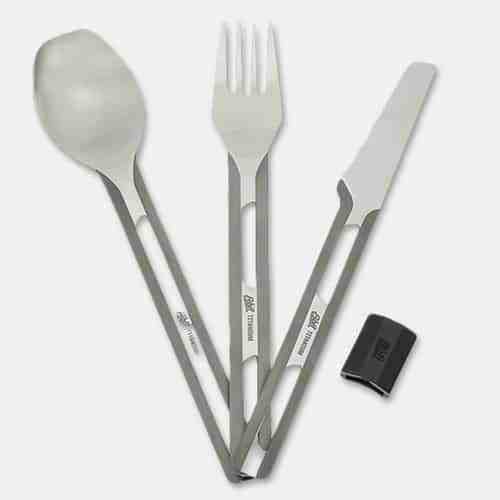


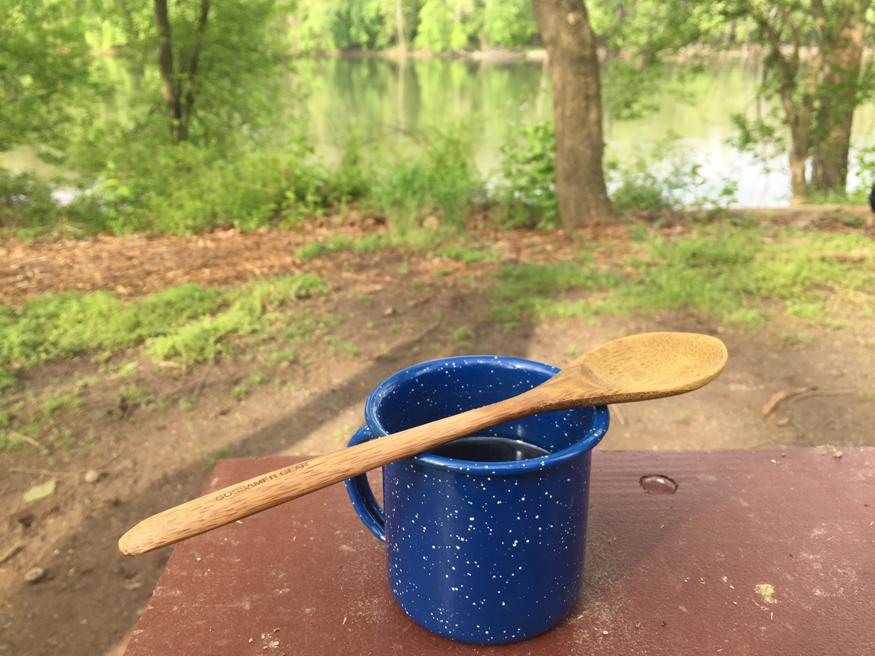


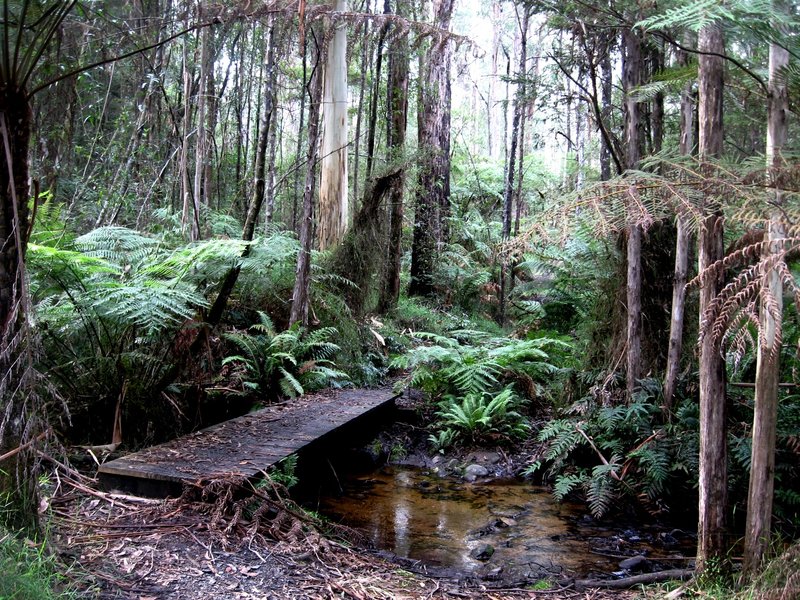
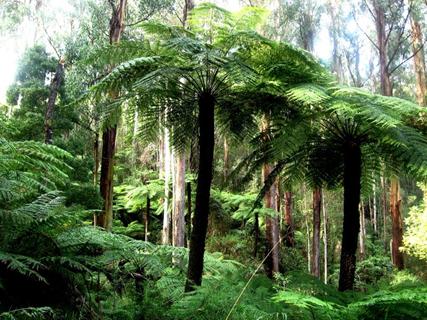
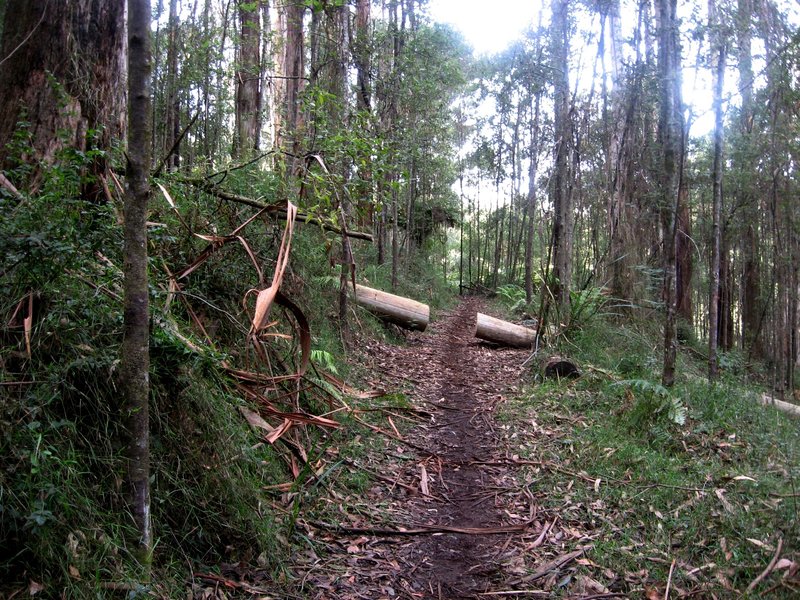
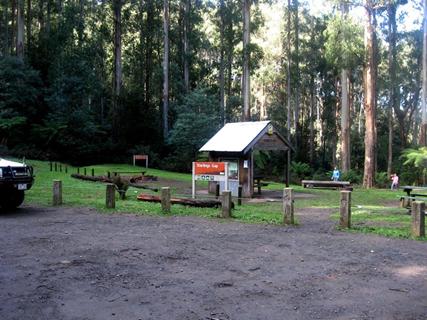

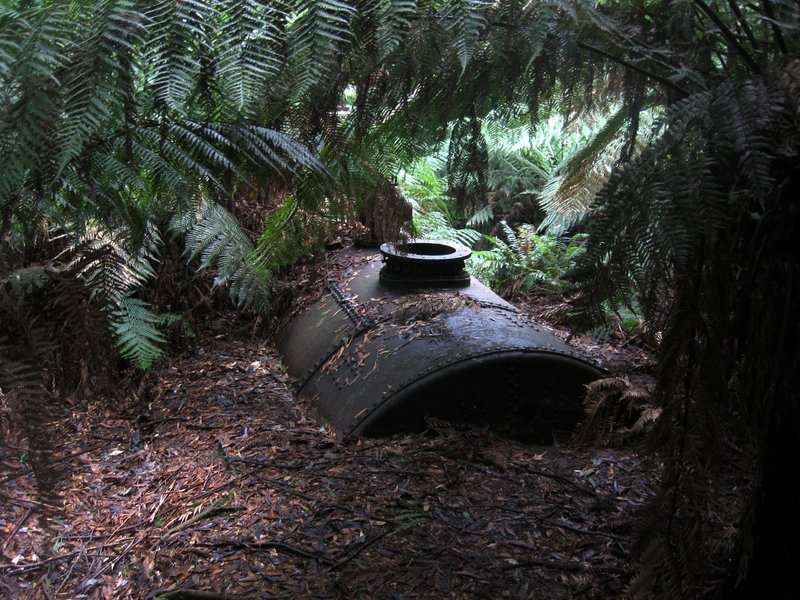
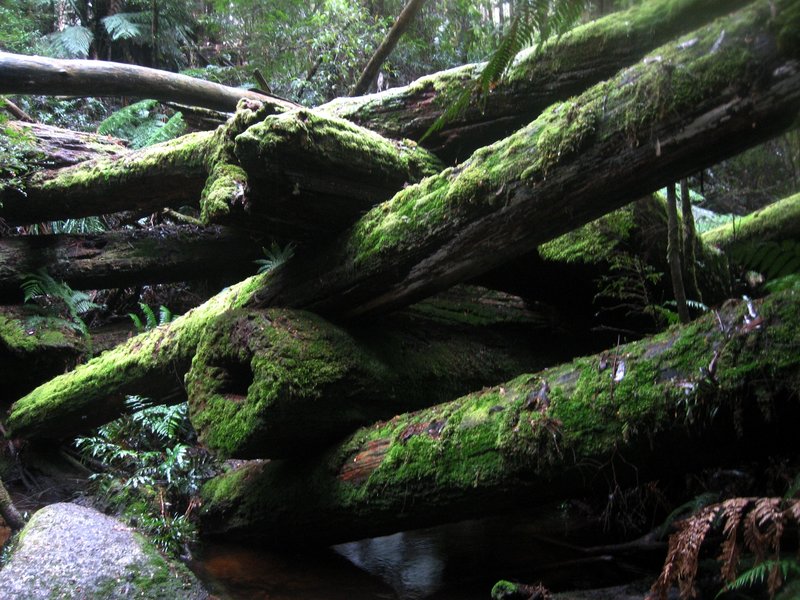
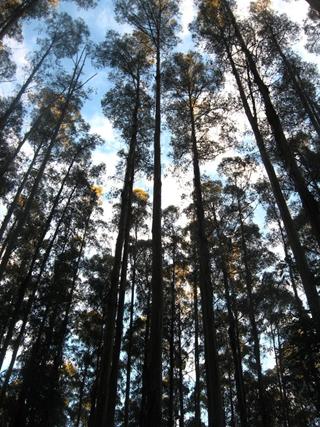
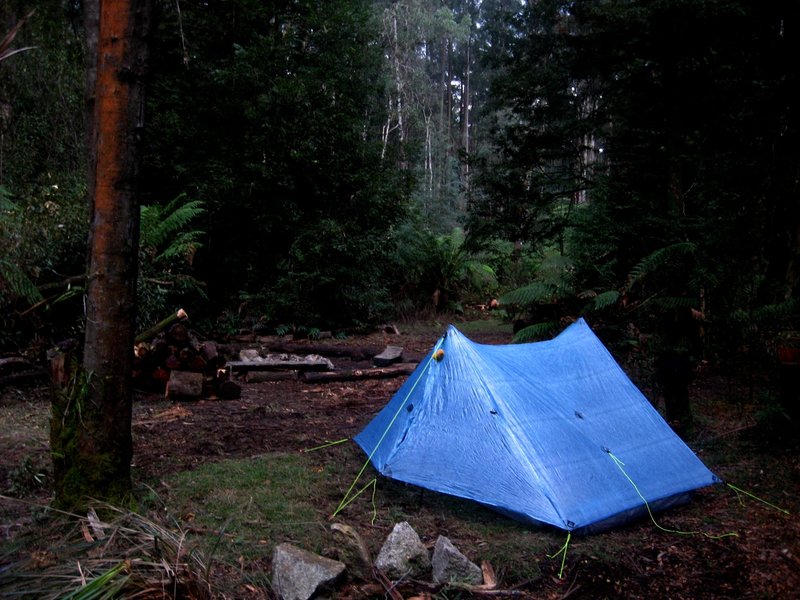
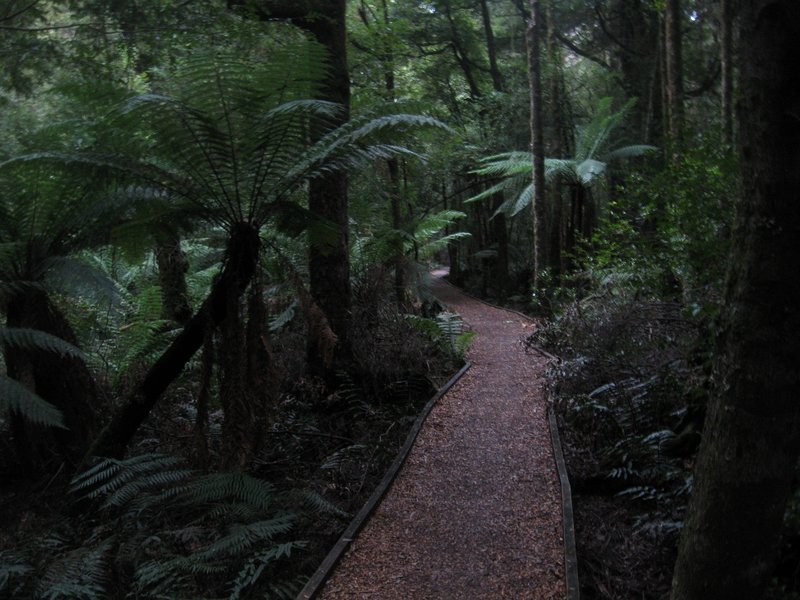

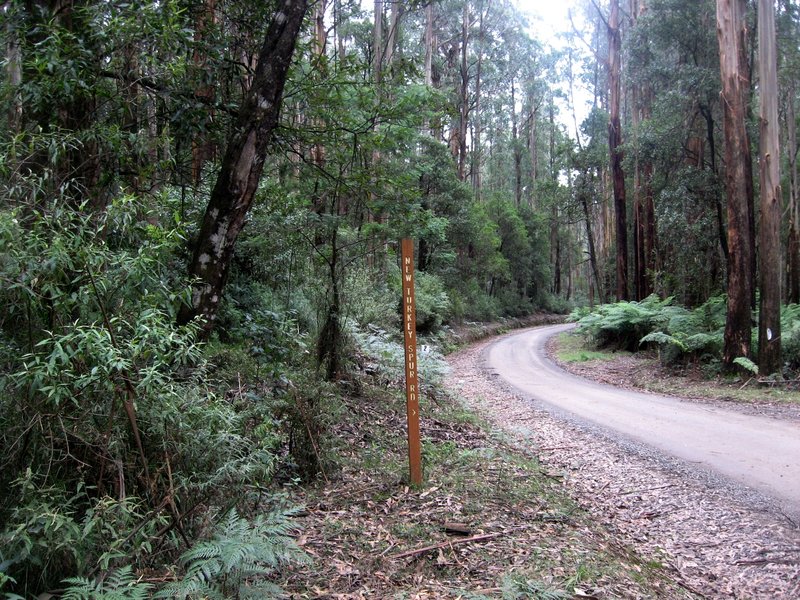
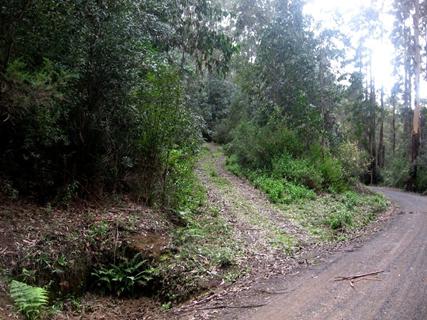
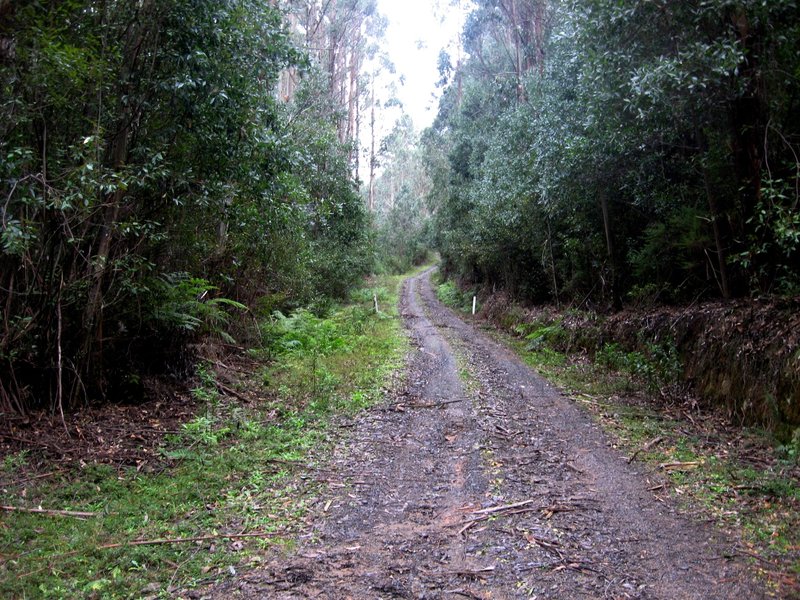
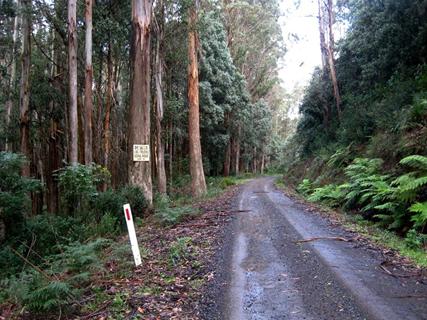
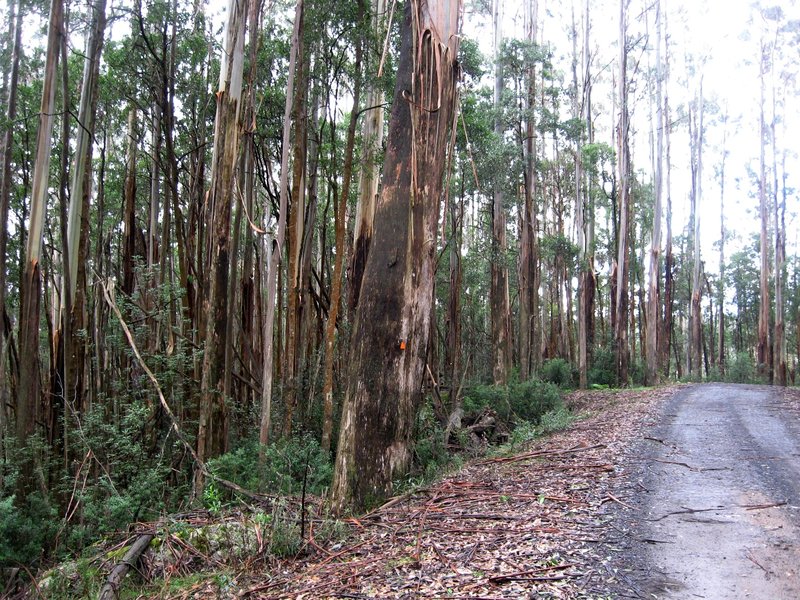
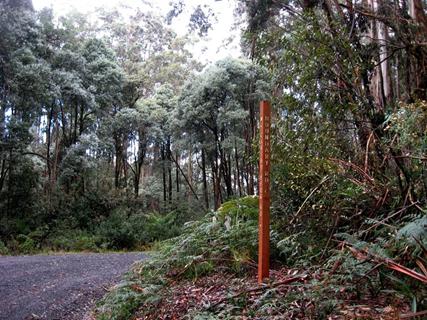
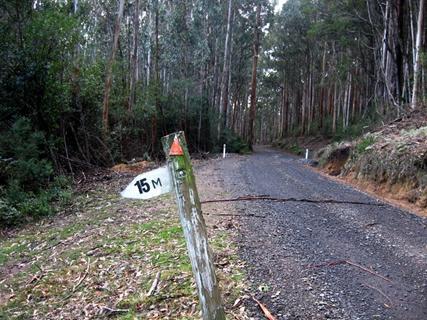
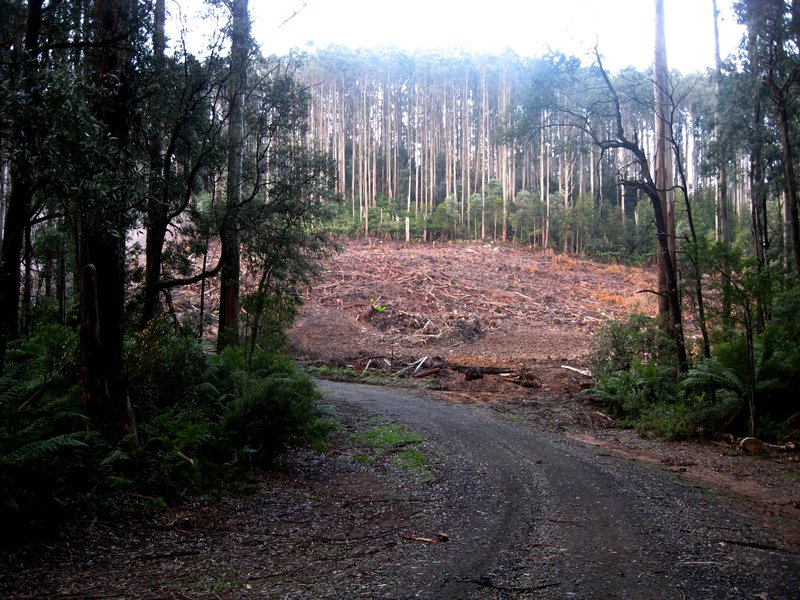
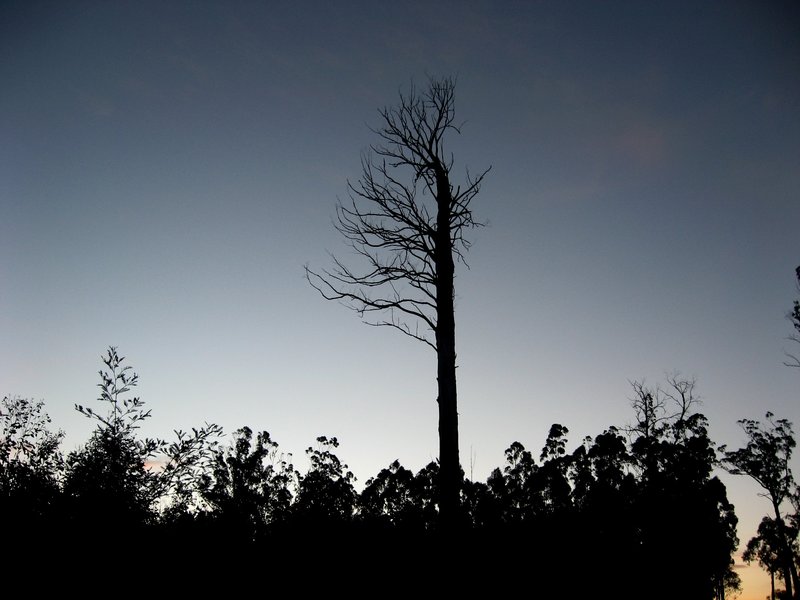
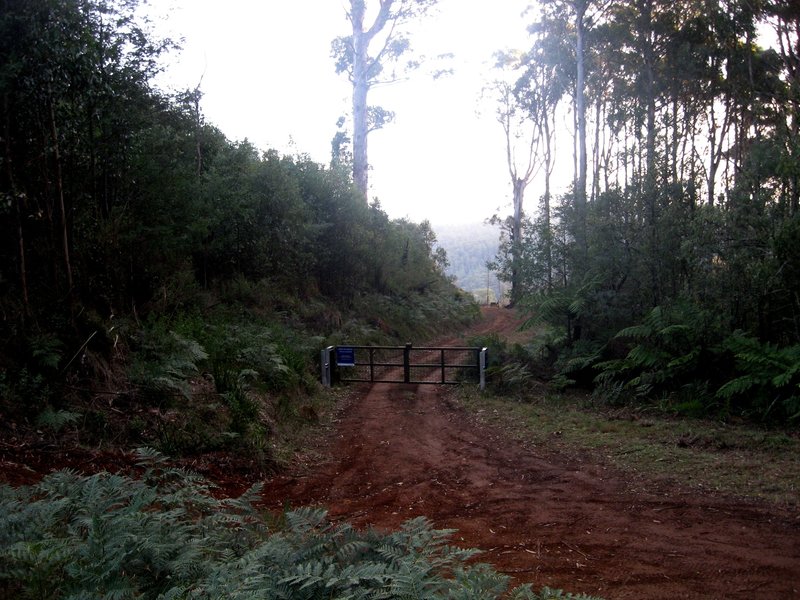
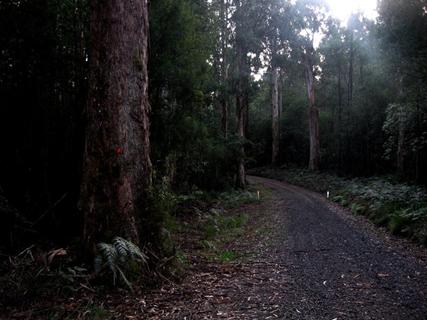
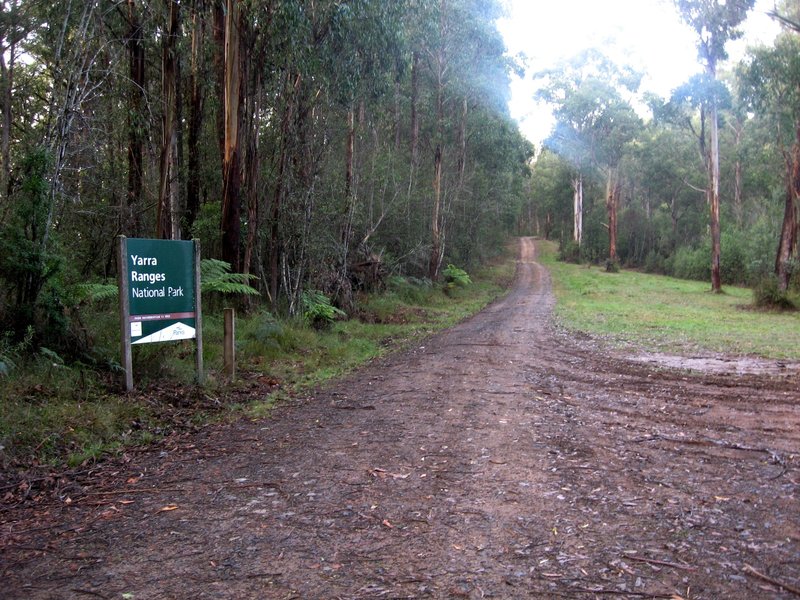
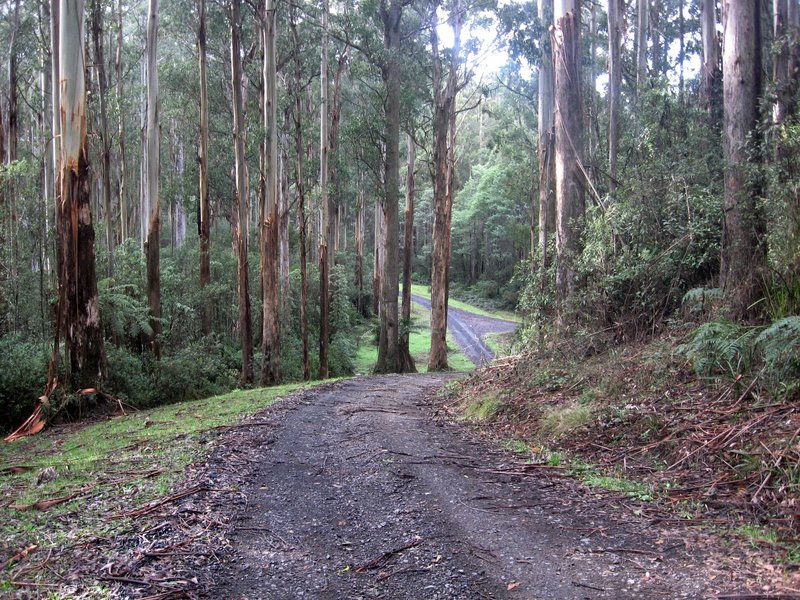
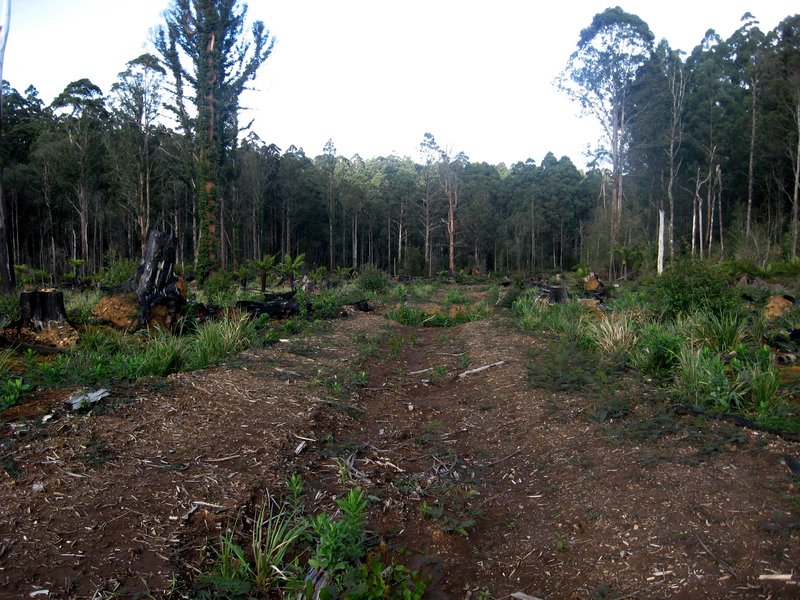
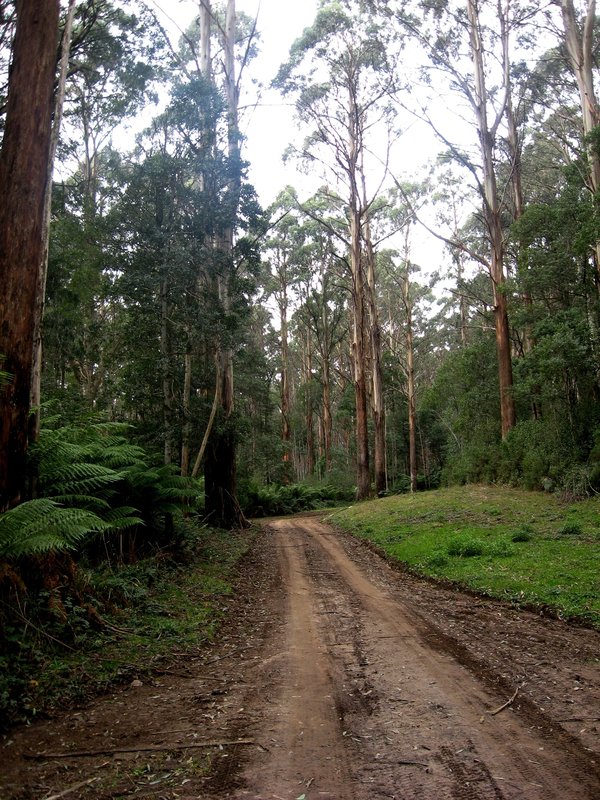
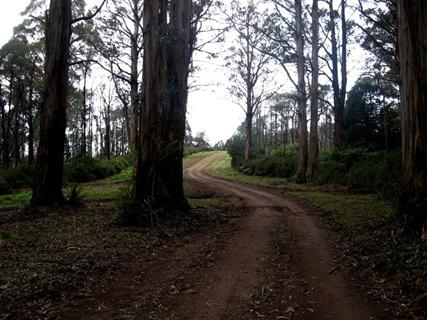

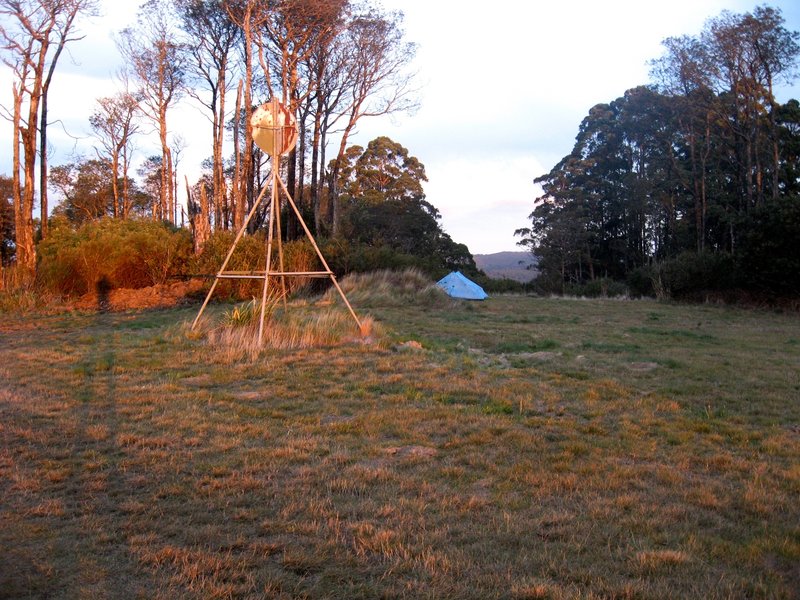

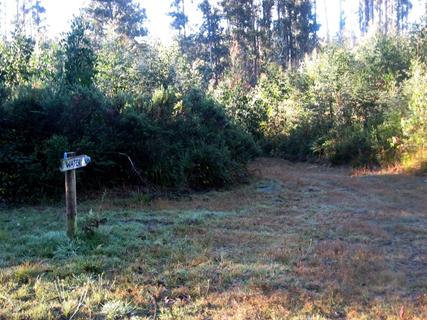
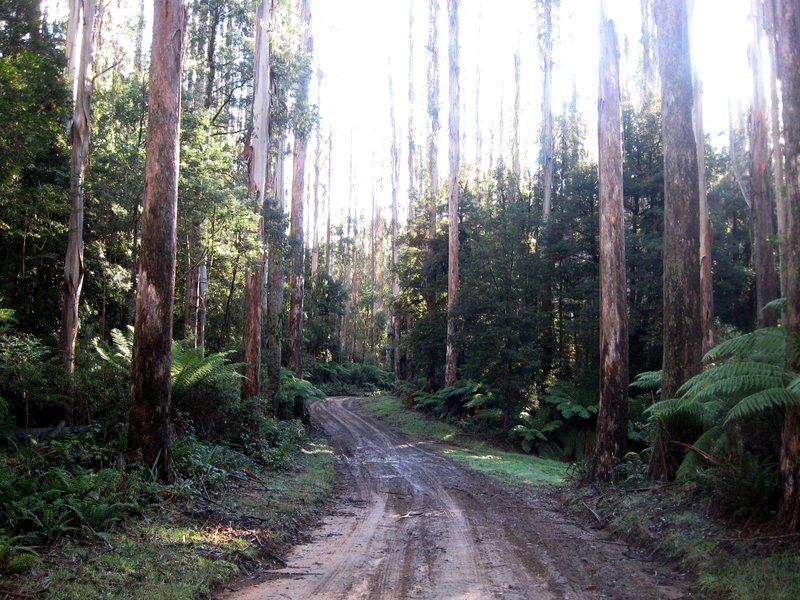
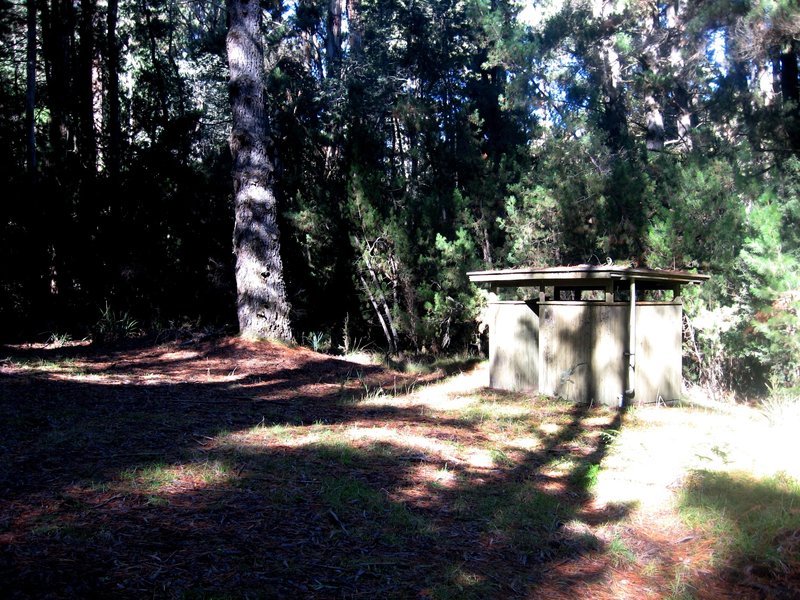
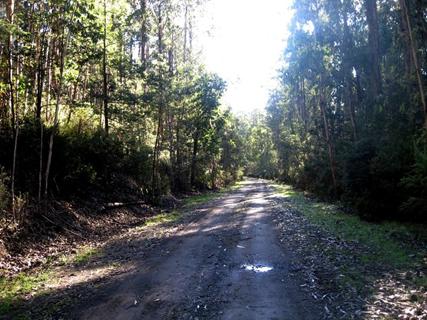
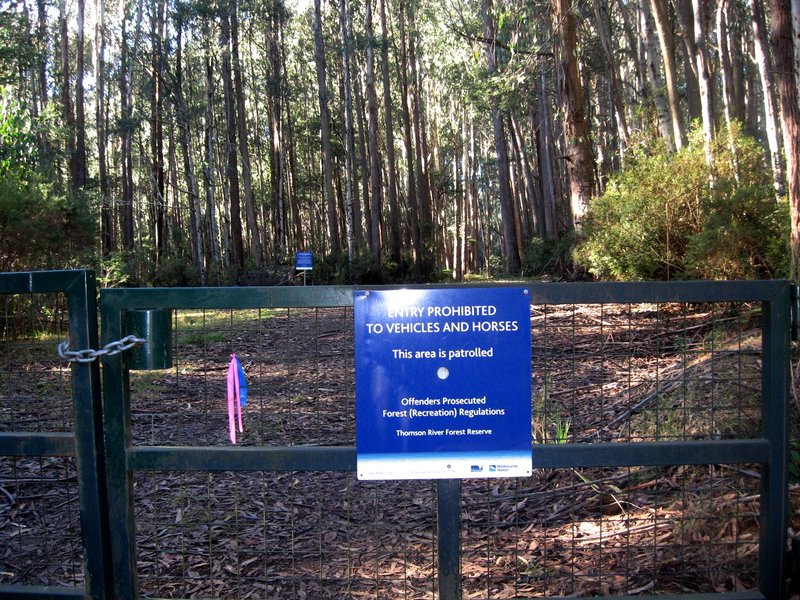
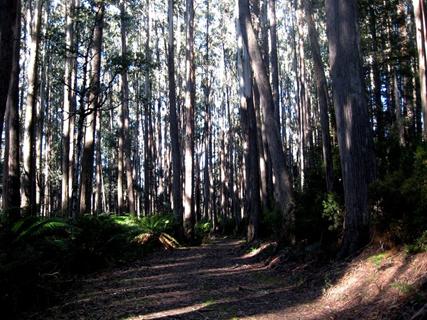
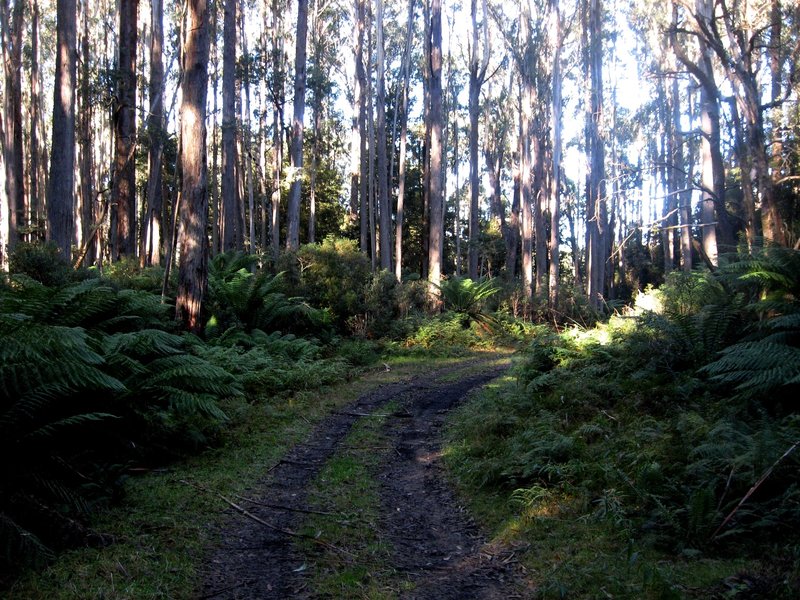
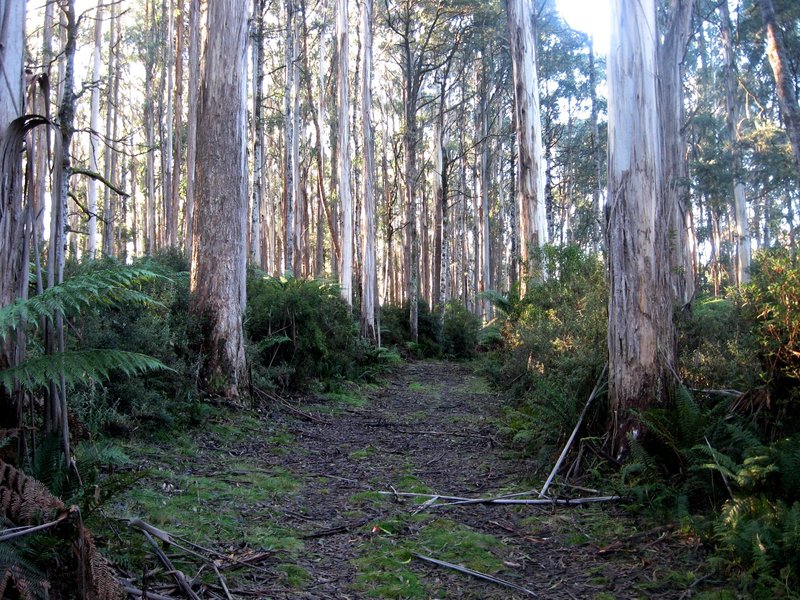
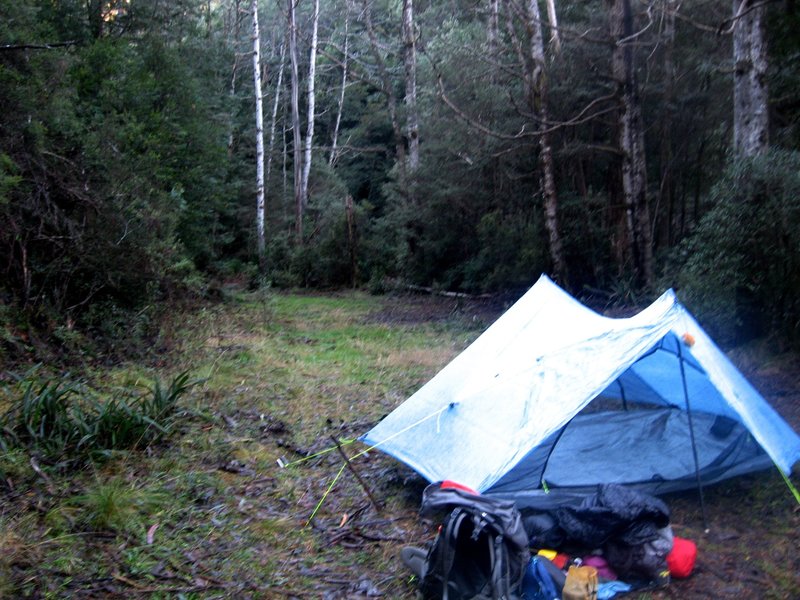
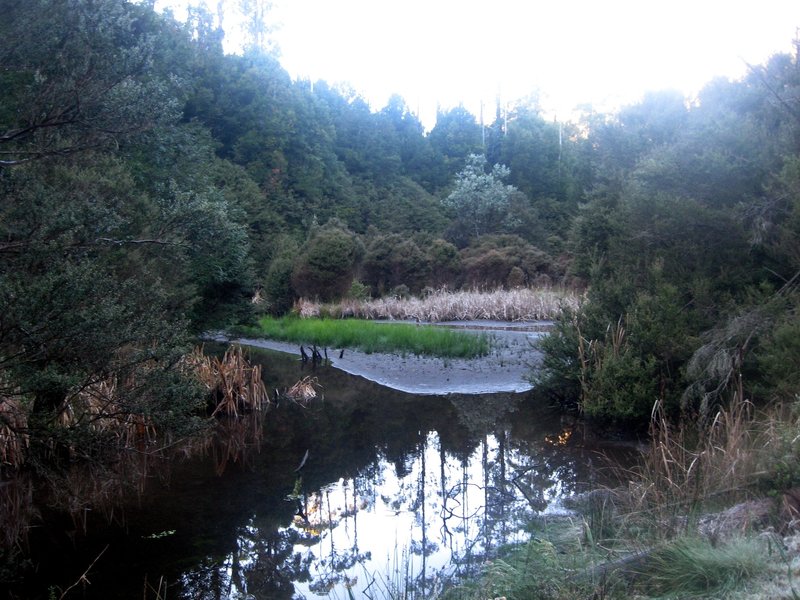
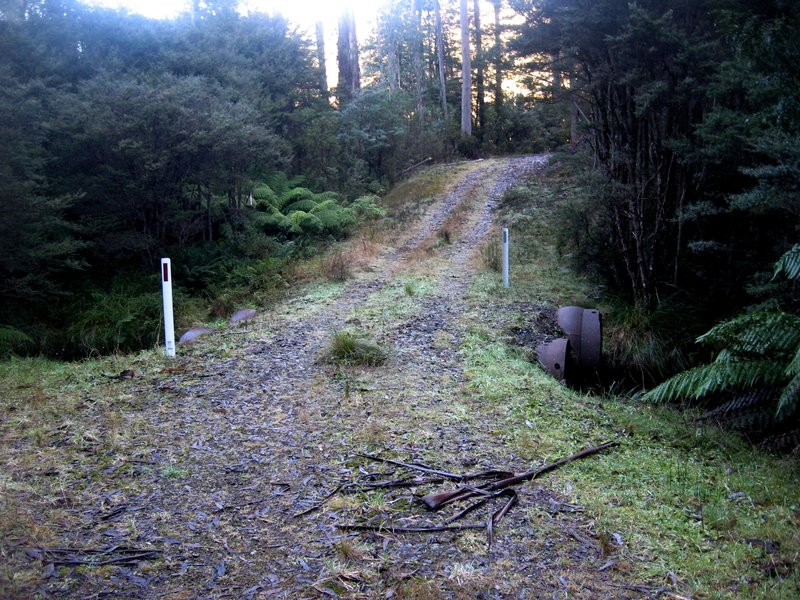
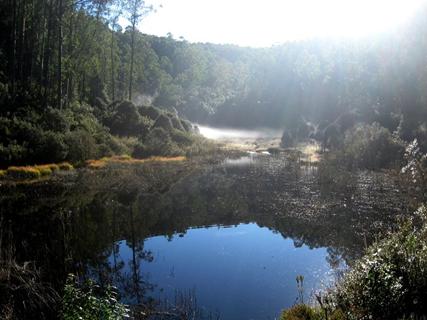
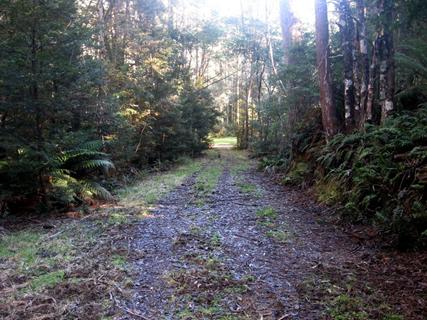
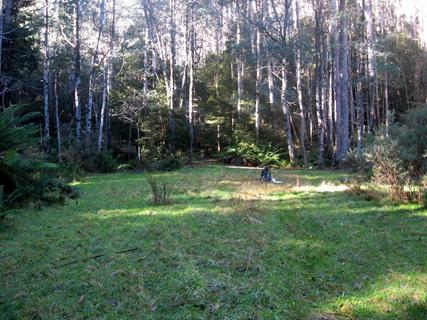
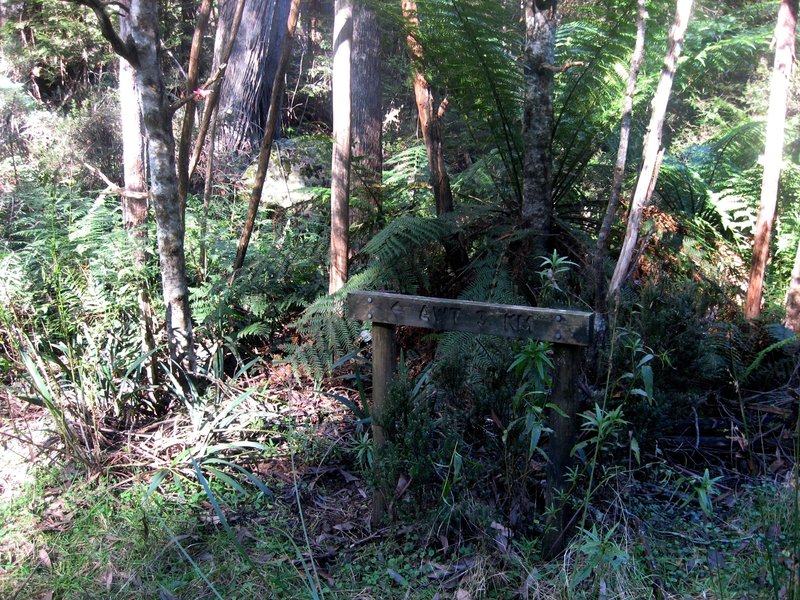

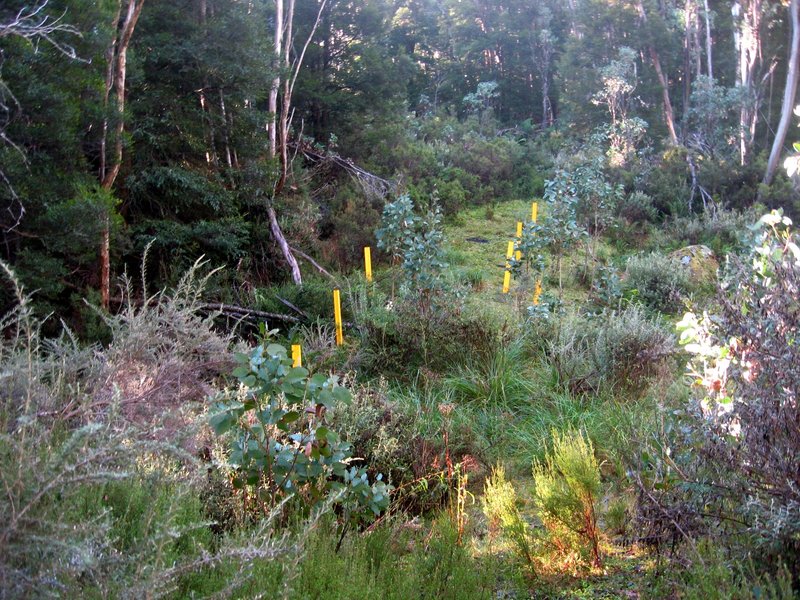
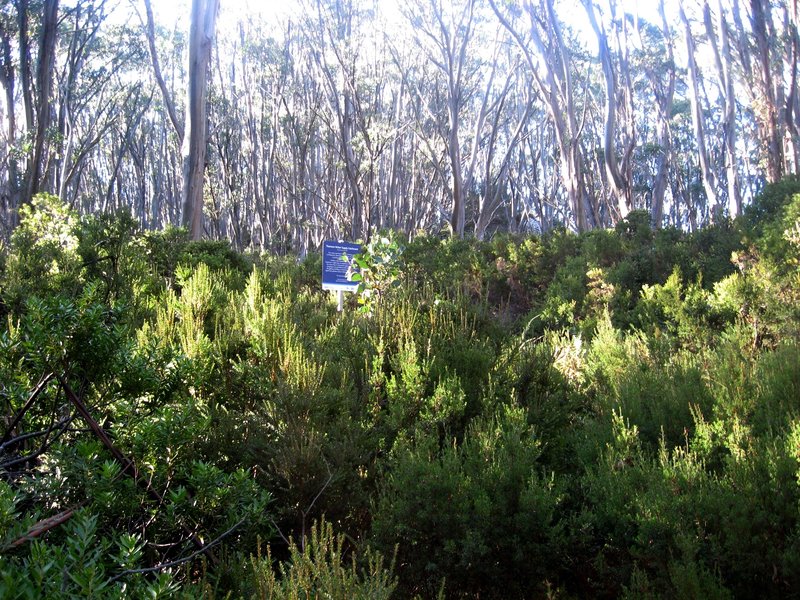
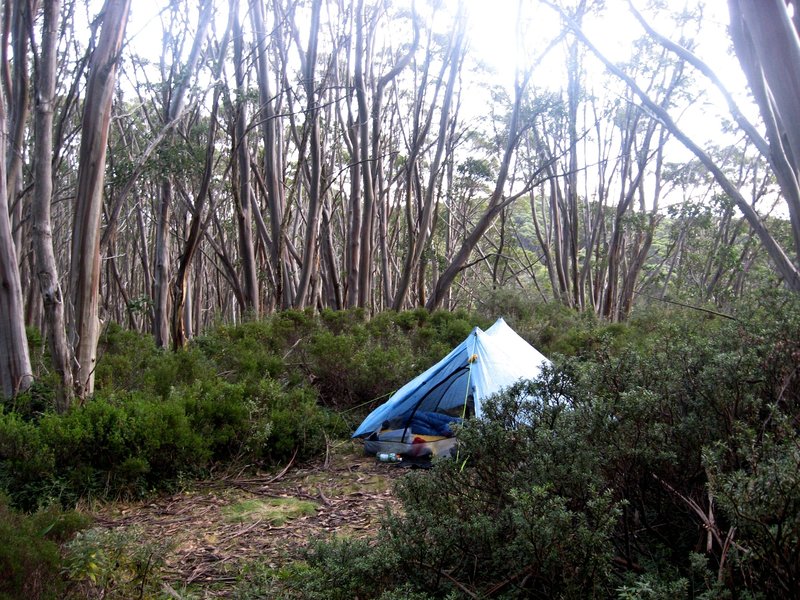
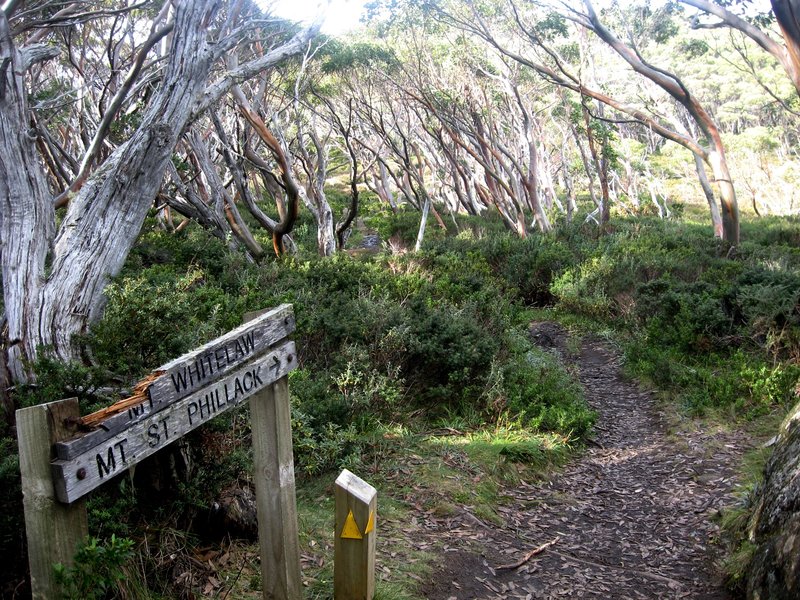
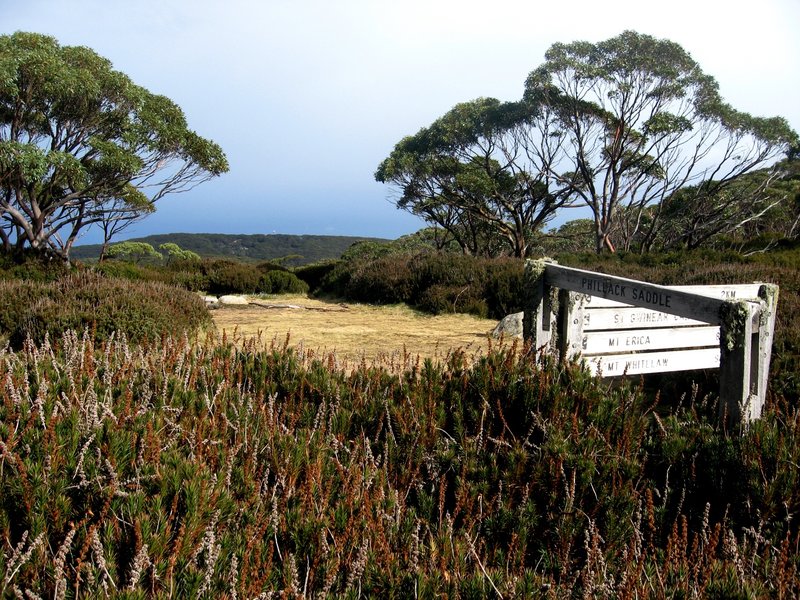
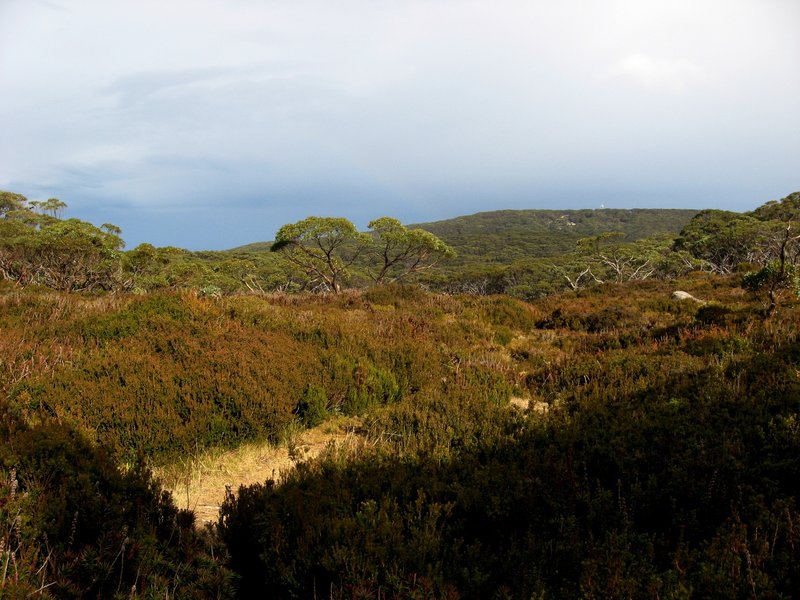


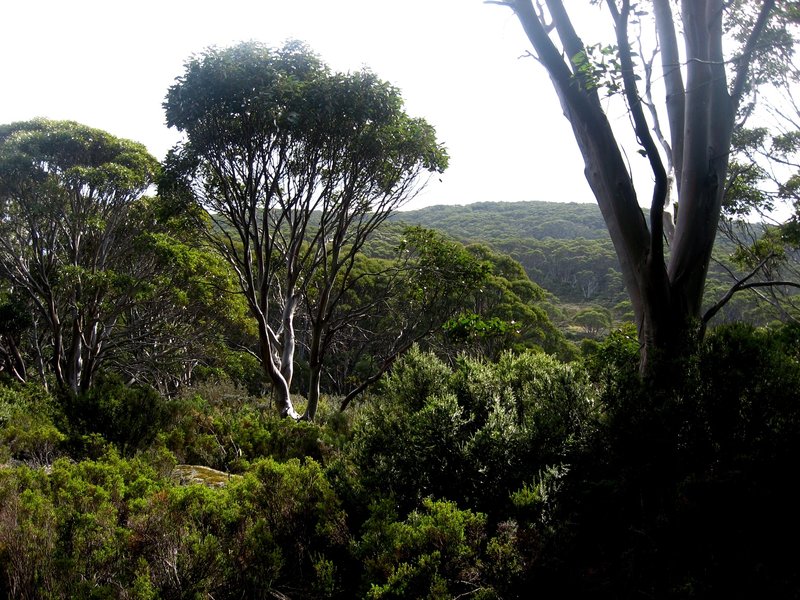
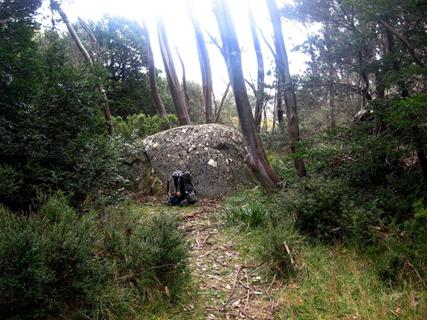
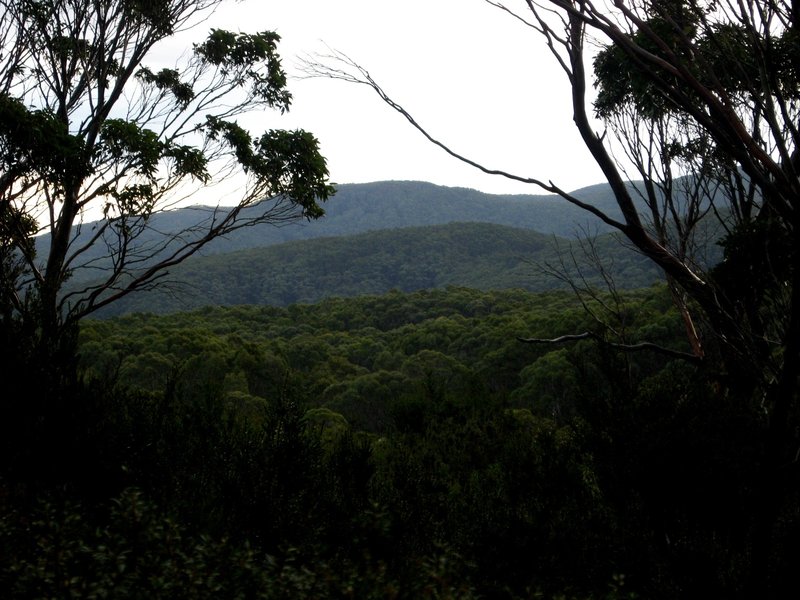
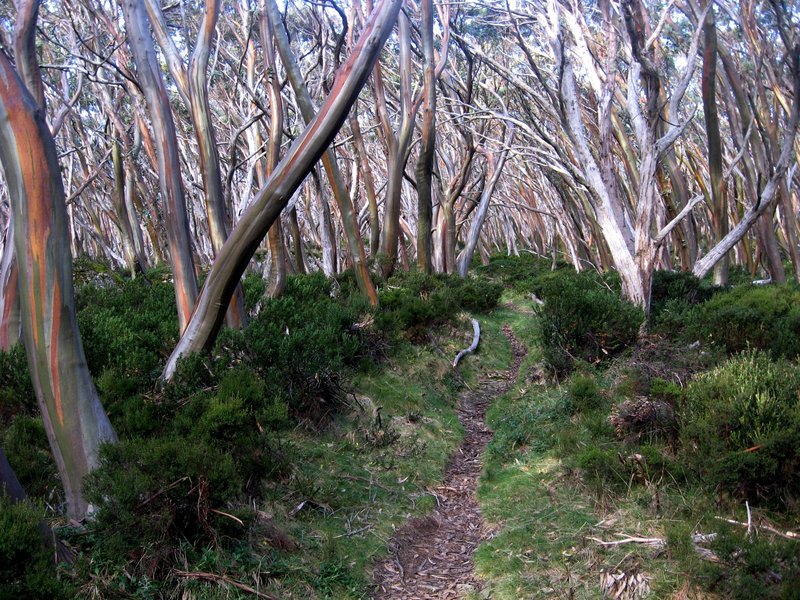
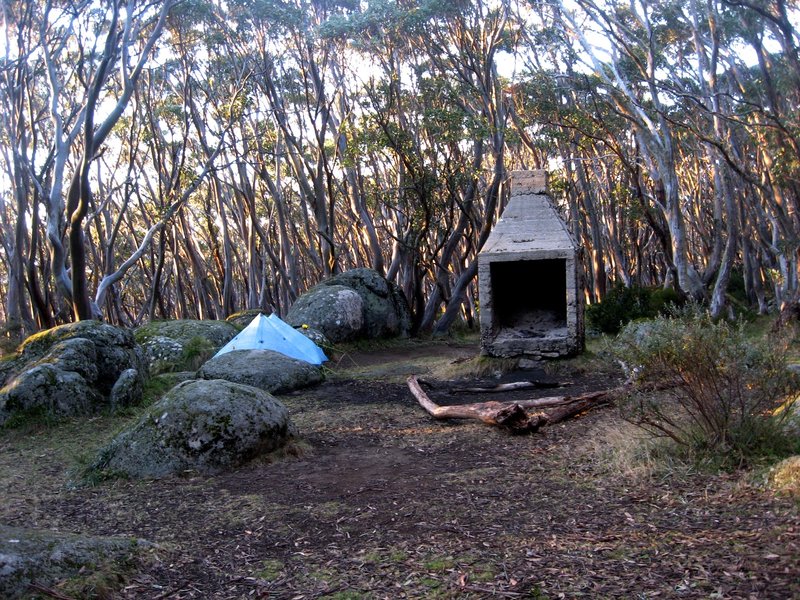
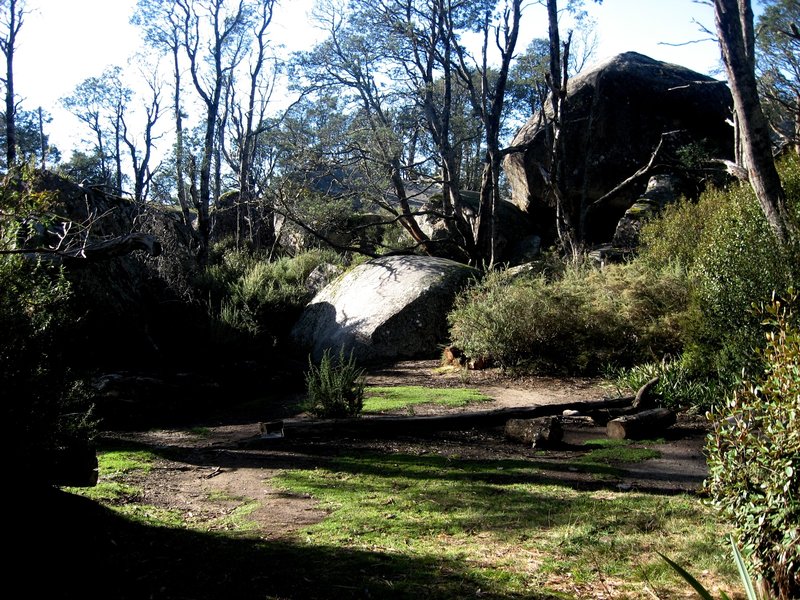
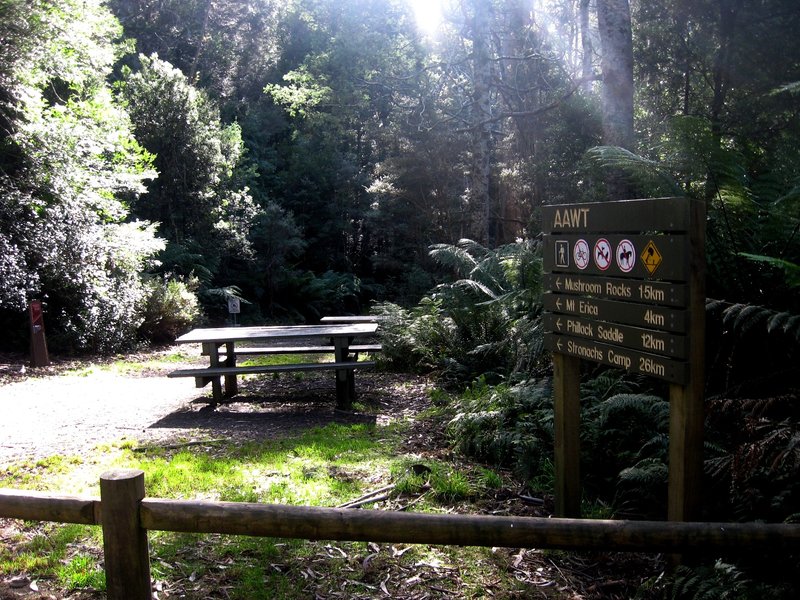
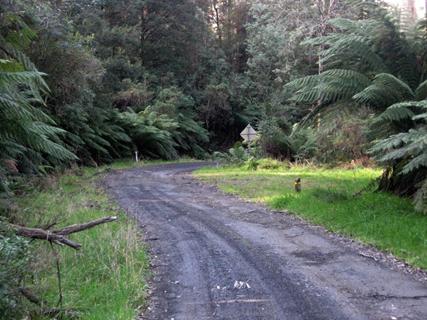
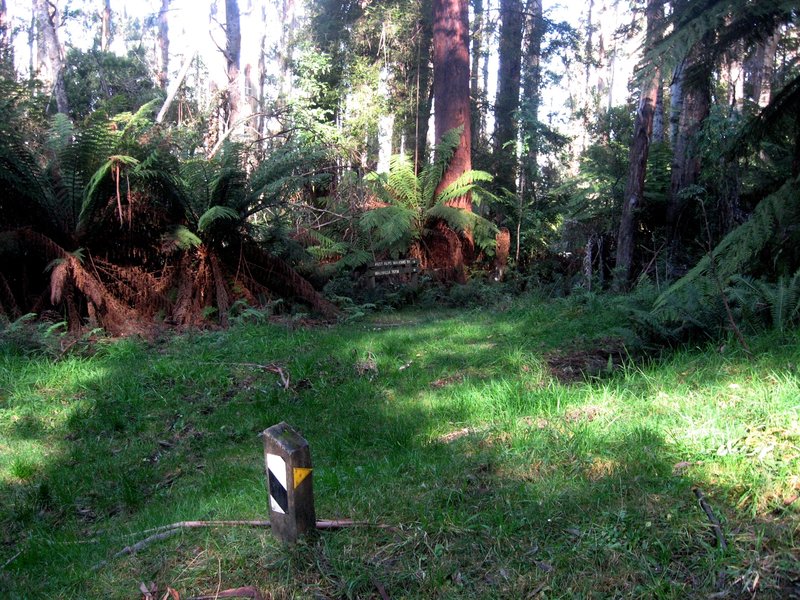
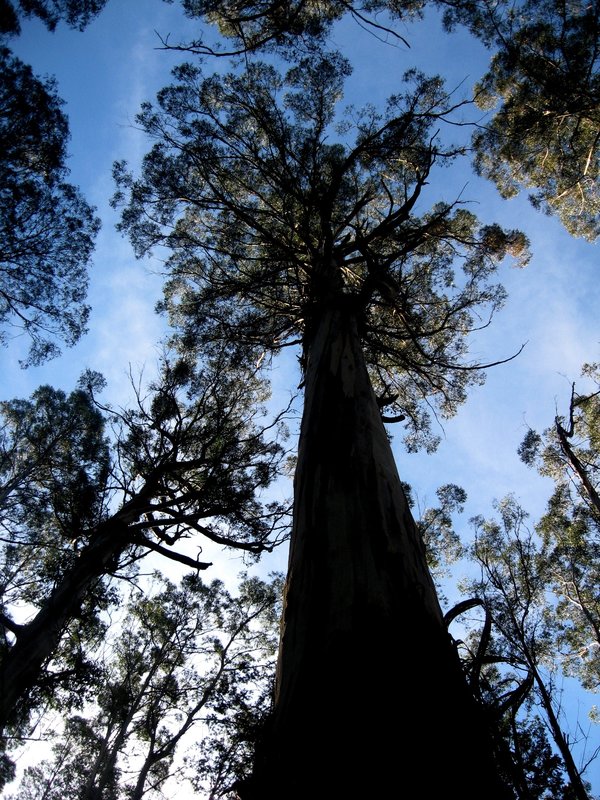
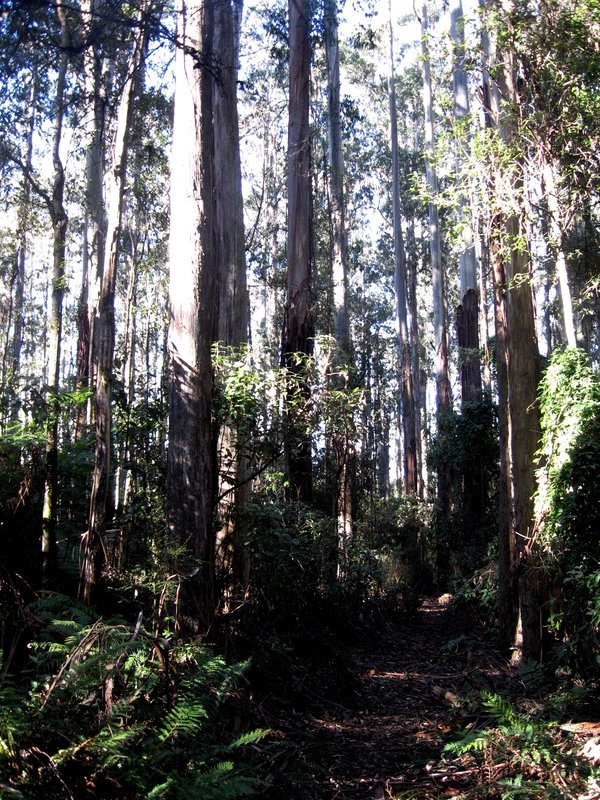
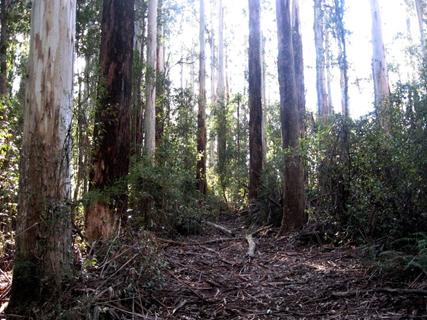
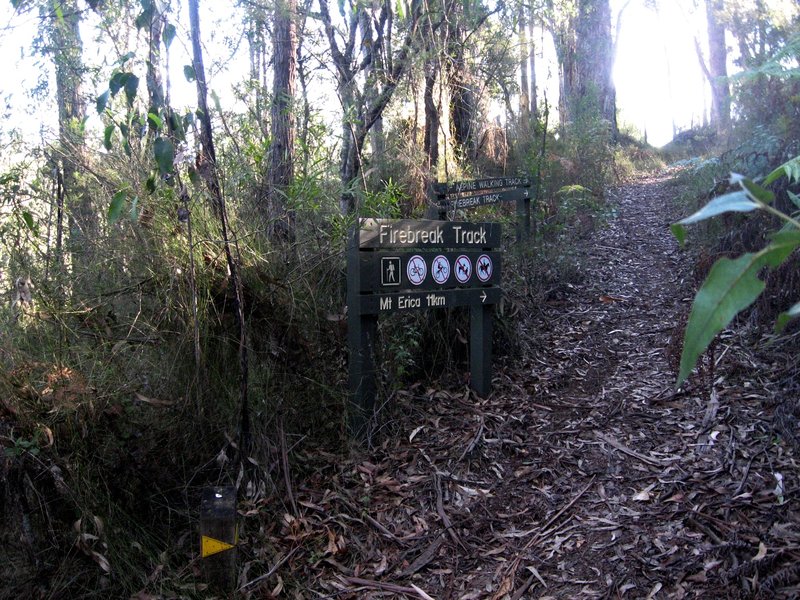
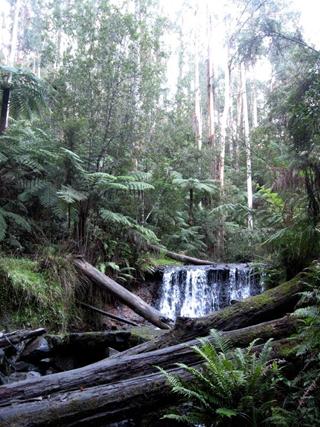
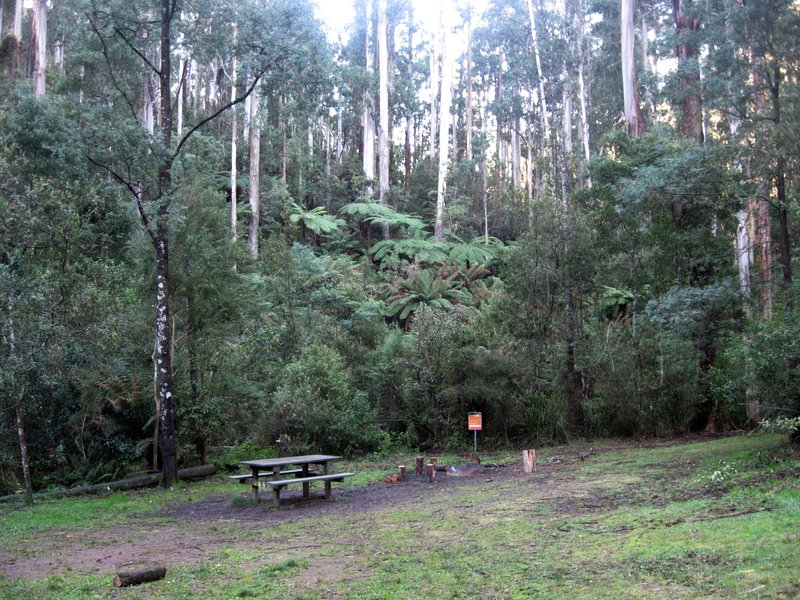
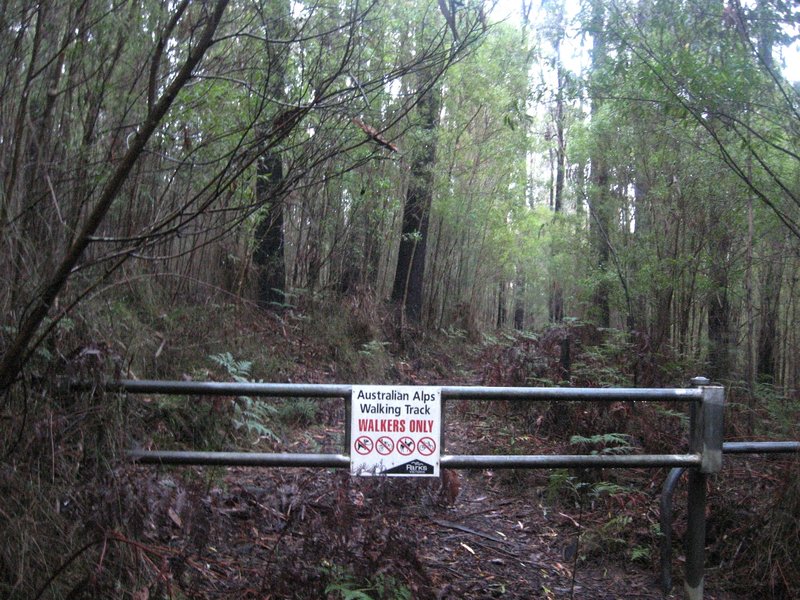
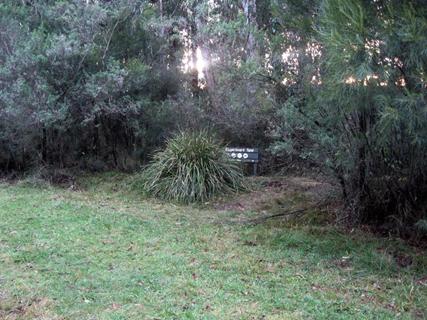

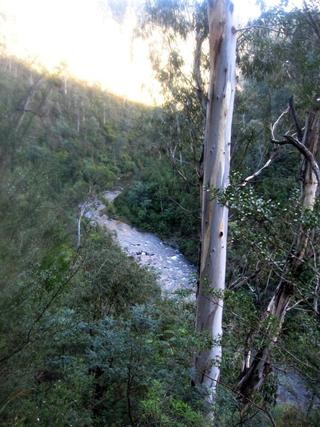
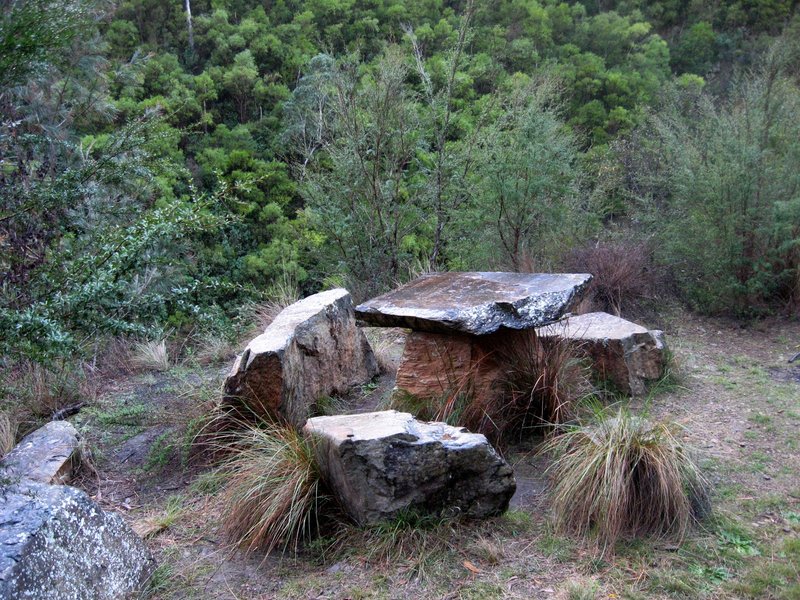

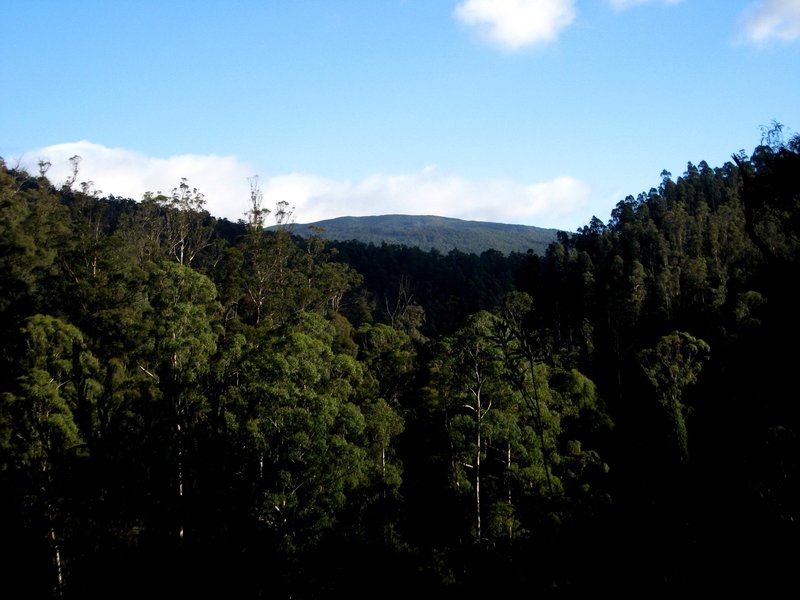
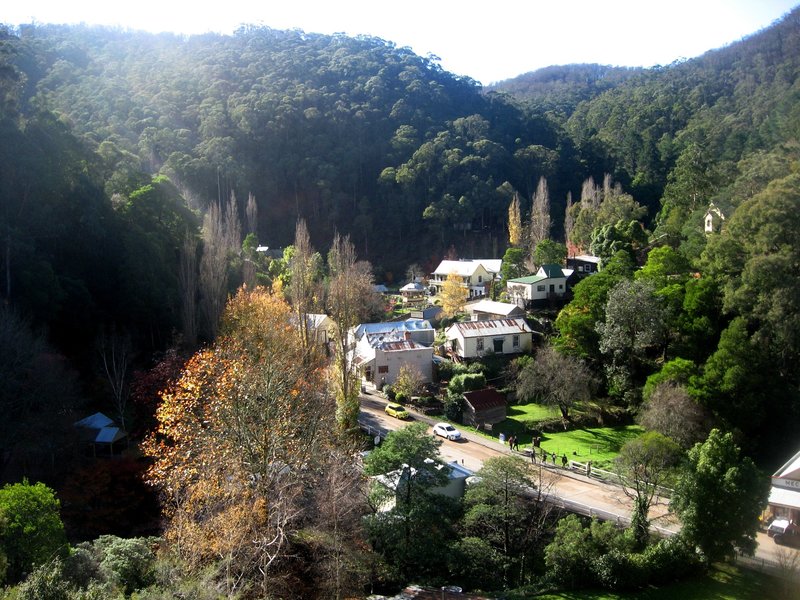

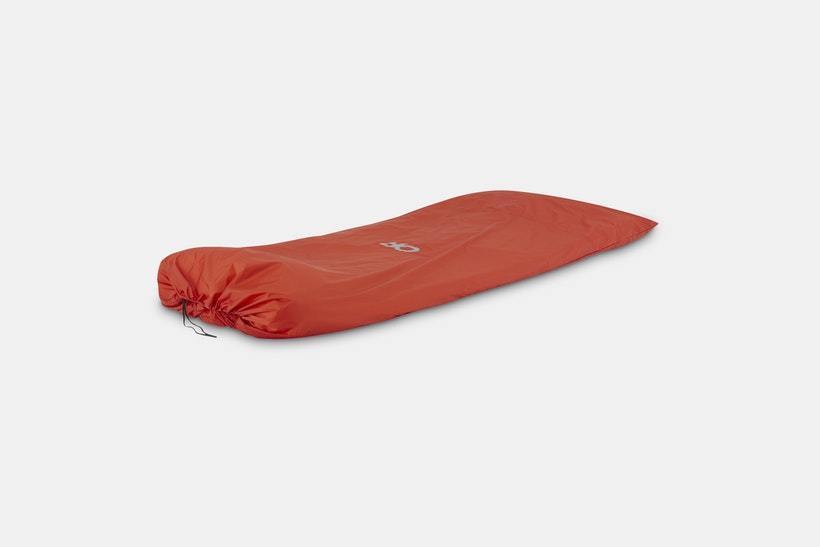 Helium
Emergency Bivy
Helium
Emergency Bivy  Helium
(Standard) Bivy
Helium
(Standard) Bivy 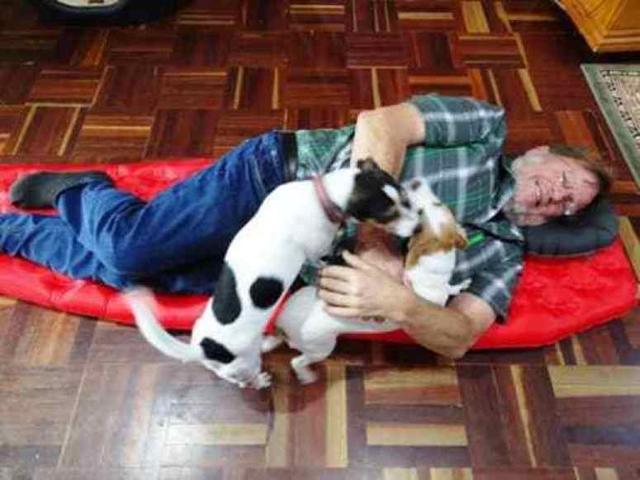


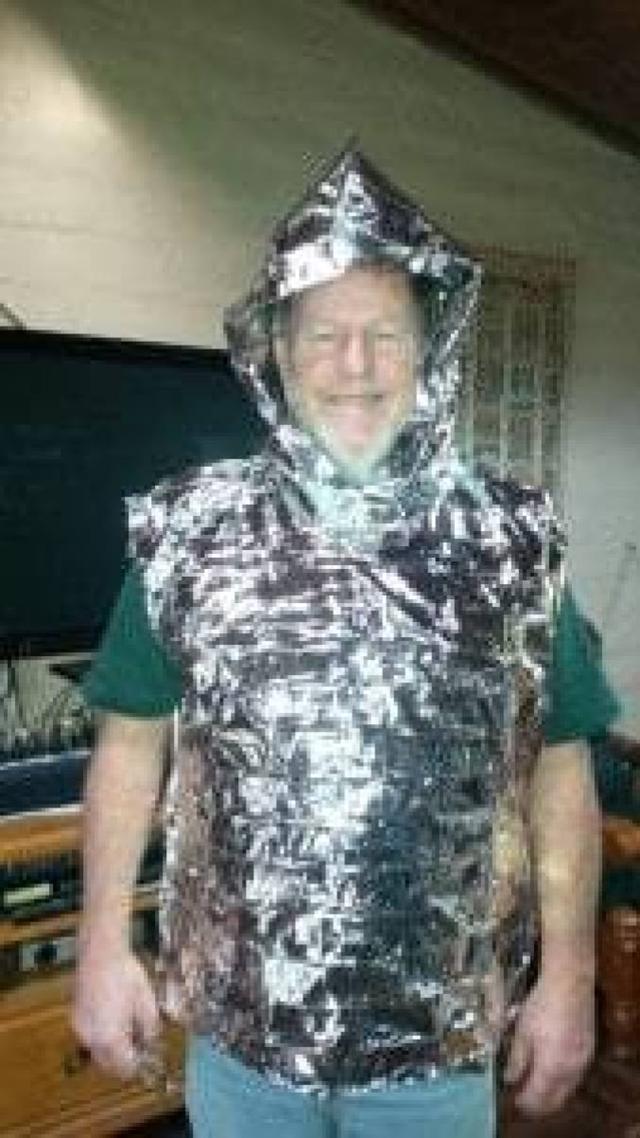


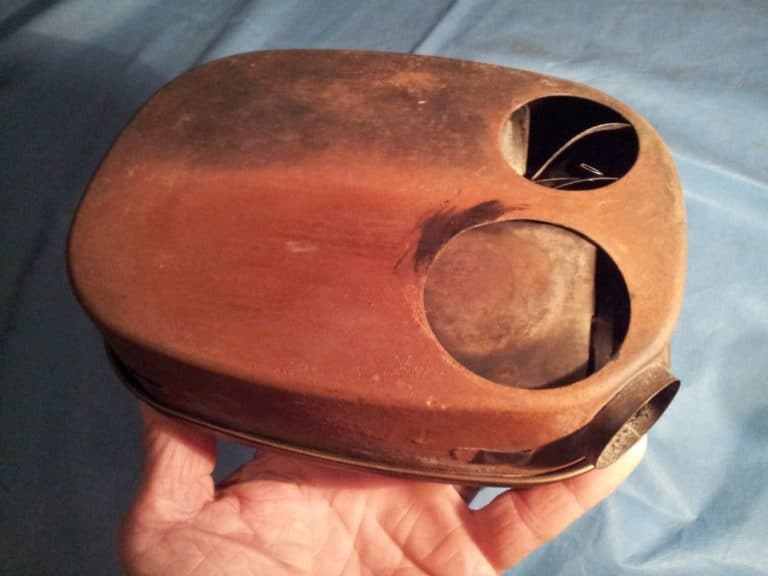 Tim
Tinker tent Stove – actual size
Tim
Tinker tent Stove – actual size 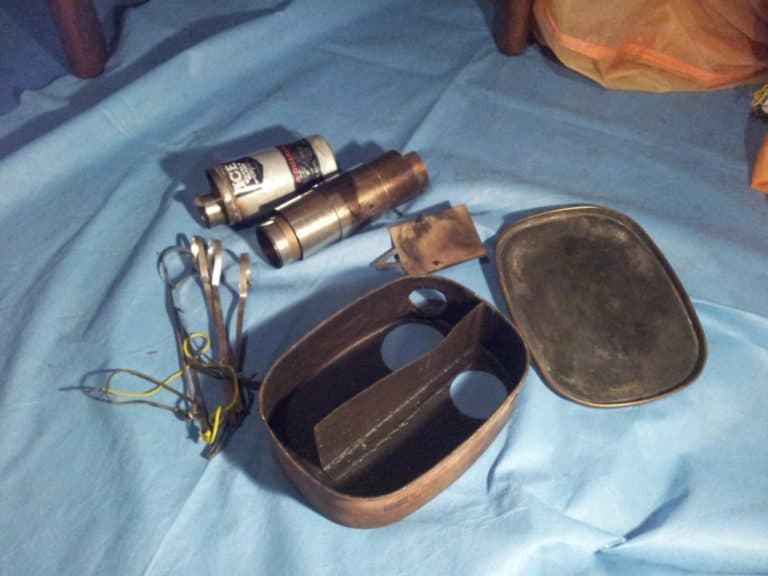 Tim
Tinker Stove Contents – inc chimney!
Tim
Tinker Stove Contents – inc chimney! 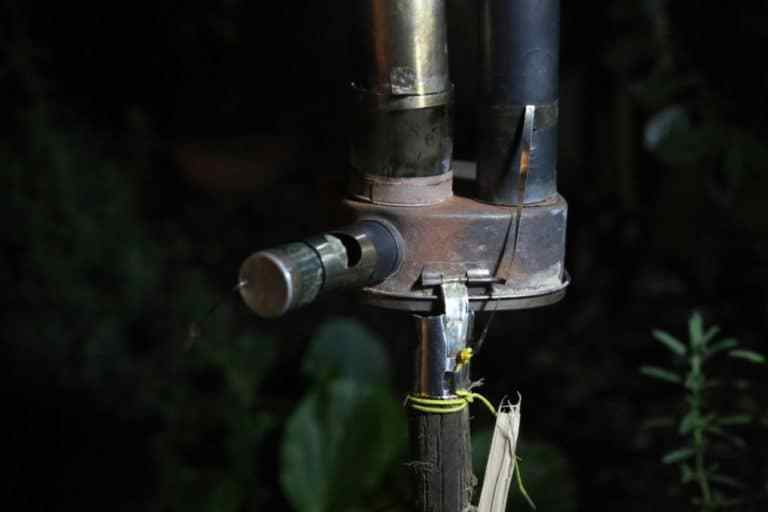 Tim
Tinker Stove Air Control – what an ingenious idea for adjusting the air intake!
Tim
Tinker Stove Air Control – what an ingenious idea for adjusting the air intake!
 Tim
Tinker Stove – glass ‘window’ in chimney base gives light as well as heat!
Tim
Tinker Stove – glass ‘window’ in chimney base gives light as well as heat! 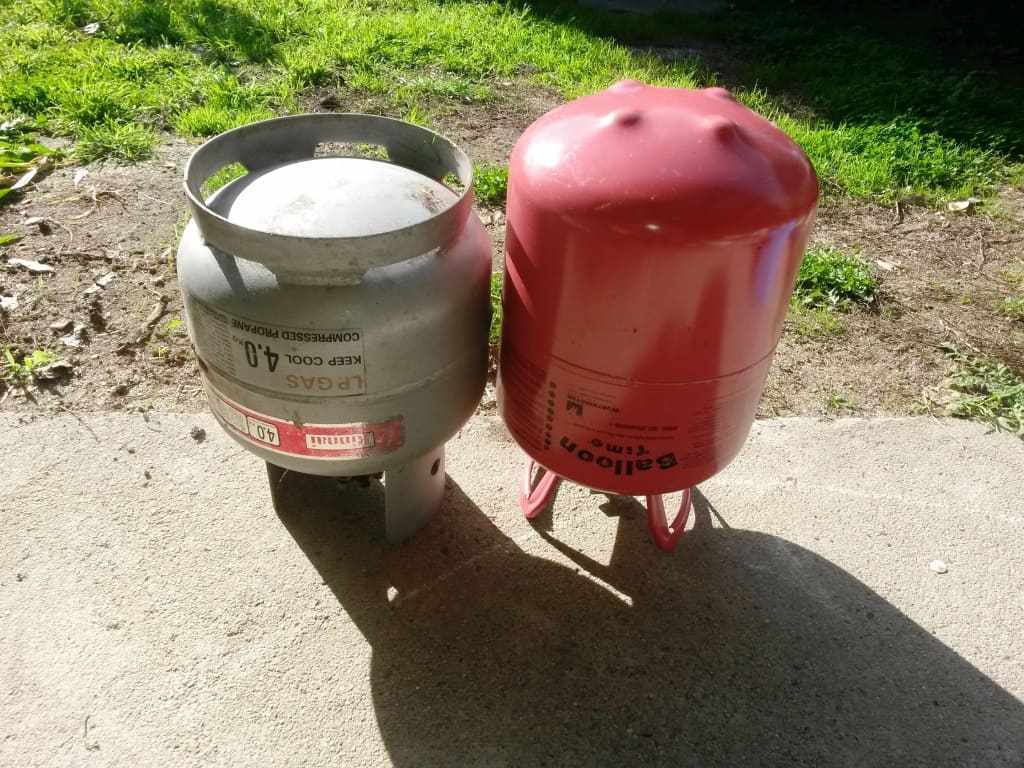


 hellos
sunny waterproof shoe cover
hellos
sunny waterproof shoe cover New
Surface Meniscus Implant
New
Surface Meniscus Implant 

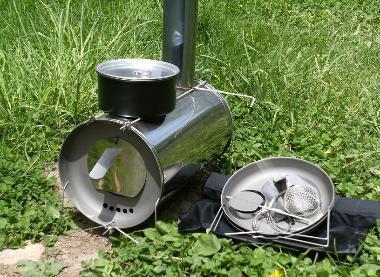
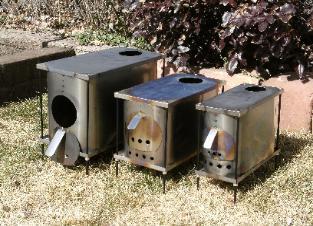

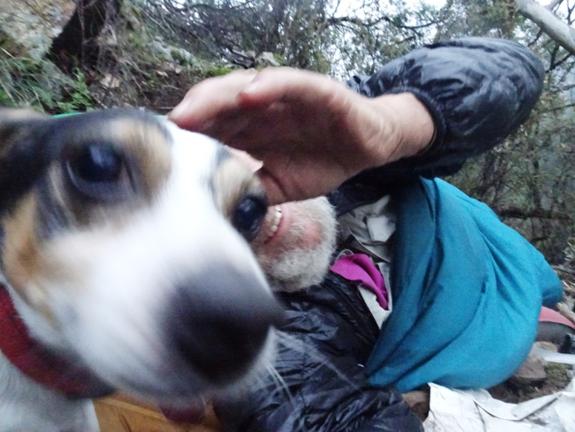
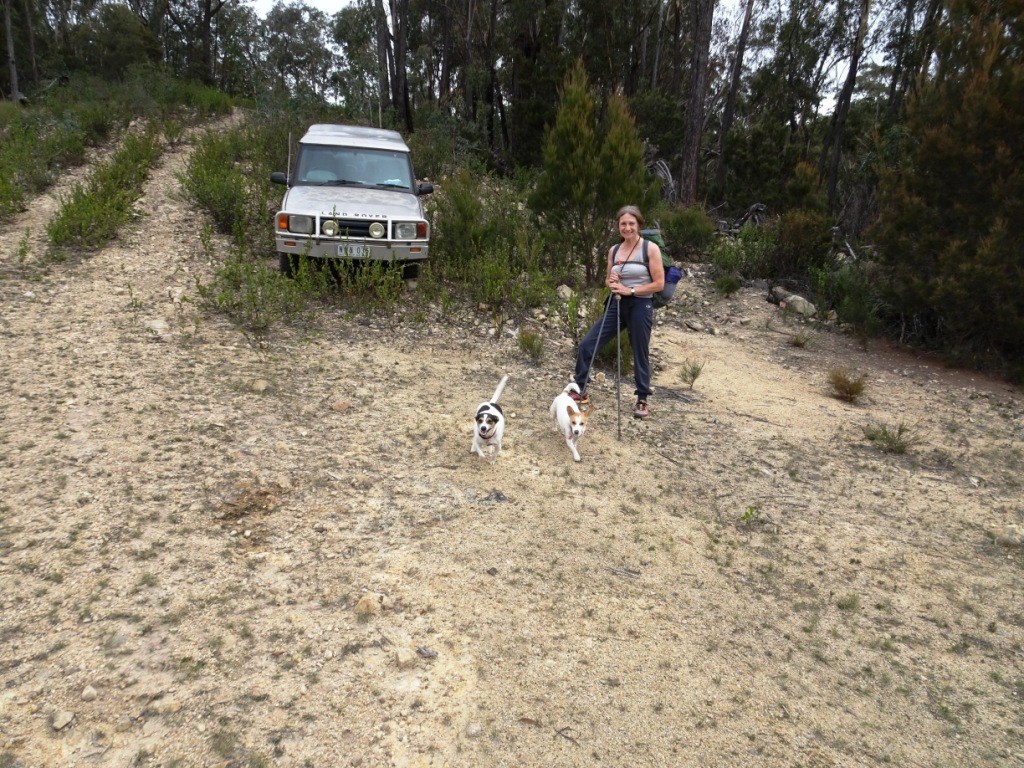


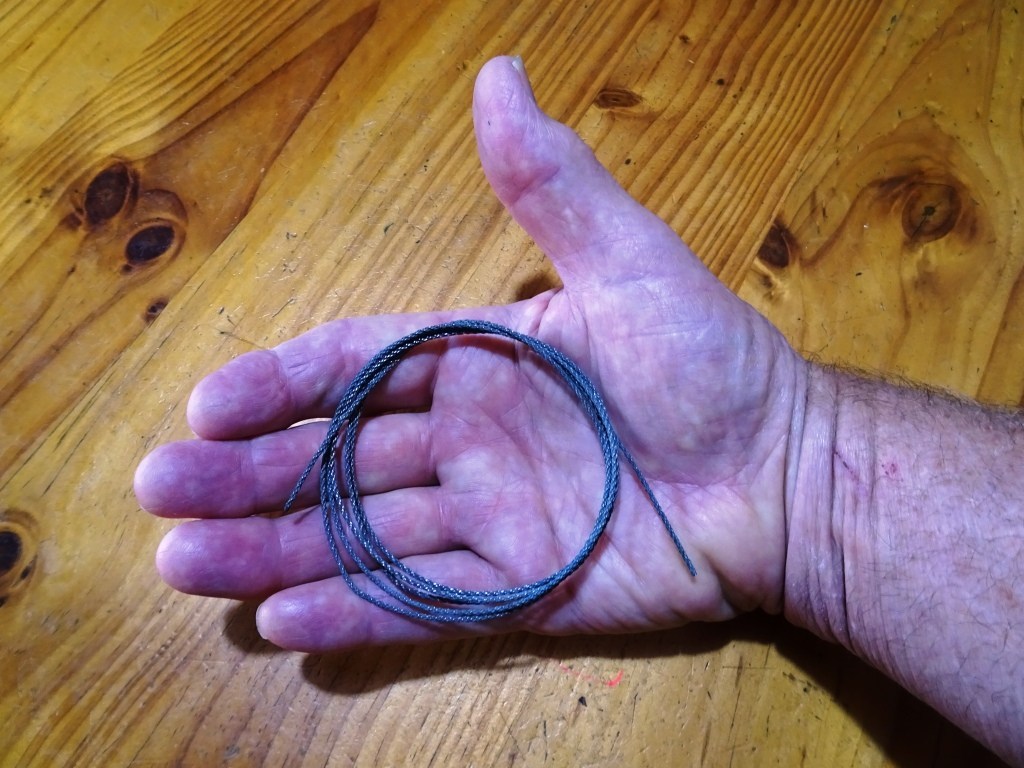
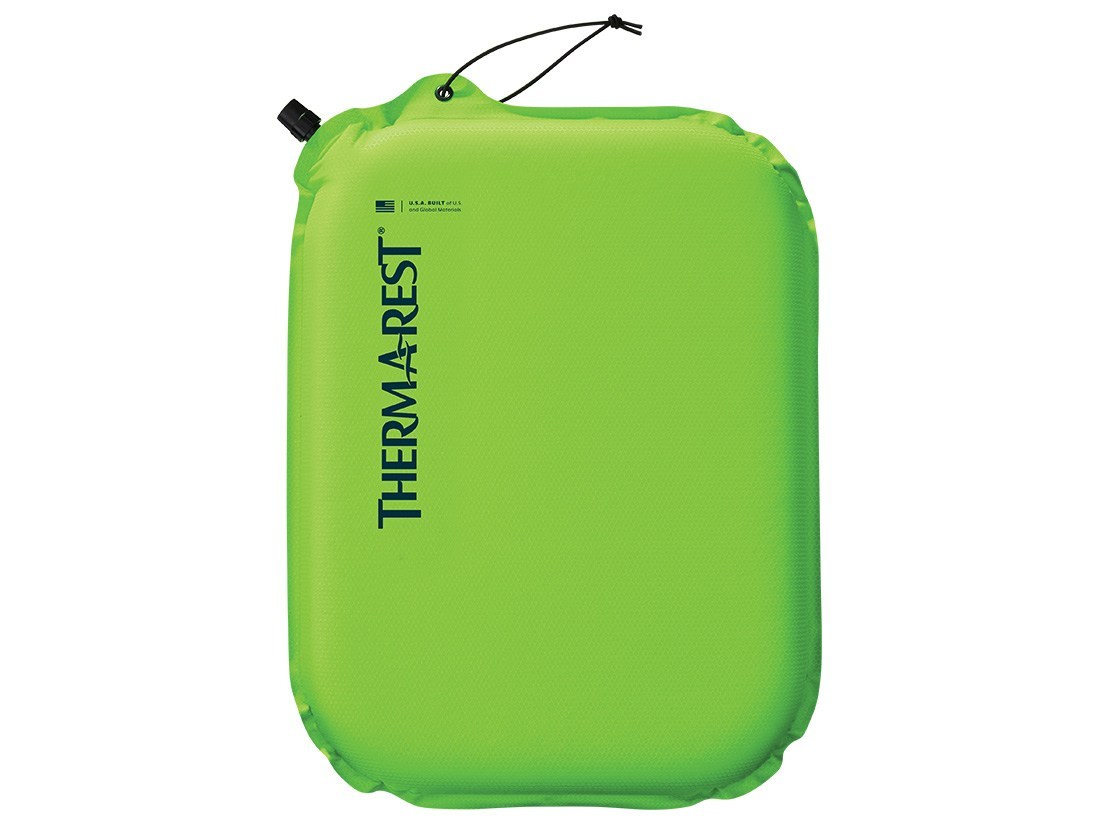
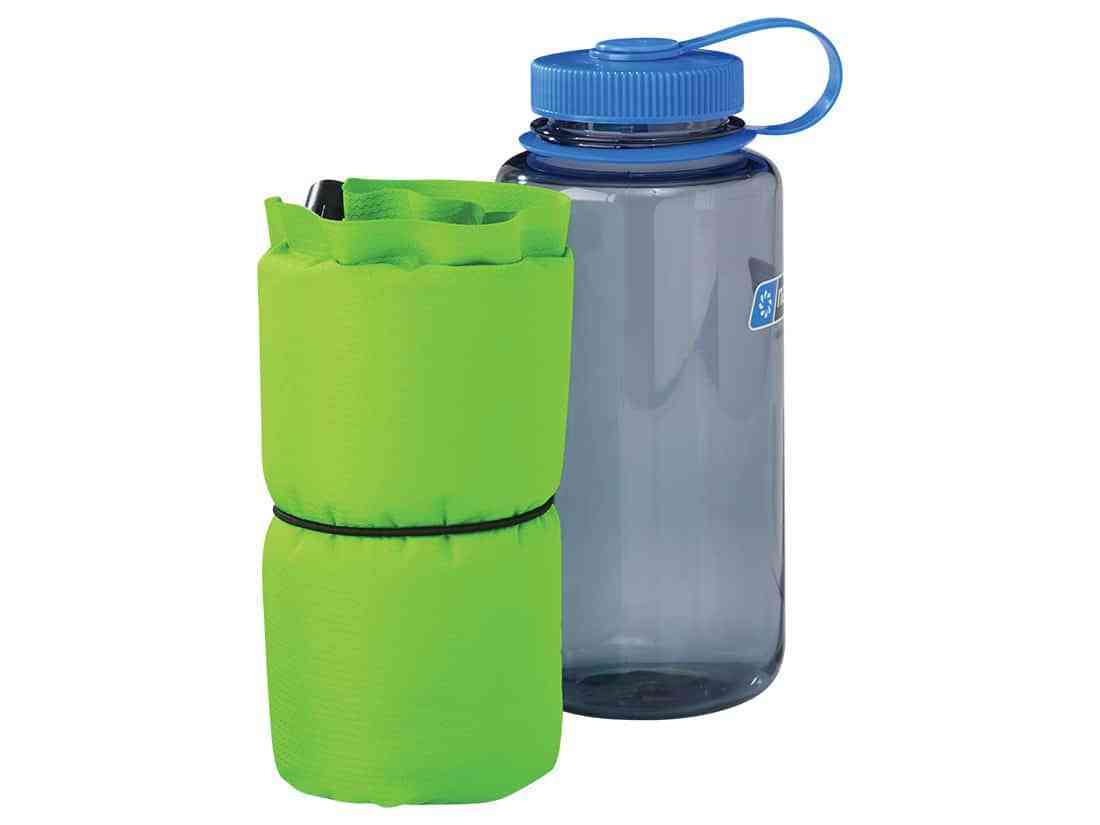
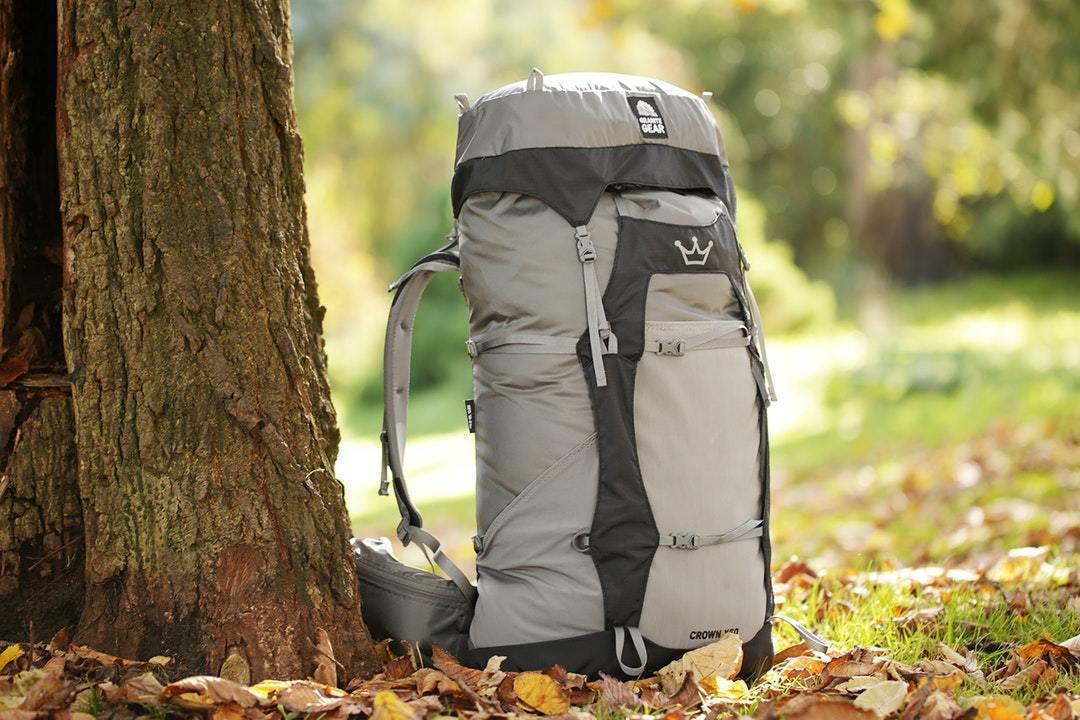
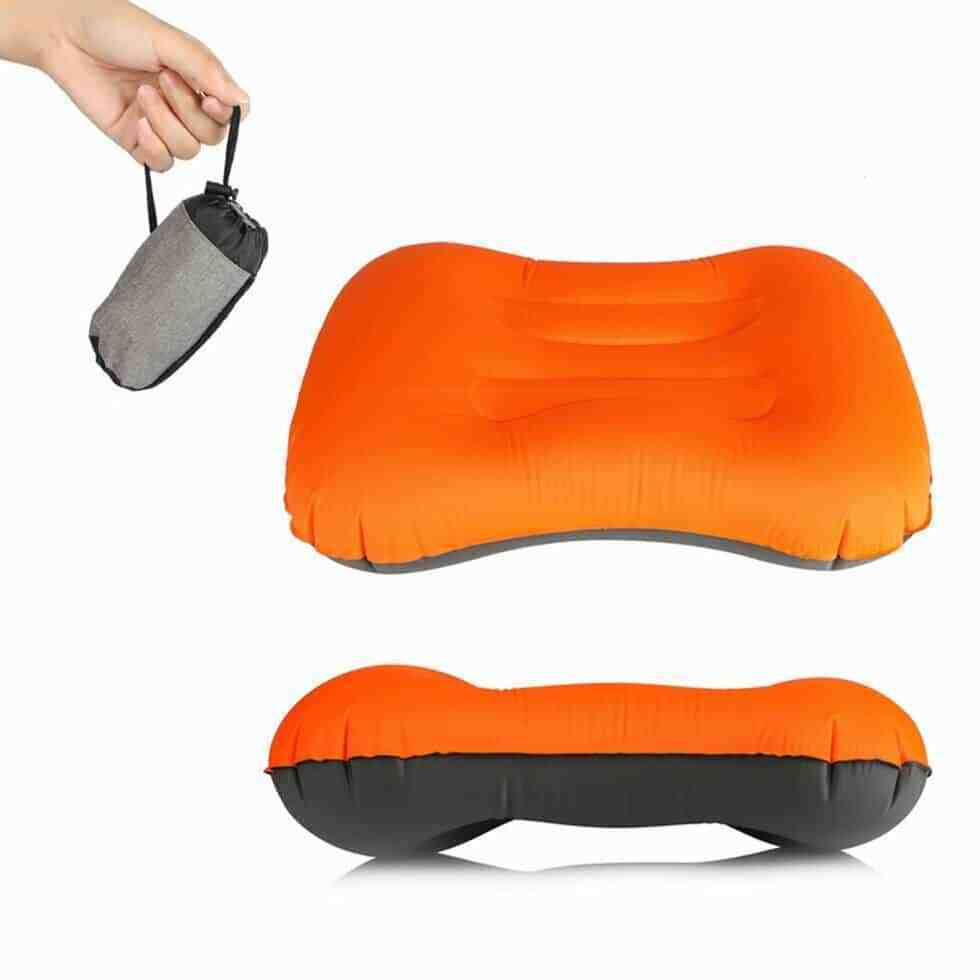


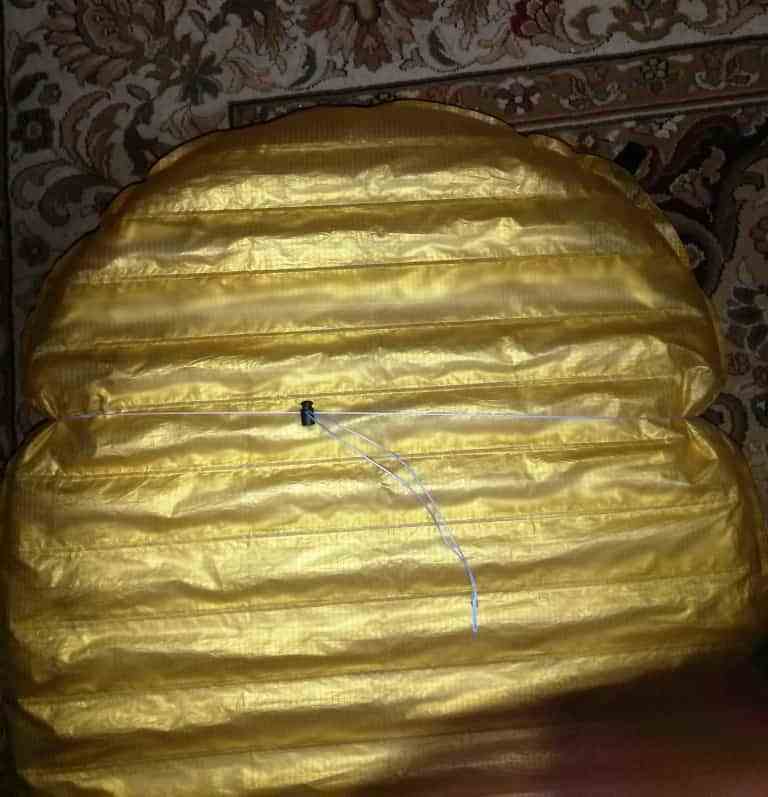


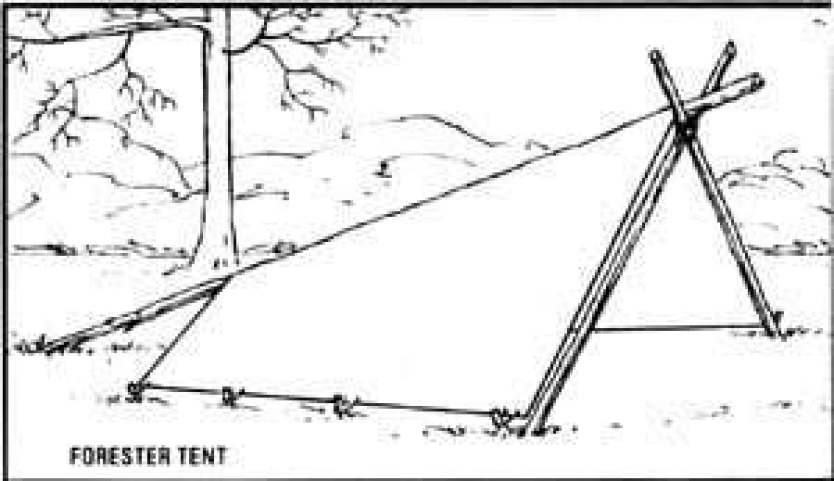


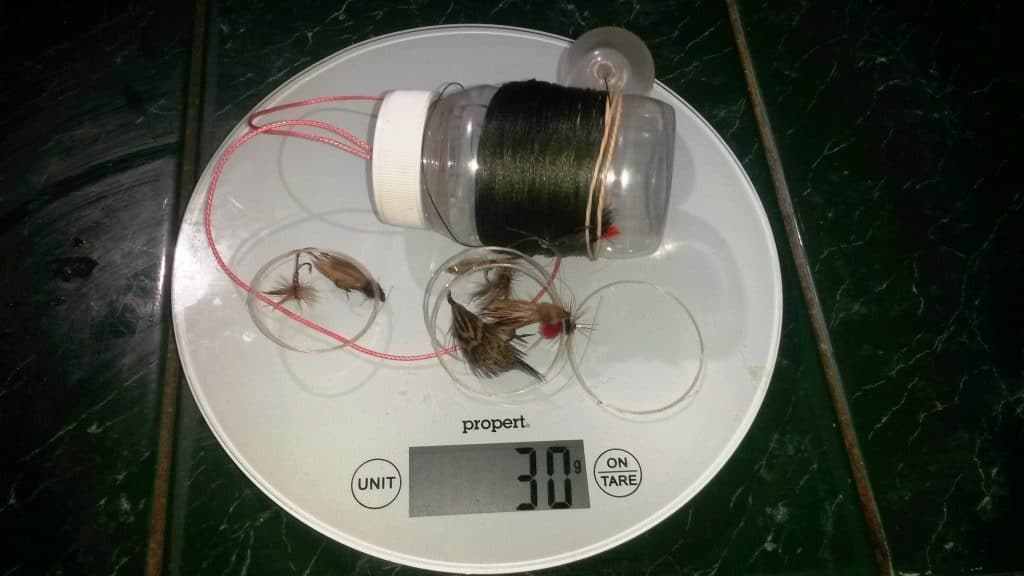


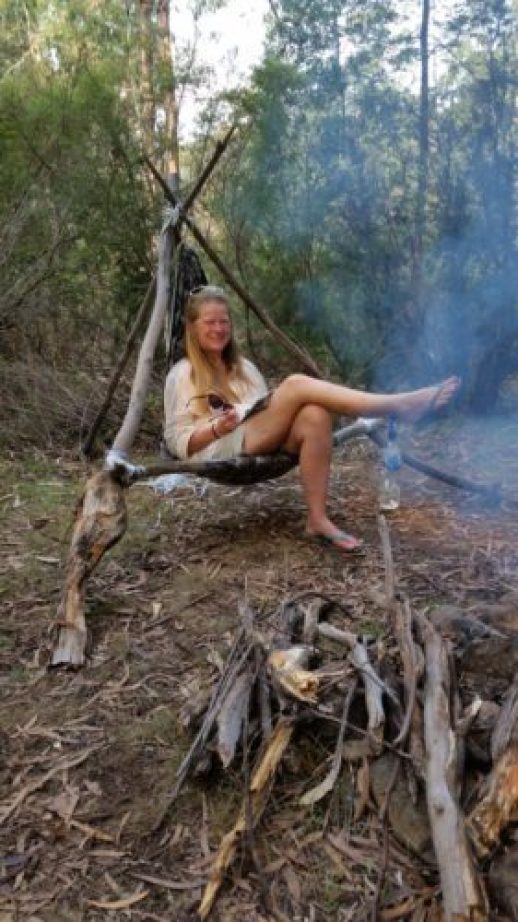


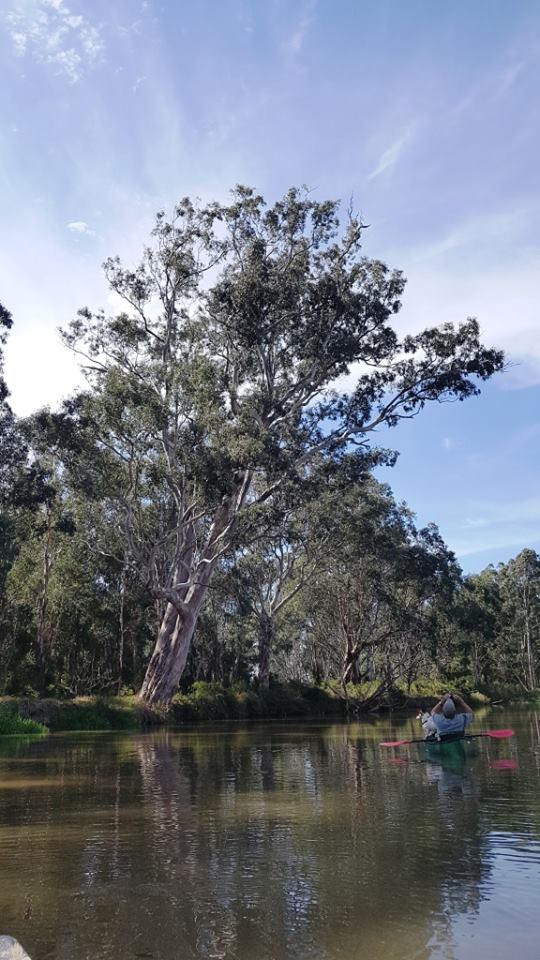

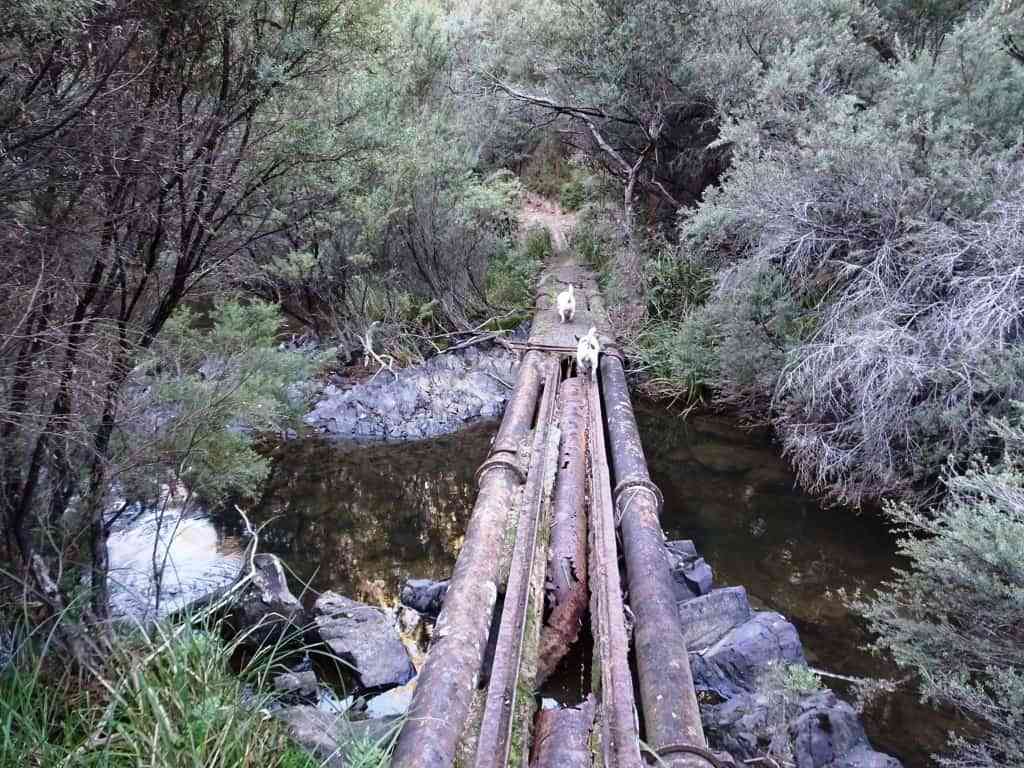
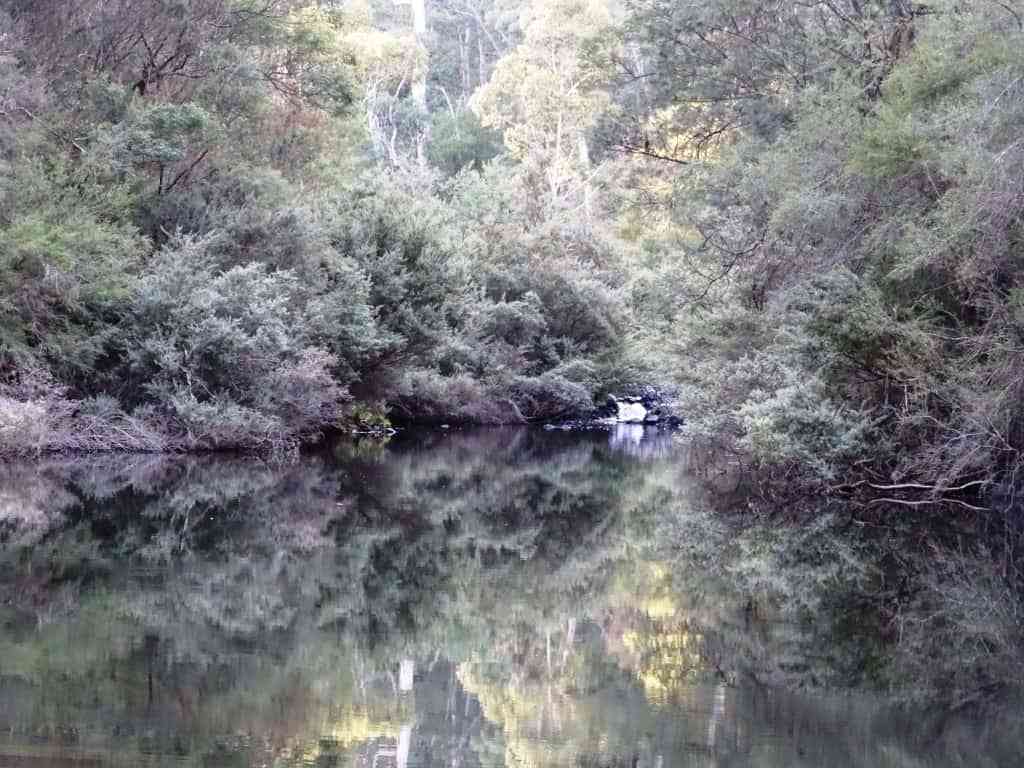


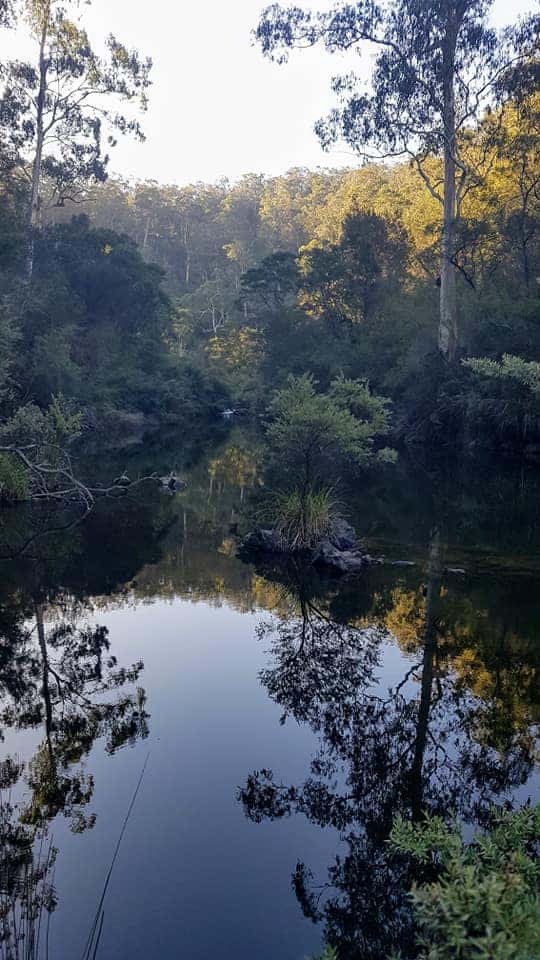
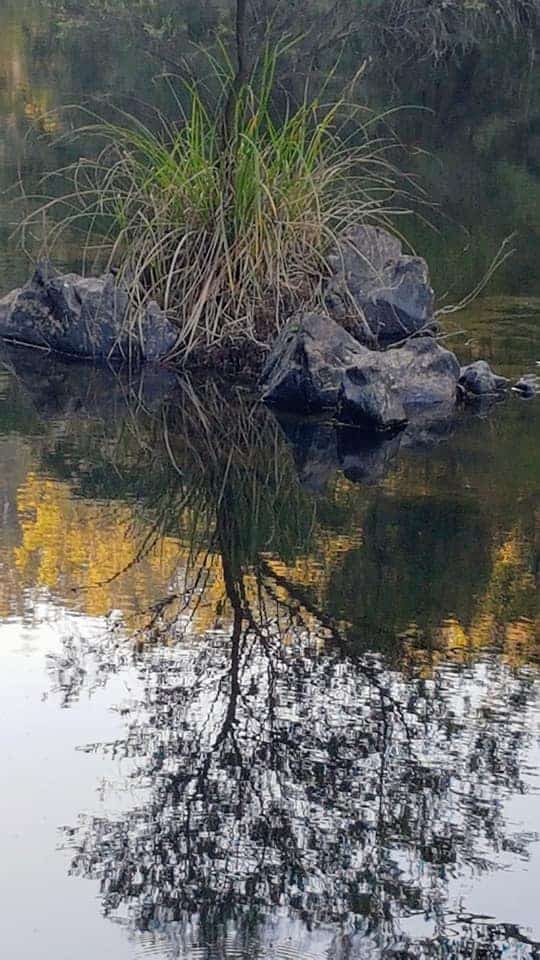

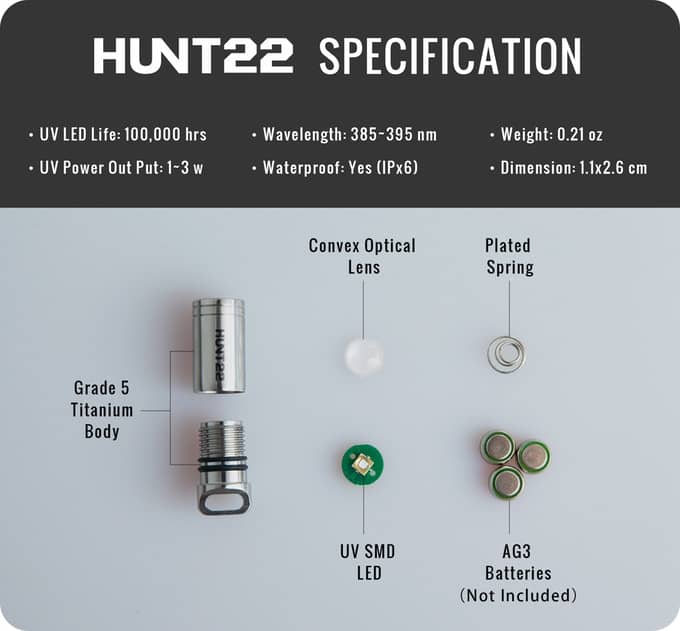

 Telstra Go Repeater Mobile Above Fixed Below

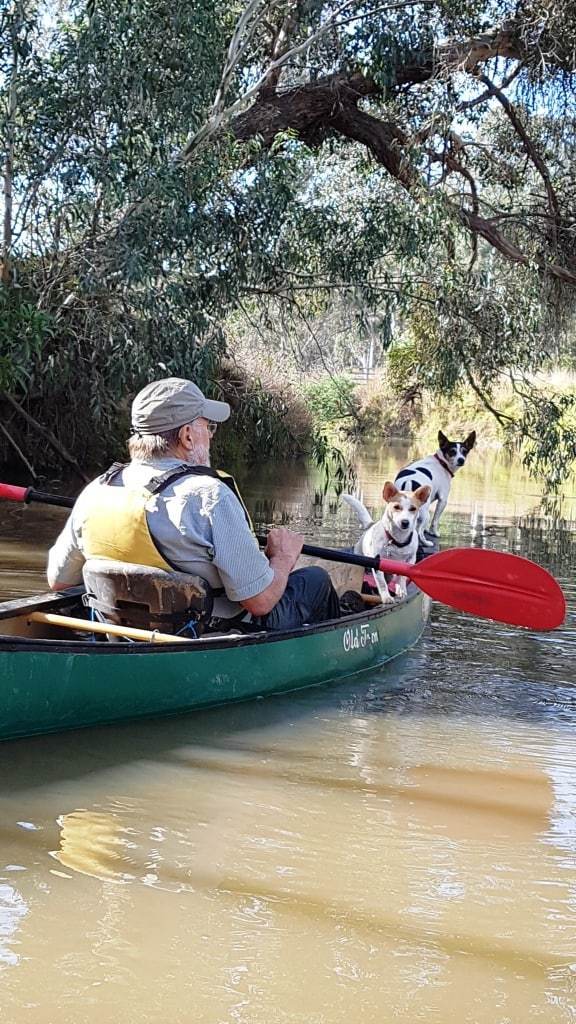
 Crooks
Lane Bridge, Latrobe River
Crooks
Lane Bridge, Latrobe River 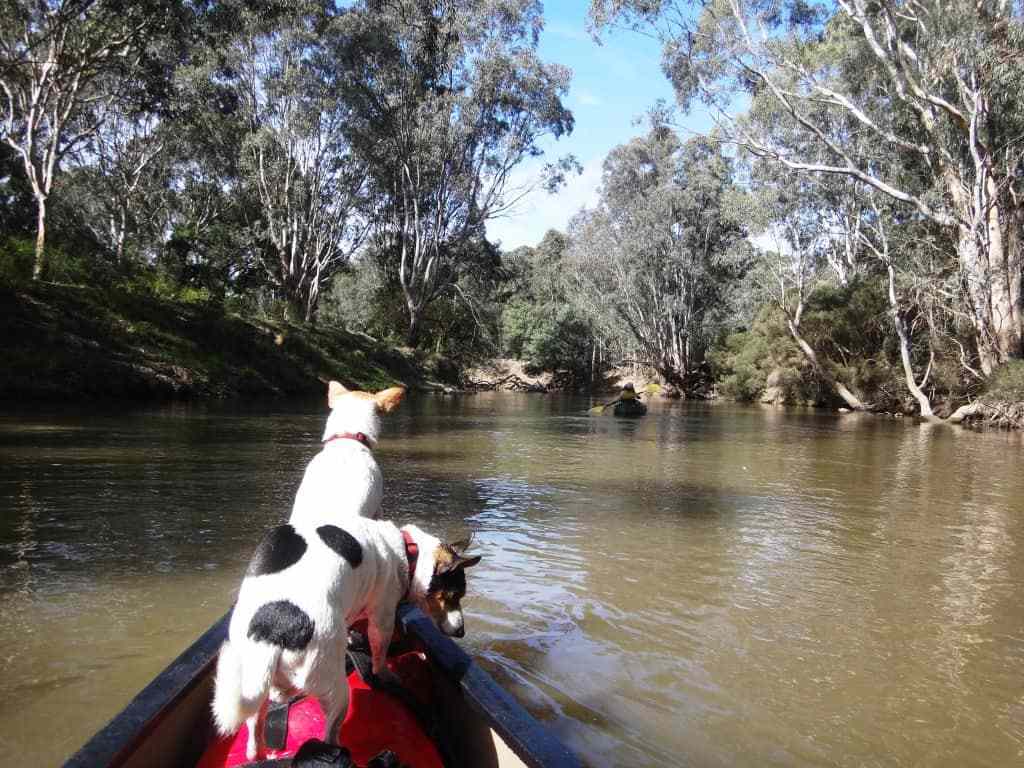


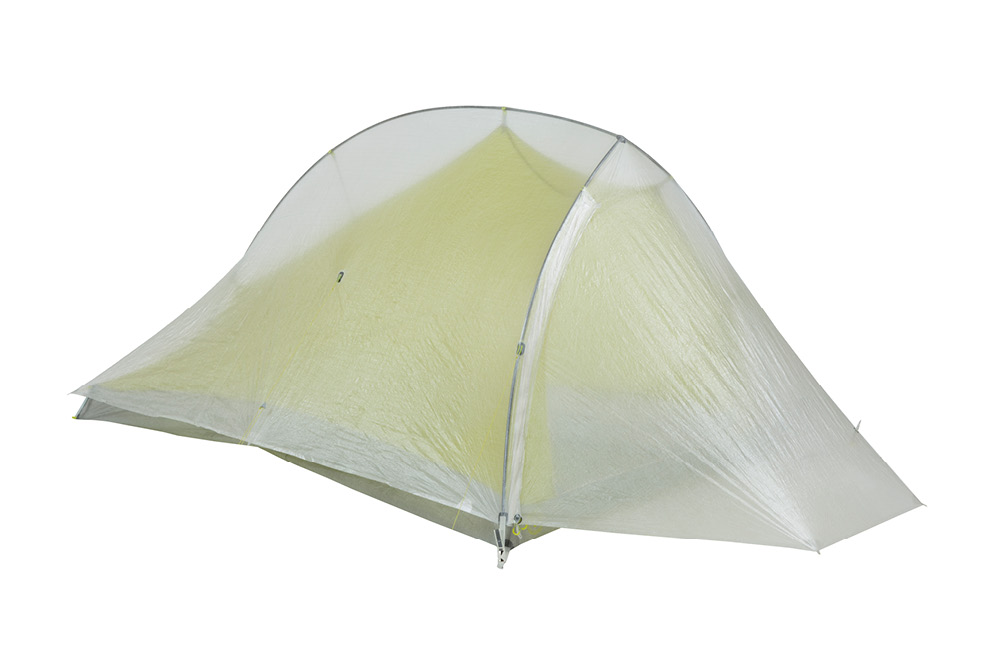
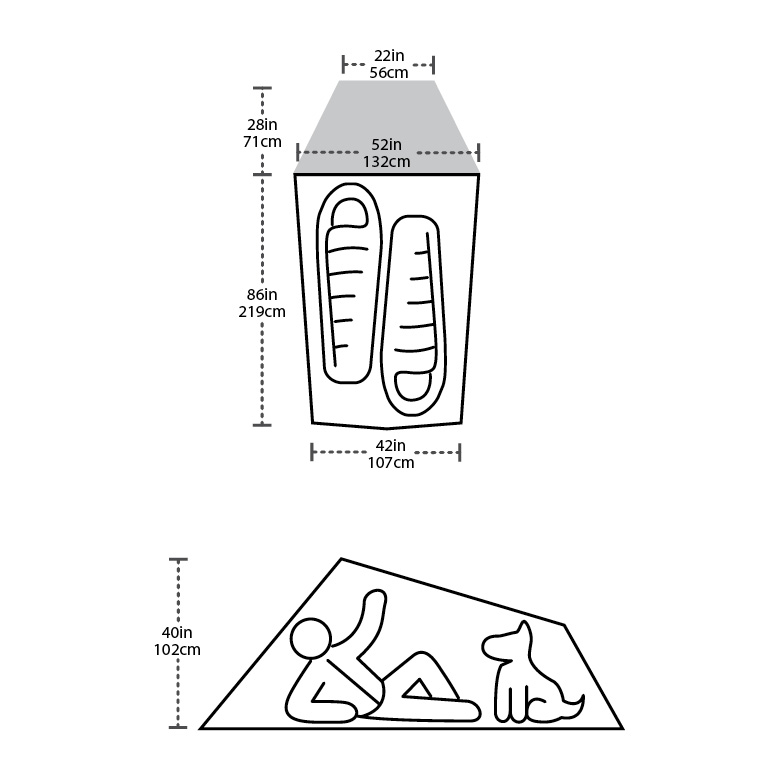
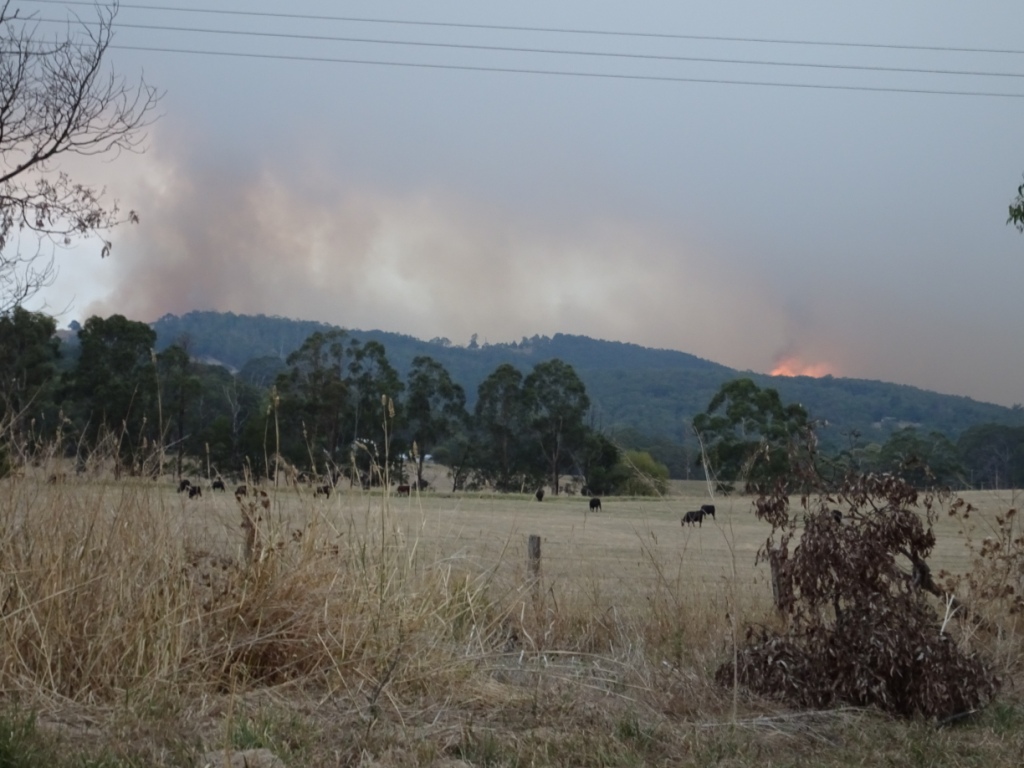
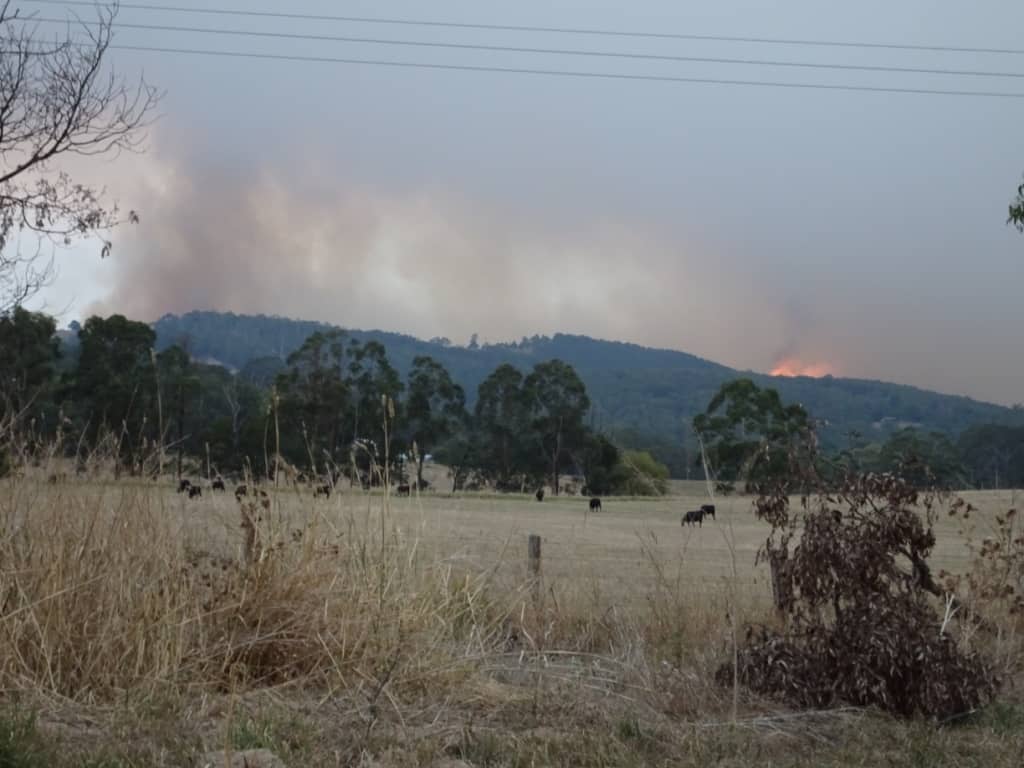
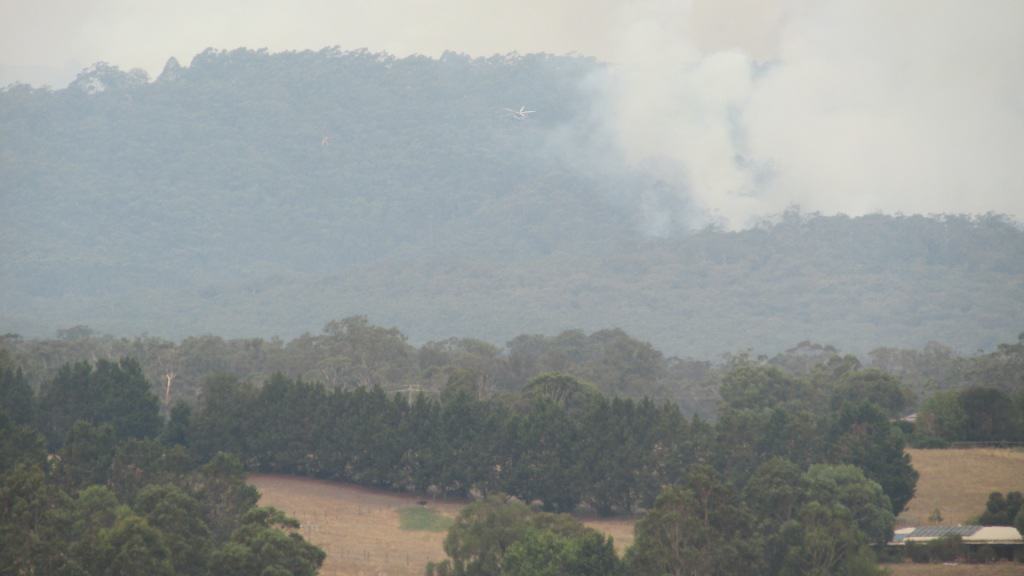
 Elk infected with CWD[/caption]
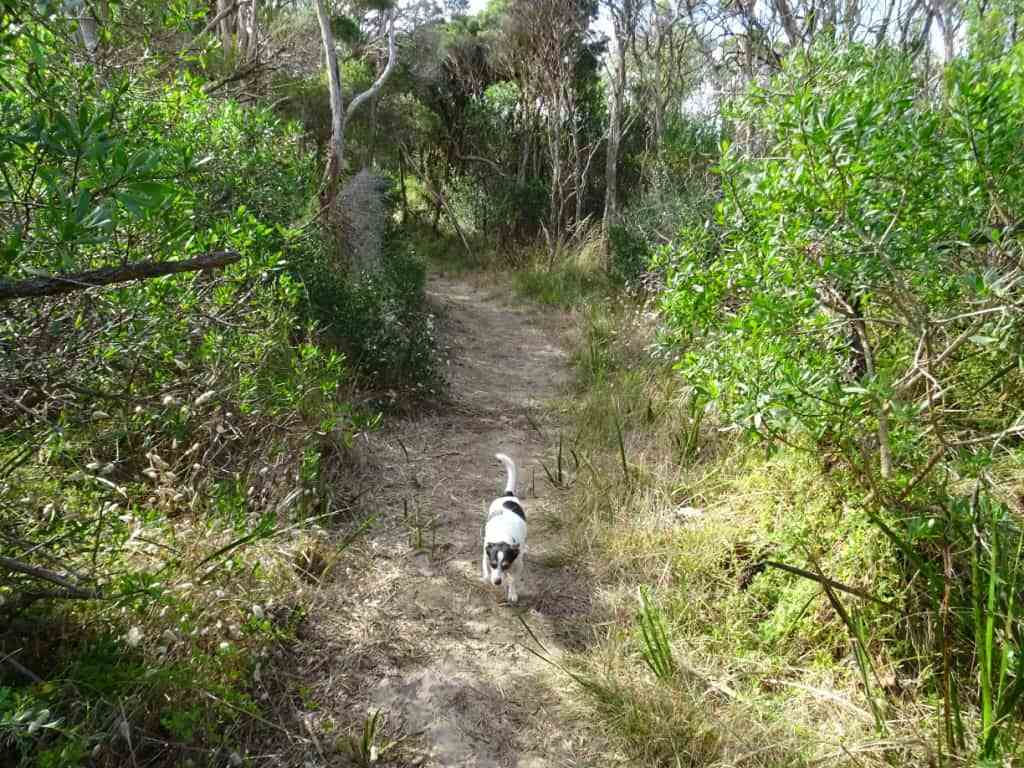


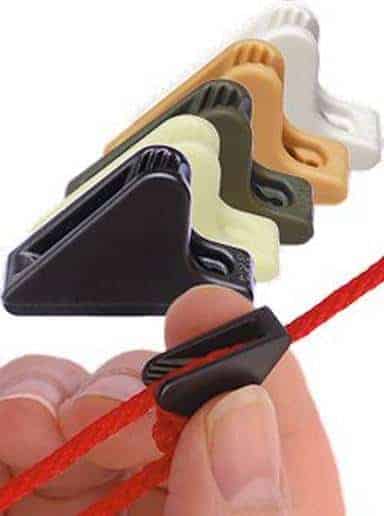
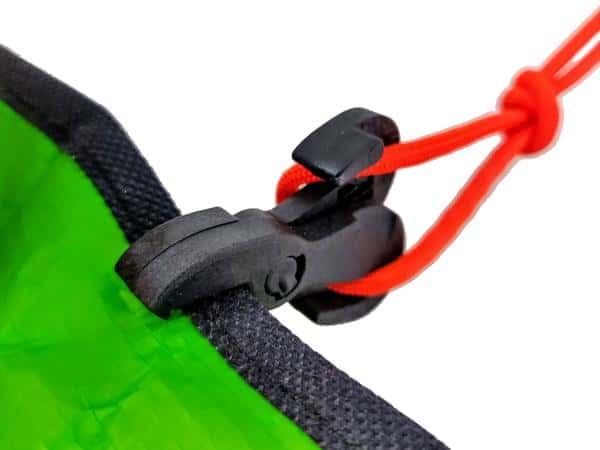 These are a good choice for a spare ultralight
tarp clip, though there are others to choose from (which can even be used to make a kayak). These are the lightest though.
These are a good choice for a spare ultralight
tarp clip, though there are others to choose from (which can even be used to make a kayak). These are the lightest though.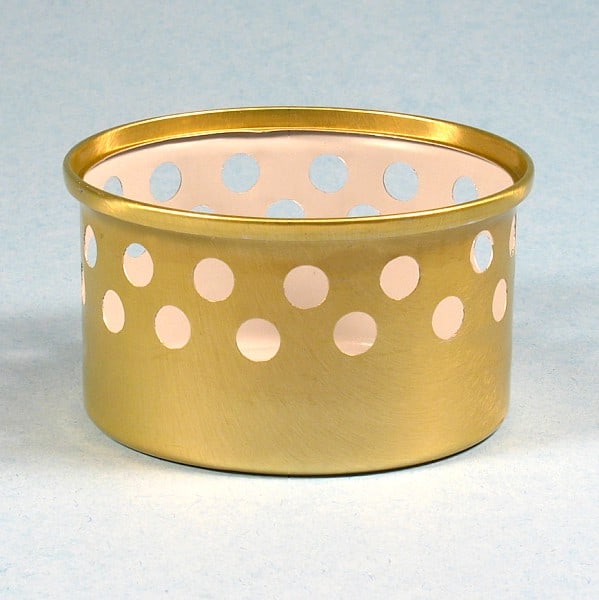 For example there is my own Egg-Ring Stove. There is Jim Wood’s classic Super Cat Stove. The Soda Can Stove. Ray Garlington’s YACC Stove. The Fancy Feast Stove.
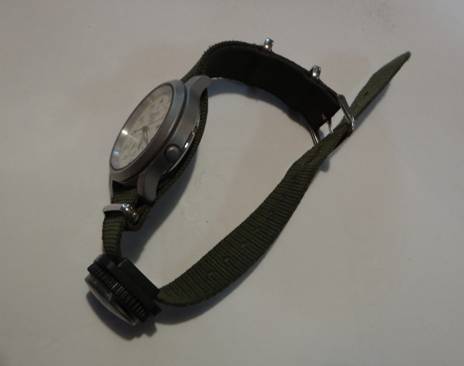 I always have one of these on my watch band.
They cost around $2, as do these excellent watch bands which ensure you never lose your self-winding
watch which you should always use as they don’t go flat and let you down..
I always have one of these on my watch band.
They cost around $2, as do these excellent watch bands which ensure you never lose your self-winding
watch which you should always use as they don’t go flat and let you down..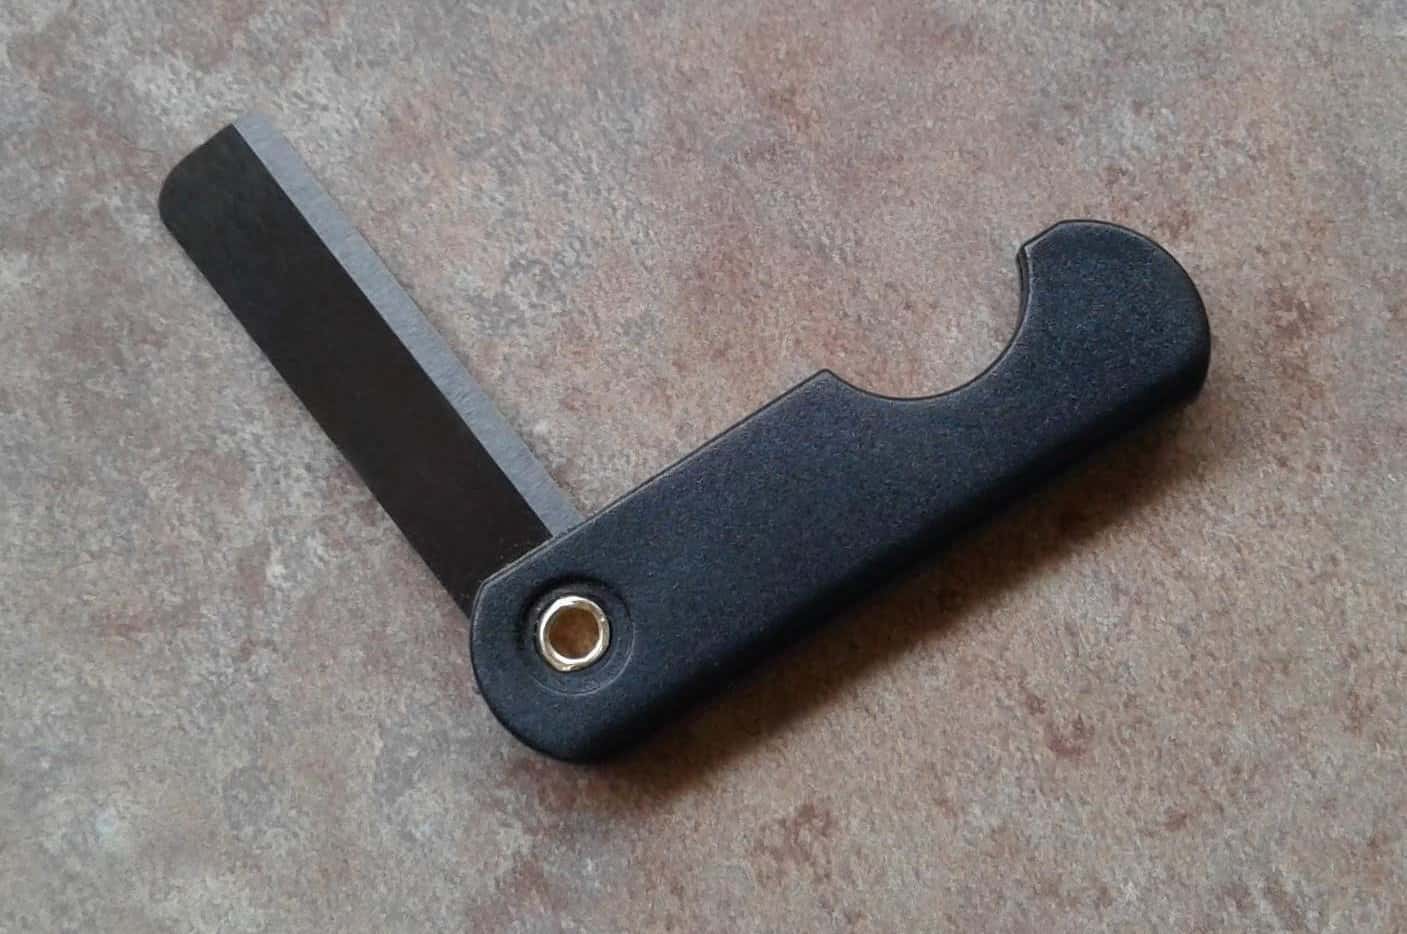 These plastic scalpels are great too – and will butcher a mature
sambar deer. I have.
These plastic scalpels are great too – and will butcher a mature
sambar deer. I have. can
be made from material which costs less than $5 (though you may have to
spend more than $5 to buy the larger quantity. For example these Toughened
Foam Flip Flops or these No Sew Sandals made from a car inner
tube and some blue foam or shoe inserts.
can
be made from material which costs less than $5 (though you may have to
spend more than $5 to buy the larger quantity. For example these Toughened
Foam Flip Flops or these No Sew Sandals made from a car inner
tube and some blue foam or shoe inserts. This
chair is a genius idea and I again thank Jenny for her contribution. If
you visit sale items you will get enough fabric to make it for under $5
but you would probably be better to use a high-end fabric such as Ripstop by the Rolls Robic or Mountain Series
perhaps their 1.7 oz at US$7.95 per yard (Jan 2019) as you are going to
want this item to last for years.
This
chair is a genius idea and I again thank Jenny for her contribution. If
you visit sale items you will get enough fabric to make it for under $5
but you would probably be better to use a high-end fabric such as Ripstop by the Rolls Robic or Mountain Series
perhaps their 1.7 oz at US$7.95 per yard (Jan 2019) as you are going to
want this item to last for years.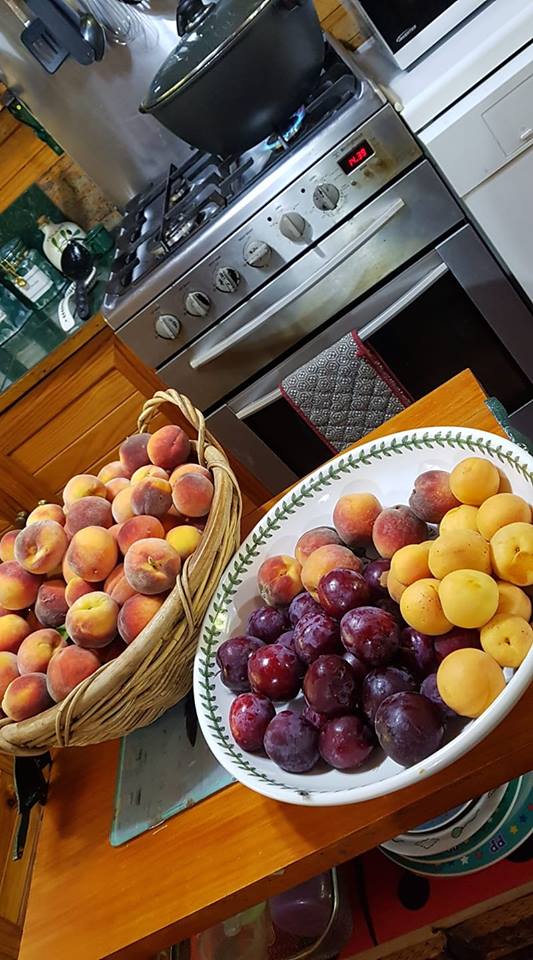

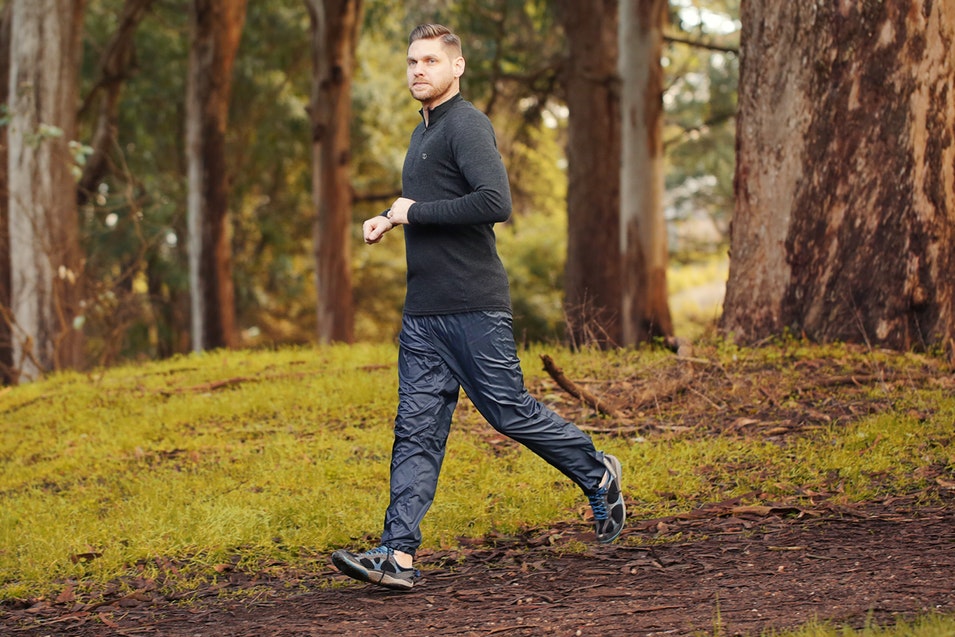
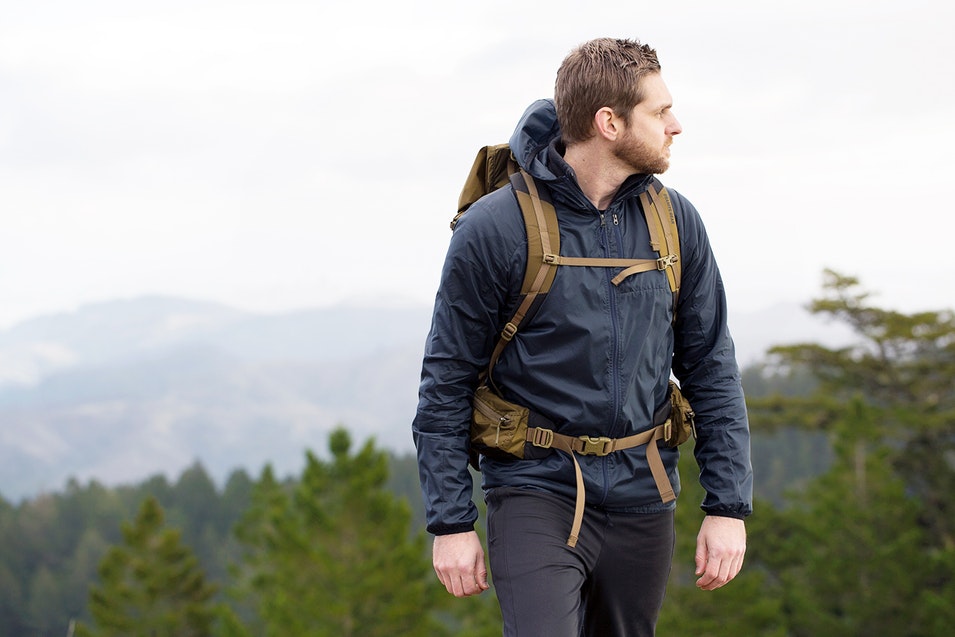

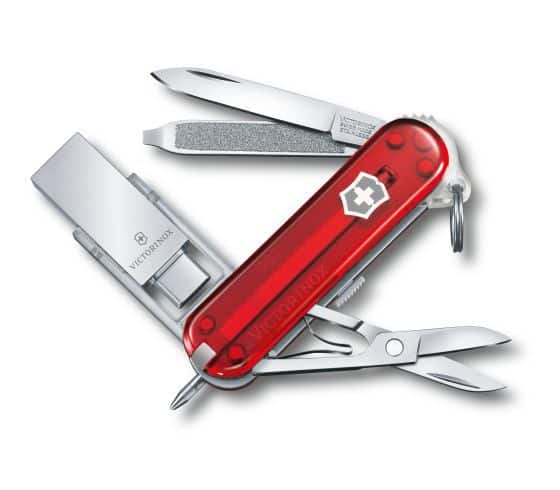
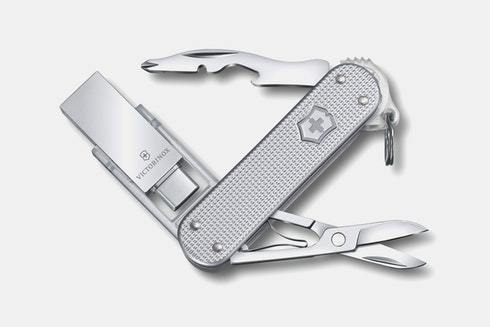


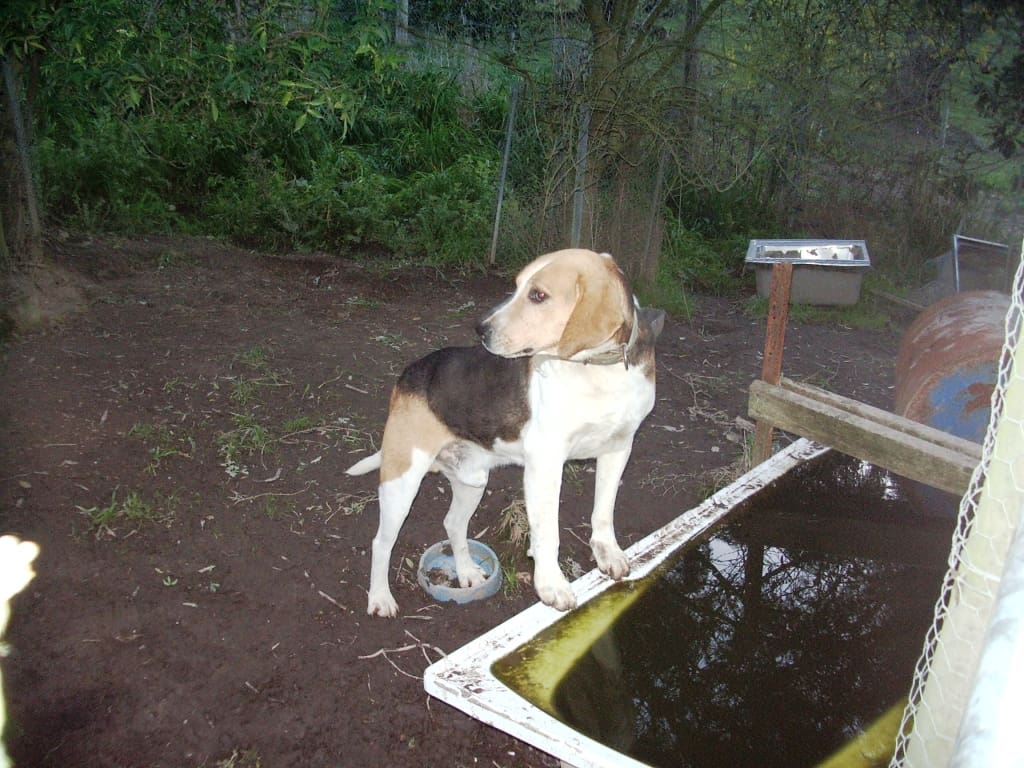
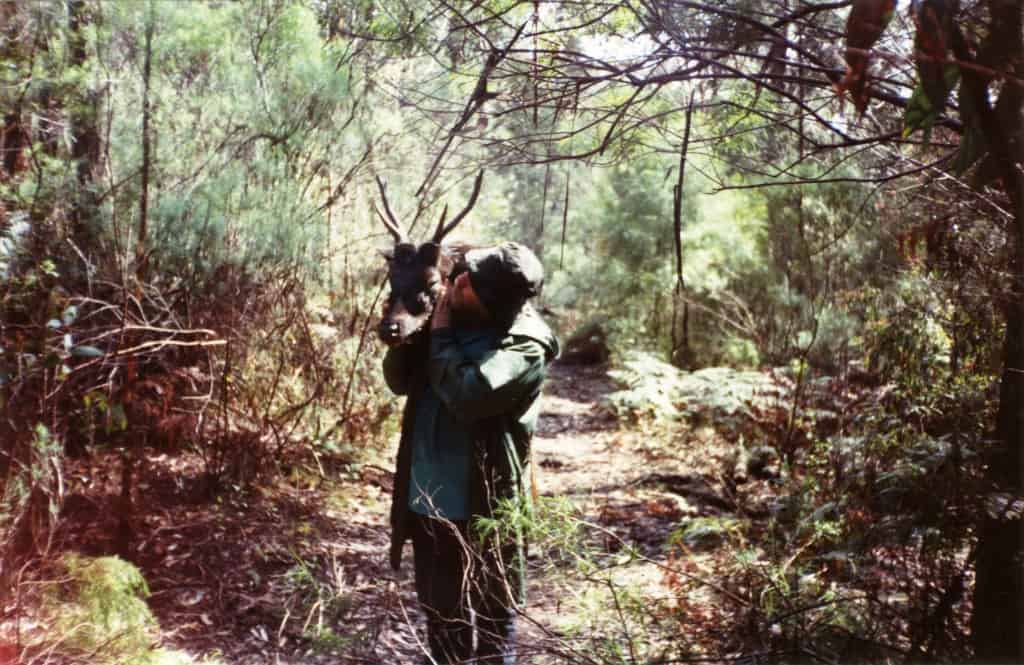

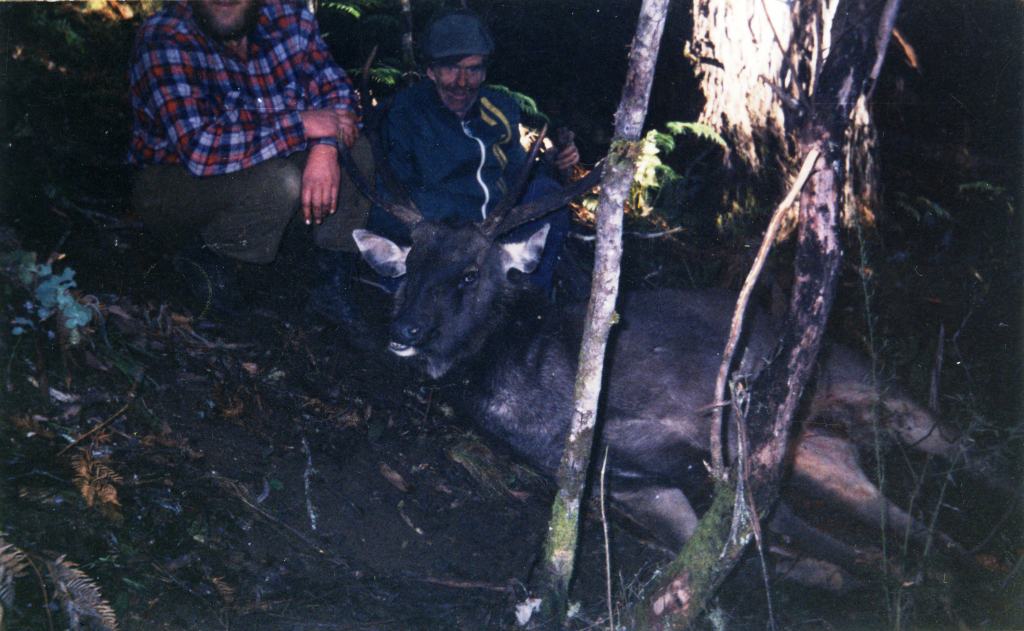


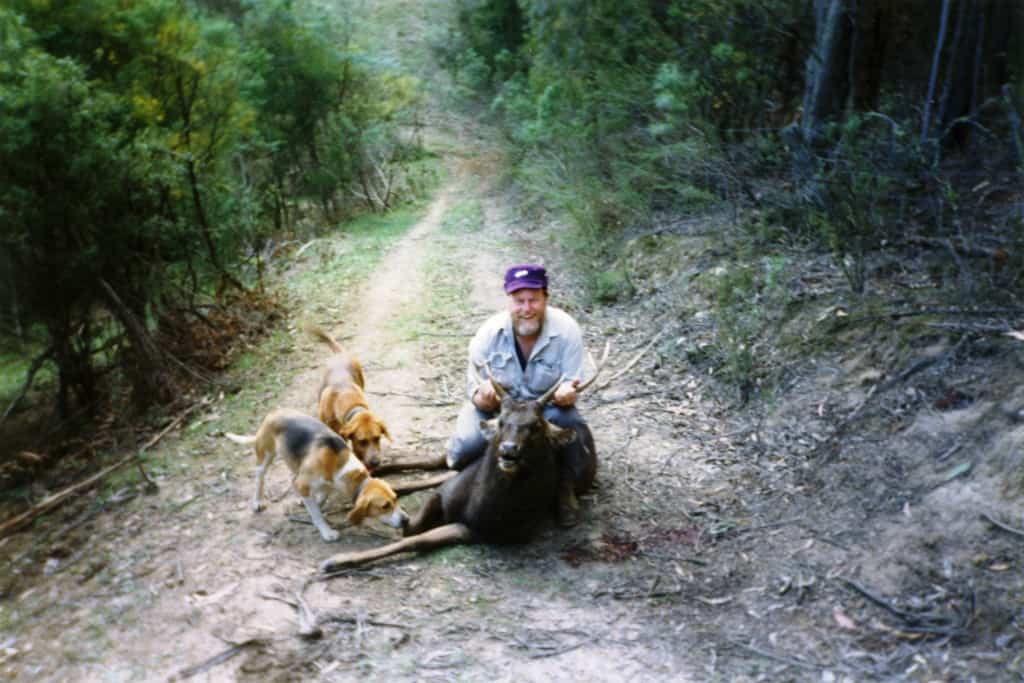
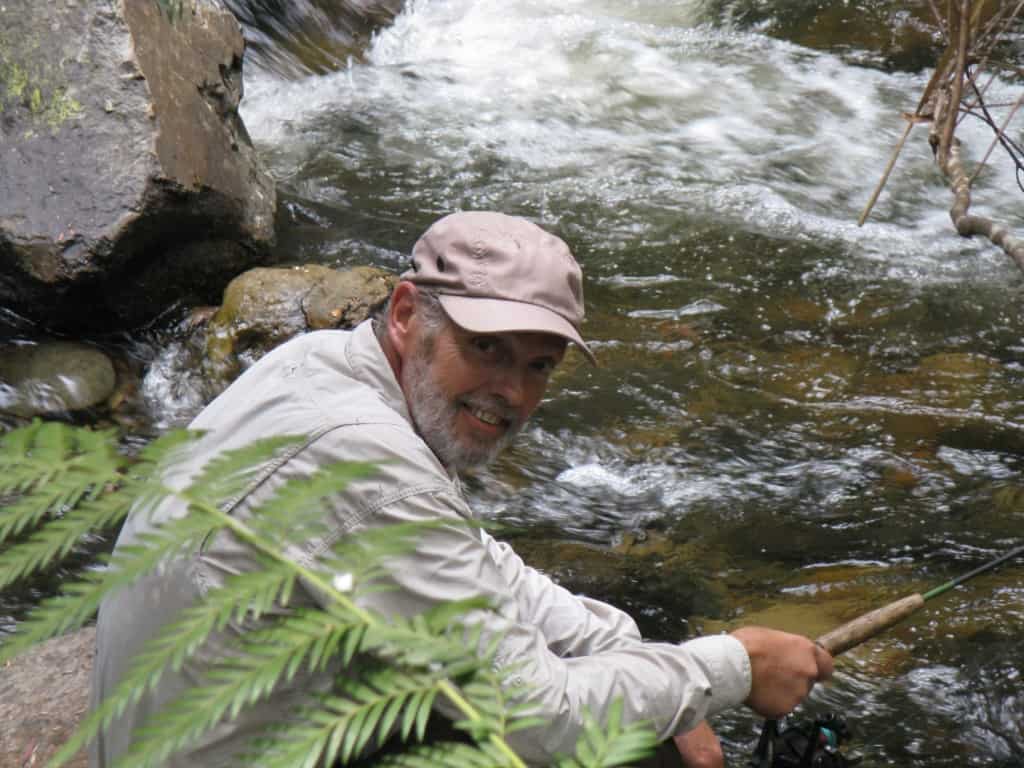


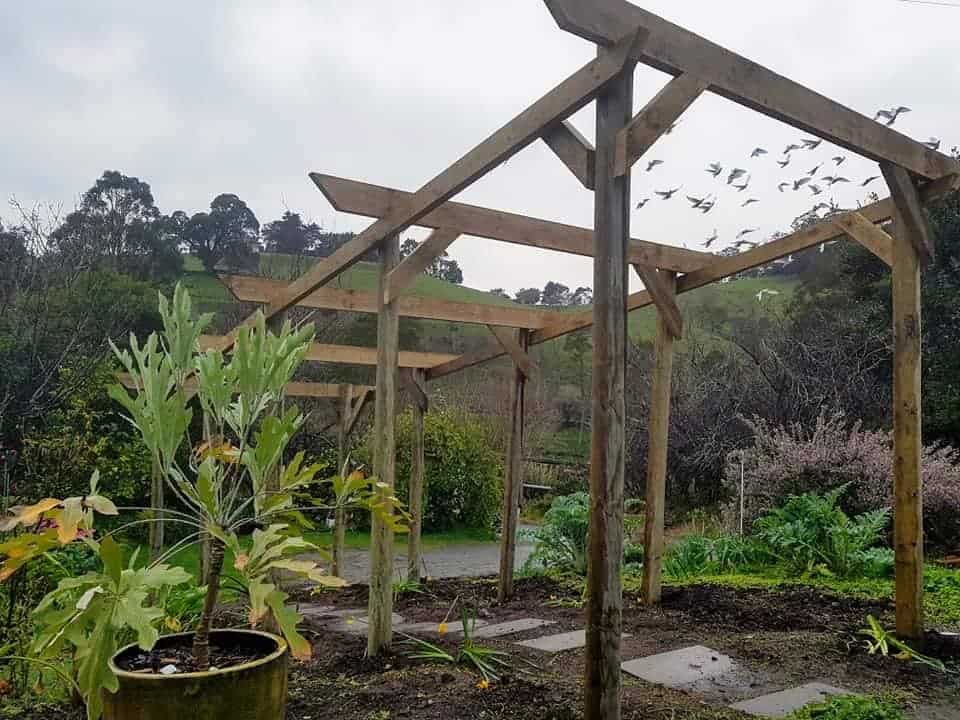
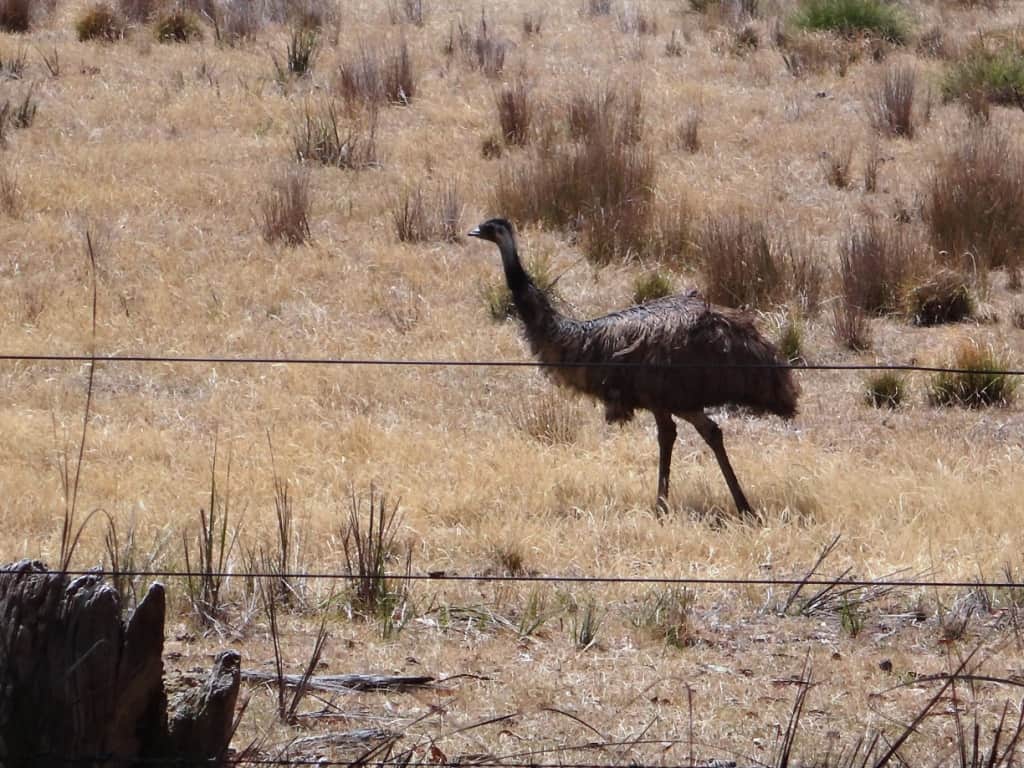
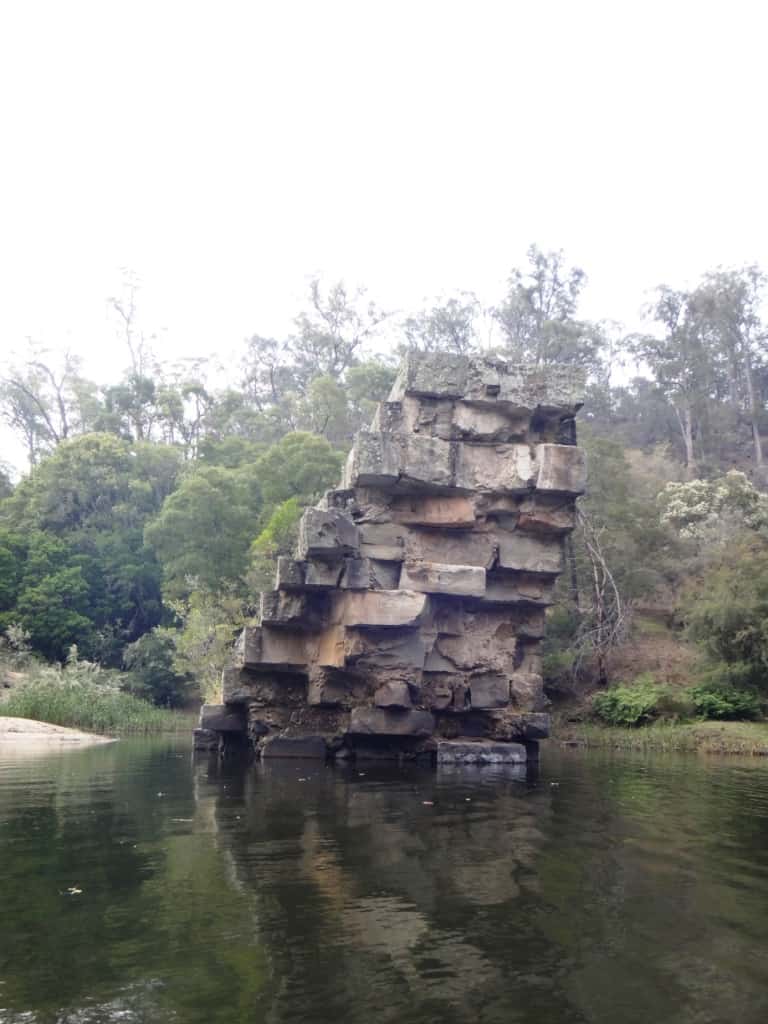
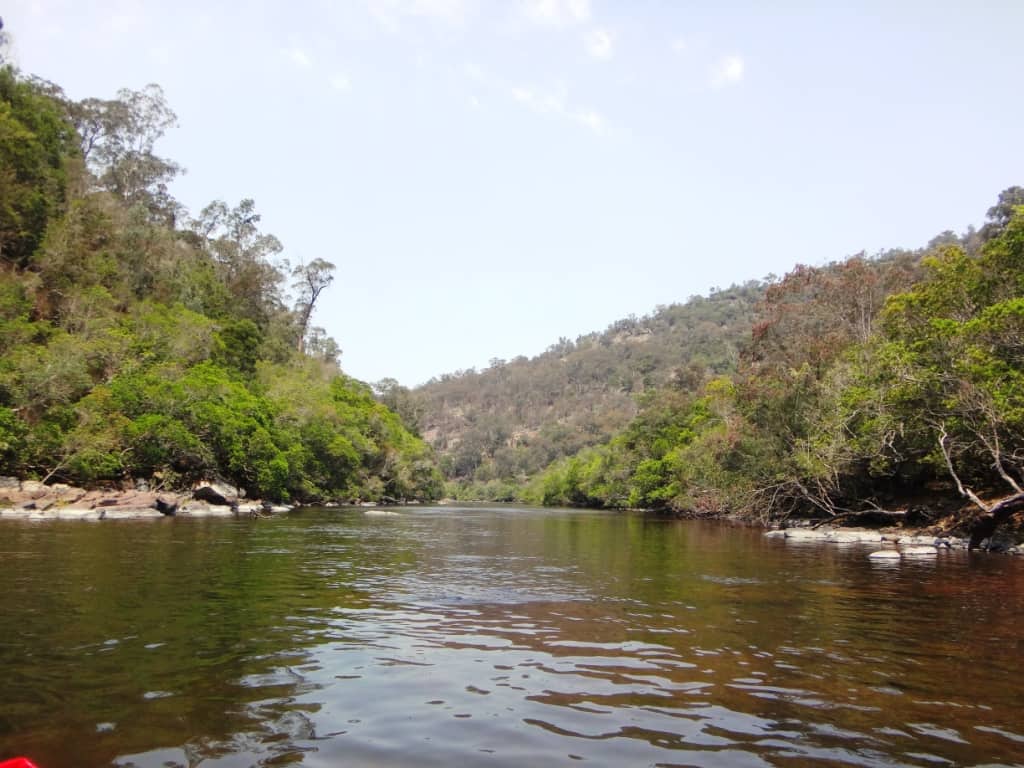
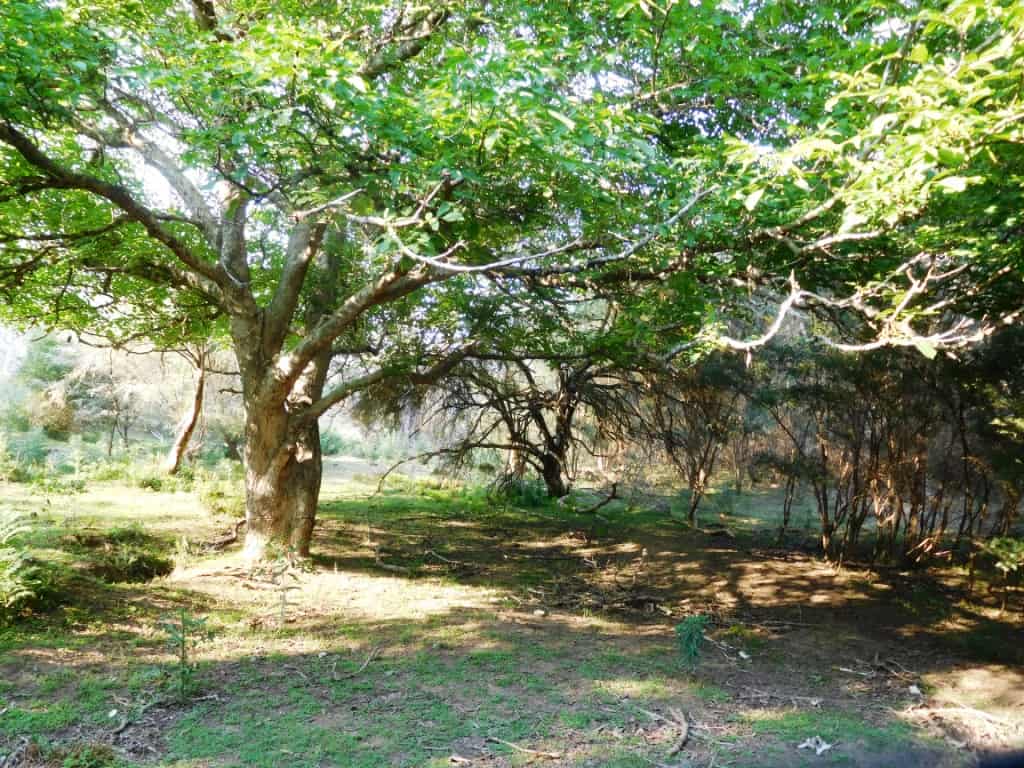
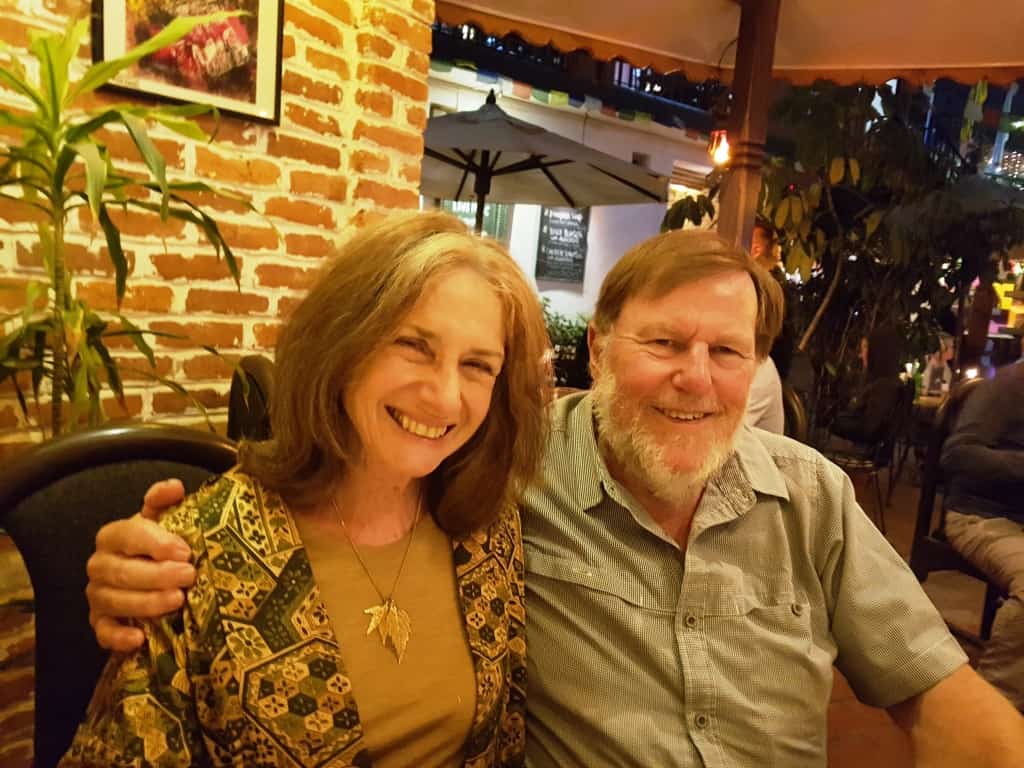
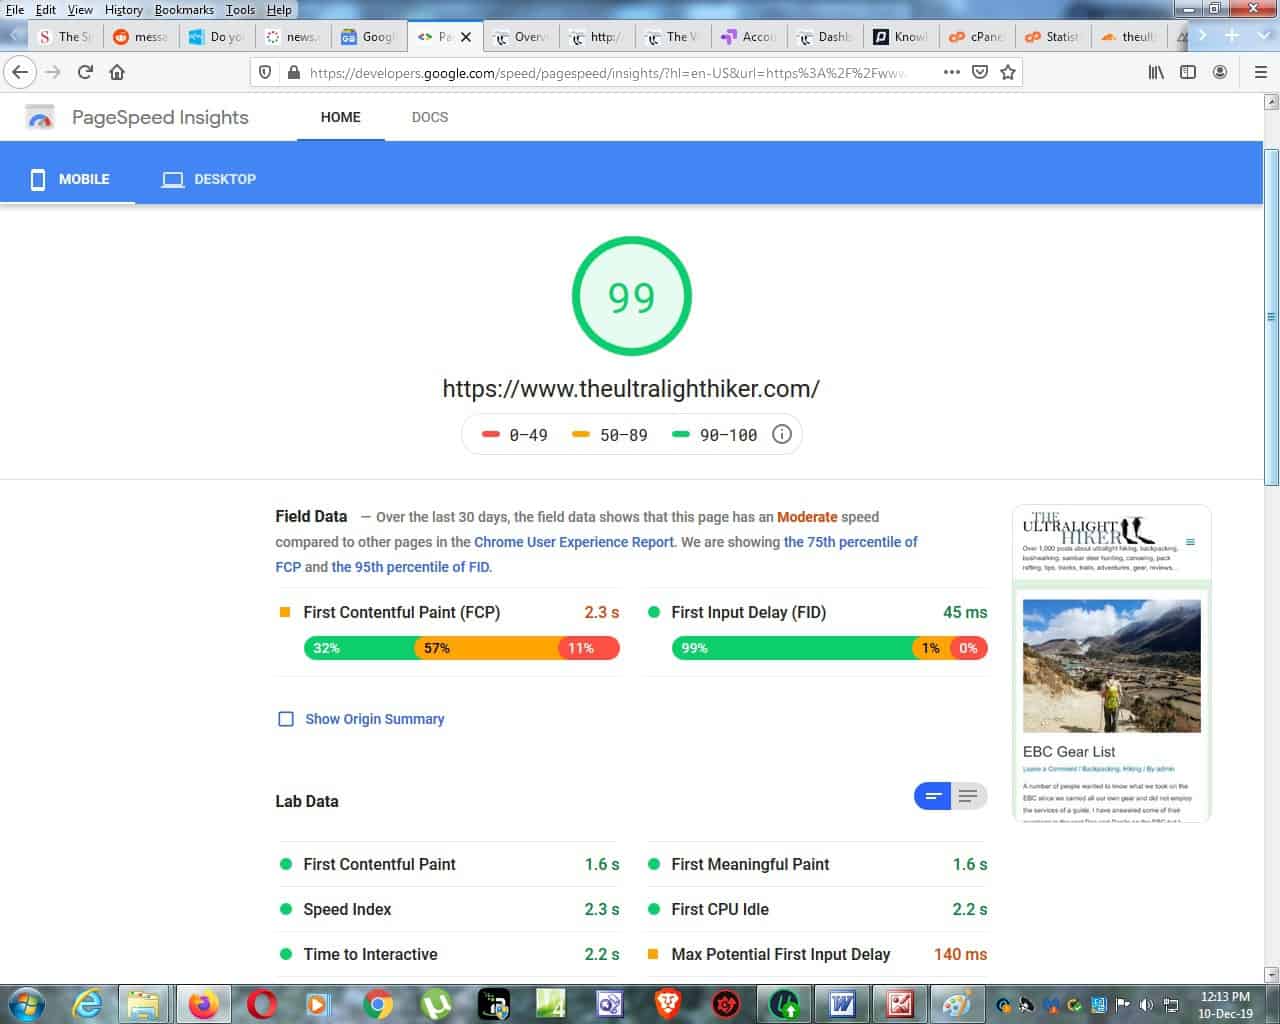
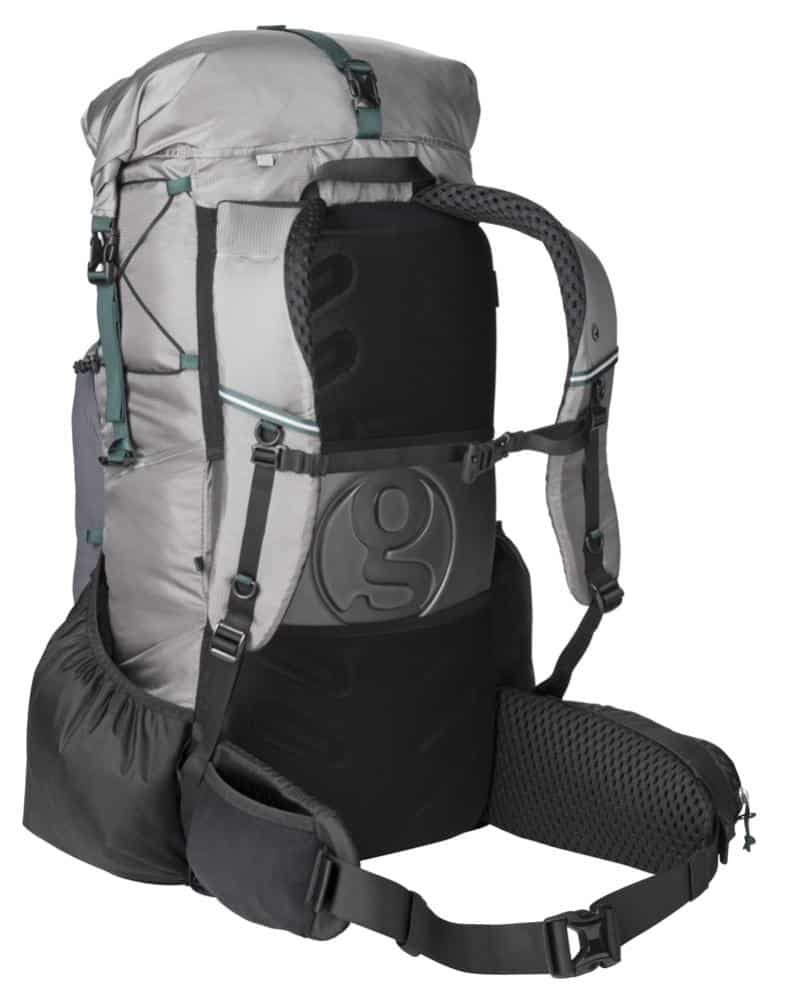
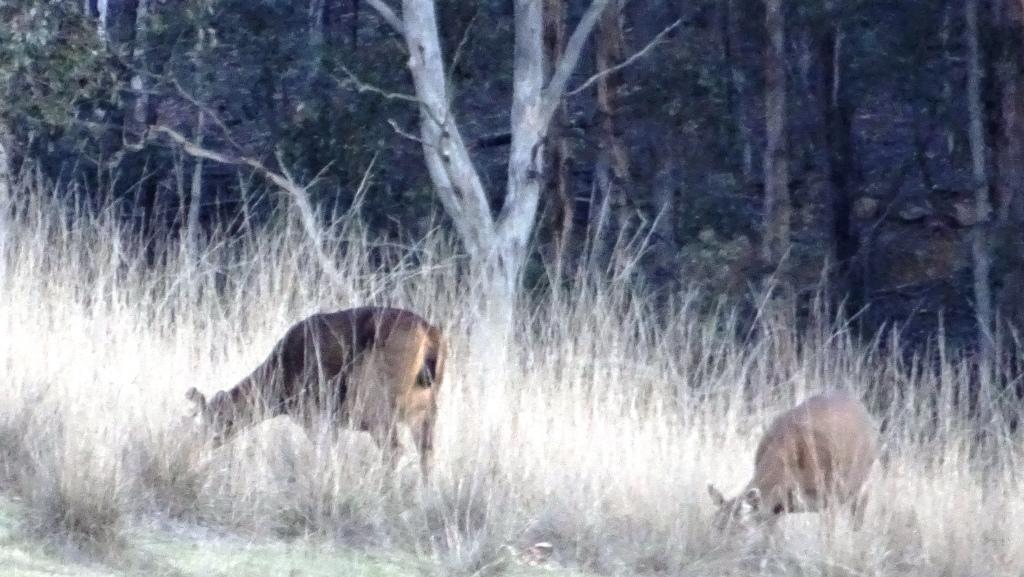
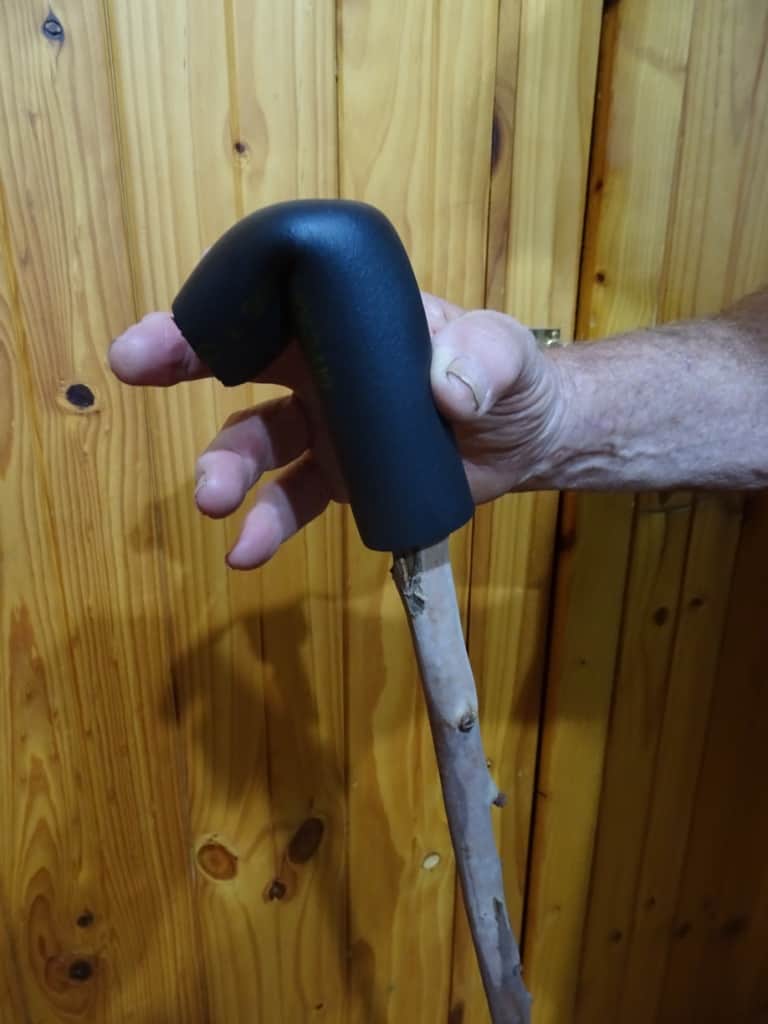
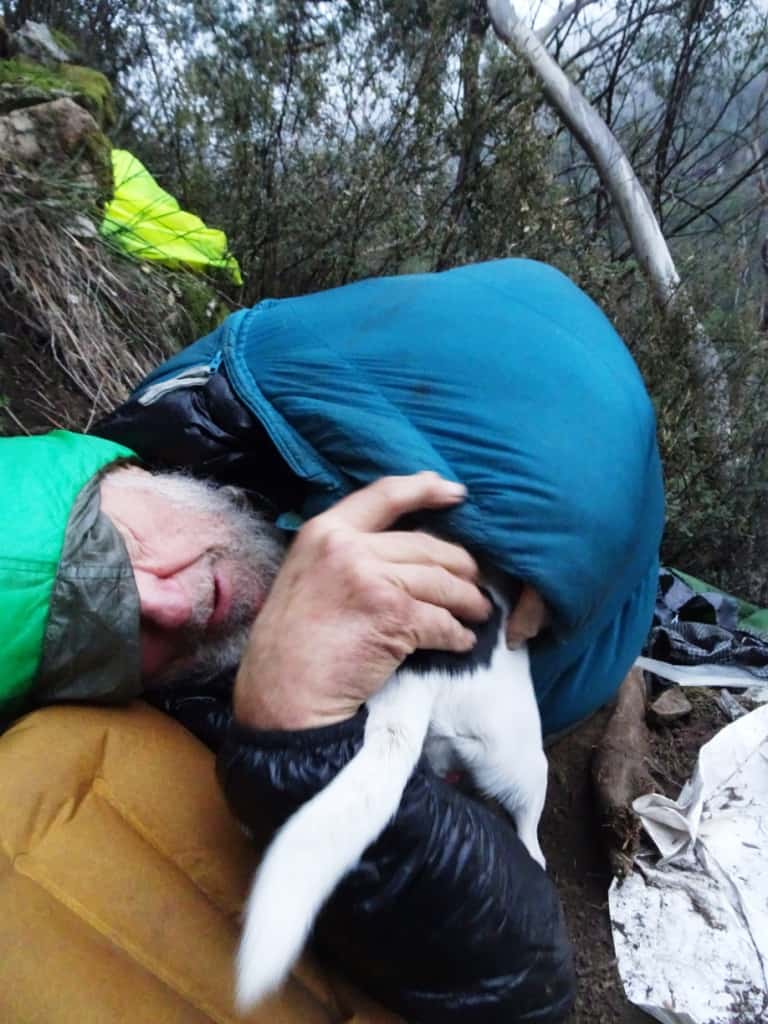
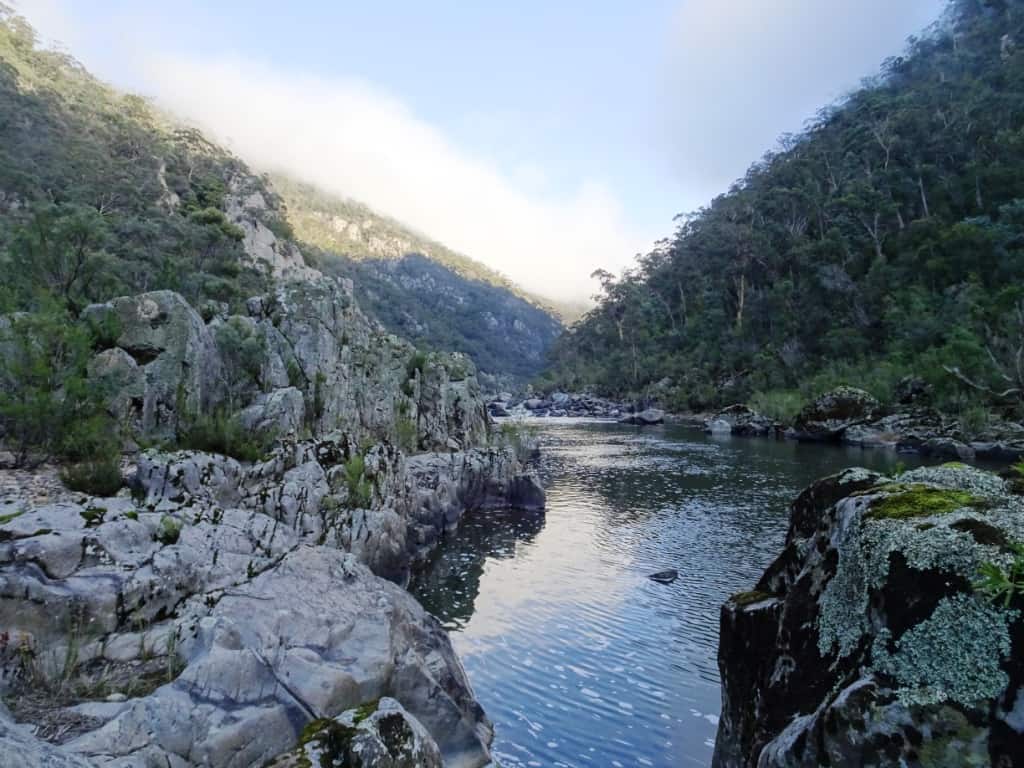
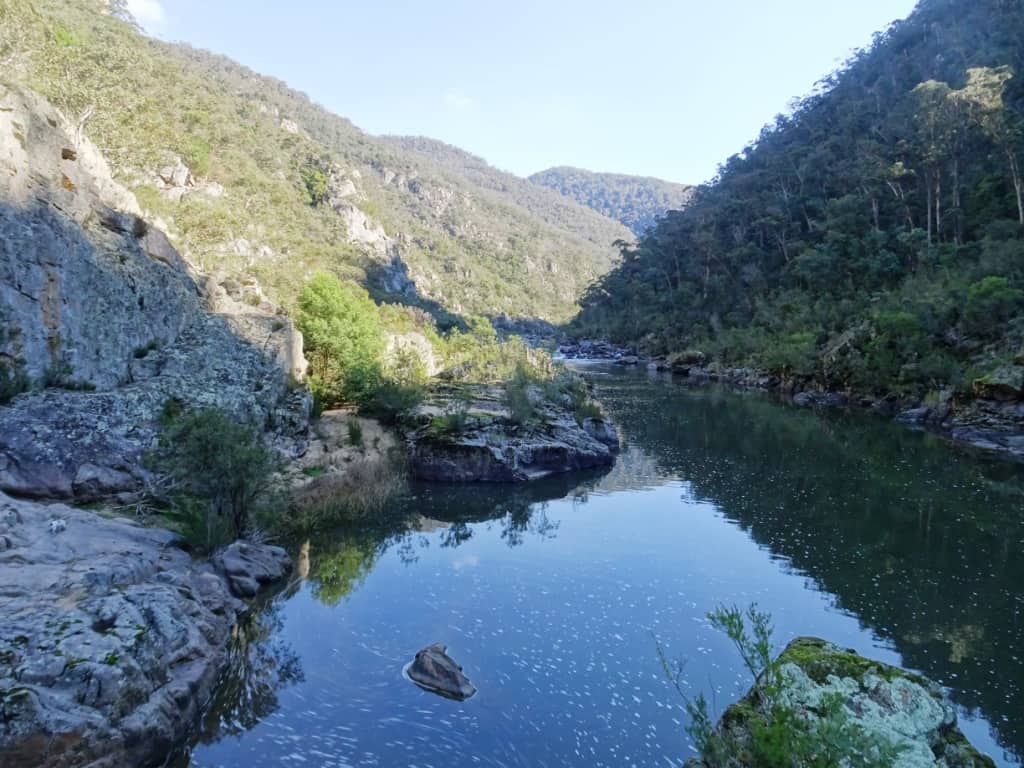
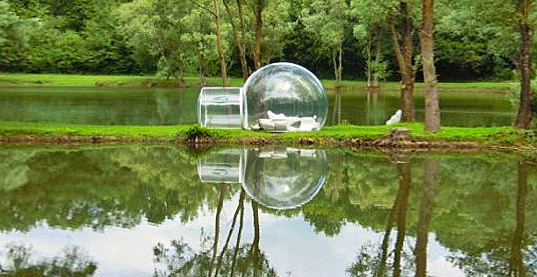
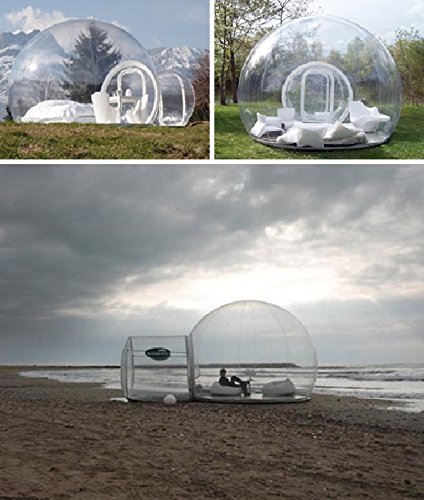
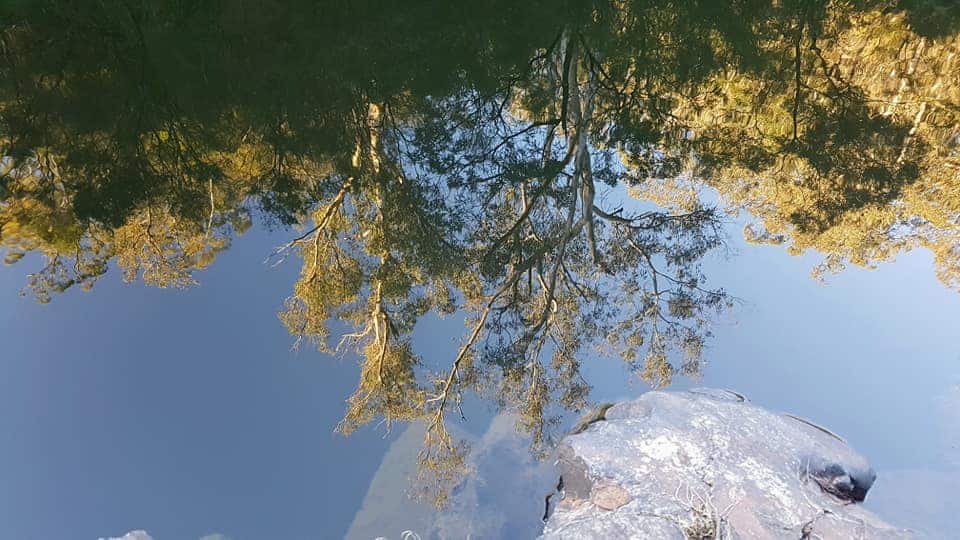
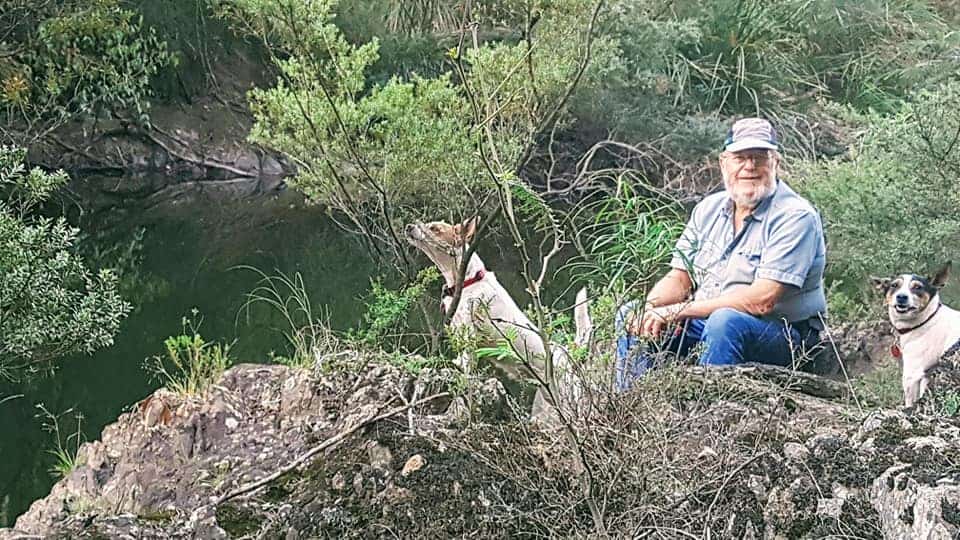
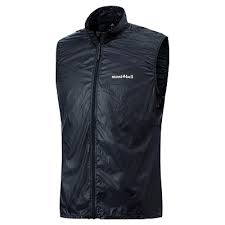
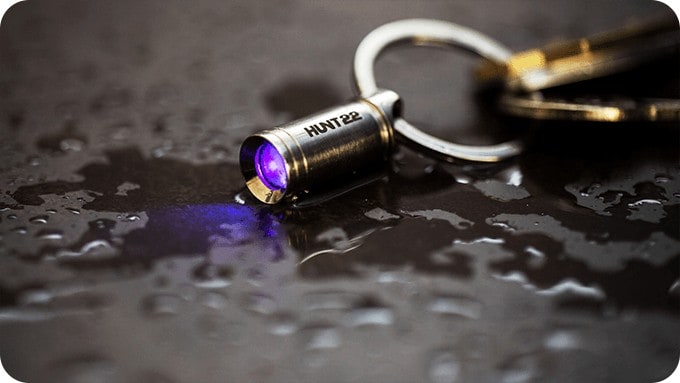
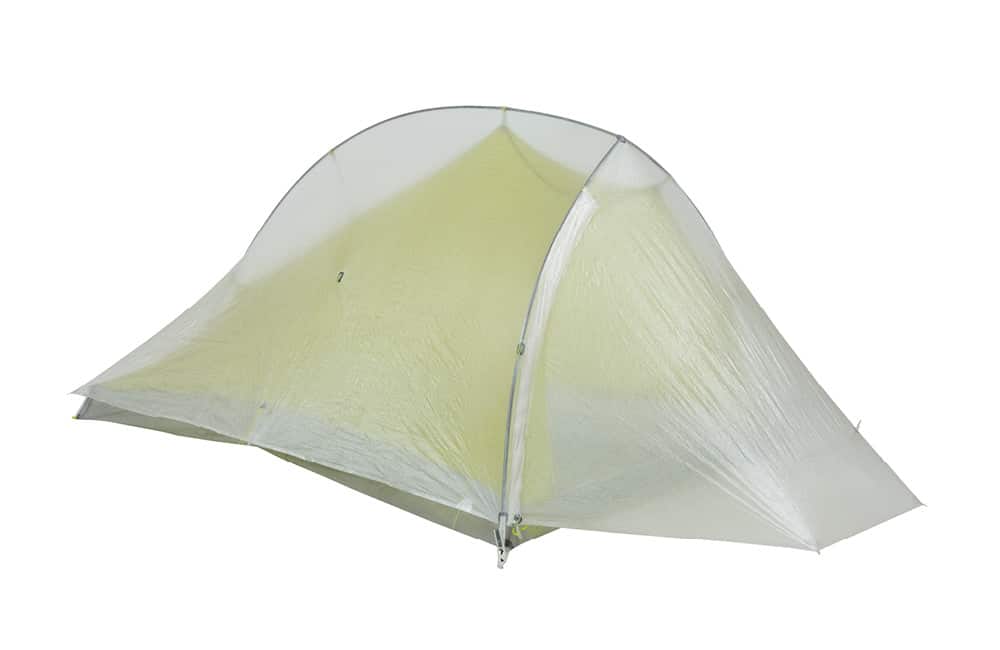
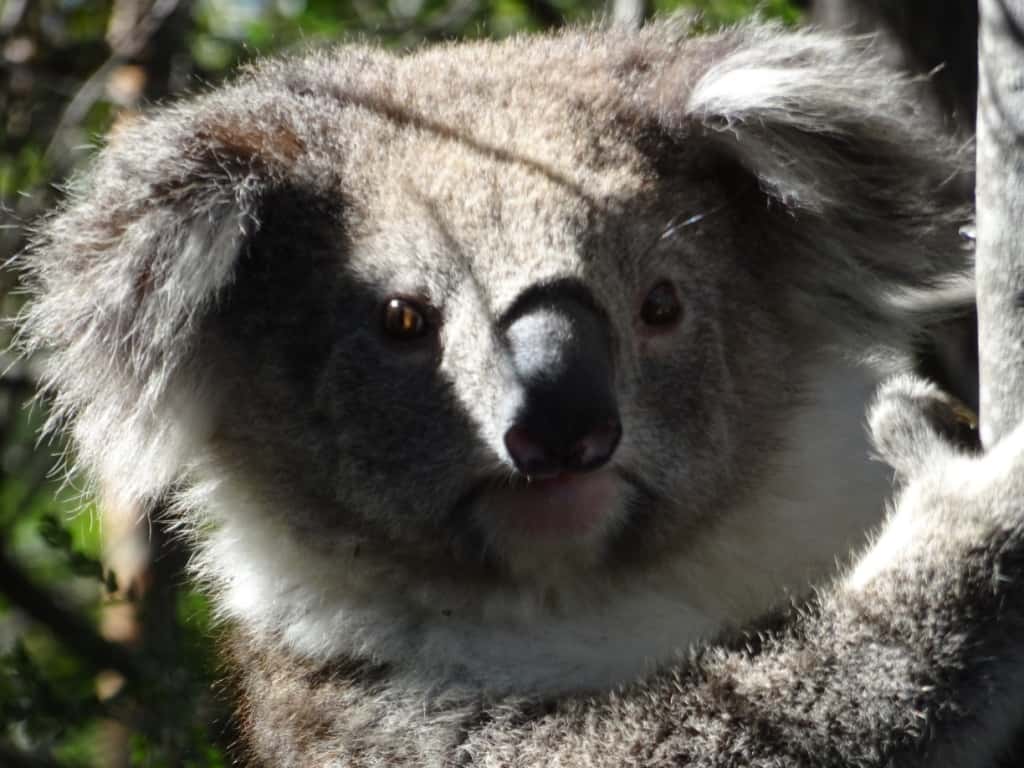
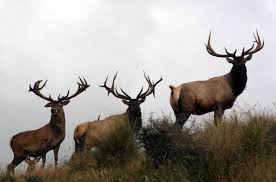
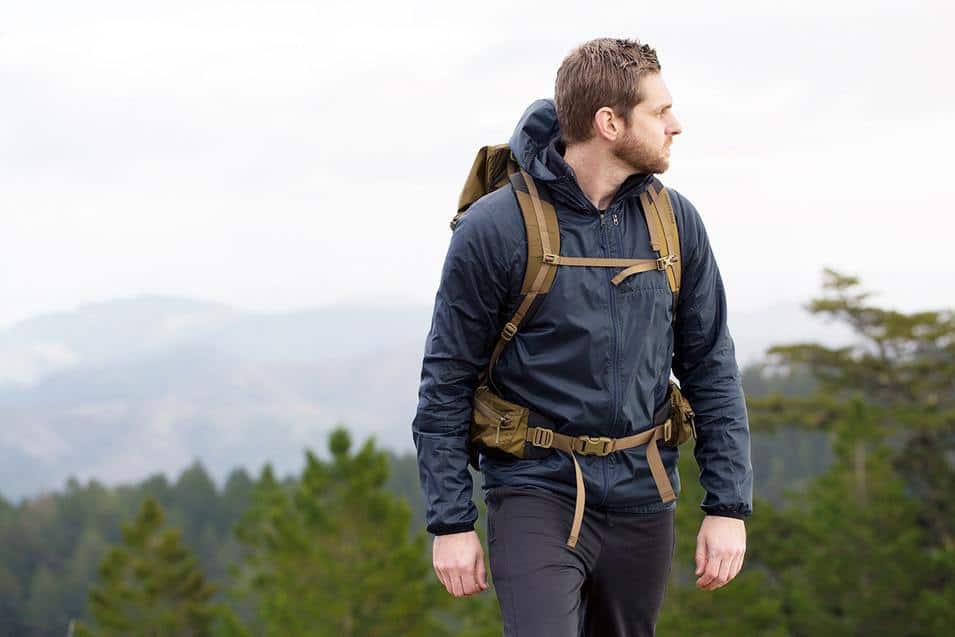
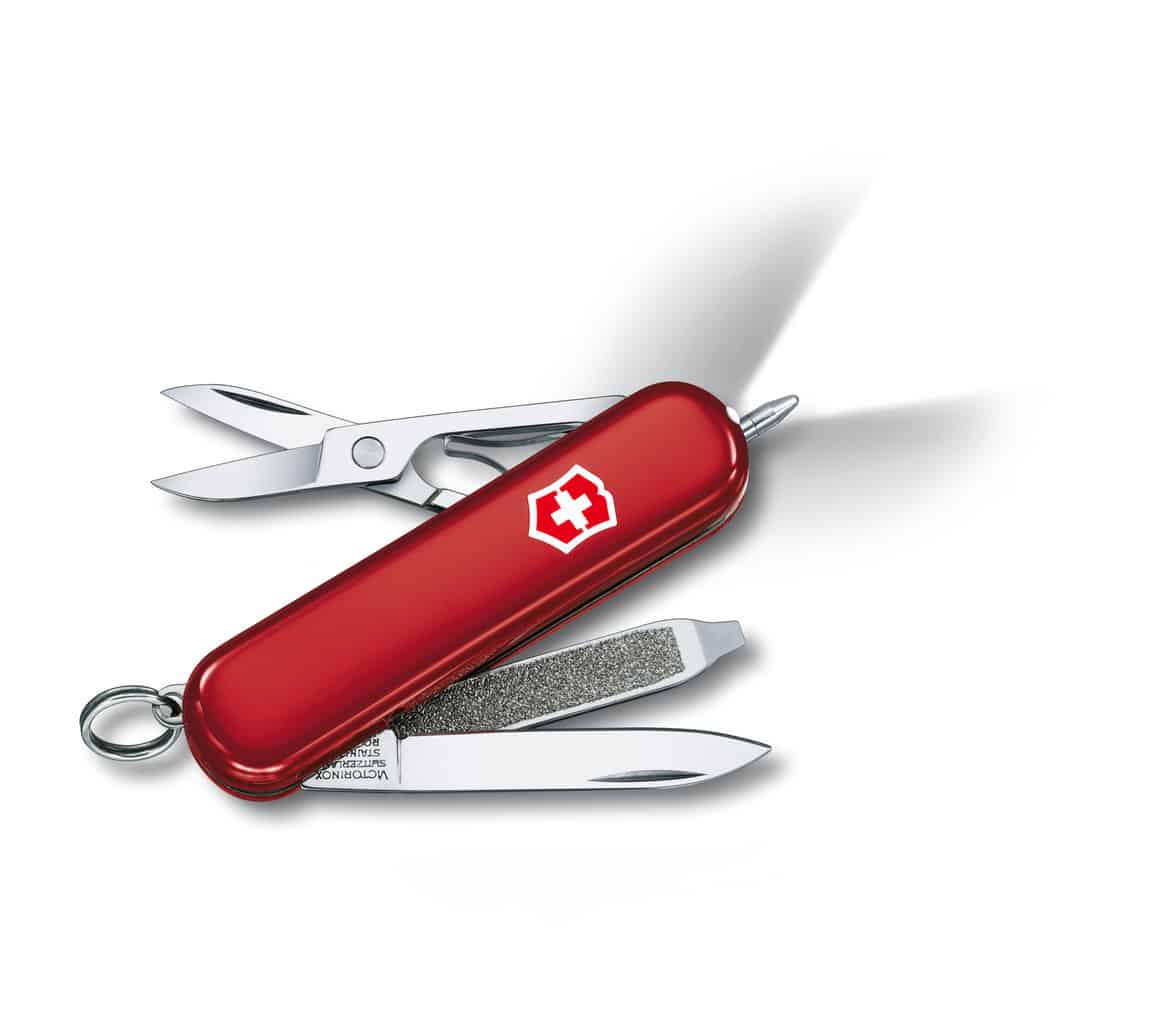
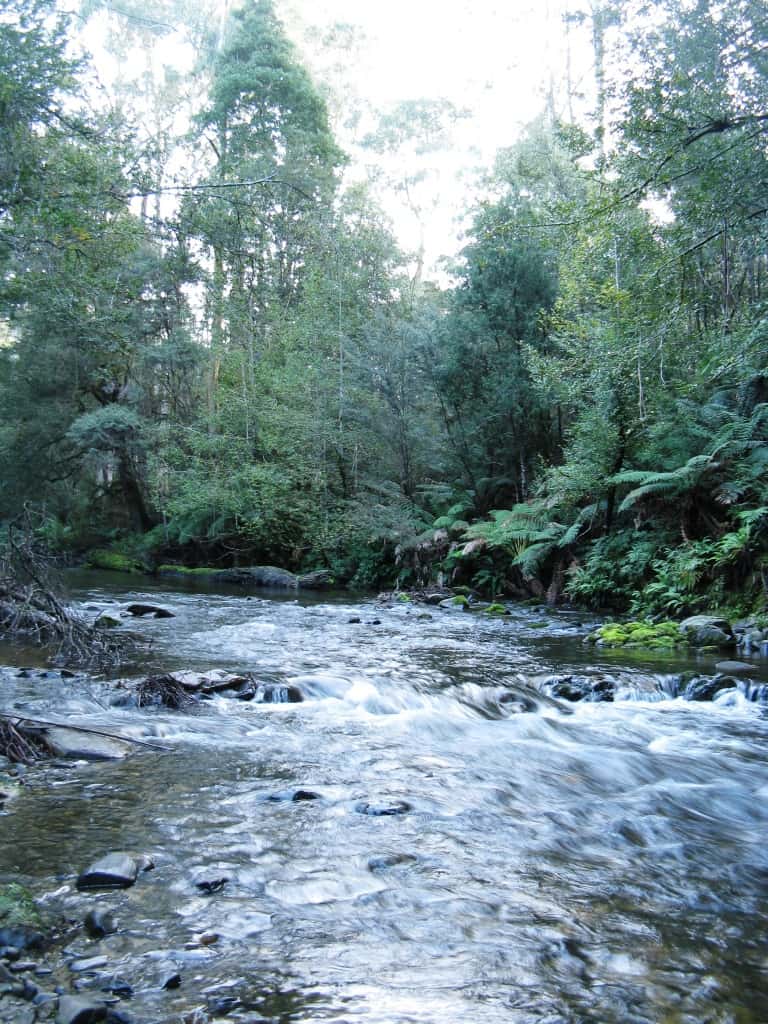
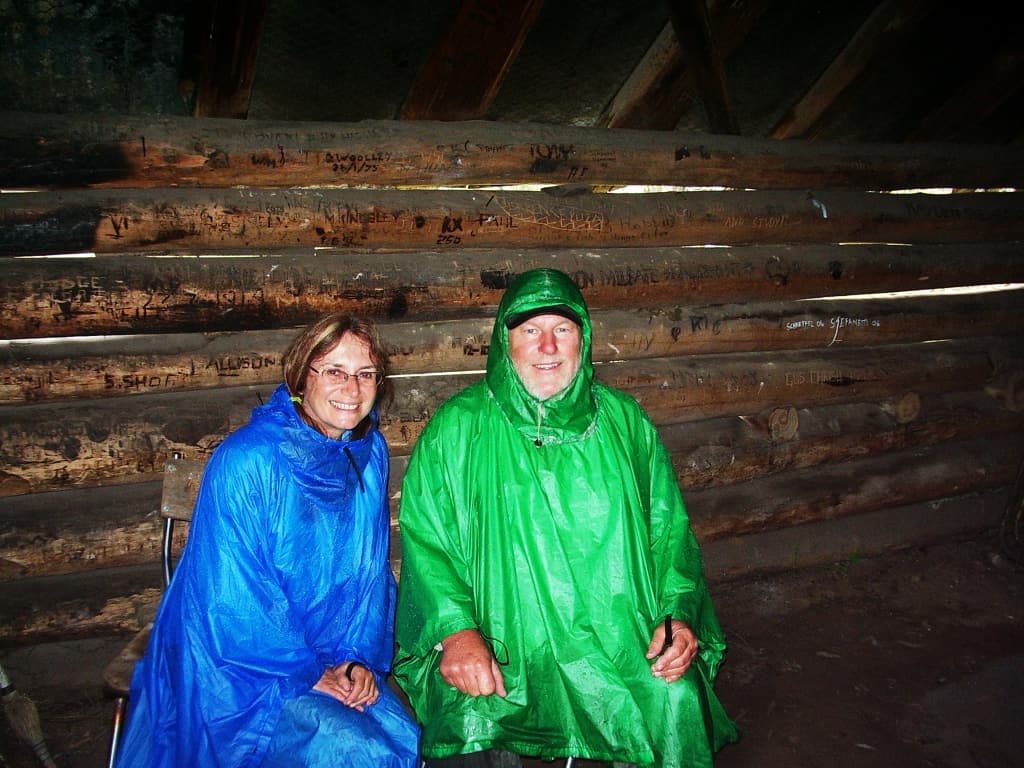
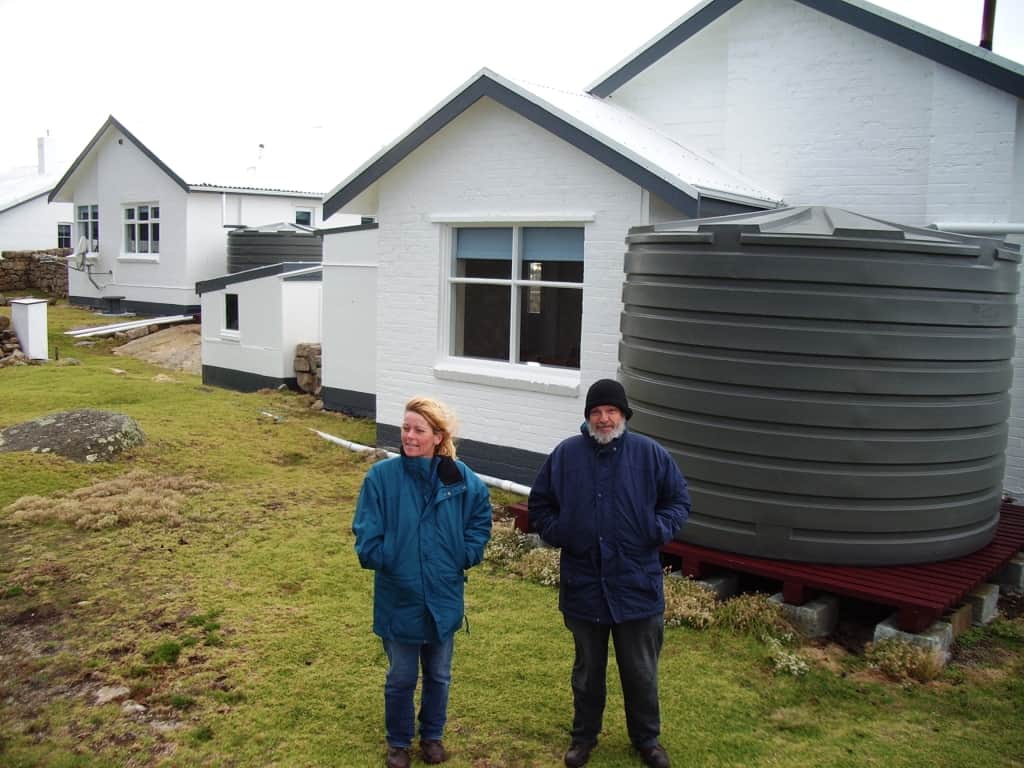
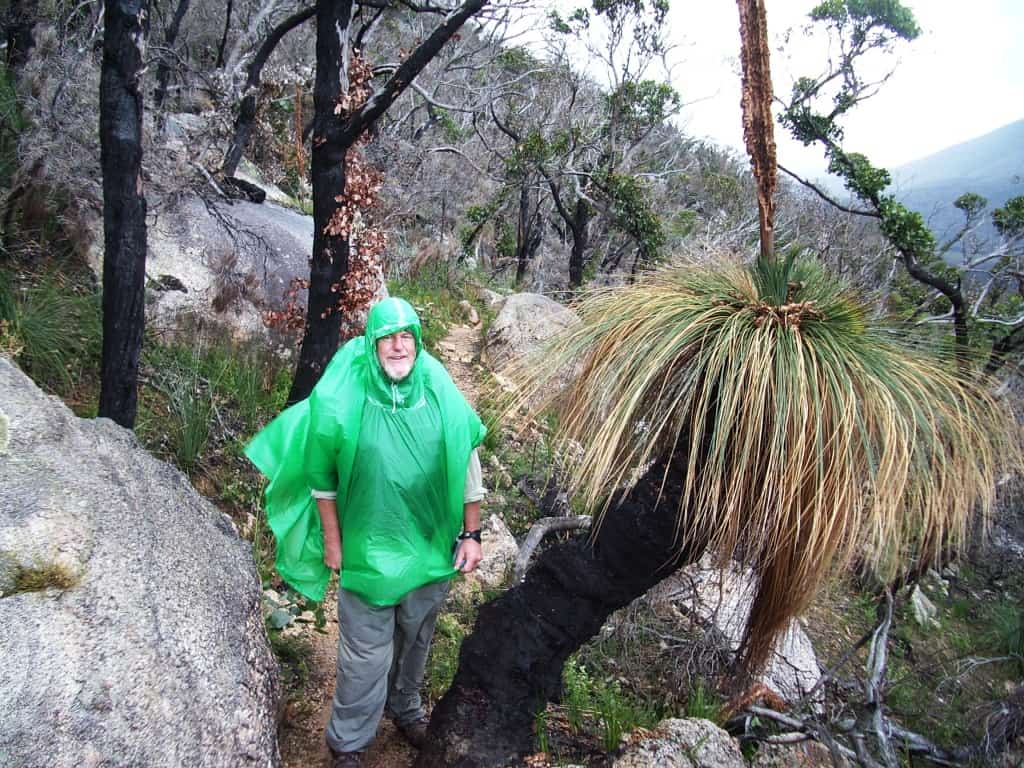
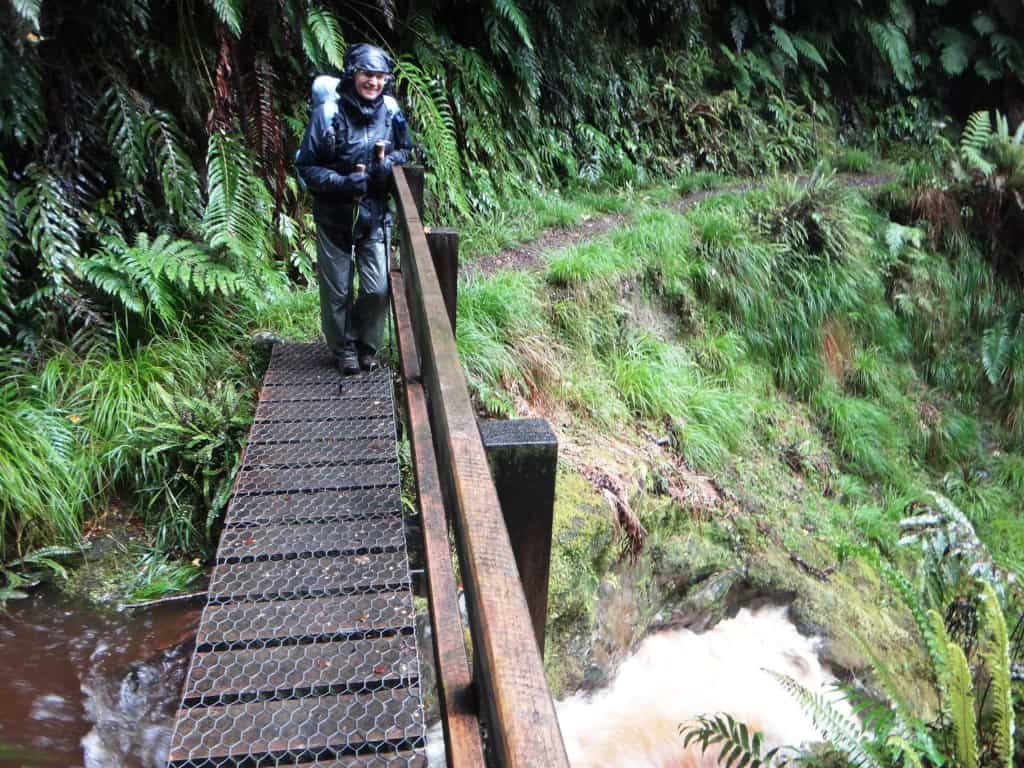

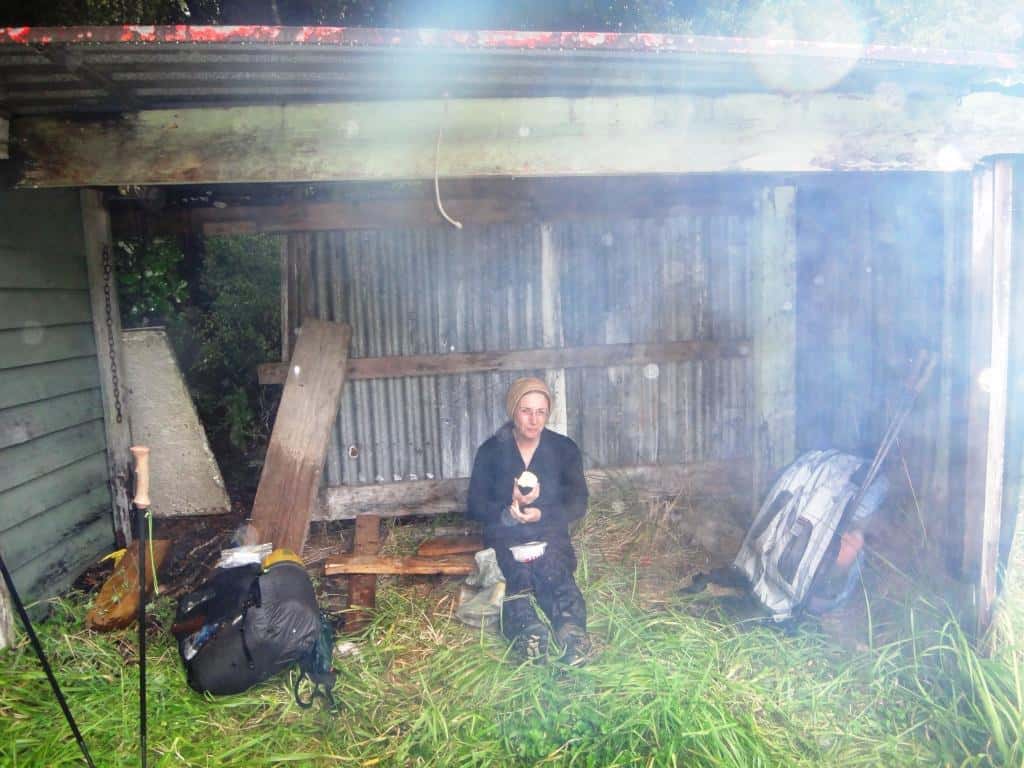
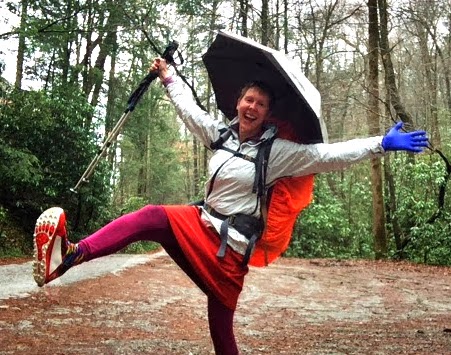